

This post may contain affiliate links. Please read our disclosure policy.





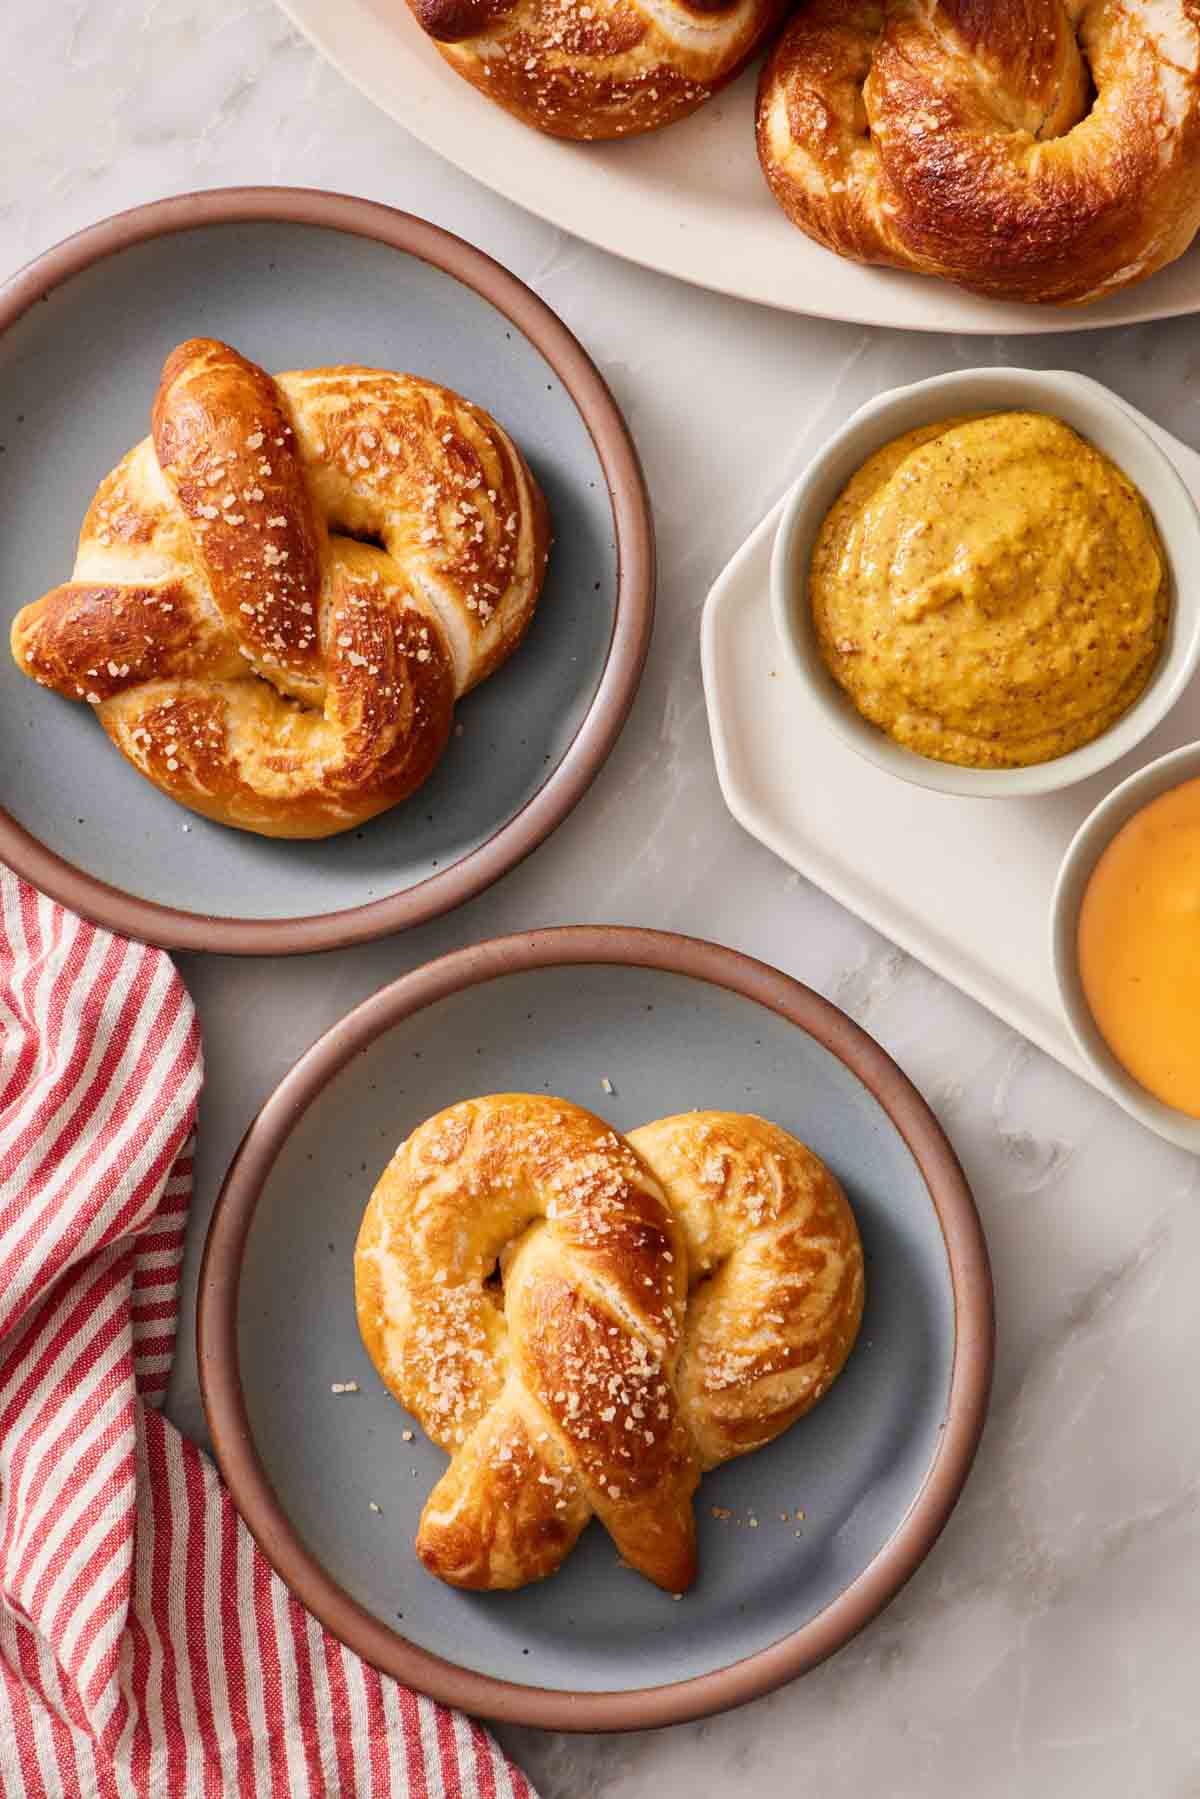
Homemade soft pretzels are surprisingly easy to make! With soft, chewy centers, a deep golden crust, and that classic salty bite, my shaping techniques and tested baking soda bath ensure you can make these perfectly the very first time.
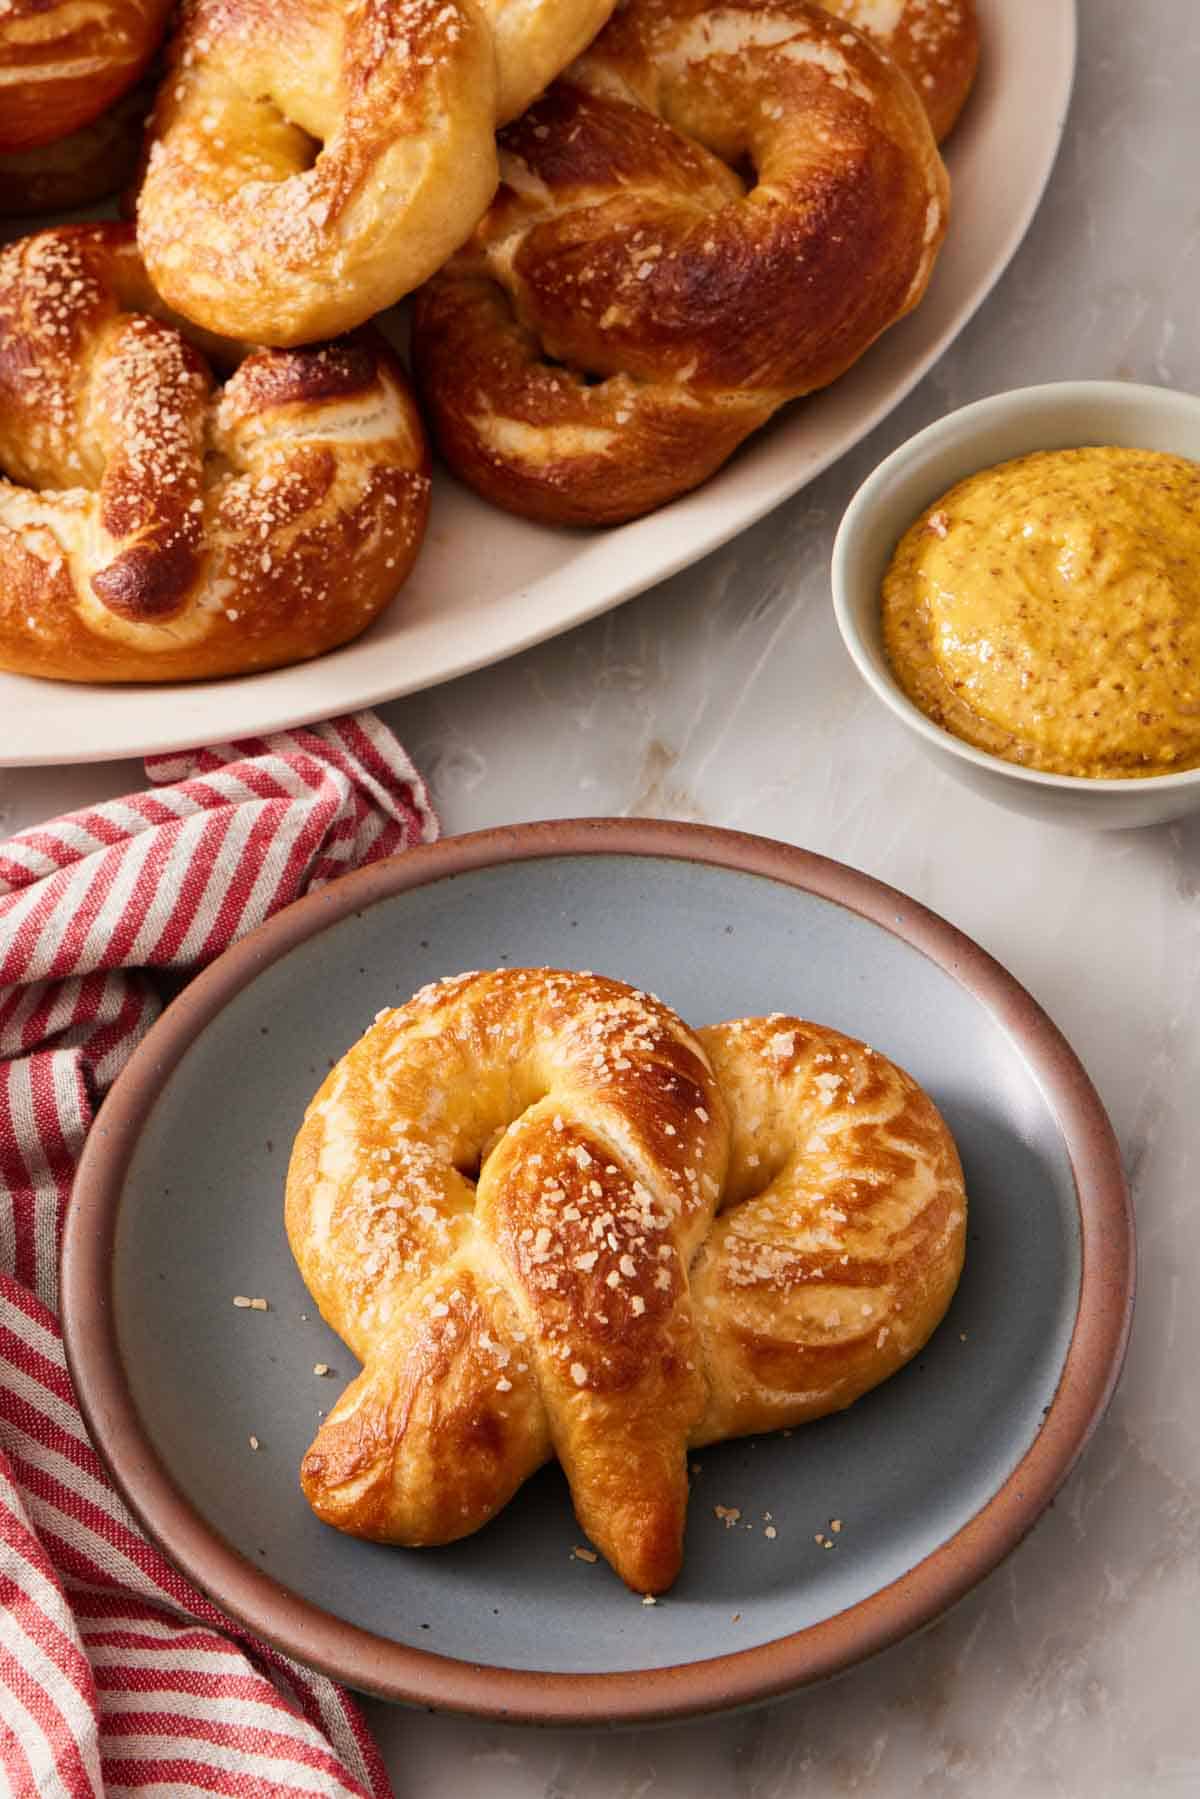
Most people think homemade soft pretzels are a project, but they’re not! The dough is one of the most forgiving yeasted doughs I make with just a few ingredients, and I give you an alternative option to knead it by hand if you don’t have a stand mixer. The whole thing comes together in about an hour and a half, most of which is hands-off rise time, and the dough only needs one rise. What turns a plain rope of dough into an actual pretzel is one 30-second step: a dip in boiling water spiked with baking soda. Skip it, and you’ve simply baked breadsticks.
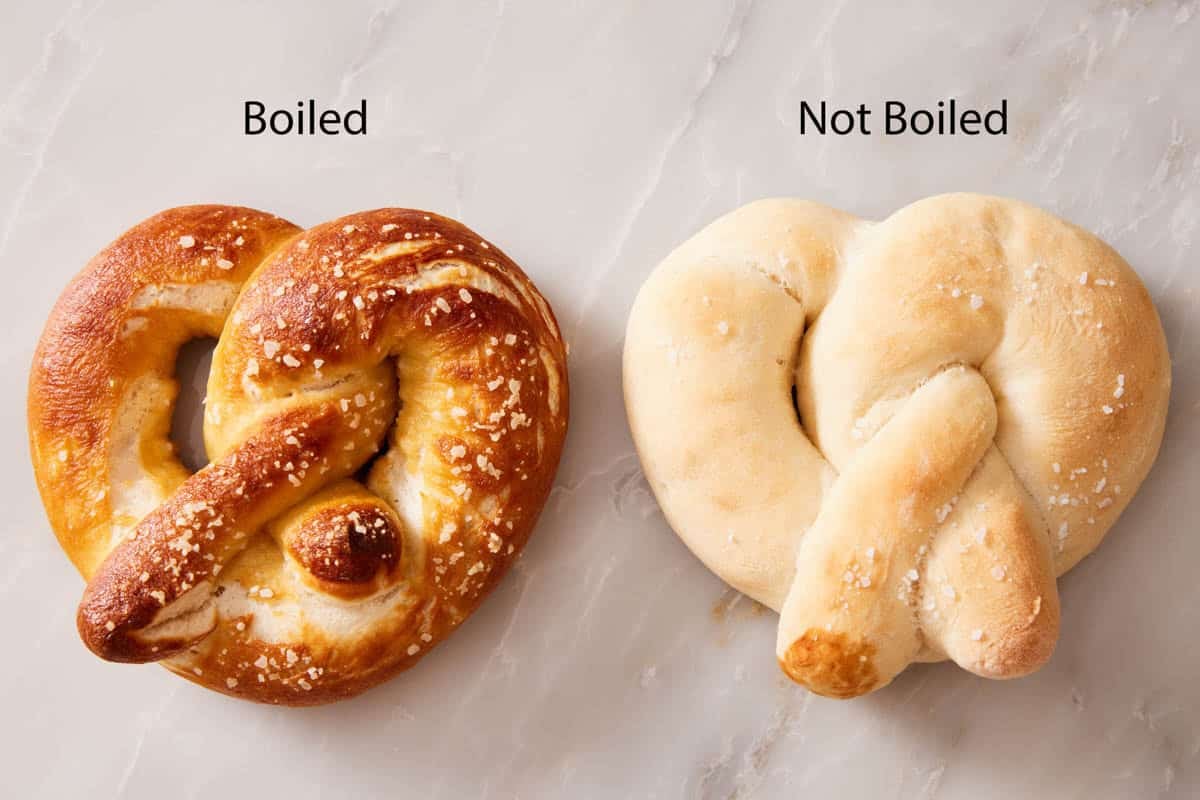
The quick boil gets you that chewy, mahogany-brown, unmistakable pretzel exterior. I tested baking the pretzels with and without the boil so you can see the results, and just how much that step matters.
If you’re worried about shaping them, don’t be! The first time I shaped a batch, I was sure I’d end up with a mangled twist, but they still came out looking like pretzels. The shape is far easier and more forgiving than it looks, and I include step-by-step images for you below. The baking soda bath is the real key to making the right pretzel flavor, texture, and color, regardless of the shape.
“My family LOVES these pretzels. I have made these several times now 2 batches at a time and they are gone super-fast.”
Jen
Key Ingredients
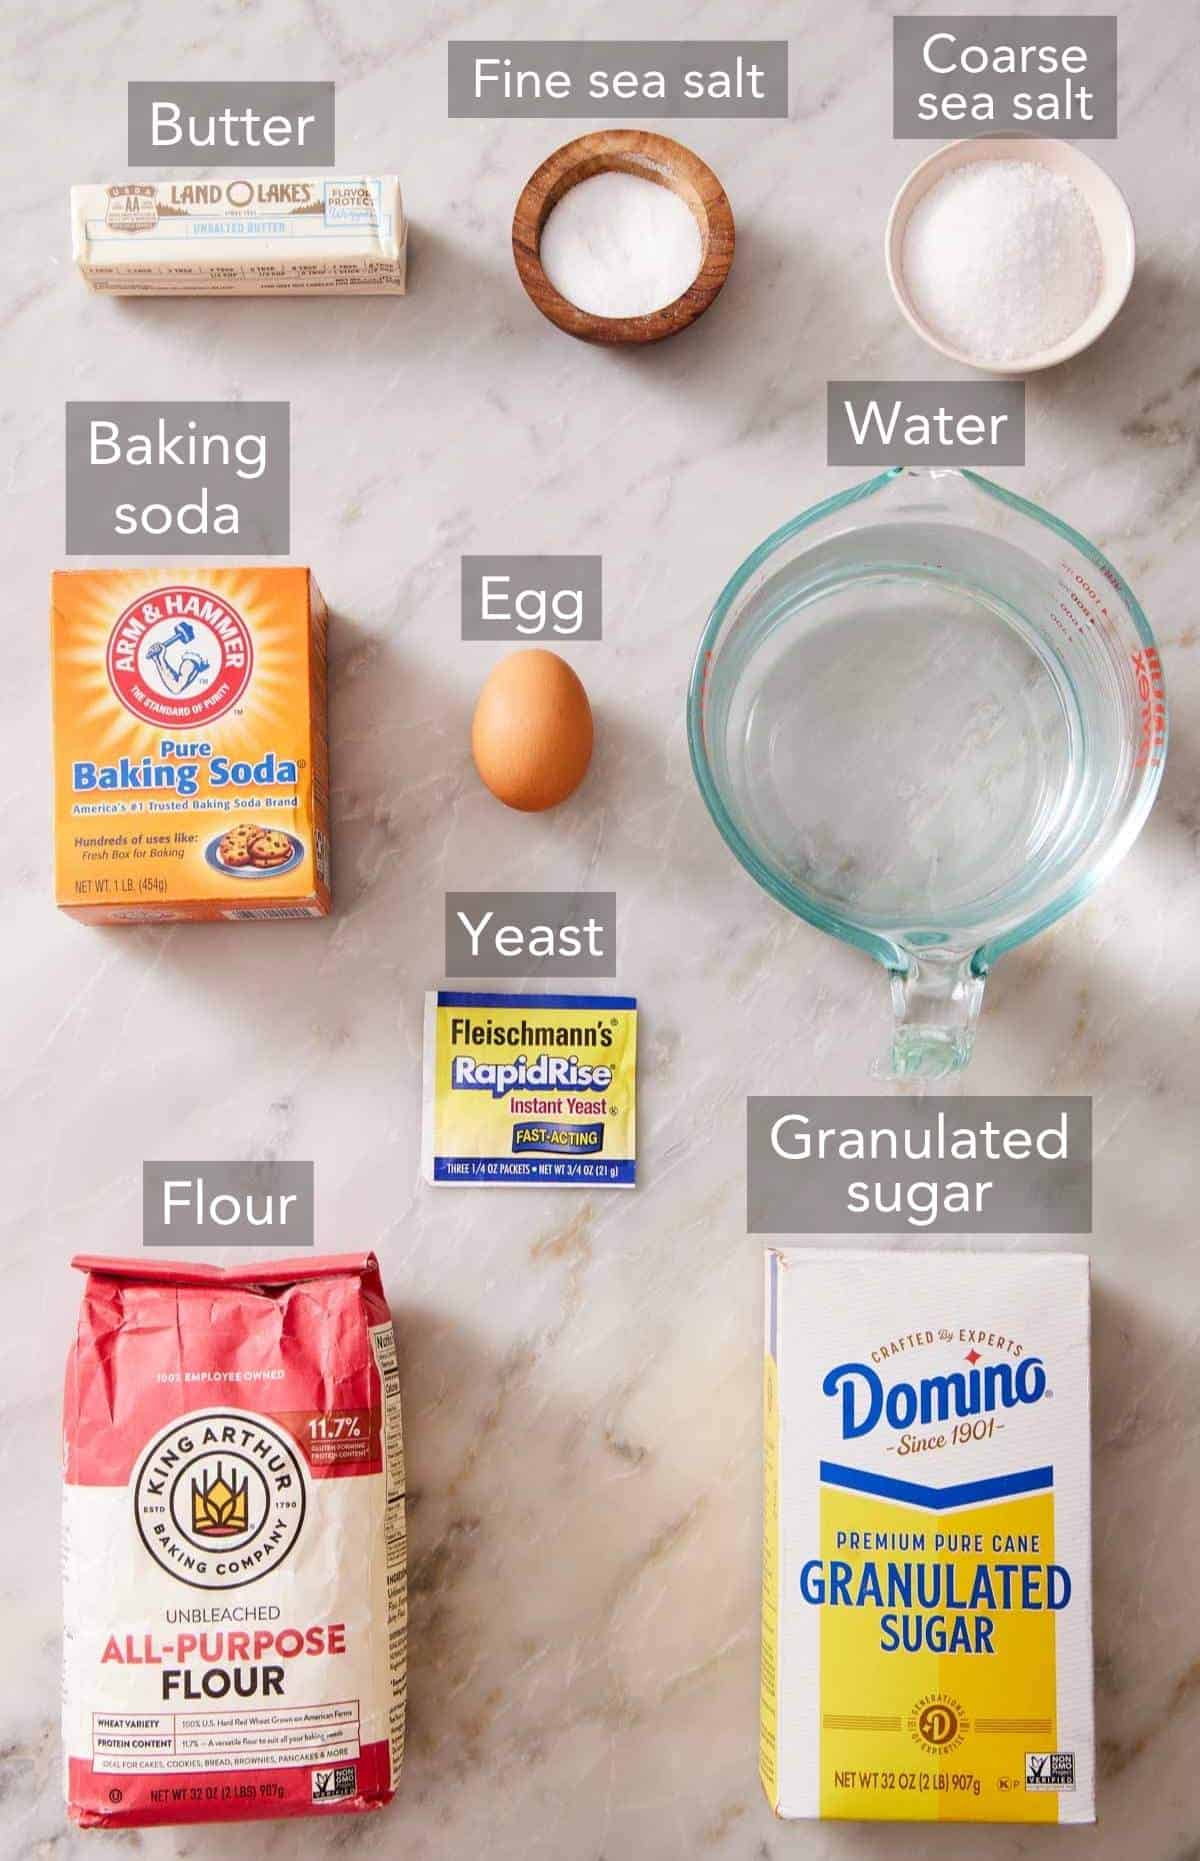
There are no specialty items on this list! It’s pantry-standard ingredients, which is part of why readers keep coming back to it. The full list with measurements is in the recipe card below.
Yeast — I default to instant yeast to keep the rise times fast so you can make this recipe relatively quickly. Active dry yeast also works here; I’ve tested the recipe with each, and the main difference is that active yeast needs to be bloomed first to get a bubbly start. Once mixed with the water, let it sit until it’s foamy on top (about 5 minutes) before you add the flour, butter, and salt. The dough rise takes a bit longer, too. If you want a deeper look at the two, my Academy guide: The difference between active dry and instant yeast, breaks it all down.
Water — make sure it’s warm, not hot. I aim for about 110°F. That’s hot enough to wake the yeast, but not hot enough to kill it. Above roughly 130°F, you start losing yeast activity, and the dough struggles to double. (My Academy lesson: How to activate yeast covers why!)
Flour — all-purpose is what I use for perfect soft pretzels. I weigh the flour for every yeasted dough because a packed volume measuring cup can run 20% more than it should, and over-floured pretzel dough bakes up tough and dense rather than chewy. If you’re using cups, fluff the flour, spoon it in, and level it off. I have also tested this with bread flour. The pretzels were noticeably chewier, so you can use it if you’d like. But since the pretzels get a good amount of their signature chewiness from the quick boil before baking, you don’t need bread flour.
Baking soda — you need a good amount for the water bath (1 tablespoon per 1 cup of boiling water). This is what gives the pretzels their signature shiny, smooth, and chewy crust. More on why this matters below. Make sure your baking soda is fresh and hasn’t been used as an odor absorber, or it can give the pretzels an off flavor.
Butter — two tablespoons of melted, slightly-cooled unsalted butter goes into the dough. It’s a small amount, but it’s the difference between a lean, bagel-like pretzel and the softer, tender pull a good soft pretzel should have.
Sugar — you just need a small amount to feed the yeast and lightly brown the crust. Swap in brown sugar if you want a faint caramel note, or barley malt syrup for a more classic pretzel flavor.
Egg — a beaten egg brushed onto the pretzels before baking is what gives the pretzels their extra glossy, deep-brown sheen. You can skip it and salt the pretzels while they’re still wet from the bath if you’d prefer. They’ll be a shade paler but still very good.
Salt — fine salt is used to flavor the dough because it dissolves easily. Coarse or flaked sea salt is sprinkled on top for that signature crunch. Pretzel salt is ideal if you have it, but it’s usually something you need to special order, so flaky salt or coarse kosher salt work well in its place.
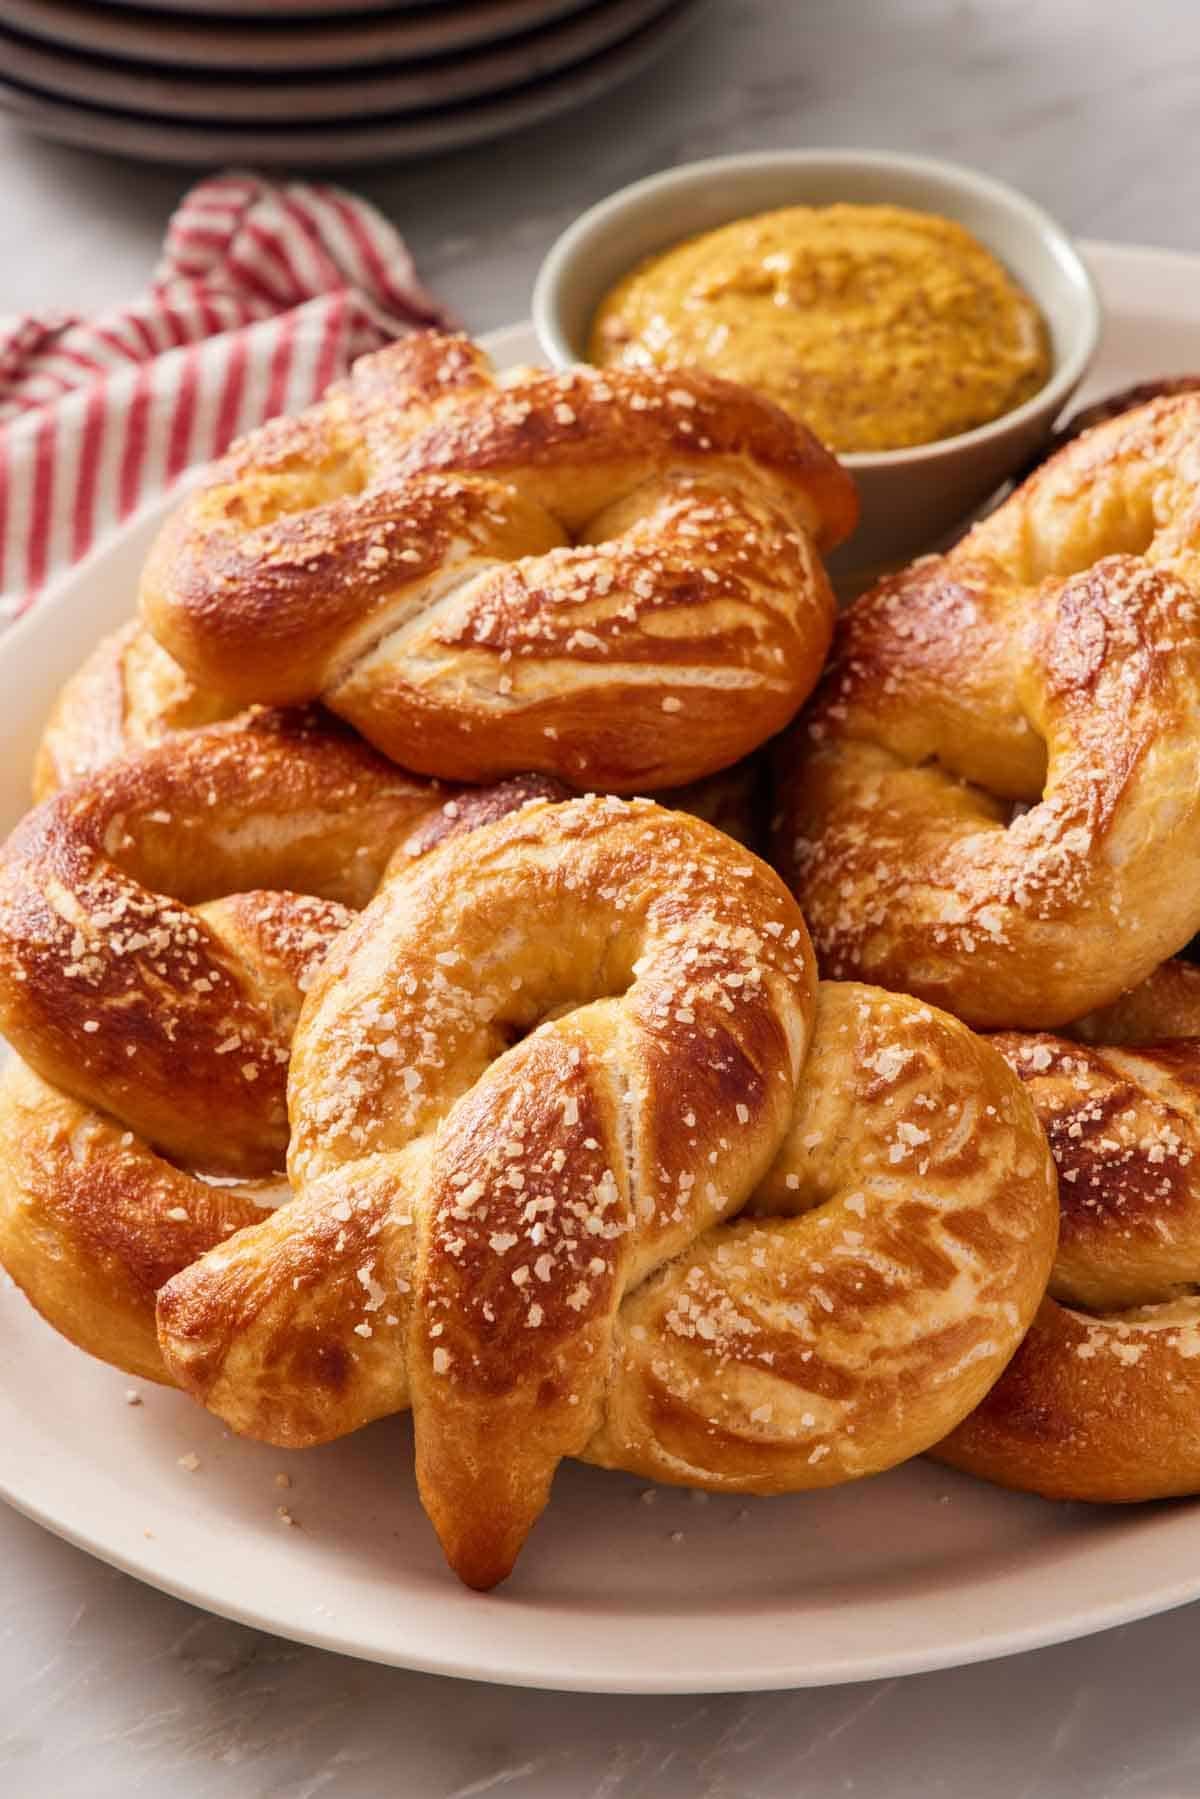
The Secret To Pretzel’s Texture: Boiling
This is the step that makes a pretzel a pretzel! The boil isn’t optional if you want a real pretzel crust. It’s where the chew and color come from! This is the same technique you use to get a chewy bagel, which is boiled before baking for exactly the same reason. This quick dip in hot water gelatinizes the flour, creating a firm exterior that turns supremely chewy once baked.
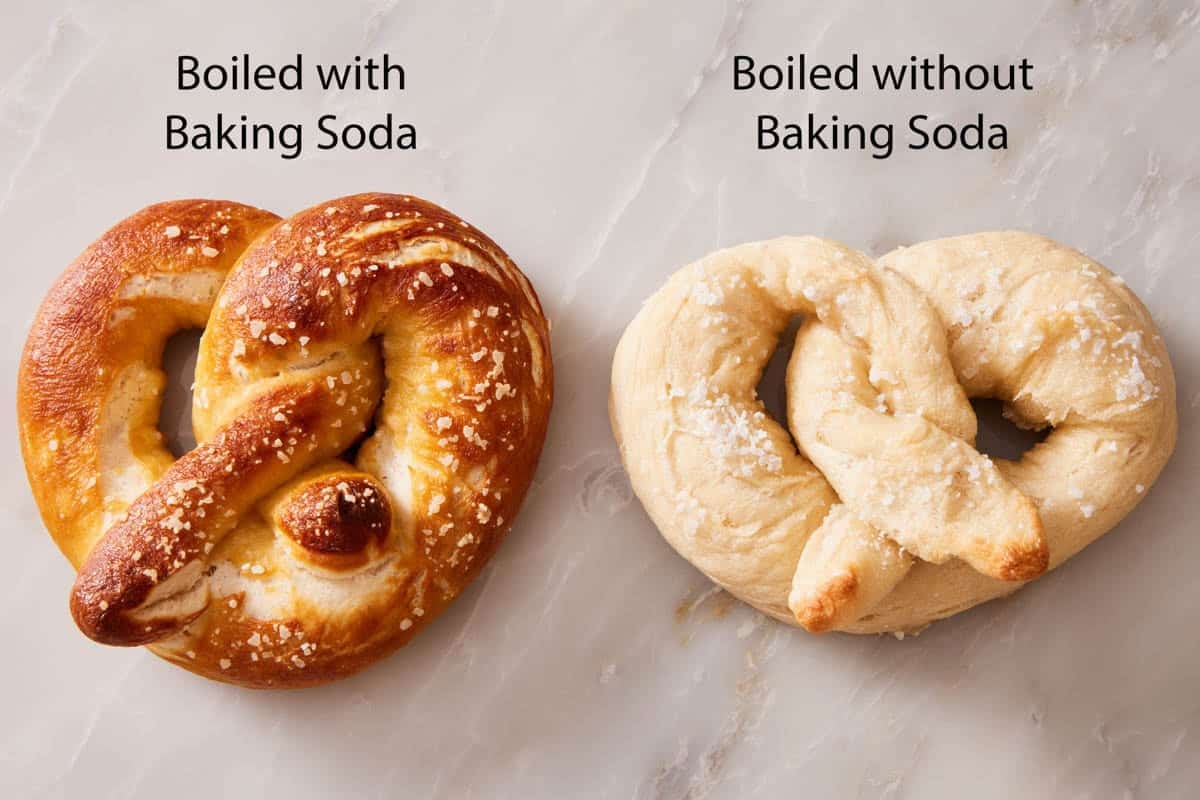
My team tested this to show you exactly how the boil makes a difference. They made one batch of pretzels and baked off two: one that was boiled for 30 seconds before baking, and one that skipped the boil altogether. You can see in the image below how the boiled version turned out shiny, smooth, and more golden brown.
Do I have to boil pretzels in baking soda?
Boiling is only part of the process. Baking soda is added to the water to improve the crust as well. The baking soda makes the water alkaline, and that alkalinity is what drives the fast, deep browning and the chewy, slightly glossy crust when the pretzels hit a hot oven.
My team tested two more pretzels from that same batch: one was boiled in plain water for 30 seconds, and the other was boiled in baking soda water for 30 seconds. You can see how they both developed a shiny exterior, but the pretzel that didn’t have baking soda baked up paler.
Can I use lye or barley malt instead?
Authentic Bavarian pretzels (soft pretzels) use a food-grade lye (sodium hydroxide) dip, which works the same way as baking soda (to increase the pH and make it more alkaline). It gives the pretzels an even deeper finish, but lye is caustic and needs careful handling. So, I use a baking soda bath at home. It’s safe, reliable, and gets you very close to the same results.
A spoon of barley malt syrup can be added to the boiling water as well for a subtle malty note, subtle sweetness in the crust, and a touch more color. It won’t replace the baking soda, so use it alongside, not instead of it.
How To Make Soft Pretzels
Below, I’ve highlighted portions of the recipe in step-by-step process images along with instructions for making soft homemade pretzels. You can find the full set of instructions in the recipe card below.
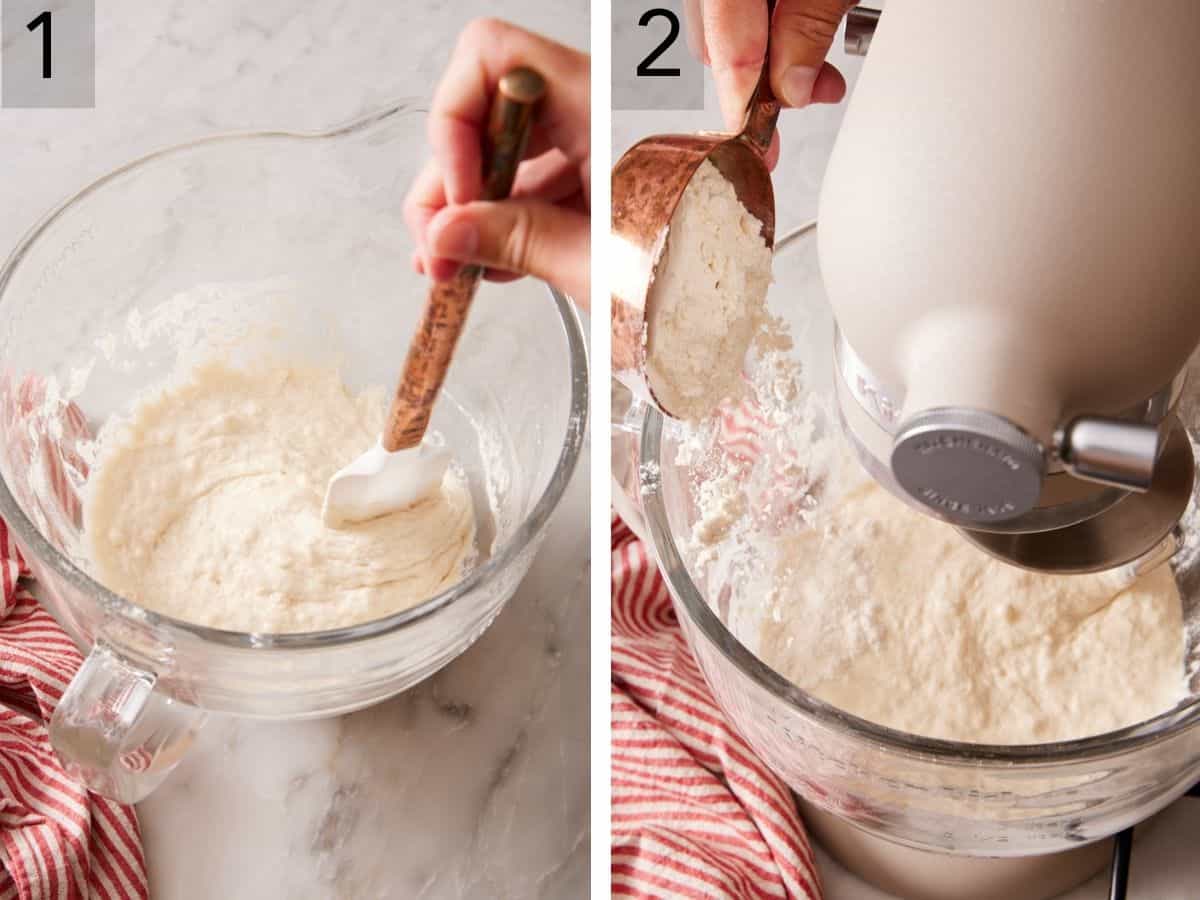
1. Start the dough. Combine the warm water, sugar, and yeast, and stir it together to dissolve the yeast. Add the salt, melted butter, and the first 2 cups of flour, stirring with a wooden spoon or spatula, then switch to a dough hook and add the rest of the flour a cup at a time while mixing on medium-low.
2. Knead and check it. Mix until the dough pulls away from the bowl, is elastic, and feels tacky. I add additional flour, a tablespoon at a time, if needed to change the dough from being sticky to slightly tacky. Turn the dough onto a floured counter and knead a few more minutes until it’s smooth and bouncy. Use the windowpane test to be certain it’s done: pull a small portion of the dough and stretch it thin—if you can see light through the membrane before it tears, the gluten is developed. If it rips immediately, keep kneading.
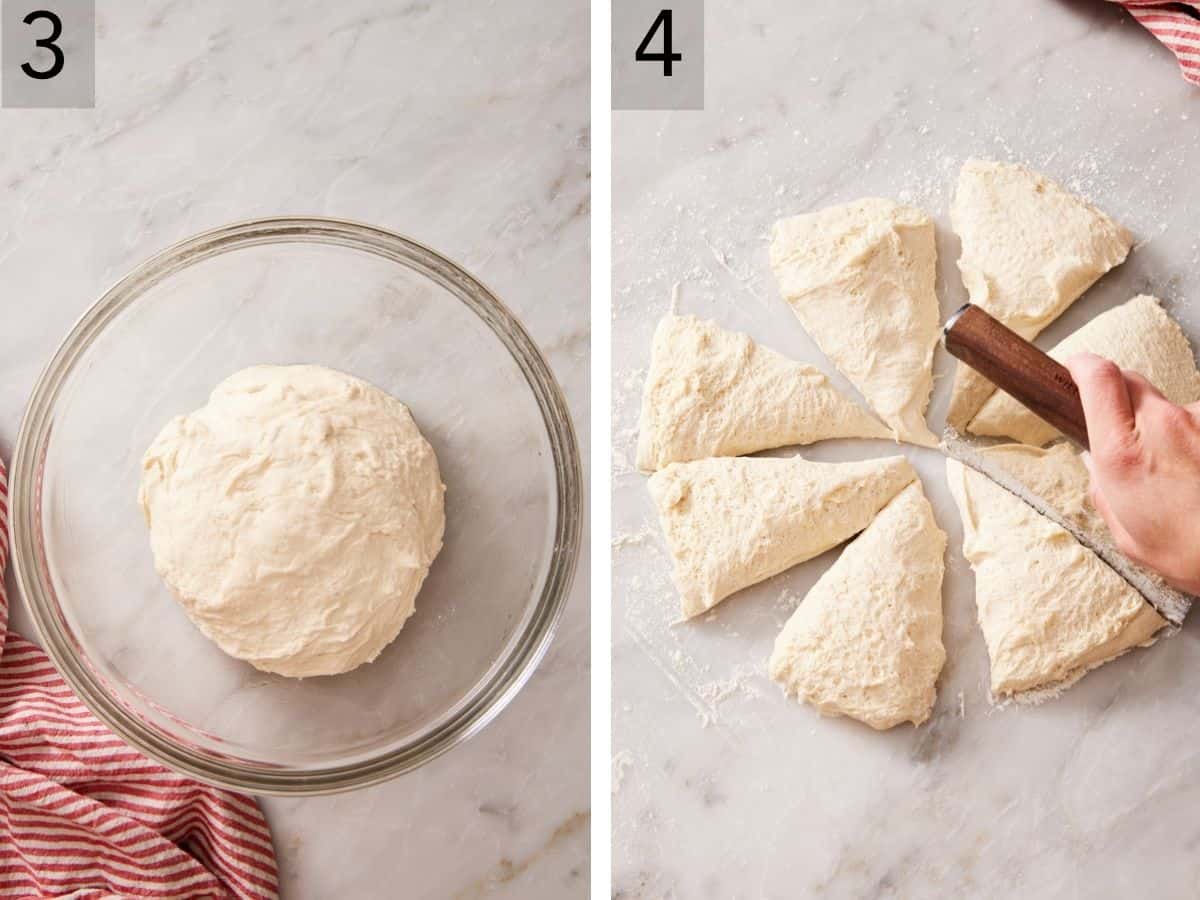
3. Let it rise. Place the dough in a lightly oiled bowl, turn to coat, then cover, and rise in a warm spot for about 40 minutes, or until doubled in volume. Don’t pick a hot spot (above 75F). I’ve rushed dough by placing it in the sun before, and it was overproofed by the time I shaped them. The instant yeast rises so fast that it doesn’t need the additional push. (Academy: how to proof bread covers what a good warm spot looks like.)
4. Shape. Divide the dough into 8 pieces. You can weigh the whole mass of dough, divide by 8 and then cut each piece if you want them perfectly even. I don’t worry too much about it since they’re homemade!
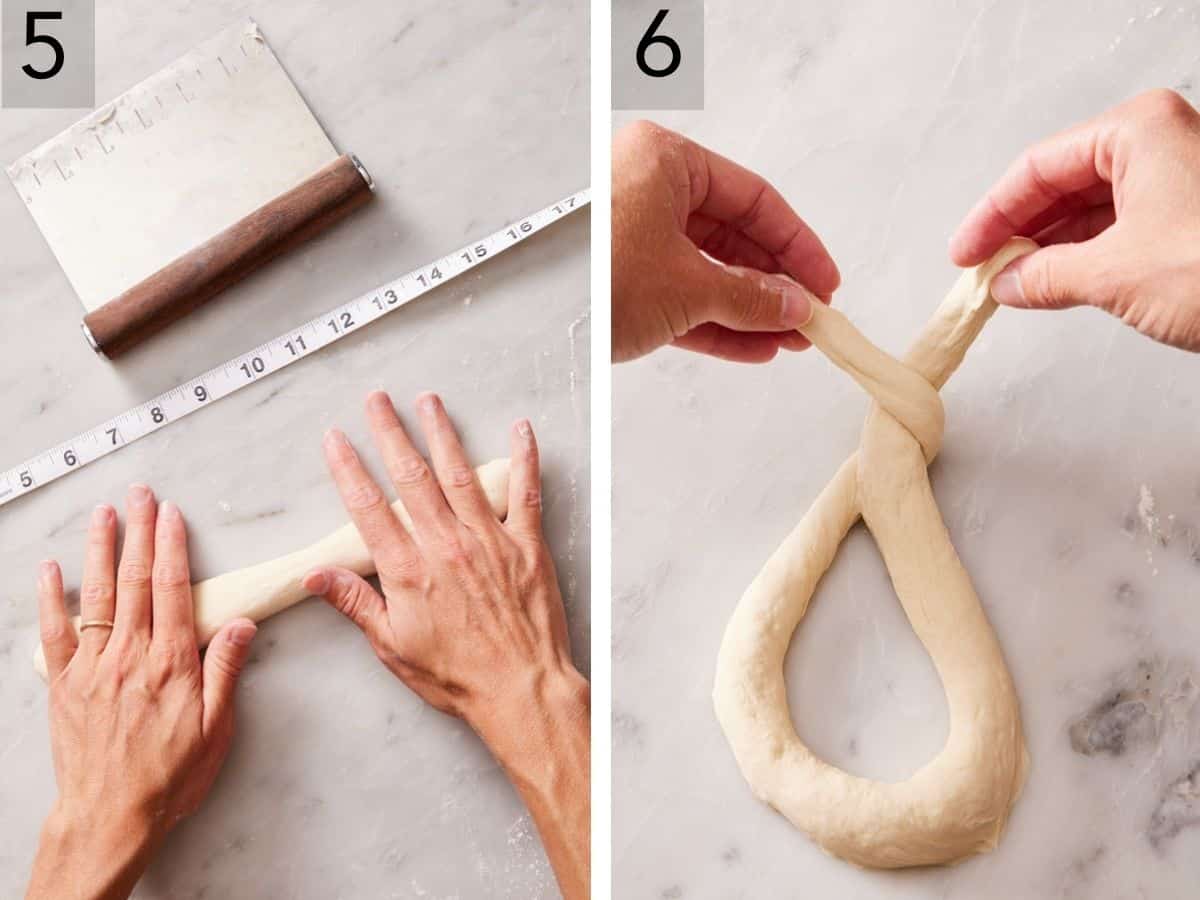
5. Roll each piece into a 22-24-inch-long rope. I like to shape them one at a time so I don’t have a counter full of long ropes!
6. To make the classic pretzel shape, form a “U” shape with the rope, cross the ends over about 4 inches down from the tips, and twist them together once.
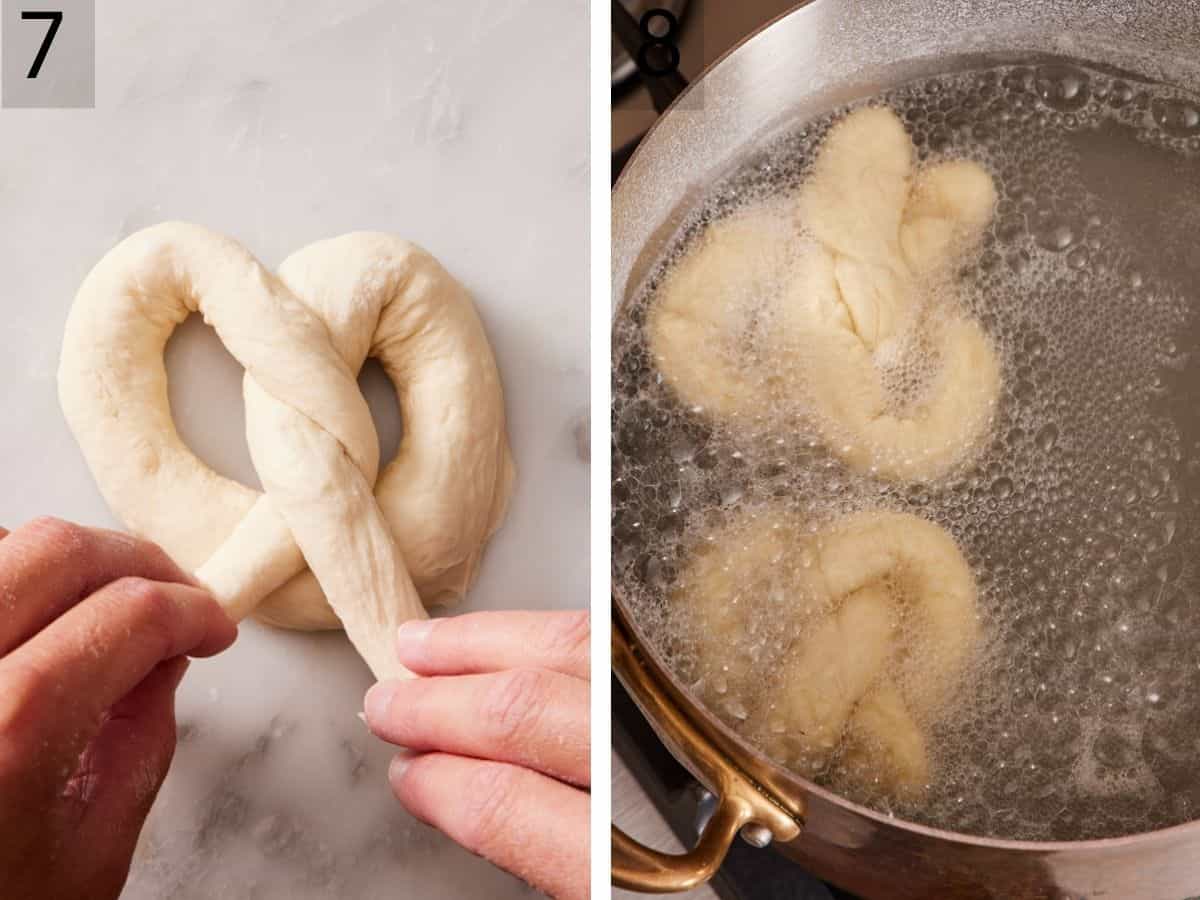
7. Fold the twist down onto the curved bottom of the “U” and press the loose ends to either side of the center of the pretzel. That’s it! They don’t need to be symmetrical. The rustic shape adds character and shows it’s homemade!
8. Boil: Bring a large pot of water to a rolling boil, carefully stir in the baking soda, and lower each shaped pretzel into the water bath for 30 seconds. (I can usually do 2 pretzels at a time.) 30 seconds is the number I stick to. It’s long enough to set the crust, and short enough to avoid the faintly soapy, metallic edge that can happen when pretzels sit in the baking soda for too long. Lift each pretzel out with a slotted spoon, and set it on a lined sheet.
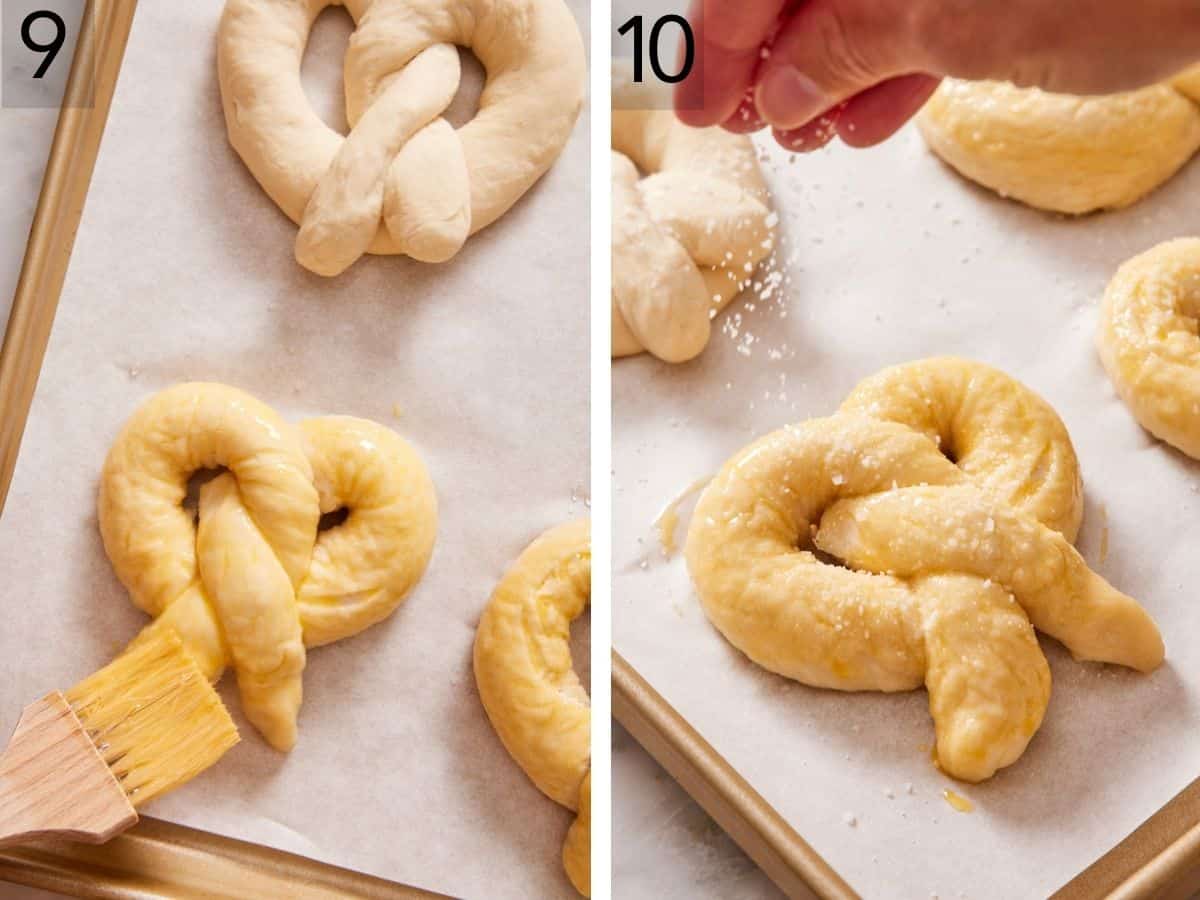
9. Brush the boiled pretzels with the beaten egg. This helps the salt stick and gives them an even browner crust.
10. Bake. Sprinkle the pretzels with coarse salt. Bake at 450°F for about 12 minutes, or until deeply golden. They’re best within a few hours of baking, or fresh and warm from the oven.
Pro Tips for the Best Soft Pretzels
Weigh your flour. I say it twice because it’s the biggest variable between your pretzels coming out tender versus tough. If you don’t have a scale, use the fluff and scoop method so you don’t overpack the flour in your cup. I break this down step-by-step in my Academy lesson: How To Measure Ingredients Correctly, if you’d like a visual. I give a range for the flour so that if your dough feels sticky, you can gradually add more as needed.
Don’t boil the pretzels for too long. 30 seconds is just the right amount of time for the dough to develop a firm exterior that will turn chewy in the oven. If you boil for too long, the flour will continue to gelatinize deeper into the pretzel, and they won’t puff well in the oven, making them flat and dense. (A few seconds on either side of 30 won’t ruin them—just be mindful of your timer.)
To mix by hand: Mix the dough together in a mixing bowl as shown in the recipe (I use a spatula or wooden spoon to mix) until a cohesive mass forms. Turn out the dough onto a well-floured surface, flour your hands and the top of the dough, and knead it by hand for 10-15 minutes. Add more flour as needed. Doing this by hand will work more flour into the dough so it won’t be quite as tacky or soft, but you will still have delicious pretzels! (My Academy lesson: How To Knead Dough walks you through the hand-kneading motion if it’s your first time.)
Flavor Variations
The base recipe is a launch pad for many other flavors. Here are a few I make on repeat:
- Cinnamon sugar: Skip the salt and egg wash. Brush the warm, baked pretzels with melted butter and dip the tops in cinnamon sugar. These are best the day they’re made. The butter softens the surface over a few hours.
- Cheese: Work grated sharp cheddar or parmesan into the dough so it’s distributed throughout (add it at the end of kneading), and sprinkle a little more on top of the shaped pretzels before baking.
- Auntie Anne’s–style: For that mall-pretzel richness, brush the pretzels with melted butter both before and after baking (skip the egg wash). The copycat flavor will have everyone thinking it’s the real thing, but even better!
- Everything bagel: Swap the coarse salt for everything-bagel seasoning right after the egg wash.
Soft Pretzel Recipe

Ingredients
For the Pretzels:
- 1½ cups warm water (105-110°F) (360mL)
- 1 (.25-ounce/7g) packet instant yeast (2¼ teaspoons)
- 1 tablespoon granulated sugar
- 1 teaspoon fine sea salt
- 2 tablespoons unsalted butter melted and slightly cooled
- 4 to 4¼ cups all-purpose flour divided (480-510g)
For Boiling and Baking
- ⅔ cup baking soda (250g)
- 10 cups water (2.4 liters)
- Egg wash (1 large egg beaten with 1 teaspoon water) optional
- Coarse or flaky sea salt for sprinkling
Instructions
Make the Pretzel Dough:
- Combine the warm water, sugar and yeast in a large bowl or the bowl of your stand mixer. Mix together, then add 1 cup (120g) of the flour, the melted butter and salt. (The yeast doesn’t need to bloom first since we are using instant.)
- Mix together with a wooden spoon or spatula. Then add another 1 cup (120g) of flour and mix until it is well incorporated.
- Attach the dough hook to your stand mixer, and turn on to medium-low speed. Add the remaining 2 cups (240g) of flour, about a cup at a time, while mixing.
- Mix for about 10 minutes or until the dough feels elastic and is tacky when lightly tapped with your clean finger (it shouldn’t stick to your finder). If your dough is still quite loose or sticky, you can mix in up to ¼ cup (60g) of the remaining flour, a tablespoon at a time as needed. Mix for an additional 2-3 minutes or until the dough has the right texture. (See my tips section below on how to do the windowpane test if you are unsure whether your dough is ready.)
- Turn the dough onto a floured counter and knead a few more minutes until it’s smooth and bouncy. (Poke it with your finger and it should bounce back.) Transfer the dough to a large, lightly oiled bowl, turn it to coat, then cover with plastic and place in a warm place to rise for 30-40 minutes or until roughly doubled in size.
Shape the Pretzels:
- Once risen, fill a large pot (5- to 7-quarts) with the 10 cups of water and set it over medium-high heat to come to a boil. Preheat the oven to 450°F.
- Meanwhile, shape the pretzels. Scrape the dough out onto a lightly floured counter, and divide it into 8 pieces. Working with one piece at a time, roll and stretch each piece with your hands to make a 22- to 24-inch-long rope.
- Form a U shape with the dough, then cross the two ends over each other and twist them together once at the top, leaving about an inch and a half free at the very tips. Fold the twisted portion down towards the base of the U and press the loose ends to either side of the center, forming a pretzel shape. Repeat for the remaining ropes.
Boil and Bake the Pretzels:
- Line two baking sheets with parchment paper or silicone mats.
- Once the water is boiling, carefully add the baking soda a few spoonfuls at a time (it will foam up a bit at first, which is why you need a large pot.) Add 1-2 pretzels at a time, and boil them for 30 seconds, then remove with a slotted spoon, and place on your lined baking sheet.
- If you’d like a browner finish, brush the boiled pretzels lightly with the egg wash. Sprinkle each with coarse salt.
- Bake for about 12 minutes or until golden brown. Let the pretzel cool on the pan for a few minutes before serving warm.
Notes
- The windowpane test: a great way to know if your dough is kneaded enough. Pull on a section of the dough, and gently stretch it to create a thin membrane-like pane (or windowpane). It should be thin enough to see light through it. If the dough breaks when you stretch it, it means the gluten hasn’t developed properly, and you should knead it for a little longer, then test again. (I walk you through this test step-by-step in the video in the recipe card!)
- Instead of traditional pretzel shapes, you can cut the ropes into small pieces to make soft pretzel bites! Or experiment with the shapes. One reader commented that they made snakes to celebrate a DND birthday—I love the creativity!
- Make sure the water is boiling when you add the pretzels. It needs to be very hot to gelatinize the flour quickly for a good, chewy crust. Adjust the burner as needed to keep the water boiling.
- Don’t overcrowd the pot. Since this makes 8 pretzels, you’ll need to boil them in batches. I usually do 2 at a time to prevent them from sticking together or dropping the water temperature too drastically.
- Storage: Soft pretzel keep well at room temperature in an airtight container for up to 3 days. They freeze great in a freezer bag for up to 3 months. To rewarm, place them in a 350°F oven or toaster oven for 3-5 minutes or in the air fryer at 300°F for 3-5 minutes.
Nutrition
Have you tried this recipe? Tag me today!
Mention @preppykitchen and tag #preppykitchen!
Troubleshooting
If your pretzels baked up flat or lost their shape (and you didn’t over-boil), the dough was almost certainly under-kneaded or over-risen. Dough that fails the windowpane test doesn’t have the gluten structure to hold the bubbles from the yeast, and dough left to rise well past doubled collapses. Using instant yeast means the rise times will be fairly quick, so keep an eye on them. And keep your kitchen temperature in mind. A warmer kitchen will rise faster than a colder one. (Learn more about how the environment affects dough rise in my Academy lesson: How To Proof Bread.)
If the crust came out pale, you either skipped the baking soda bath, did not bake them long enough, or your oven runs cooler, so they didn’t get as dark. Remember, the egg wash doesn’t replace what the alkaline boil (baking soda) does for color. Also, don’t pull them out too early. If you have an instant-read thermometer, you can check the centers—they should be around 200F. An oven thermometer will also help you know if it’s heating at the right temperature so you can adjust the dial if needed.
If they taste metallic or soapy, you used too much baking soda for the water, or boiled them for too long. Measure the soda (⅔ cup = 250g) and keep the dip brief (30 seconds is plenty!).
What to Serve With Soft Pretzels
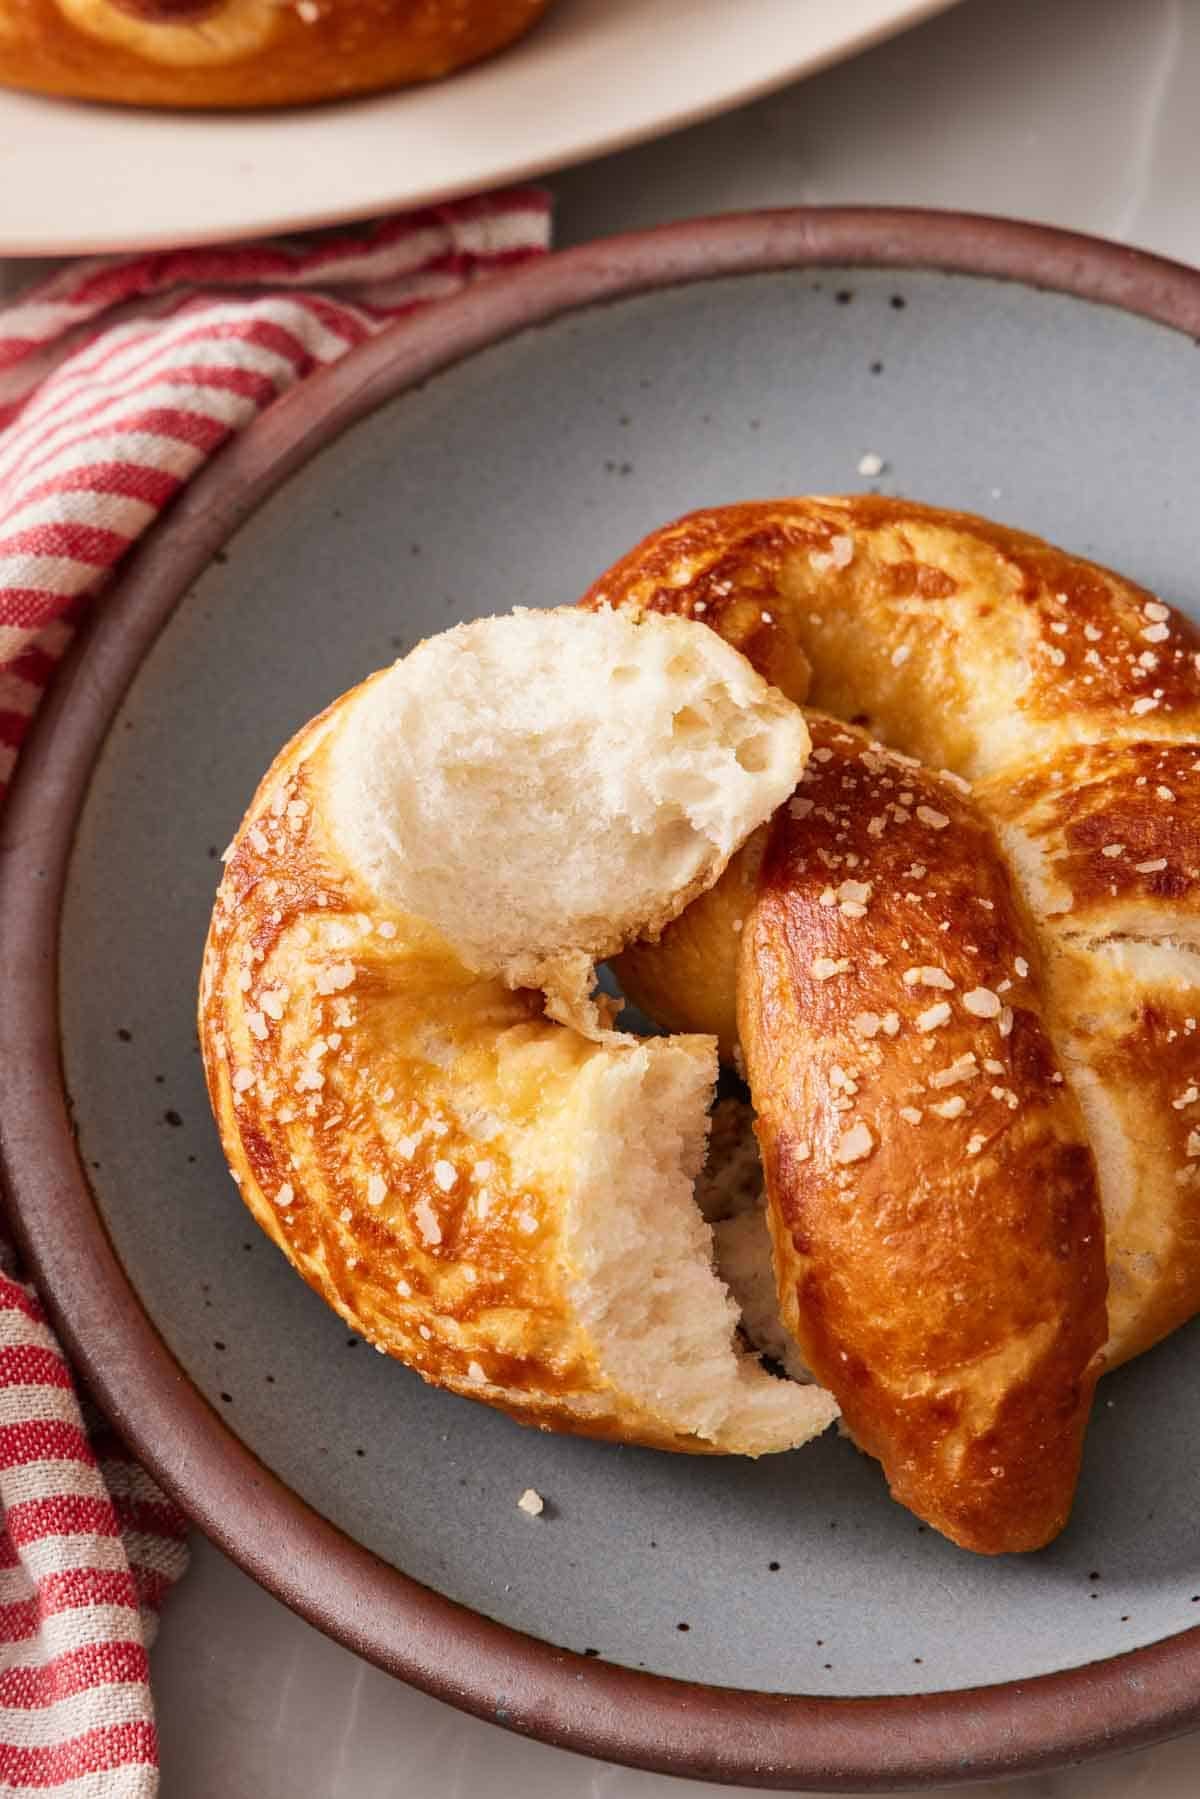
Warm pretzels want a dip. The classic pairing is beer cheese dip with sharp cheddar and gruyère, made for tearing pretzels into. Queso or a nacho-style cheese sauce is the crowd-pleaser at a party and for game day. I’ll put out buffalo chicken dip and baked artichoke dip alongside it for dipping too. Yellow mustard or a grainy Dijon is the no-effort option and, honestly, is hard to beat.
Frequently Asked Questions
Two usual culprits: under-kneaded dough that didn’t pass the windowpane test, or dough that over-proofed and collapsed. Knead until the gluten is developed (do the windowpane test) and shape while the dough still has spring and isn’t more than doubled in size. Also, only boil for 30 seconds, or they can set too much and not rise in the oven.
Too much baking soda in the boiling water, or boiling for too long. Measure the baking soda and the water, and keep each dip to 30 seconds.
Yes! Many readers and I have both halved and doubled it successfully, scaling the yeast, sugar, and flour down proportionally. The method doesn’t change either way. Just keep in mind that if you double it, it may put too much stress on a 5-quart stand mixer (and it won’t fit in a smaller one). Kneading the dough by hand is a better option unless you have a large mixer.
More Recipes To Try
Try one of these bread recipes next:
- Dinner Rolls — soft, fluffy yeasted rolls are a great next bake if pretzels were your first yeasted dough project.
- Breadsticks — soft, buttery, and built on a similar quick yeasted dough, they’re perfect for snacking or alongside dinner.
- Focaccia — a forgiving, dimpled flatbread that’s another low-stress way to practice working with yeast.
- French Bread — a crusty homemade loaf for sandwiches and dipping when you want a slightly more advanced bread project.
- Challah — a rich, braided egg bread that puts the same twisting-and-shaping confidence to use.
If you’ve tried this soft pretzel recipe, then don’t forget to rate it and let me know how you got on in the comments below. I love hearing from you!






