

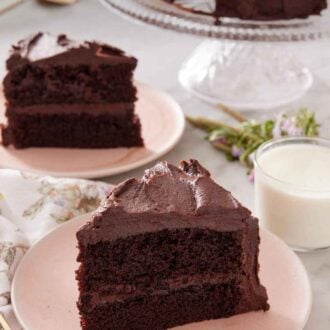
If you’ve been wanting to learn how to make chocolate cake from scratch, I am here to tell you that it’s so much easier than you think!
Whether this is your first time or you’re a seasoned baker, it takes very little time and effort to make a moist, rich chocolate cake that will wow your friends and family. You’ll never go back to store-bought chocolate cake.
No fancy ingredients or complicated steps. Simply whip up a no-fuss batter, divide it in two for a layered cake, make a fluffy chocolate buttercream, and frost the baked cake! Yes, it’s that easy. Plus, there’s one secret ingredient that will take your chocolate cake to the next level: Coffee. Brewed coffee adds nuance and amplifies the flavor of the chocolate. I highly recommend it if you are serious about chocolate!
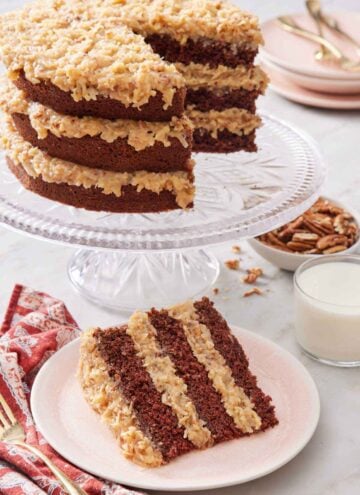
If you’re looking for different kinds of chocolate cake, then I’ve got you covered with my chocolate lava cake recipe, German chocolate cake, flourless chocolate cake recipe, and many more!
What You Need to Make this Recipe
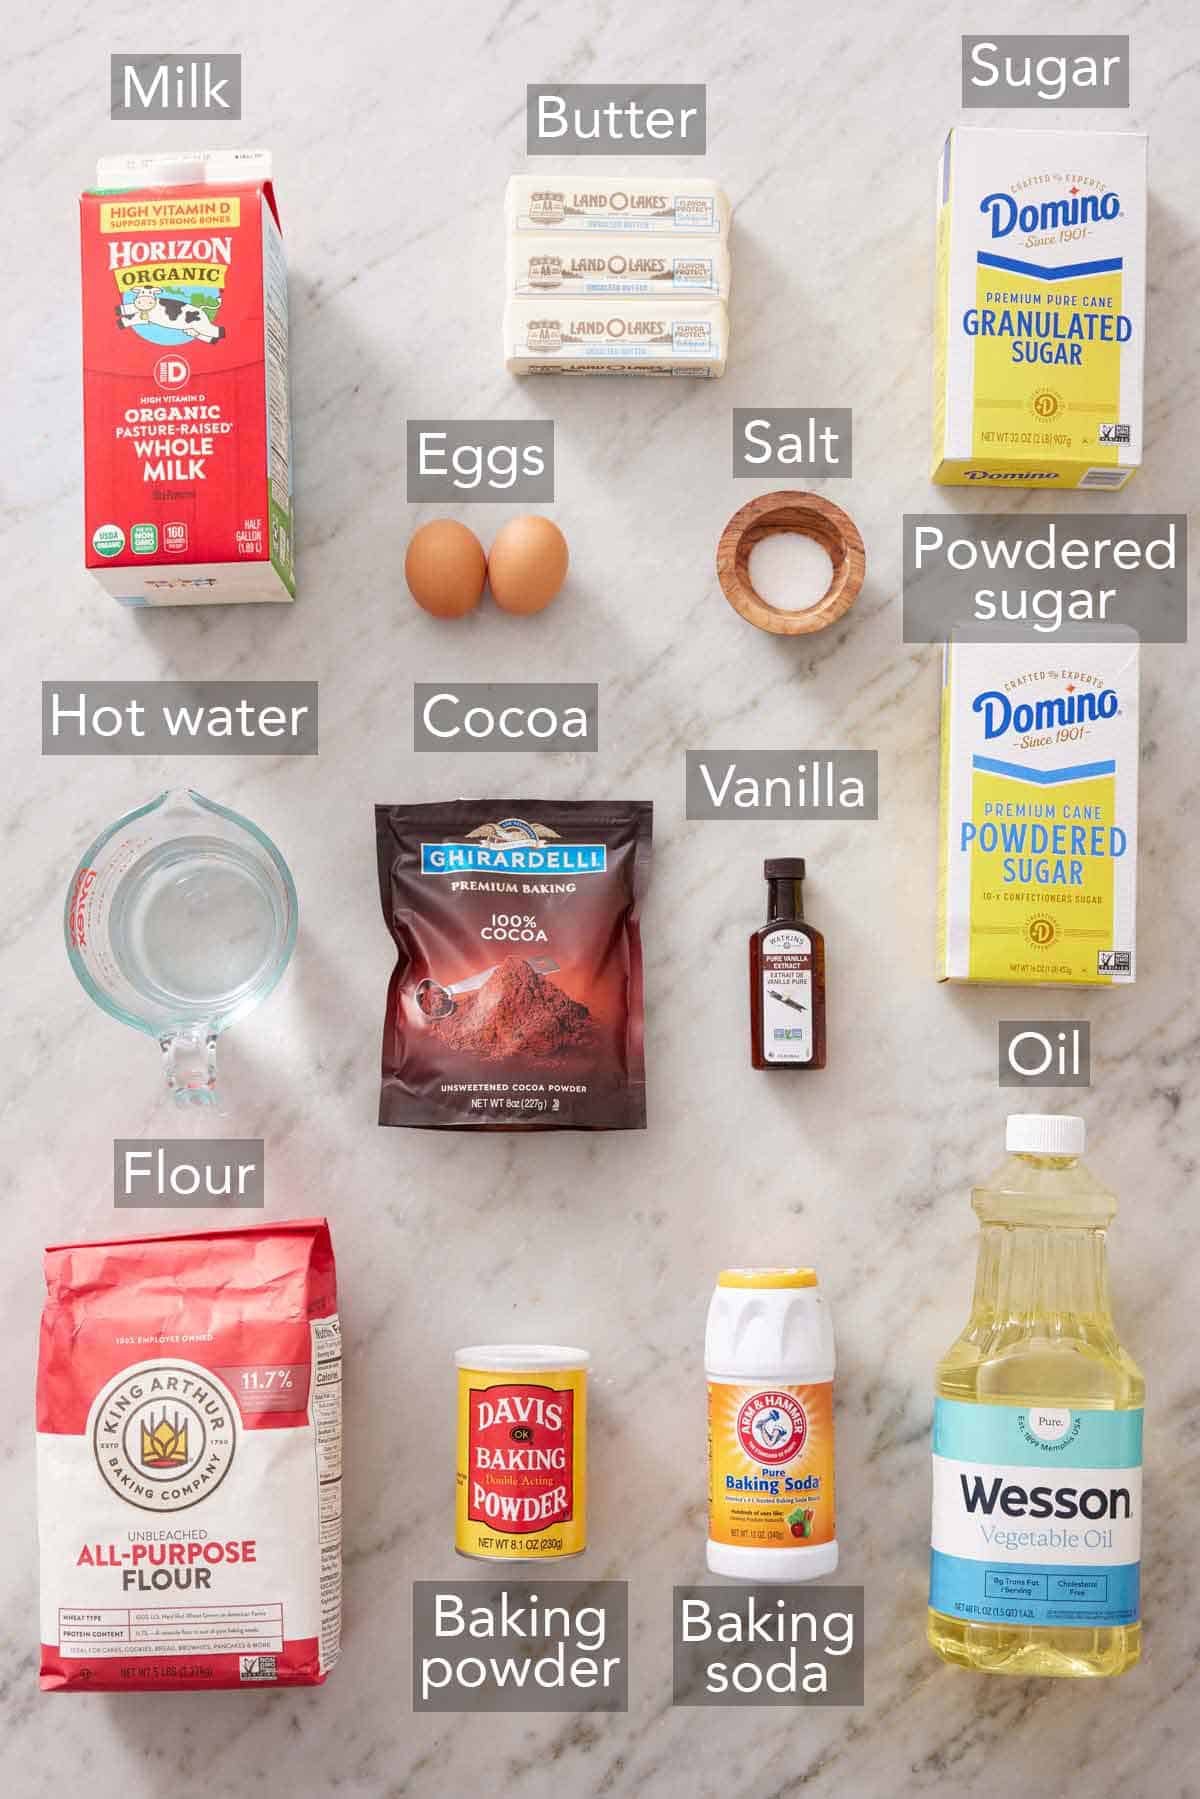
All-purpose flour — all-purpose flour gives you a moist crumb while also giving the chocolate cake structure.
Cocoa powder — as there is plenty of sugar in this cake recipe, be sure to use unsweetened cocoa powder. You need cocoa powder for the cake batter and the creamy buttercream frosting.
Leavening agents — yes, you need both to help the cake rise well. Check the expiration date on these items before using them. They become less effective as time goes on.
Milk — I recommend using whole milk for a rich, moist chocolate cake and extra creamy buttercream.
Eggs — bring the eggs to room temperature before using them. Simply set them out 30 minutes to an hour before you intend to start baking.
Vegetable oil — A vegetable oil, like canola oil, adds moisture to the cake.
Boiling water — the water must be hot! Hot water helps to bring out more of that incredible chocolate flavor, as well as adding to the moisture of the cake. Or, use hot brewed coffee instead (more on that below).
How to Make Chocolate Cake
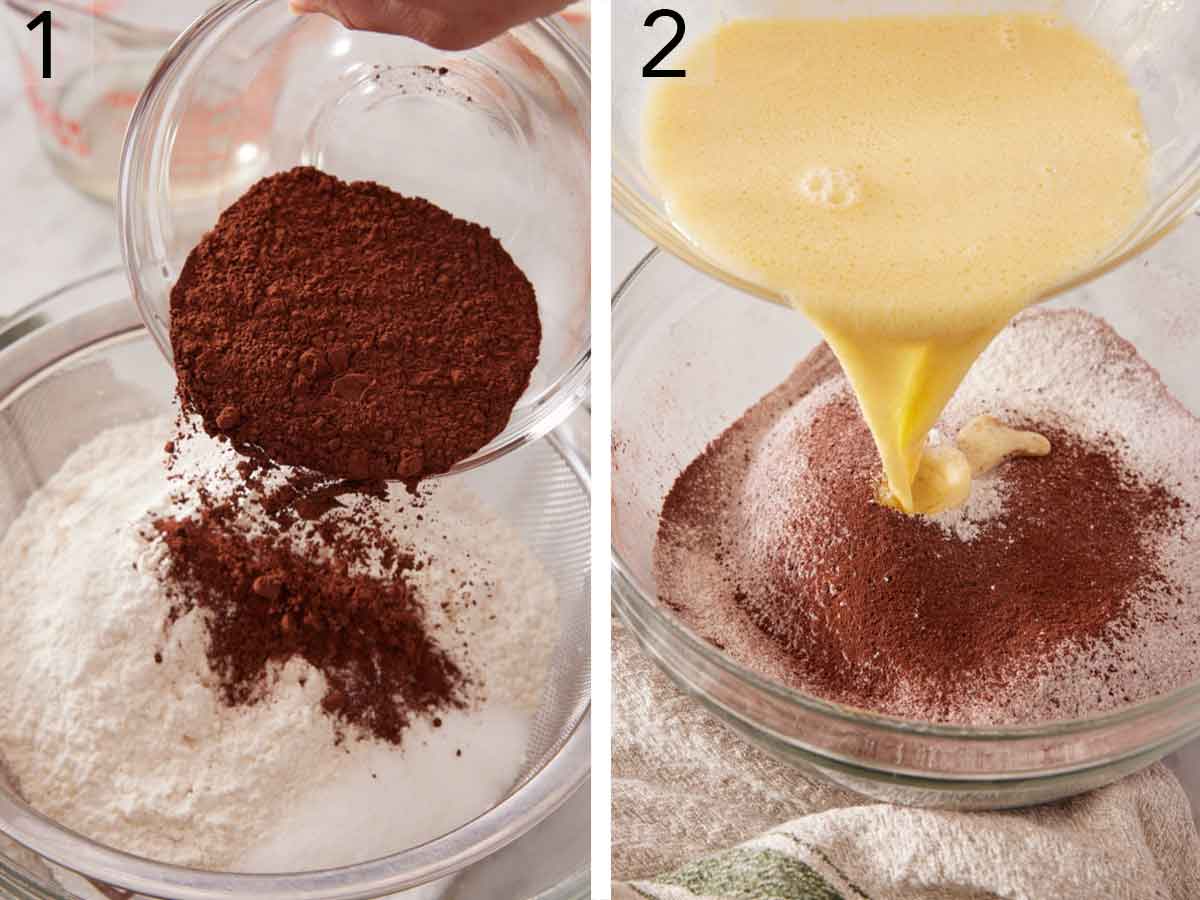
1. Sift the dry ingredients (flour, granulated sugar, cocoa, baking soda, baking powder, and salt) into a large bowl. Whisk to combine.
2. In a smaller bowl, whisk together the wet ingredients (milk, egg, oil, and vanilla). Add the wet ingredients to the bowl with the dry ingredients and whisk it all until well incorporated.
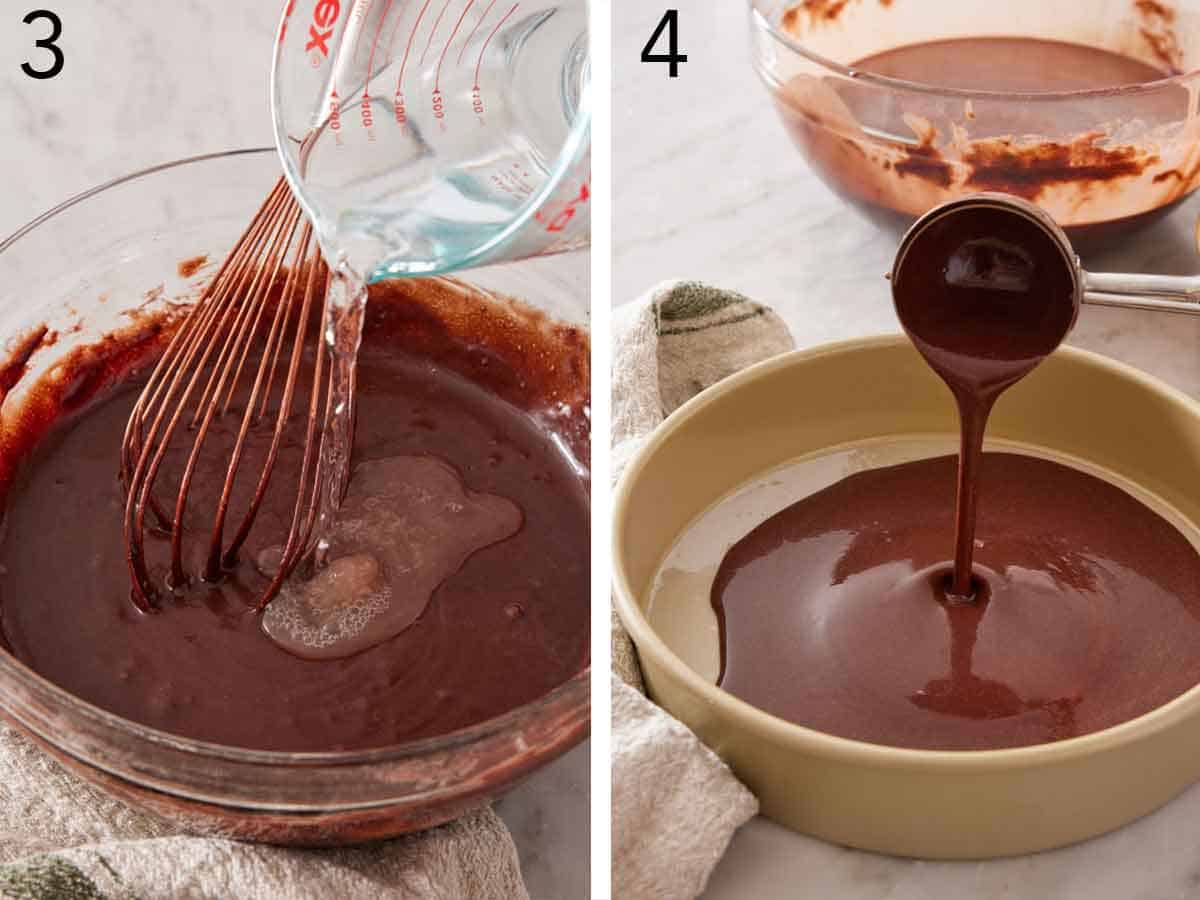
3. Pour in the boiling water and whisk again. You will end up with a runny cake batter. (It will be runnier than you expect, but don’t be tempted to add more flour.)
4. Grease 2 round 9-inch cake pans and line the bottom of each with parchment paper to make removing the chocolate cake easier. If you have them, use cake strips to help the cakes bake more evenly. Once the cake pans are prepared, divide the cake batter evenly between them. Bake the cakes for 35 minutes at 350°F or until a toothpick inserted in the center of the cake comes out clean. Keep the cakes in the baking pans on a wire cooling rack for 15 minutes. Then carefully invert them onto the wire racks. Let them cool completely.
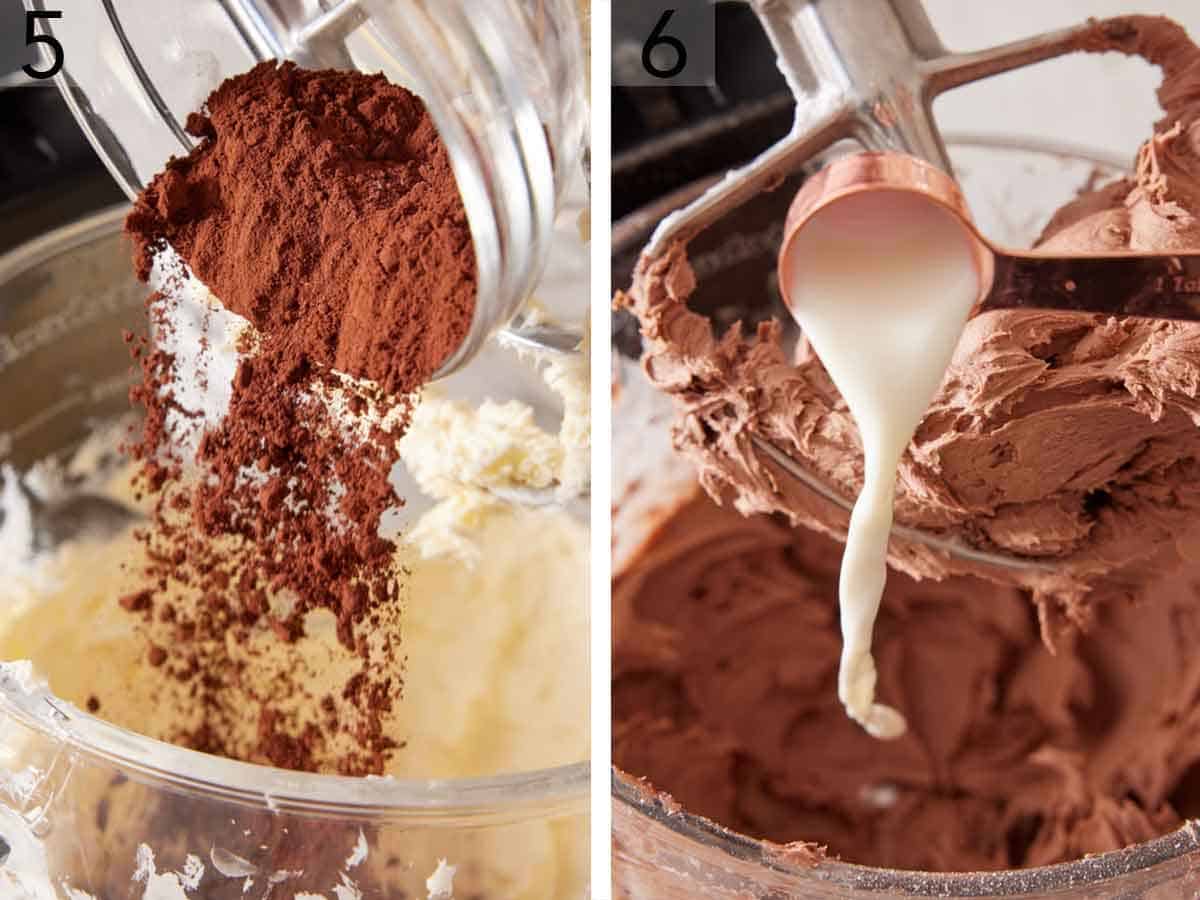
5. While the cakes are cooling, you can prepare the decadent chocolate buttercream frosting. You’ll need a stand mixer fitted with the paddle attachment for this part. In the bowl of the stand mixer, beat the butter on medium speed for about 2 minutes. Add the cocoa powder and salt and mix on low to incorporate them. Scrape the bowl.
6. Keep the speed on low and add a little powdered sugar at a time, alternating with small amounts of milk (up to 4 tablespoons total of whole milk). Once you’ve added all the sugar, add the vanilla extract and beat on medium-low speed for approximately 1 minute, until you have a fluffy buttercream.

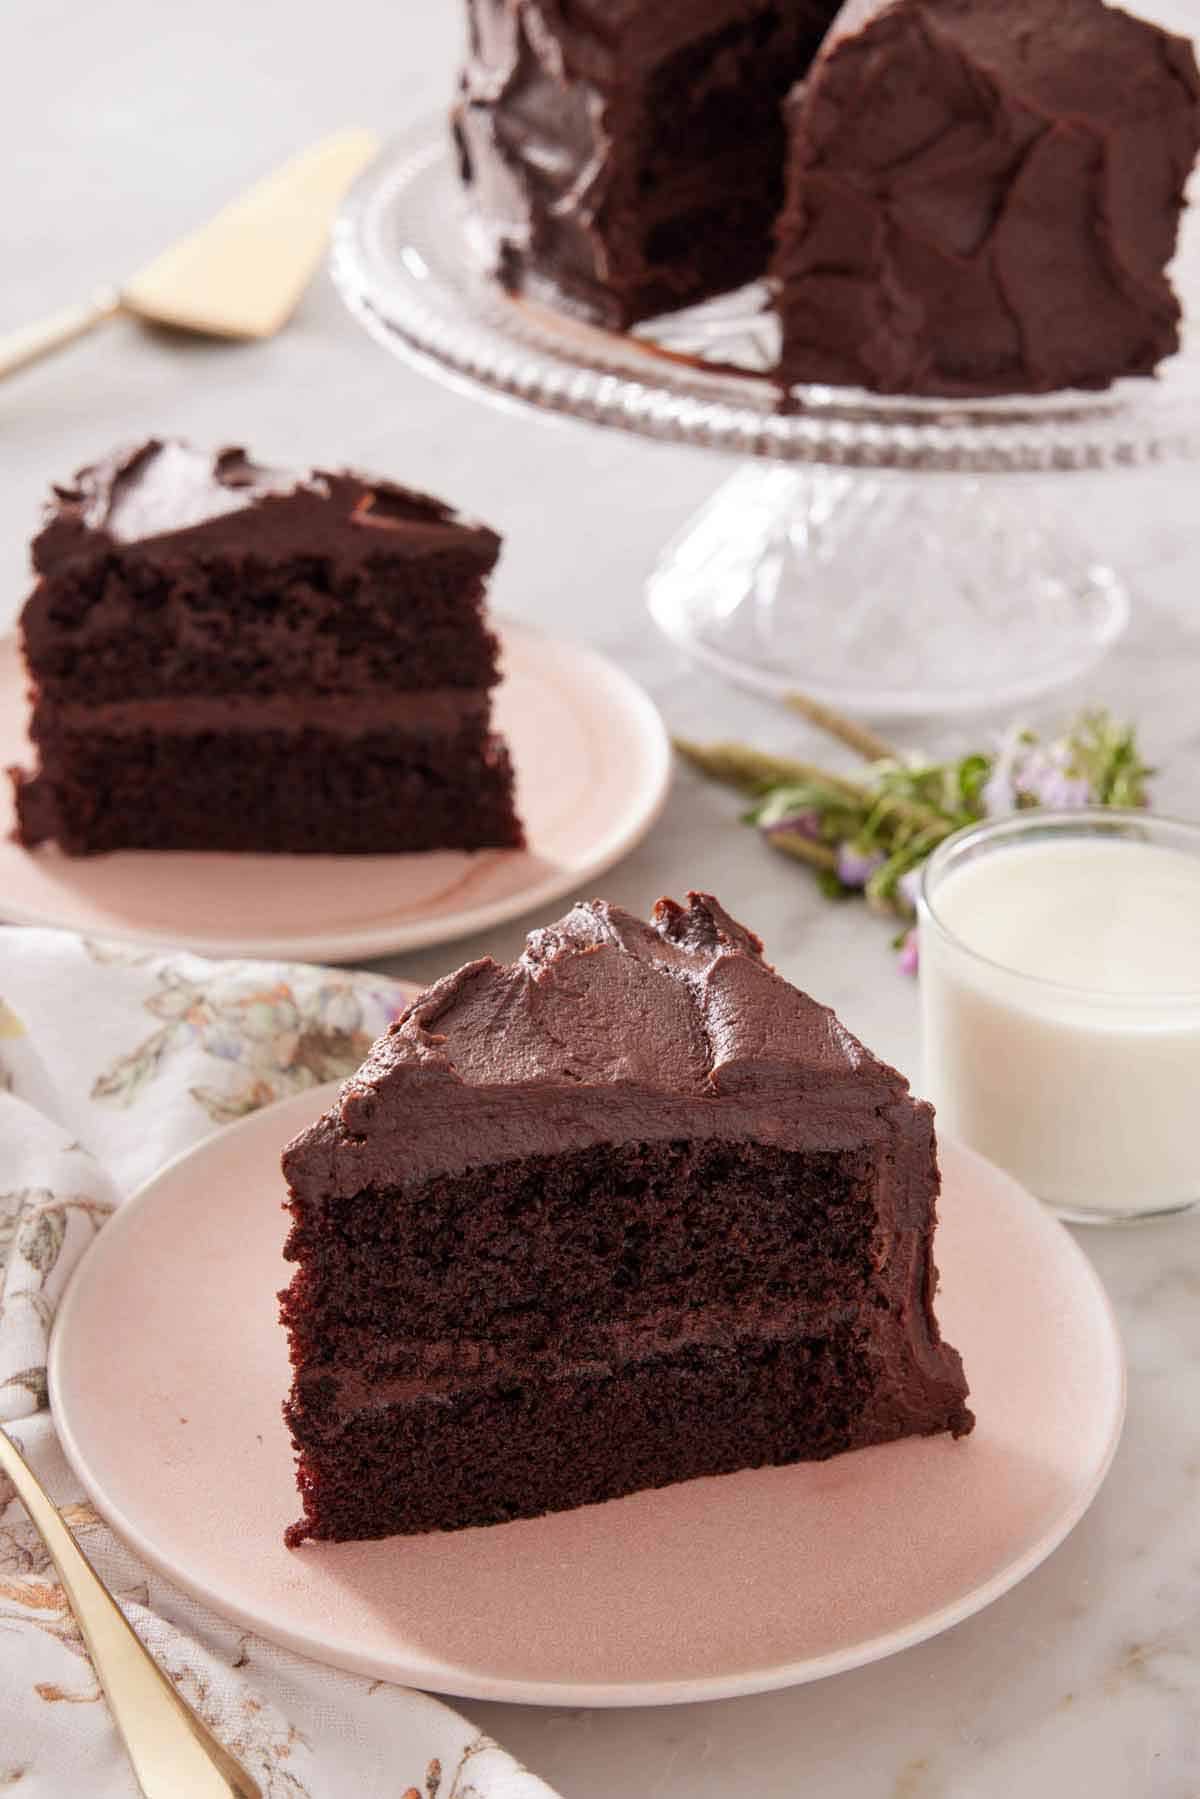
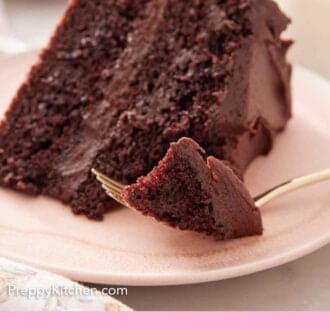
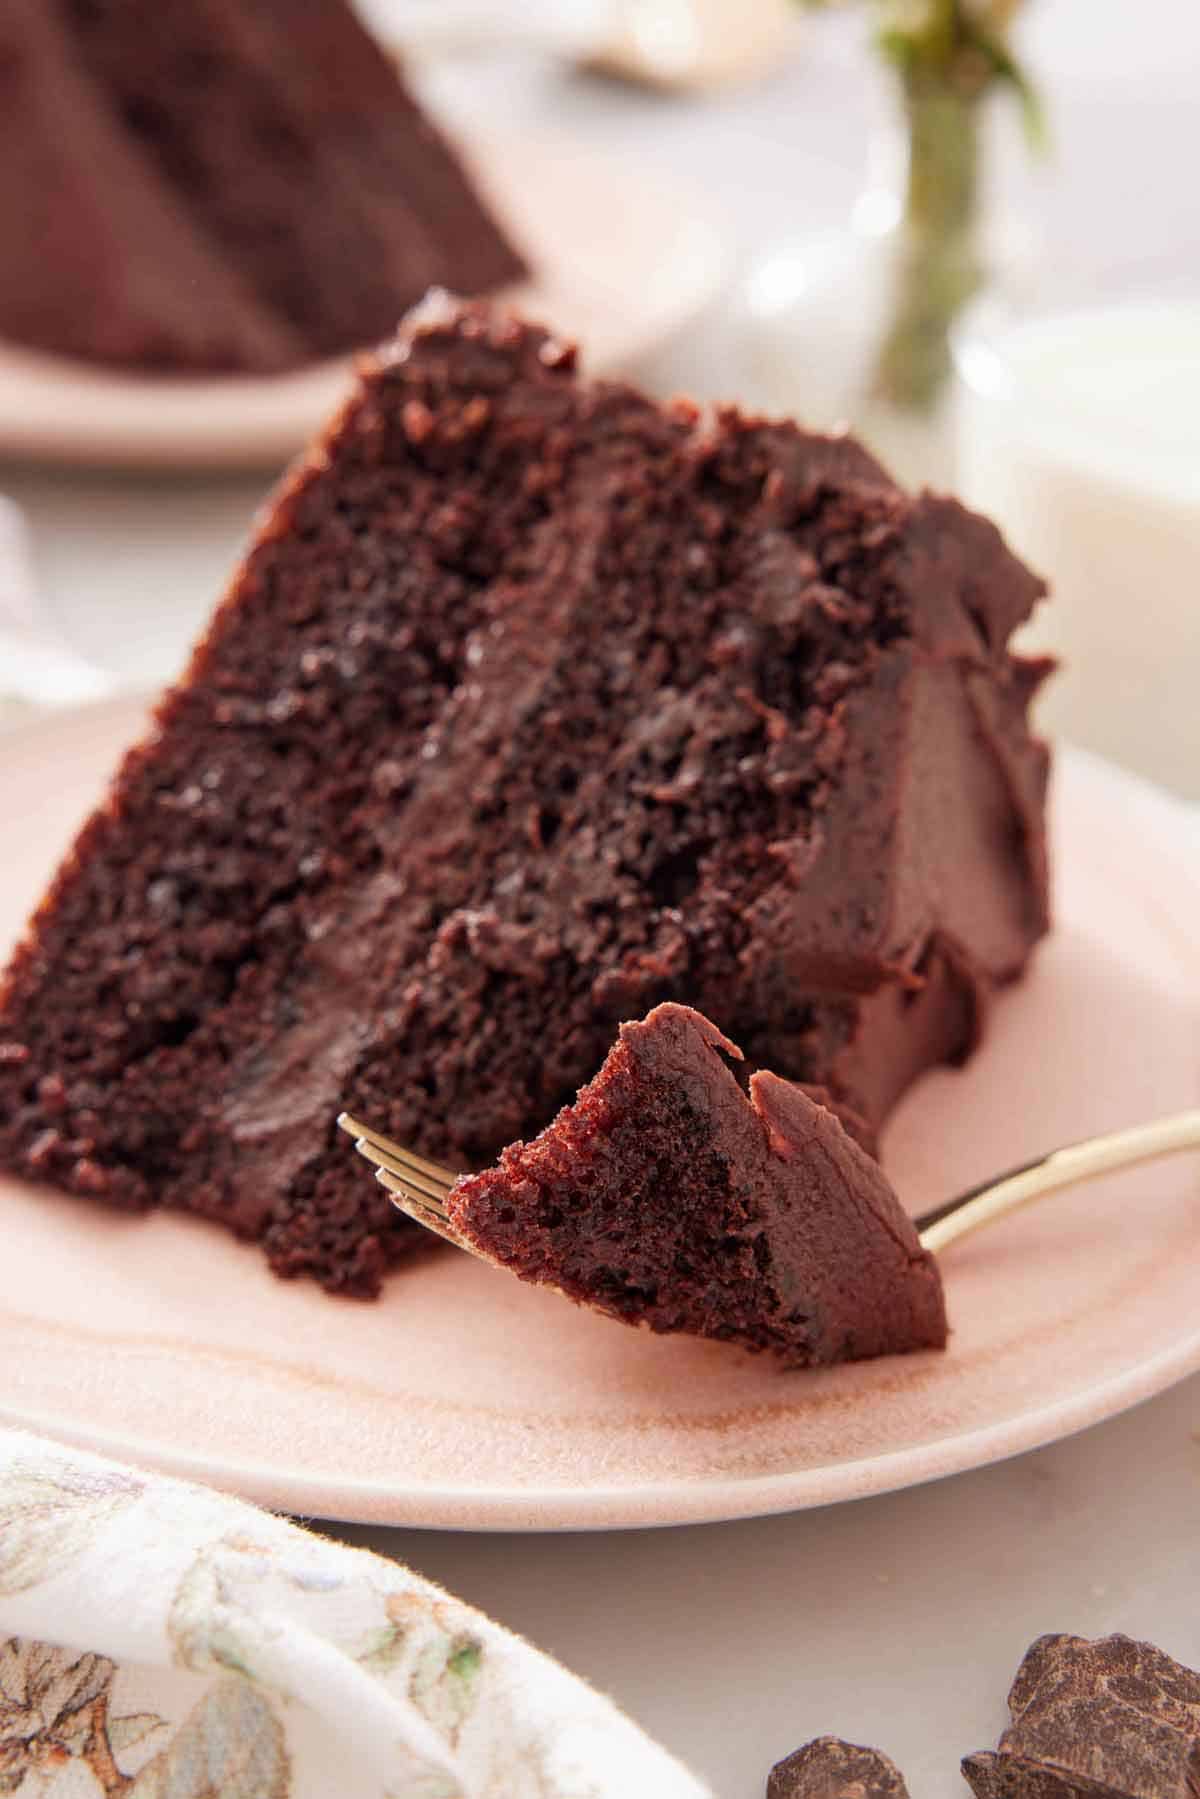
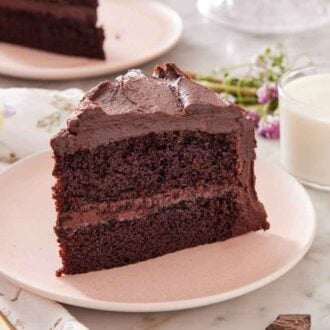
7. Once the cakes have cooled completely, it’s time to assemble your chocolate cake! Place one layer on a cake stand and top it with 1 cup of frosting. Spread the frosting right to the edges before carefully placing the other cake layer on top.
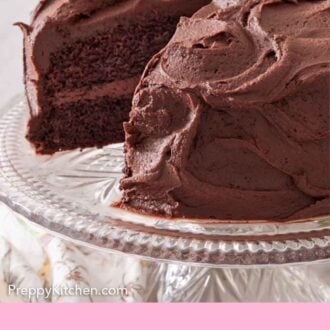
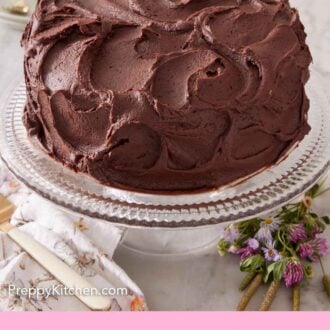
8. Spread the rest of the frosting on top and around the sides of the cake. If you’re feeling fancy, you can save some of the buttercream frosting to pipe decorations. If decorating a cake is overwhelming for you, get some ideas in my cake decorating tutorial. Or just serve a simple frosted chocolate cake: It will get devoured regardless!

Pro Tips for Making this Recipe
- Ingredient temperature matters. Use room temperature eggs and butter. Room temperature eggs give you a fluffier cake, and room temperature butter creams better for a feather-light buttercream frosting.
- Measure the flour correctly. One of the top complaints when it comes to baking cakes is that the cake turns out “floury”, and this is due to using too much flour. The best way to get the right amount of flour is to measure it using a kitchen scale. Alternatively, you can spoon flour into a cup and then scrape a knife across to level it out. Scooping directly from the flour bag or container will inevitably lead to using too much of it.
- Keep the cake moist for longer. For a cake that has even more moisture, substitute ⅓ cup of the whole milk for sour cream. This will give you a cake that will stay moist for longer, which is helpful if you plan to make it ahead or keep it for a few days after baking. Note that the batter will be a bit thicker than if you only used milk.
- Amplify the chocolate flavor. To take the chocolatey-ness to the next level, use hot brewed coffee instead of water. Or add 1 tablespoon espresso powder to the wet ingredients. The cake will not taste like coffee, I promise! Coffee simply amplifies the flavor of the chocolate for a richer, more decadent cake.
- Get perfectly flat layers every time. Cake strips are a must for flat, evenly baked, professional-looking cakes. If you don’t have any on hand, they’re really easy to make with some aluminum foil and paper towels! Check out my easy DIY cake strip tutorial for more details.
Frequently Asked Questions
Cocoa powder is very absorbent and drying, which can lead to dry, crumbly chocolate cake. That’s why you make this chocolate cake recipe with oil, milk, and hot water (or hot coffee) — these ingredients help counteract that dryness, and will give you a moist, velvety crumb.
Yes, this is an ideal make-ahead recipe. Since cooling the chocolate cake layers can take a while, you can bake the cakes a night in advance, and then frost them the next day.
Or you can make everything well in advance and freeze it. Once the cakes are cooled, wrap each layer separately in plastic wrap. Then place them into freezer-safe bags and store in the freezer. Spoon the buttercream frosting into a freezer bag or freezer-safe container and freeze. The cake and frosting can be frozen for up to 3 months. Thaw overnight in the refrigerator before frosting the cake and serving.
Chocolate buttercream frosting is an easy, classic choice for a chocolate cake, but you have a bunch of different options! If you’re looking for something a little different, try chocolate ganache, vanilla buttercream, cream cheese frosting, strawberry buttercream, or even mocha frosting!
You can store homemade chocolate cake at room temperature or in the refrigerator. If you plan on eating it within 2 or 3 days, simply keep it on your kitchen counter under a cake dome. To store it for a little longer, refrigerate it instead.
If you love this recipe try these out!
If you’ve tried this recipe then don’t forget to leave a rating and let me know how you got on in the comments below, I love hearing from you!
Chocolate Cake
Video
Equipment
- 9" round baking pans
- Mixing Bowls
- Electric mixer
- Wire cooling rack
Ingredients
For the Cake:
- 2 cups all-purpose flour (240g)
- 2 cups granulated sugar (400g)
- ½ cup unsweetened cocoa powder (50g)
- 1½ teaspoons baking powder
- 1½ teaspoons baking soda
- ½ teaspoon kosher salt
- 1 cup milk (240mL)
- 2 large eggs
- ½ cup vegetable oil (180mL)
- 1 tablespoon vanilla extract
- 1 cup boiling water (240ml)
For the Chocolate Buttercream:
- 1½ cups unsalted butter room temperature (338g)
- ¼ cup unsweetened cocoa powder (25g)
- ¼ teaspoon salt
- 1 teaspoon vanilla
- 6 cups powdered sugar (680g)
- 3 to 4 tablespoons milk (45-60mL)
Instructions
For the Cake:
- Preheat the oven to 350°F. Grease 2 (9-inch) round cake pans with butter or baking spray and line the bottom of each pan with parchment paper. (I highly recommend using cake strips for a more even bake.)
- Sift the flour, sugar, cocoa, baking soda, baking powder, and salt into a large mixing bowl and whisk to combine.
- In a medium mixing bowl, whisk together the milk, egg, oil, and vanilla. Add to the flour mixture and whisk together until well combined. Pour in the boiling water and whisk until well combined. (The batter will be runny.)
- Divide the batter between the prepared cake pans.
- Bake for 35 minutes or until a toothpick inserted in the center comes out clean. Let the cakes cool in the pans on a wire cooling rack for 15 minutes. Carefully invert the cake layers onto the wire rack, remove the parchment paper, and let cool completely.
For the Chocolate Buttercream:
- In the bowl of a stand mixer fitted with the paddle attachment, beat the butter on medium speed until soft and creamy, about 2 minutes. Add the cocoa powder and salt and mix on low speed until combined. Scrape the bowl down.
- While mixing on low speed, gradually add in the powdered sugar alternating with a little bit of milk on occasion up to 4 tablespoons. Once the sugar is added, beat in the vanilla. Scrape down the bowl and beat on medium-low speed until light and fluffy, about 1 minute.
For the Assembly:
- Place a cooled cake layer on a cake stand. Top with 1 cup of frosting and spread it out the edges in an even layer. Place the remaining cake layer on top and spread the rest of the frosting all over the outside of the cake. You can reserve some of the frosting to pipe decorations if desired.
Notes
- Ingredient temperature matters. Use room temperature eggs and butter. Room temperature eggs give you a fluffier cake, and room temperature butter creams better for a feather-light buttercream frosting.
- Measure the flour correctly. One of the top complaints when it comes to baking cakes is that the cake turns out “floury”, and this is due to using too much flour. The best way to get the right amount of flour is to measure it using a kitchen scale. Alternatively, you can spoon flour into a cup and then scrape a knife across to level it out. Scooping directly from the flour bag or container will inevitably lead to using too much of it.
- Keep the cake moist for longer. For a cake that has even more moisture, substitute ⅓ cup of the whole milk for sour cream. This will give you a cake that will stay moist for longer, which is helpful if you plan to make it ahead or keep it for a few days after baking. Note that the batter will be a bit thicker than if you only used milk.
- Amplify the chocolate flavor. To take the chocolatey-ness to the next level, use hot brewed coffee instead of water. Or add 1 tablespoon espresso powder to the wet ingredients. The cake will not taste like coffee, I promise! Coffee simply amplifies the flavor of the chocolate for a richer, more decadent cake.
- Get perfectly flat layers every time. Cake strips are a must for flat, evenly baked, professional-looking cakes. (If you don’t have any on hand, they’re really easy to make with some aluminum foil and paper towels! Check out my easy DIY cake strip tutorial for more details.)
Cristina says
Do you use Dutch process cocoa or natural (Hershey type)? I have both but heard you can’t interchange them. Is that true?
John K. says
Hi Cristina,
I use dutch process cocoa. You can interchange them, I just prefer not to.
Let me know what you think of the cake!
Best,
John
Ashley says
I made this cake for my husband’s birthday and we both absolutely LOVED it! It’s the best chocolate cake either of us have ever eaten. Our 2-year-old son loved it too. 🙂 We didn’t have cacao nibs, so we used Semi-Sweet Mini Chocolate Chips, and they worked really well. The cake looked great and tasted amazing! I’m making it again for my mother’s birthday this weekend. Thank you for this delicious recipe!!
John Kanell says
I hope she enjoyed it just as much!
Sakshi says
Thanks John for replying.
Please tell me what is the quantity of buttermilk we have to take instead of egg.
Doreen says
Hi John,
I love watching your dessert videos! You say the cake is soft and moist, would it be to soft to stack and put fondant over?
Erica Garcia says
I made this cake for my little brothers birthday and it was da-bomb! It’s the second time that I make a cake from scratch and I must say that you are very clear and thorough with your recipe, if it wasn’t because of that I think I would have failed, hahaha. Thank you so much for sharing your beautiful and delicious cake recipe! I wish you nothing but success. =)
P.S. I wish I could attach a picture of the cake because you would be proud.
-Erica Garcia
John K. says
Hey Erica,
Thank you so much for the positive feedback! So happy the cake was a hit and I bet it looked WONDERFUL! 🙂
Best,
John
Elizabeth Estrella says
Hi John,
Can cake be made 2 days in advance amd stored room temp.? Should I wrap it in plastic wrap?
Elizabeth Estrella says
Hi John, this recipe sounds amazing! Can this cake be baked 2 days in advance and stored room temperature? Should I wrap in plastic wrap?
Sakshi says
Hi John
Can u suggest me how can I make this recipe in eggless
John K. says
Hi Sakshi,
Although I haven’t tried it, I hear you can substitute eggs with either banana, applesauce or buttermilk.
I’d love to hear what you decide and how it goes!
Best,
John
Janu says
How would I substitute buttermilk if there is already some in the recipe?
jkanell says
You could try adding some ground flax seeds mixed with water.
Janu says
How would I substitute buttermilk in the recipe for eggs if buttermilk is already in the recipe? I wouldn’t like the taste of banana or applesauce in the cake so…
John K. says
Hi Janu,
I believe 4 tablespoons of buttermilk equals one egg. You can also use 4 tablespoons of tofu in replacement for one egg.
Best,
John
Sakshi says
Hi John
I love your recipe , can you suggest me how can I make this recipe in eggless .
Please reply.
Sakshi says
Hi John
I love your recipe, can u tell me how to make eggless cakes
Please reply.
From
Sakshi