
This post may contain affiliate links. Please read our disclosure policy.
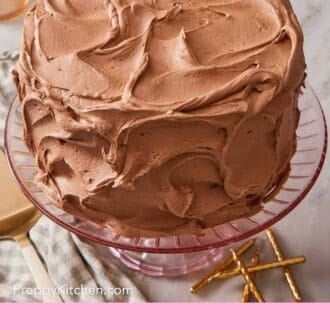
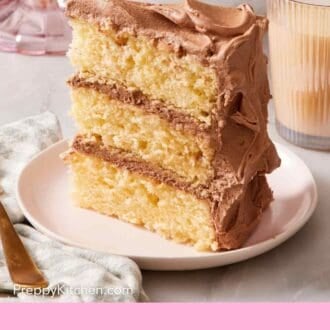
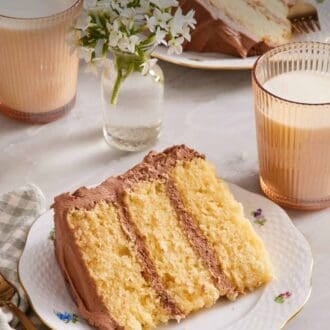
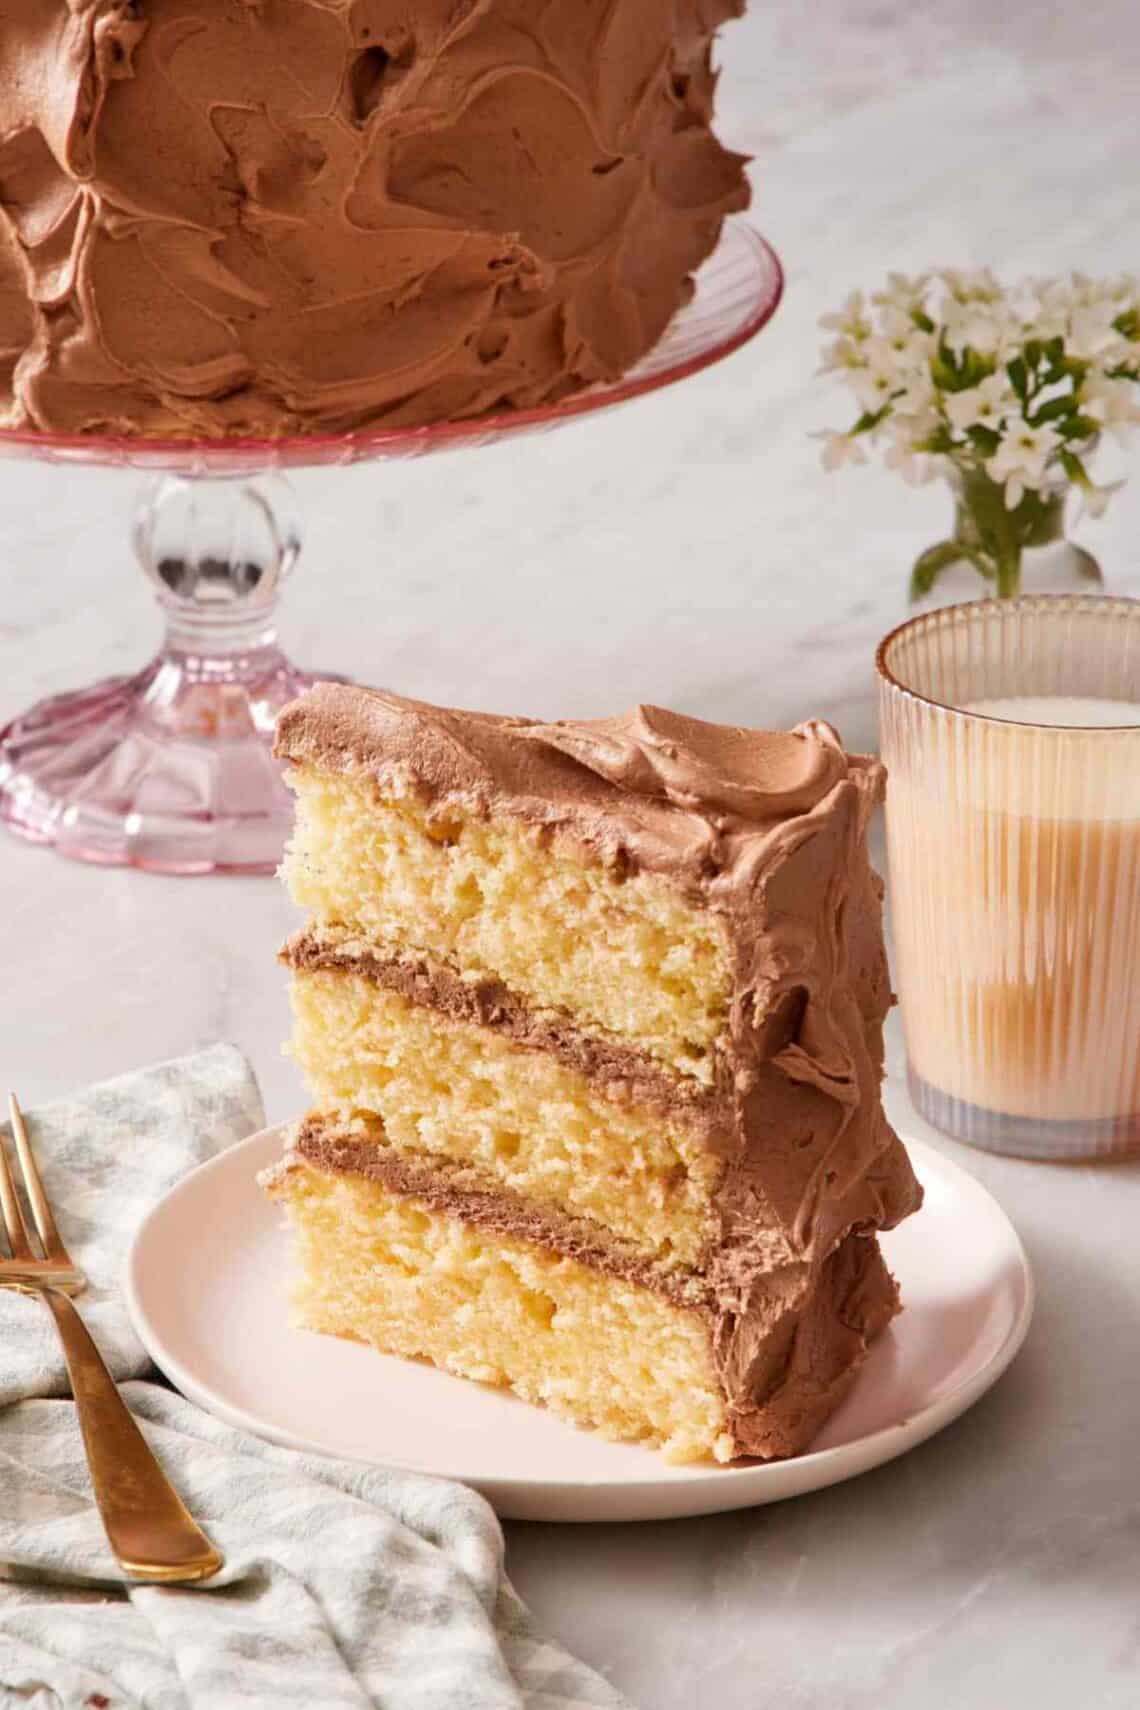
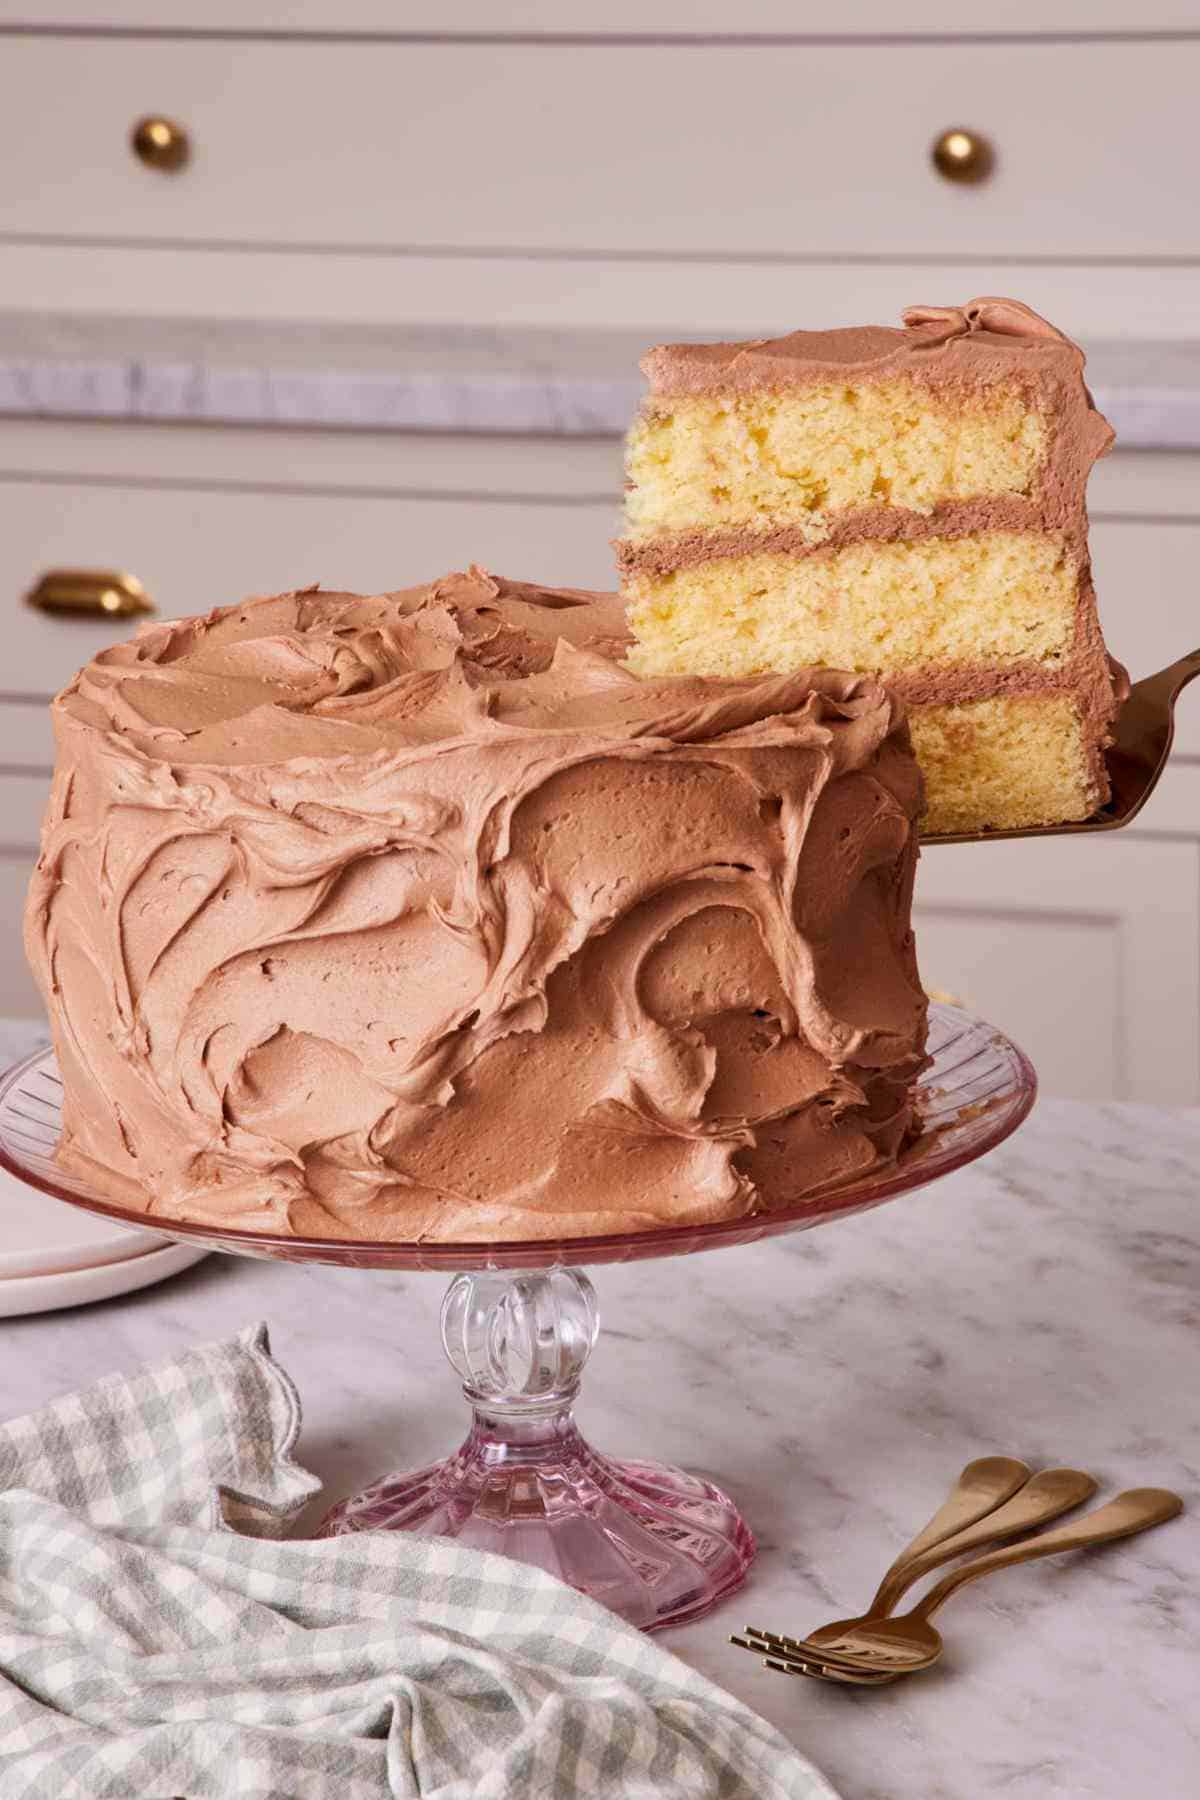
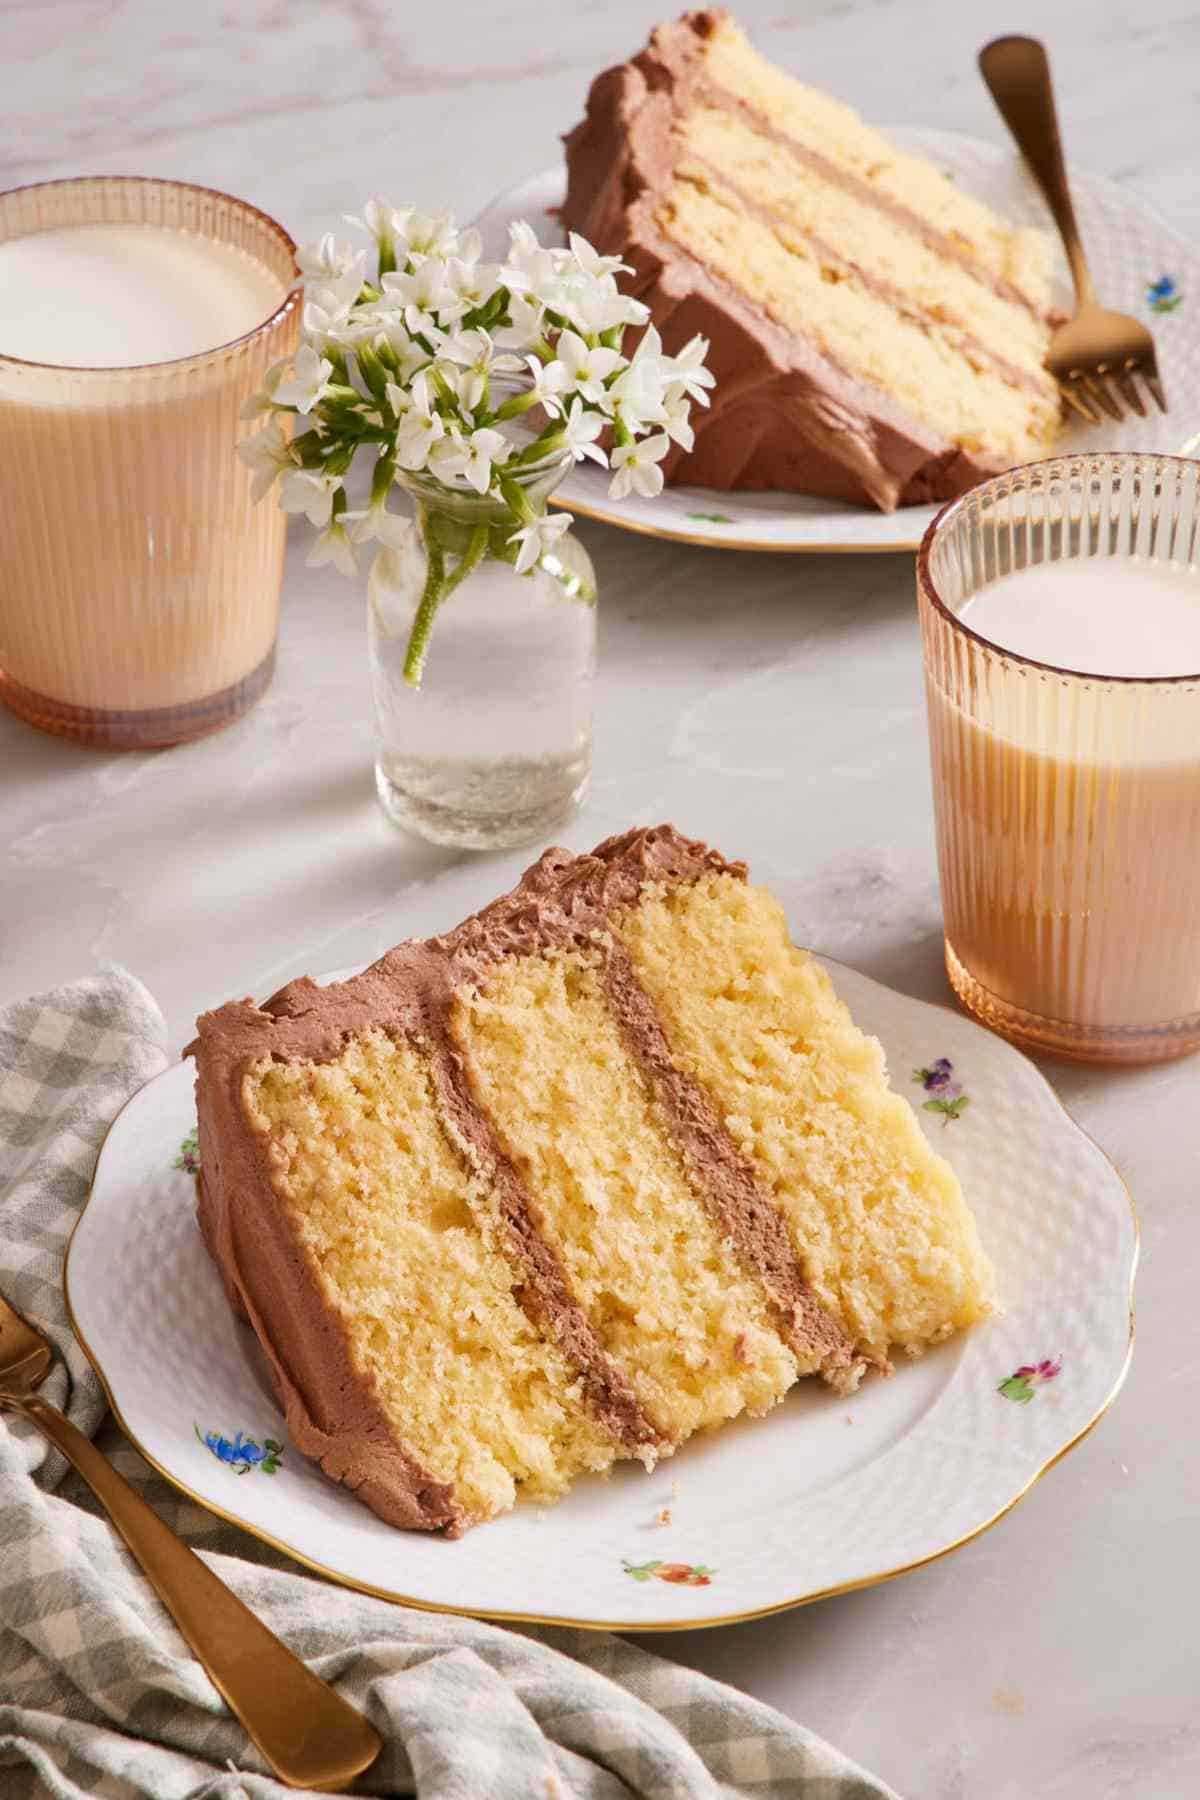
This homemade Yellow Cake recipe is as versatile as it is delicious! Perfect for parties, this showstopping cake features three layers of soft, moist cake topped with a velvety, fluffy chocolate frosting.
This yellow cake recipe is straightforward, delicious, and so much better than the box mix! While homemade yellow cake often turns out dry, I rigorously tested my recipe to ensure it stays moist, tender, and fluffy for several days.
I also recently updated this recipe to use a more common pan size to make the recipe more accessible and serve more people. With several frosting options you can try, this easy cake recipe is ideal for events like birthday parties. You can even color the cake layers with food coloring to fit different themes!
“This cake is delicious!!!! I am kind of new to baking from scratch and this recipe and your tips along the way are amazing!”
Lisa
Why You’ll Love My Updated Recipe
This easy recipe has been a fan-favorite since I first published it back in 2020. Since then, I have received questions from readers about adapting the cake to other pan sizes, ingredient substitutions, and different frostings. This updated post will help you make the perfect yellow cake!
- Same recipe! I kept the cake recipe the same, just adjusted the ingredient amounts for 8-inch cake layers. The yellow cake is the same moist, fluffy cake you have loved for years!
- A more common pan size: My original recipe made a three-layer 6-inch cake. I retested it to make an 8-inch layer cake since most readers have that pan size at home. And, now it feeds more of a crowd!
- Moist cake. Decadent frosting. My cake layers taste delicious and stay moist for days by using both butter and vegetable oil. Plus, the frosting uses bloomed cocoa powder and melted chocolate for a luscious, velvety buttercream that is rich with flavor.
What’s The Difference Between Yellow Cake And Vanilla Cake?
Vanilla cake and yellow cake are very similar, but yellow cake uses more whole eggs and additional egg yolks. The egg yolks are responsible for the yellow cake’s signature color.
White cake is different from both in that only egg whites are used to keep the cake white in color. Bakers will often use clear vanilla in white cake, too, to ensure the cake is not tinted by real vanilla extract’s brown color.
Key Ingredients & Substitutions
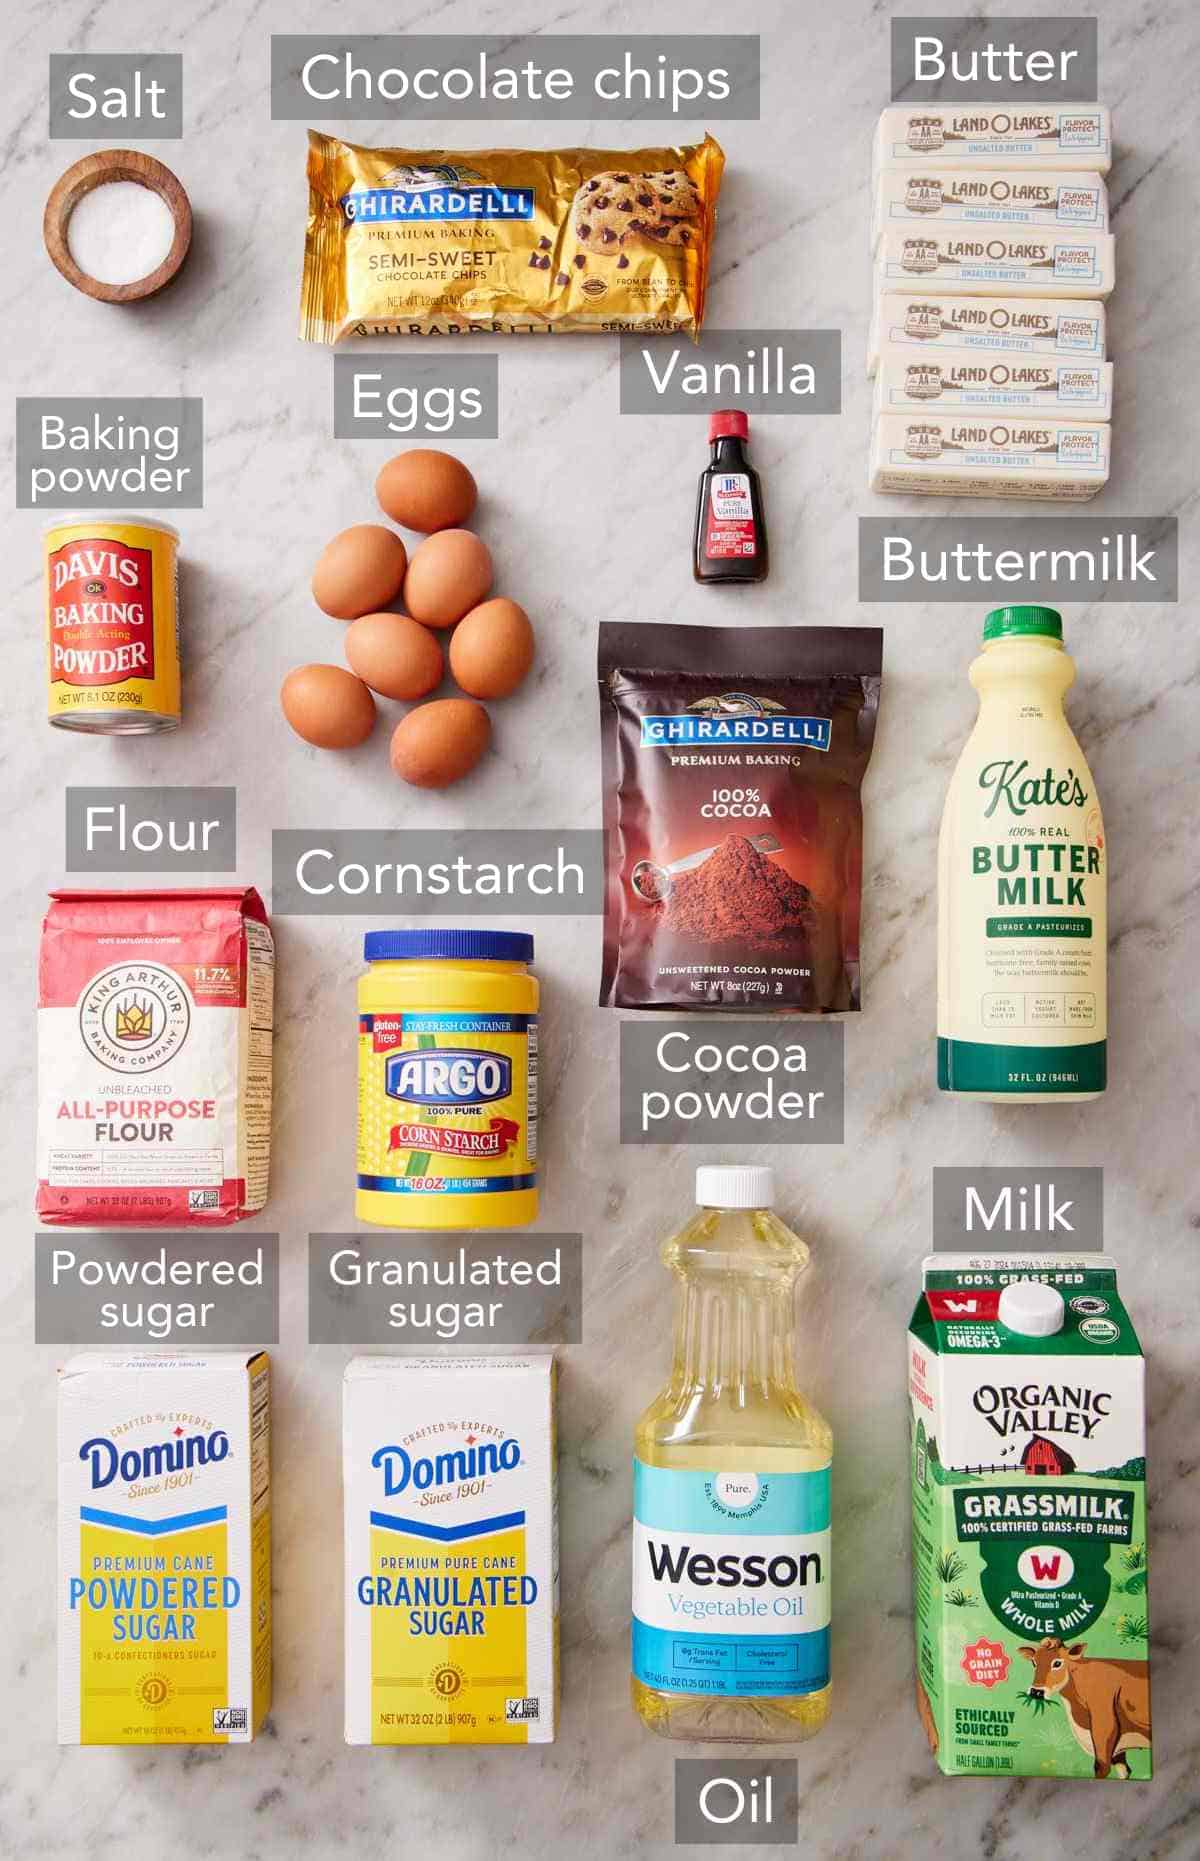
These are the main ingredients you need to make a homemade yellow cake. You can find the full list of ingredients and measurements in the recipe card below.
Flour — I chose to use all-purpose flour and cornstarch to mimic cake flour, since many people don’t have cake flour in their pantries all the time. Mixing AP flour and cornstarch is actually how you make a cake flour substitute, and with this combo, you don’t need to buy a special flour! The addition of cornstarch makes the cake layers tender and fluffy by reducing the protein content that forms gluten.
Butter and oil — butter and oil add moisture and richness to the cake. Butter adds rich flavor and also contributes to the cake’s yellow color. I love including vegetable oil (or any neutral oil) along with the butter. Since it doesn’t firm up at cooler temperatures like the butter does, it keeps the cake’s crumb incredibly soft and moist for days. Set the butter out about an hour or so before you start baking, so it softens. If you forget, just follow my tutorial for how to soften butter in about 10 minutes!
Eggs — you need 4 whole eggs, plus 3 extra egg yolks to make yellow cake. They add flavor, richness, and structure to the cake. The yolks are also the main contributor to the cake’s signature color. If you really want to amplify the color, look for heritage or pasture-raised eggs that have a deep yellow or orange yolk. (You can save the egg whites to make coconut macaroons or freeze them!)
Vanilla — a large splash of vanilla is a key flavor component in yellow cake. I recommend using real vanilla extract, not vanilla essence (which is synthetically flavored). Or use homemade vanilla extract, which is simple to make with vanilla beans and vodka.
Buttermilk — the acid in buttermilk makes the cake layers tender and fluffy. It helps reduce gluten formation and reacts with the leaveners to make the batter rise. No buttermilk? No problem! Make your own with my 2-ingredient buttermilk substitute or mix 1 cup (240g) of sour cream with ½ cup (120ml) of water.
Chocolate buttercream — to make this variation of my classic chocolate buttercream, you will essentially mix chocolate ganache with buttercream. Using ganache in the frosting cuts the sweetness a bit and gives the frosting a decadent, melt-in-your-mouth texture with a deep chocolate flavor. You’ll also mix the cocoa powder with melted butter at the very beginning, which blooms the cocoa for a deeper, more enhanced chocolate flavor. Doing this also helps the cocoa incorporate more easily with the other frosting ingredients.
Can I Use Different Pan Sizes?
Yes! You can bake this recipe in other pans without scaling for most pan sizes. Bake times may vary, so always check for doneness by pressing the centers (they should be springy) or inserting a toothpick (it should come out clean). Here’s how to make the adjustments:
- 6-inch cake: You have a few options here! You can make the recipe as-written and divide it among five 6-inch cake pans, or fill three cake pans halfway with batter and bake the extra batter as cupcakes. If you don’t mind doing a little bit of math, you can reduce the recipe by a third (33%) and bake three cake layers. (This will turn out just like my original recipe!) Bake the 6-inch layers for 25 to 30 minutes.
- 9-inch cake: Divide the batter between three 9-inch round cake pans and bake for 20 to 25 minutes. The layers will be slightly thinner.
- Sheet cake: Pour the batter into a 9×13-inch cake pan and bake for 30 to 35 minutes.
- Cupcakes: Line muffin pans with paper cupcake liners and fill each liner two-thirds full (about ¼ cup) with batter. Bake for about 20 minutes, or until a toothpick comes out of the center with a few crumbs. You will get about 32 cupcakes.
For the frosting: You can make the full recipe to evenly coat a 9-inch cake or pipe onto cupcakes. If you want a thinner coating for a sheet cake or the 6-inch cake, cut the frosting recipe by half.
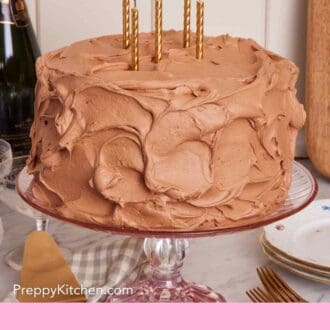
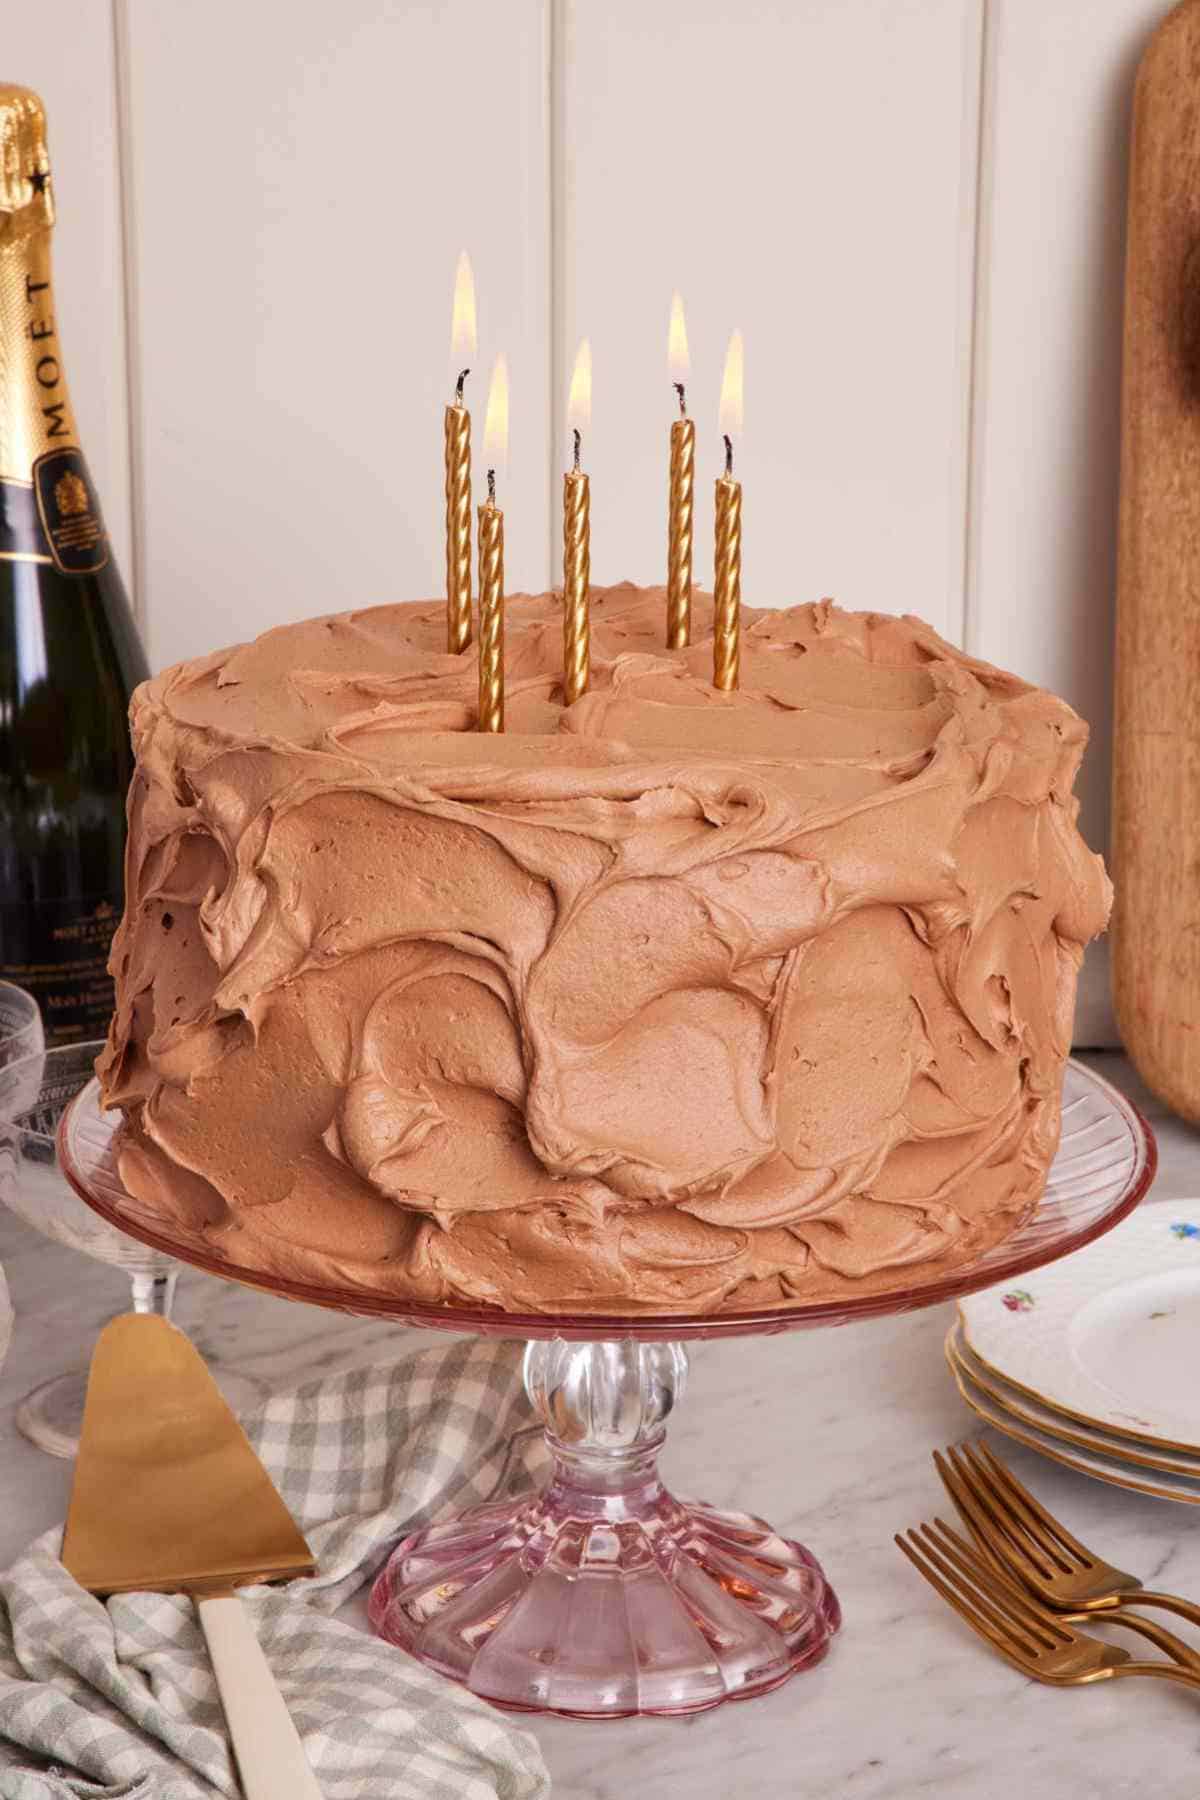
Decorating Yellow Birthday Cake
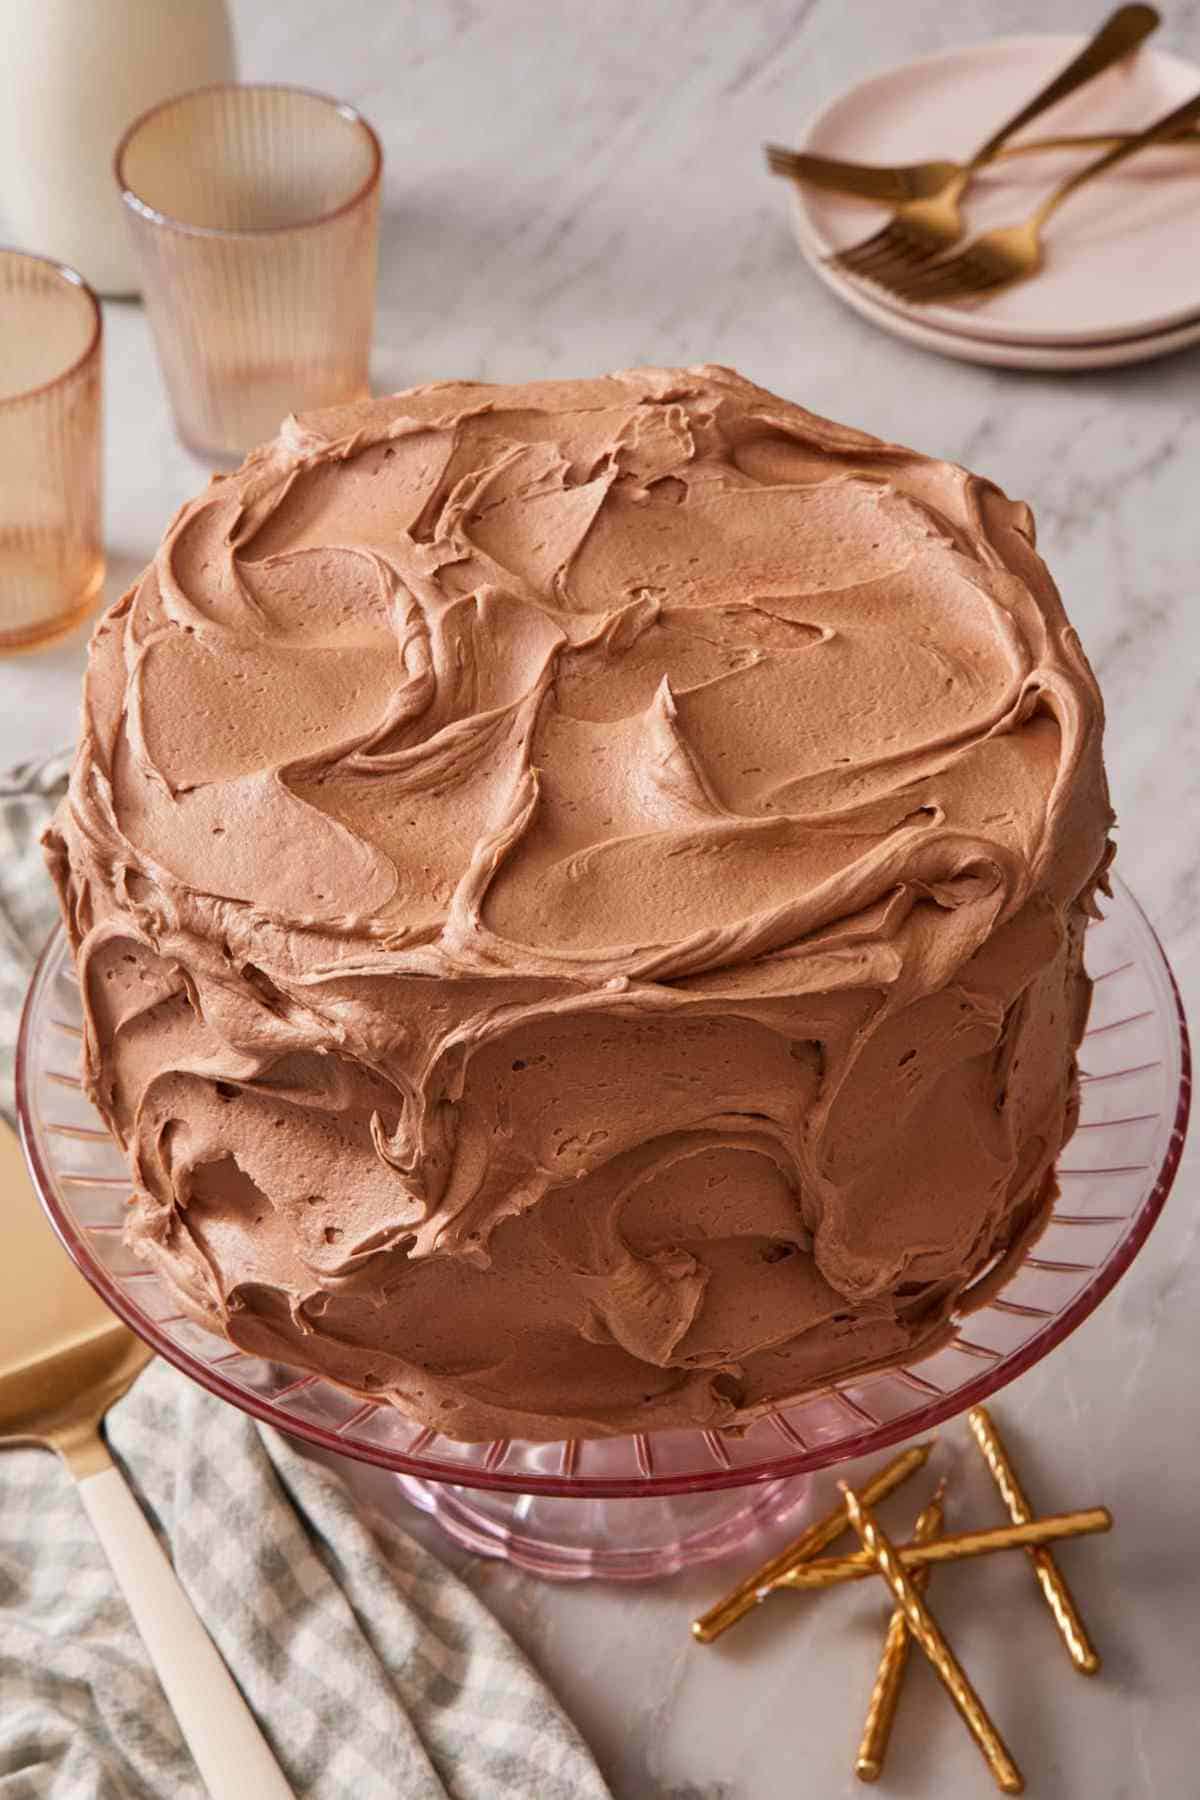
I love a simple swoopy frosting for a more rustic yellow cake, but you can pipe decorations with the frosting as well for a fun celebration cake. This cake is easy to decorate based on the occasion! Feel free to add sprinkles, a ganache drip, edible flowers, or fresh fruit if you’d like. Decorating a cake can feel overwhelming, so check out my tips on how to decorate a cake for lots of simple and beautiful ideas.
If you’re making moist yellow cake for a crowd, for example, to serve at a birthday party, see my post on how to cut a round cake to easily slice the cake into equal pieces.
Pro Tips For The Best Yellow Cake
Measure ingredients by weight. Weighing ingredients is by far the most accurate way to measure ingredients. Accuracy is especially important for ingredients like flour, which can really affect the end result if too little or too much is used.
Bake flat cake layers for the most stable layer cake. Stability is key for a layer cake such as this yellow cake recipe. Cakes that dome in the middle are unsteady when stacked, so the cake might topple over. Follow my simple tutorial for how to bake flat cake layers with cake strips so they bake up nice and flat every time, for a tall, stable 3-layer yellow cake. If the cakes dome when baked, use a serrated knife to even them out.
Don’t overbake the cake layers. The cake layers are not terribly thick, so they bake quite fast (in about 25 to 30 minutes—exact baking time will depend on your oven). Bake them until the centers are set and springy when pressed gently. Overbaking the layers will cause them to become dry and crumbly.
How To Make Yellow Cake
Below, I’ve highlighted portions of the recipe in step-by-step process images along with instructions for making this yellow cake from scratch. You can find the full set of instructions in the recipe card below.
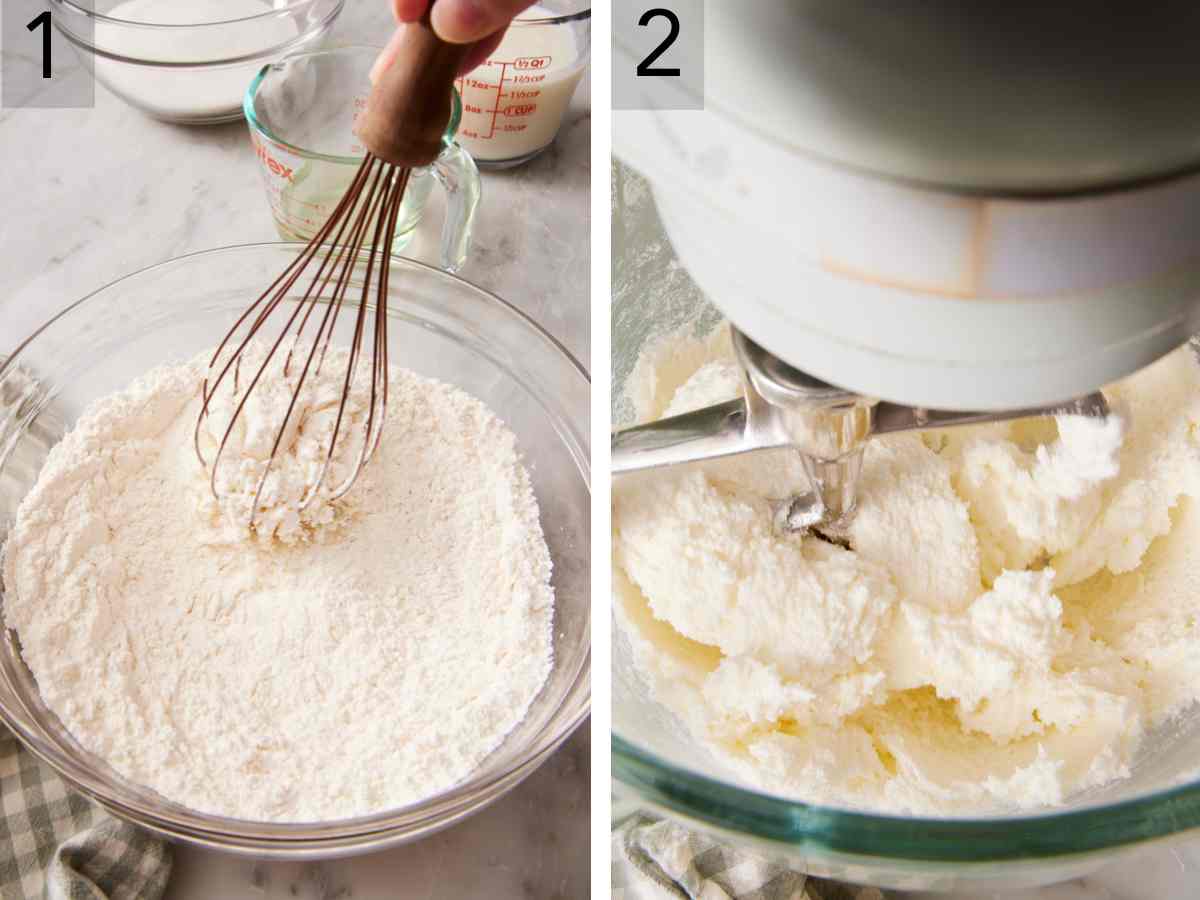
1. Whisk together the all-purpose flour, cornstarch, baking powder, and salt in a medium bowl. Set aside for now.
2. In the bowl of a stand mixer fitted with the paddle attachment (or in a large mixing bowl with an electric hand mixer), beat the softened butter and granulated sugar on medium speed for about 3 minutes. It should look light and fluffy after this time. Pour in the vegetable oil and vanilla extract and mix to combine. Scrape down the bowl to encourage the batter to have a uniform consistency throughout.
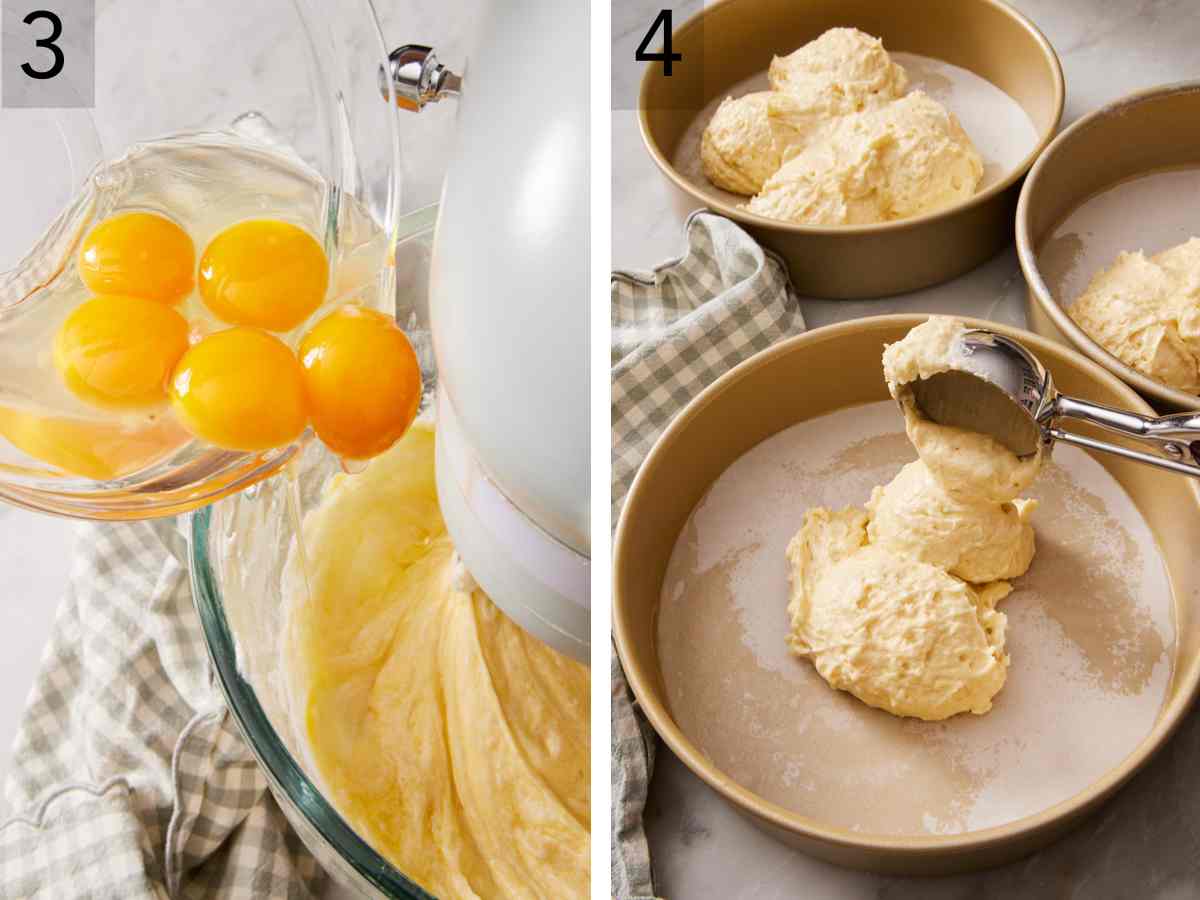
3. Add the eggs and egg yolks one by one. Make sure each one is nicely mixed with the other ingredients before adding the next. Then scrape down the bowl again and mix. Reduce the mixer speed to Low and add the dry ingredients to the egg mixture in three batches, alternating with the buttermilk. You can scrape down the bowl and mix again if necessary.
4. Divide the yellow cake batter equally amongst three 8-inch round cake pans, lightly greased and the bottoms lined with parchment paper. Bake the cake layers at 350°F for about 25 to 30 minutes. Let them cool in the pans for 10 minutes, then invert them onto a wire rack to cool completely.
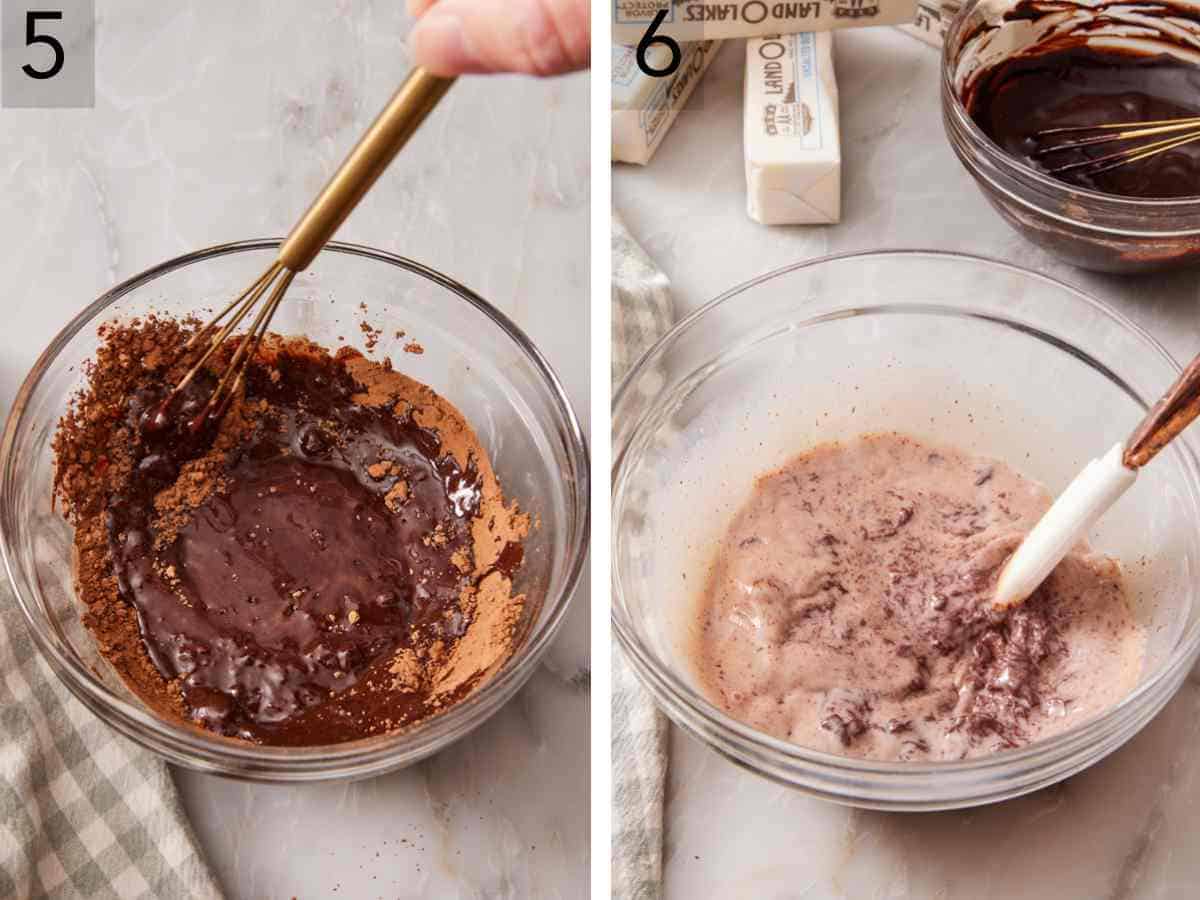
5. To make the velvety chocolate buttercream, start by melting ¼ cup of butter and combining it with the cocoa powder. Set aside for the moment.
6. Next, work on the chocolate ganache. Add the milk and semisweet chocolate to a microwave-safe bowl and heat in 30-second intervals until the chocolate is melted. Set aside to cool slightly.

7. For this next part, you can either use a stand mixer fitted with the paddle attachment or a large bowl and an electric mixer. Beat the rest of the softened butter on medium speed until creamy and lightened in color. Add the cocoa and butter mixture and mix to combine. With the mixer on low speed, gradually add the powdered sugar and pour in the ganache once the sugar is fully combined. Beat until fluffy and easily spreadable. If the frosting feels stiff, add a bit more milk, just 1 teaspoon at a time, until it is silky and luscious.
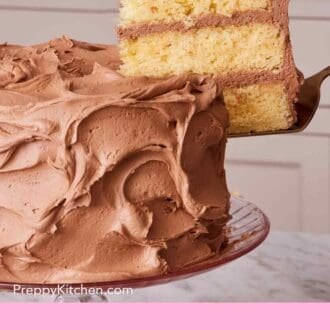
8. Once the buttercream is ready and the cake layers are completely cool, it’s time to assemble your yellow cake! Place one cake layer on a large plate or cake stand and spread 1 cup of frosting on top, going all the way to the edges of the cake. Add the second layer and repeat the frosting process. Add the last layer, bottom side up, so the cake is flat on top. Cover all over the cake with the rest of the buttercream. I like to create swoops of buttercream with an offset spatula for a more rustic look, but you can create more precise piped swirls if you prefer. Allow the assembled yellow cake to chill in the fridge for 30 minutes to set the frosting before slicing and serving.
Yellow Cake Recipe
Ingredients
For the Cake:
- 3⅓ cups all-purpose flour (400g)
- ⅓ cup cornstarch (42g)
- 1 tablespoon baking powder
- ¾ teaspoon salt
- ¾ cup unsalted butter room temperature (170g)
- 2 cups granulated sugar (400g)
- ⅓ cup vegetable oil (80mL)
- 4 large eggs room temperature
- 3 large egg yolks room temperature
- 1 tablespoon vanilla extract
- 1½ cup buttermilk room temperature (360mL)
For the Chocolate Buttercream:
- 2 cups unsalted butter divided (450g)
- ¼ cup unsweetened natural cocoa powder (25g)
- ½ teaspoon salt
- ¼ cup whole milk (60ml)
- 5 to 6 cups powdered sugar (600-720g)
- ½ cup semisweet chocolate chips (90g)
Instructions
For the Cake:
- Preheat the oven to 350°F. Lightly grease three 8-inch round pans with baking spray or coat them with butter and flour. Line the bottoms with parchment paper, and wrap the pans with soaked fabric baking strips if you have them.
- In a medium bowl, whisk together the flour, cornstarch, baking powder, and salt, then set aside.
- In the bowl of a stand mixer using the paddle attachment, beat the butter and sugar on medium speed until light and fluffy, about 3 minutes. (You can also use a large bowl and an electric hand mixer.)
- Add the oil and vanilla, mix to combine then scrape the bowl down. Add the eggs one at a time, mixing until incorporated before adding the next. Scrape the bowl down once more and mix again.
- With the mixer running on low speed, add flour mixture in three batches alternating with the buttermilk. Scrape down the bowl and mix again if needed. Divide the batter evenly among the three prepared pans. Smooth it into an even layer in each pan.
- Bake at 350°F for about 25 to 30 minutes or until the centers are set and springy when gently pressed. Allow the layers to cool in pans for 10 minutes then invert them onto a wire rack, remove the parchment paper, and cool completely.
For the Chocolate Buttercream:
- Place ¼ cup (56g) of the butter in the microwave-safe bowl and melt in 15 second intervals. Mix in the cocoa powder and set aside.
- Combine the semisweet chocolate with the milk in another microwave-safe bowl, and heat in 30-second increments, stirring between each until melted and smooth. Set the ganache aside to cool slightly.
- In the bowl of a stand mixer using a paddle attachment (or a large bowl if using an electric hand mixer), beat the remaining softened butter on medium speed until creamy, about 1 minute.
- Pour in the cocoa mixture, mix to combine, then stop to scrape the bowl down and mix again. While mixing on low speed, gradually add the powdered sugar. Once combined, pour in the cooled ganache and beat until combined and the frosting is fluffy and spreadable. Stop and scrape the bowl down as needed. Your frosting should be silky, soft and luscious. If it feels stiff, add a bit more milk, a teaspoon at a time.
For the Assembly:
- Place one cake layer on a cake stand or plate, spread 1 cup (238g) of the buttercream on top of the layer. Add the next layer on top and repeat with more frosting. Add the final layer, bottom side up so the top of the cake is flat.
- Cover the cake with the rest of the buttercream, then use a spatula to swirl the buttercream around for a rustic effect. Chill the cake for 30 minutes before slicing to set the frosting.
Notes
- Cool the cake layers completely before frosting them. If the layers are still warm, the frosting will melt, causing the layers to slide off each other. If you’re in a rush, you can pop the cake layers in the freezer to chill them faster.
- An offset spatula is a great tool for frosting the cake! It easily spreads the frosting in an even layer between the cake layers. Plus, it makes a great smooth frosting layer on the outside, or you can use it to make swoops.
Nutrition
Have you tried this recipe? Tag me today!
Mention @preppykitchen and tag #preppykitchen!
Storing Yellow Cake
This cake keeps well when covered at room temperature for 2 to 3 days or up to 1 week in the fridge. I like to press a piece of parchment or wax paper to the cut sides of the cake to keep it from drying out, then loosely cover the whole cake with plastic wrap. Because the cake contains butter, it will always be more enjoyable at room temperature, so let it warm up before serving.
Freezing cake layers: You can freeze unfrosted, well-wrapped cake layers for up to 3 months. Tightly wrap them in plastic wrap, then place them in a freezer bag or wrap them in a layer of foil.
Freezing frosted cake: Freeze individual slices by wrapping them in plastic wrap or foil, and place them on a tray to freeze until firm. Store in a freezer container for up to 1 month. Thaw in the fridge for a few hours before serving. Slowly thawing in the fridge helps reduce condensation from forming on the frosting.
Frequently Asked Questions
You don’t want to open the oven much when baking a cake, so keep an eye on the layers with the oven light on. The edges of the layers will just be pulling away from the pan, and the center should look dry and lightly golden when they’re about done. When you see that happening, take a layer out and press the center with your finger. It will spring back when pressed lightly.
Yes! Yellow cake is easy to color to suit different events and themes. Just add several drops of your chosen food coloring to the buttermilk before adding it to the batter in Step 5.
This is a super versatile cake, so any frosting you like will taste delicious! Some of my favorites are strawberry buttercream, chocolate cream cheese frosting, Swiss meringue buttercream, mocha frosting, and vanilla buttercream.
More Cake Recipes To Try
I have lots of homemade cake recipes on the blog for you to try! Here are a few ideas:
My decadent chocolate cake is moist, soft, and topped with an incredibly fluffy chocolate buttercream. The batter is so easy to whisk together!
Colorful funfetti cake is delicious and festive! Layers of white cake are dotted with rainbow sprinkles and covered with buttercream.
My classic chocolate cupcakes will have you ditching the box mix for good. While a chocolate buttercream topping will never disappoint, you can also swap it for cream cheese frosting or vanilla buttercream (I share many other options in the post, too)!
You can whip up a batch of vanilla cupcakes in a flash! The batter stirs together easily, and the cupcakes stay moist for days thanks to sour cream.
Caramel cake is a showstopper! It features three layers of moist cake filled with rich caramel frosting.
If you’ve tried this yellow cake recipe, then don’t forget to rate it and let me know how you got on in the comments below. I love hearing from you!


