
This post may contain affiliate links. Please read our disclosure policy.
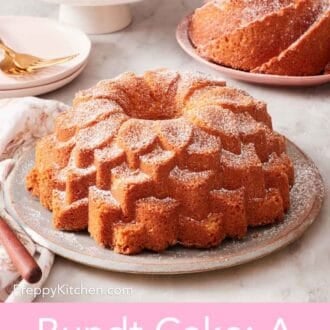
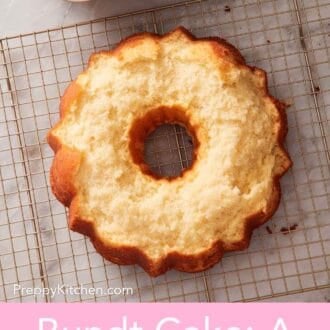
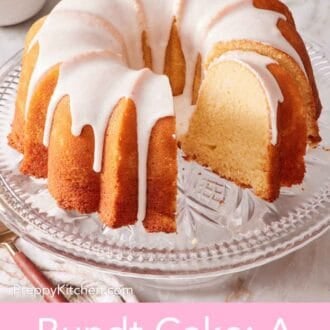
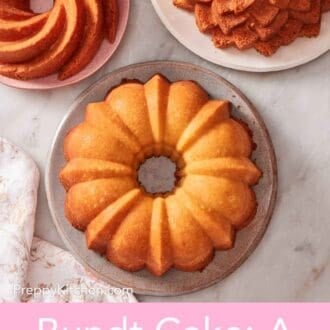
A Bundt cake is a different animal than a layer cake—different batter density, different pan physics, different potential failures. Here’s how the pans actually work, why cakes stick (and how to make sure yours doesn’t), what size pan your recipe needs, and the four things that go wrong most often.
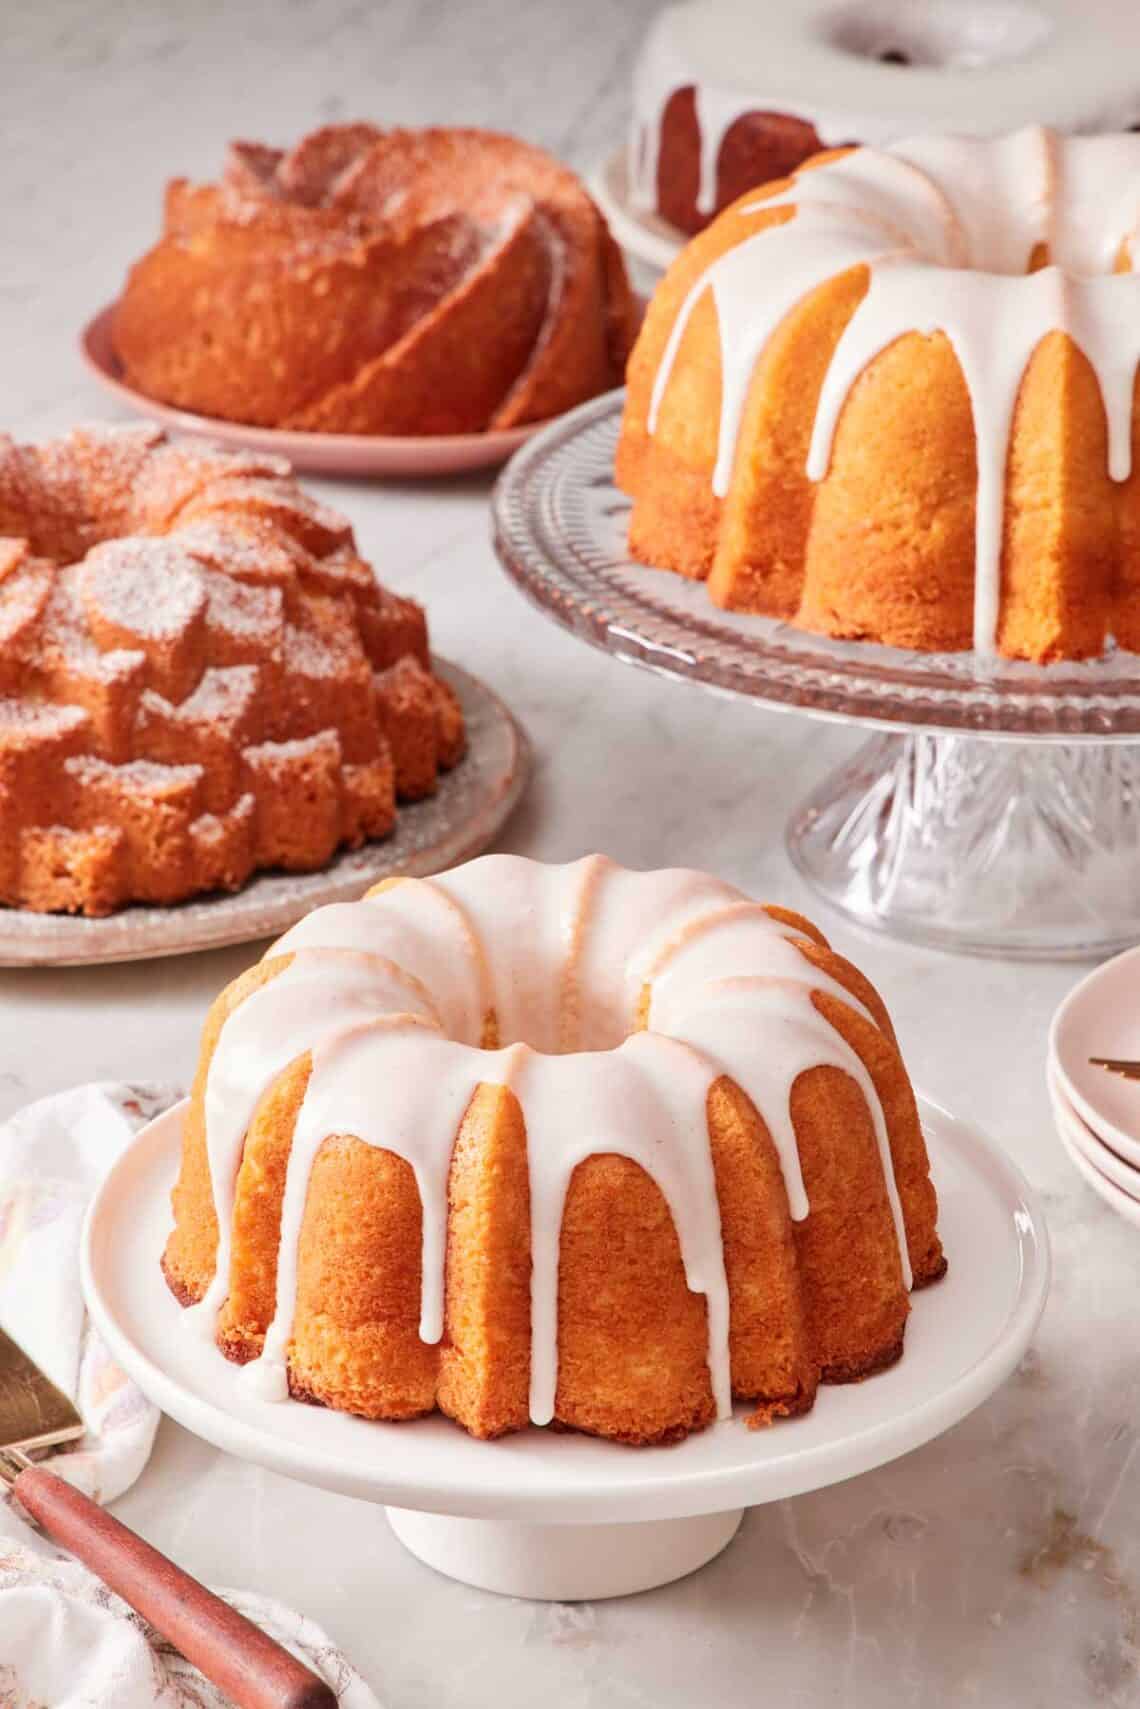
I have made so many Bundt cakes over the years and experienced all of the joys and failures that come with baking in these decorative cake pans. When I first started, my cakes would commonly stick until I figured out why. The first issue was with a beautifully ornate pan with so many fluted ridges that I lost half the cake in the pan, no matter how much butter I used (I was missing flour!). The second was an older pan I had inherited that had a worn nonstick coating that I now know was the problem—the batter could find any tiny imperfection in the surface and grip it and not want to let go. The third was a new Nordic Ware Anniversary, properly greased with butter and flour, and the cake came out clean on the first try. Through all of this trial and error, I discovered the difference wasn’t my baking. It was the pan and how I prepped it.
This guide is everything I wish I’d known before I ever baked in a Bundt pan. I cover everything you need to know about the equipment, the pan prep method, and troubleshooting possible failures. If you want a specific Bundt cake to bake tonight, my vanilla Bundt cake recipe is one click away, along with a lemon Bundt cake, chocolate Bundt cake, apple Bundt cake, mini Bundt cakes, and a large pumpkin cake variant. I answer common questions and tips for the best results, regardless of the specific recipe you use—what pan to buy, how to grease it so the cake actually comes out, why Bundt cake batter is typically denser than a layer cake batter, and how to fix the things that go wrong.
“I have tried several times to make my grandmother’s pound cake and it always stuck to the Bundt pan. I found this article and decided to give it another go and it came out perfectly! I’m guessing she didn’t mention the flour coating but must have used it because it turned out just like hers. Thank you so much for helping me make her recipe again!”
Jeffery
What Makes a Bundt Cake Different
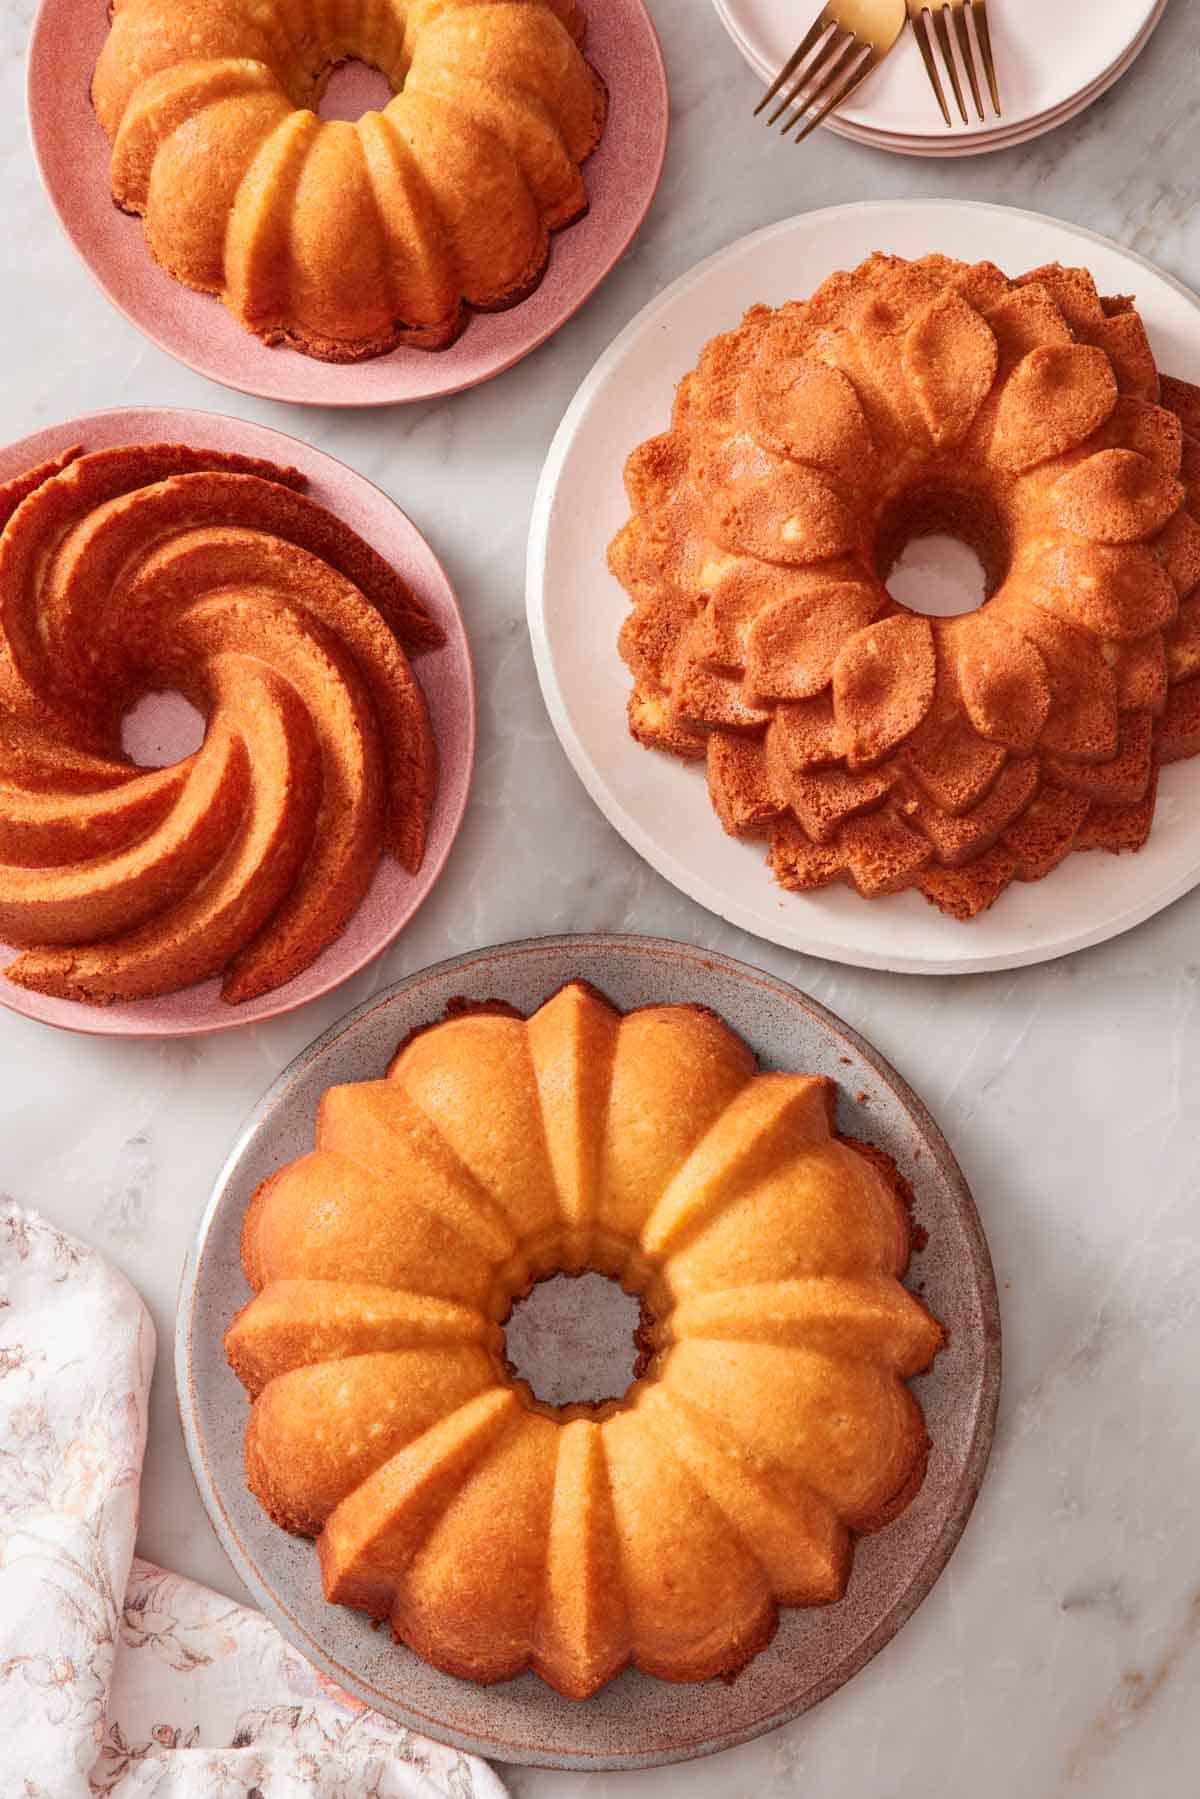
A Bundt cake isn’t just any cake batter baked in a fancy pan. The pan changes how the cake bakes, so recipes are typically built specifically for Bundt pans and differ from layer cake recipes built for round cake pans. Three structural differences matter:
- First, the pan has a tube down the center, which means the batter never sits more than a couple of inches from a heated surface. A standard 9-inch round cake pan has a cold spot at its center; a Bundt pan doesn’t. Heat reaches every part of the batter at roughly the same time, which is why Bundt cakes bake more evenly than layer cakes despite being much taller.
- Second, the surface area exposed to the pan is huge. Every flute, every ridge, every undulation in the pan’s design touches batter. That’s an enormous browning surface, which is why a properly baked Bundt cake has a deeper, more caramelized crust than a layer cake.
- Third, the cake’s structure has to hold its own weight without the support of frosting or stacked layers. A Bundt that’s too soft slumps or cracks. A Bundt that’s baked well holds tall and sturdy.
The batter has to match that pan physics. Bundt cake batter is typically denser than layer cake batter on purpose—there’s more fat, less leavening relative to the flour, and usually fewer whipped-air ingredients (like meringue). A delicate sponge cake batter would collapse in a Bundt pan. A thick, pound cake-style batter holds up beautifully.
This is why my favorite vanilla layer cake recipe doesn’t translate to a Bundt pan—the structural tension is wrong. I tested this by baking my vanilla cake batter in the Nordic Ware anniversary pan at 350°f for 55 minutes. This bake time was almost double the original recipe (35 minutes), turning the outside crust of the cake very dark and chewy. The cake also rose up in a ring around the center, but then sank dramatically. The higher amount of leavener and moisture in the batter couldn’t support itself in the deeper pan. As a result, I made a specific Vanilla Bundt cake recipe that works beautifully in a Bundt pan!
When a recipe says “for a 10- to 12-cup Bundt pan,” it’s telling you that the batter was developed for how that specific pan bakes, not just that it makes a cake of that approximate volume or shape. Can you bake a Bundt cake batter in a loaf pan or round pans? Often, yes, especially if the recipe gives you a tested conversion. But it’s harder to make the swap in the other direction because layer cakes are usually so much lighter and softer.
The practical implication: when you see a recipe for a layer cake you love and you want to bake it in a Bundt pan, you’re usually better off finding a recipe written for a Bundt rather than adapting. The conversion isn’t usually a simple 1:1 swap.
A Short History: Gugelhupf, Kugelhopf, and Nordic Ware
The Bundt pan, as Americans know it, is a 1950 invention by Nordic Ware, but the cake form is centuries older.
Gugelhupf (sometimes spelled gugelhopf, kugelhupf, or kugelhopf depending on region) is the German and Austrian tradition that the modern Bundt descends from. The word translates roughly to “hooded cap,” describing the cake’s distinctive shape. Gugelhupf cakes were yeast-leavened, often enriched with raisins, almonds, and citrus zest, and baked in earthenware or ceramic ring molds with a chimney down the center. They’ve been part of German, Austrian, Czech, and Polish baking traditions for at least 200 years. Marie Antoinette is sometimes credited with introducing them to France, where they became kouglof in Alsace.
Kugelhopf (or kouglof) is the Alsatian and French variant of Gugelhupf. It is the same yeasted bread studded with dried fruits, nuts, and other flavorings that is served at breakfast or with afternoon coffee. Kufelhopf and gugelhupf are distinct from the American Bundt in that they are enriched yeast breads rather than butter cakes.
Nordic Ware entered the picture in 1950 when H. David Dalquist of Minneapolis was approached by members of the Minneapolis Hadassah Society, who wanted American-made aluminum versions of the cast-iron kugelhupf pans their European-immigrant relatives had brought to the U.S. Dalquist designed an aluminum pan, added a “t” to the German word “Bund” (which means “gathering” or “association,” fitting for a cake meant to be shared), and trademarked the name “Bundt.” For 15 years, the pan sold modestly. Then, in 1966, a “Tunnel of Fudge” cake won second place at the Pillsbury Bake-Off using a Bundt pan, sales exploded, and the Bundt cake became an American cultural fixture. Pillsbury was inundated with consumer requests for the pan, and Nordic Ware went from a regional cookware company to a household name.
The trademark on “Bundt” technically still belongs to Nordic Ware, which is why competing manufacturers carefully sell “fluted tube pans” or “decorative cake pans” rather than calling their products Bundts. In casual use, “Bundt” has become genericized enough that nobody worries about it, but the legal distinction persists.
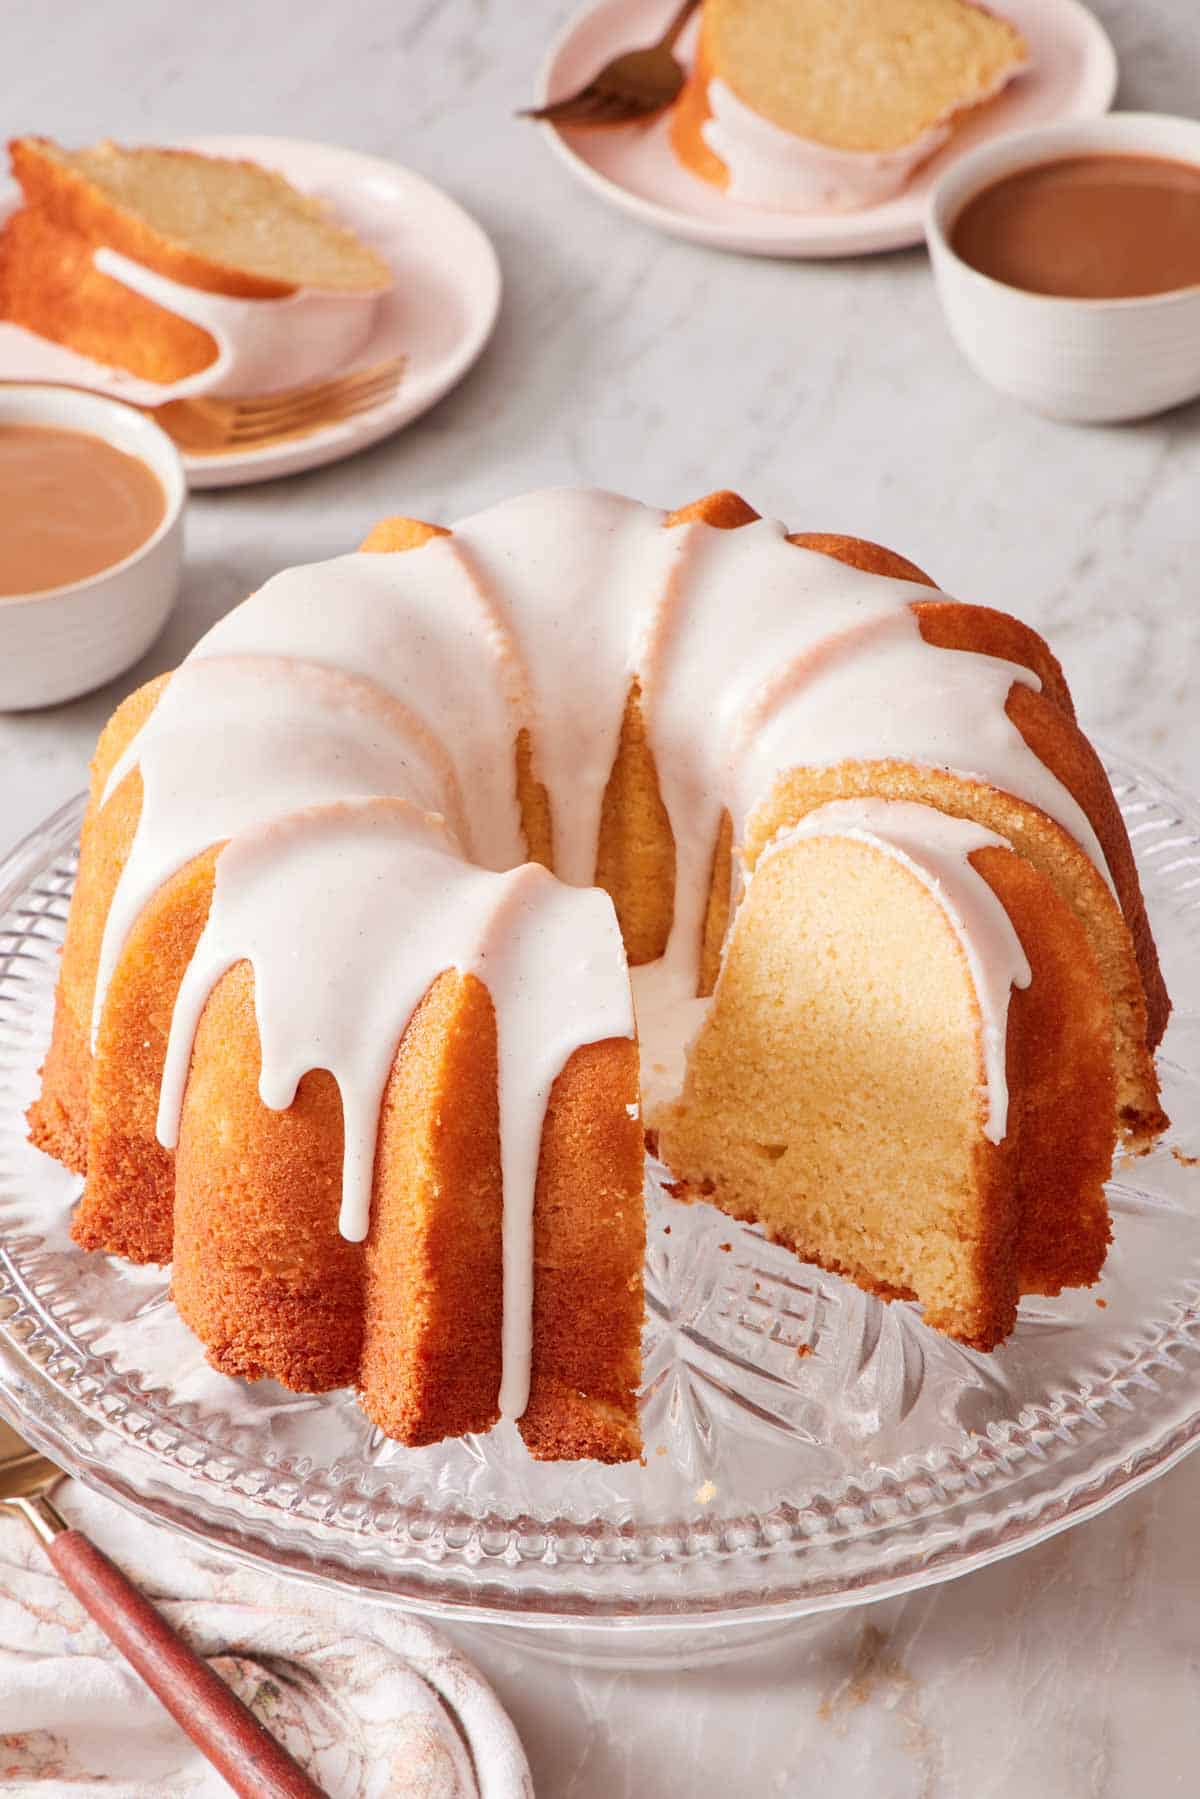
Bundt Cake vs Tube Cake vs Pound Cake
These three terms have a lot of overlap and are regularly confused, so I want to explain the distinctions up front, before we get into more details about Bundt cakes specifically:
Bundt cake is specifically a cake baked in a Bundt pan. Bundt pans are tall, round pans with a central tube that have fluted or decorative patterns pressed into the walls of the pan. The Bundt cake distinguishes itself from a tube cake by baking cakes in decorative shapes instead of with plain sides.
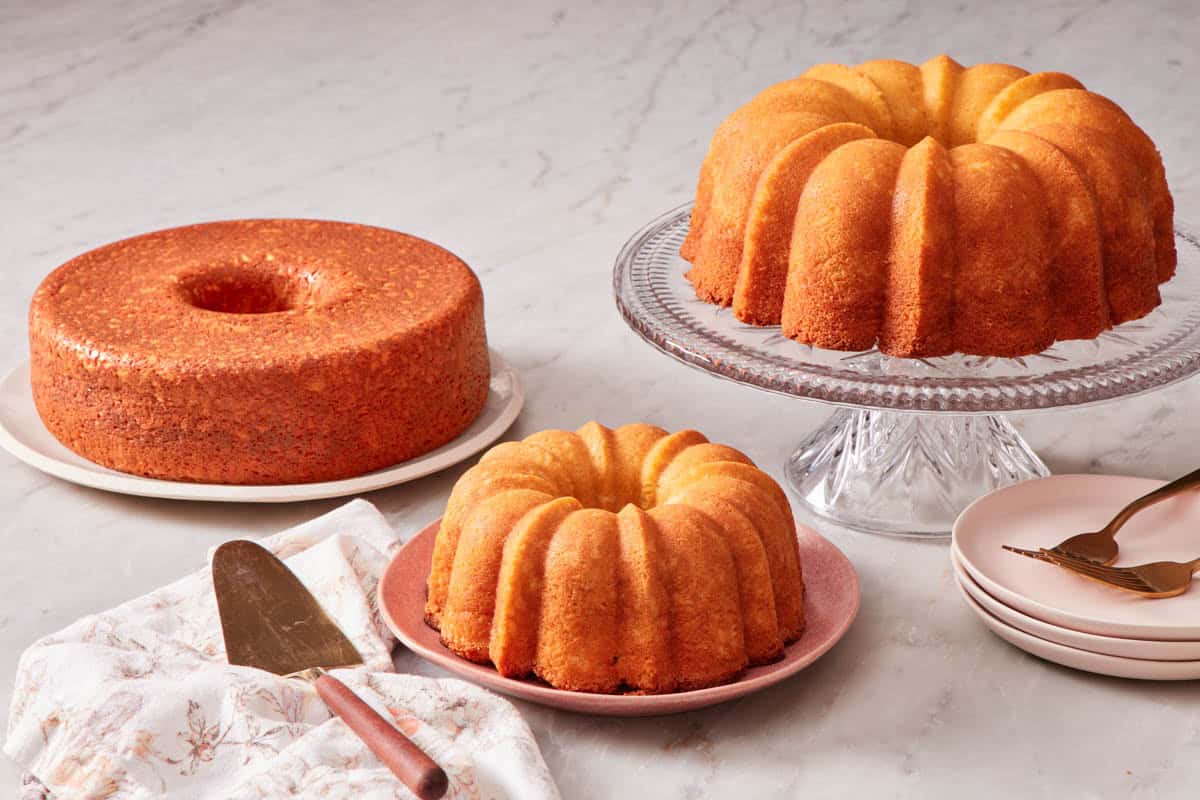
A tube cake is a cake baked in a tube pan. A tube pan is shaped like a Bundt pan (tall, round with a central tube), but the sides are straight with a smooth bottom, and sometimes the bottom is removable. Angel food cake and chiffon cake are baked in natural, uncoated tube pans with removable bottoms. The straight walls and removable bottom are key to these light and airy cakes. The batter is so delicate that it has to climb up the walls during baking—a non-stick Bundt pan would prevent that, and the decorative design would make it impossible to cleanly release. Some tube pans are nonstick without removable bottoms (essentially a non-decorative Bundt pan), and can be used to bake any Bundt cake recipe.
Pound cake is a cake batter mixing method, and is not pan-specific. It refers to a classic ratio to make the batter (one pound each of butter, sugar, flour, and eggs beaten together—hence the “pound cake” name) and baked in any pan that suits. Pound cakes are dense, fine-crumbed, and often baked in loaf pans, though they bake beautifully in Bundt pans and tube pans, too. My pound cake recipe walks through the method in depth and bakes a loaf cake with a Bundt pan option.
Bundt Pan Sizes (and How to Measure Yours)
Bundt pans are labeled by cup capacity: 6-cup, 9-cup, 10- to 12-cup, and 16-cup are the most common sizes. The cup capacity is the volume of water the pan holds when filled to the brim. That’s NOT the volume of batter the pan can actually bake.
The usable capacity—the volume of batter you can pour in without it overflowing during baking is roughly 60-65% of the capacity, or up to about an inch and a quarter below the rim of the pan. A 10-cup Bundt pan has a usable capacity of around 6 cups of batter. A 16-cup pan handles 9-10 cups.
If you are unsure of the volume of your Bundt pan, fill the pan with water to the rim, then pour it into a large measuring cup (or fill it with a small measuring cup, making note of each amount added until it is full).
To find the batter volume of your Bundt pan, do the same thing, but only fill it 1¼ inches below the rim. Write it on the bottom of the pan with a permanent marker if you want to save yourself the work next time! (I have an Academy lesson: Baking Pan Sizes and Conversions that goes in depth about pan volumes and how to find yours!)
Most Bundt recipes are written for 10- to 12-cup pans. If your pan is smaller, you’ll have batter left over (bake it in cupcake liners alongside the Bundt; they’ll be done in 20-25 minutes). If your pan is bigger, your cake will be shorter than the recipe expected, and you’ll need to start checking for doneness about 15 minutes earlier than the recipe says.
A standard cake recipe written for a 9×13 pan, two 9-inch rounds, or three 8-inch rounds produces roughly 6-8 cups of batter, which fits cleanly in a 10-cup or 12-cup Bundt pan. That’s a useful rule of thumb for converting between common cake formats, though as discussed above, the batter chemistry doesn’t always cooperate.
Pan depth and the height of the center tube also vary. Two 10-cup pans from different brands can have wildly different proportions—one wide and shallow, one narrow and tall, one with a center tube that’s wide and one that is narrow tube. The cake bakes differently in each. For the most predictable results, use the pan style the recipe was written for, especially the first time you bake a recipe. I always use Nordic Ware Bundt pans.
The Main Bundt Pan Brands & Materials
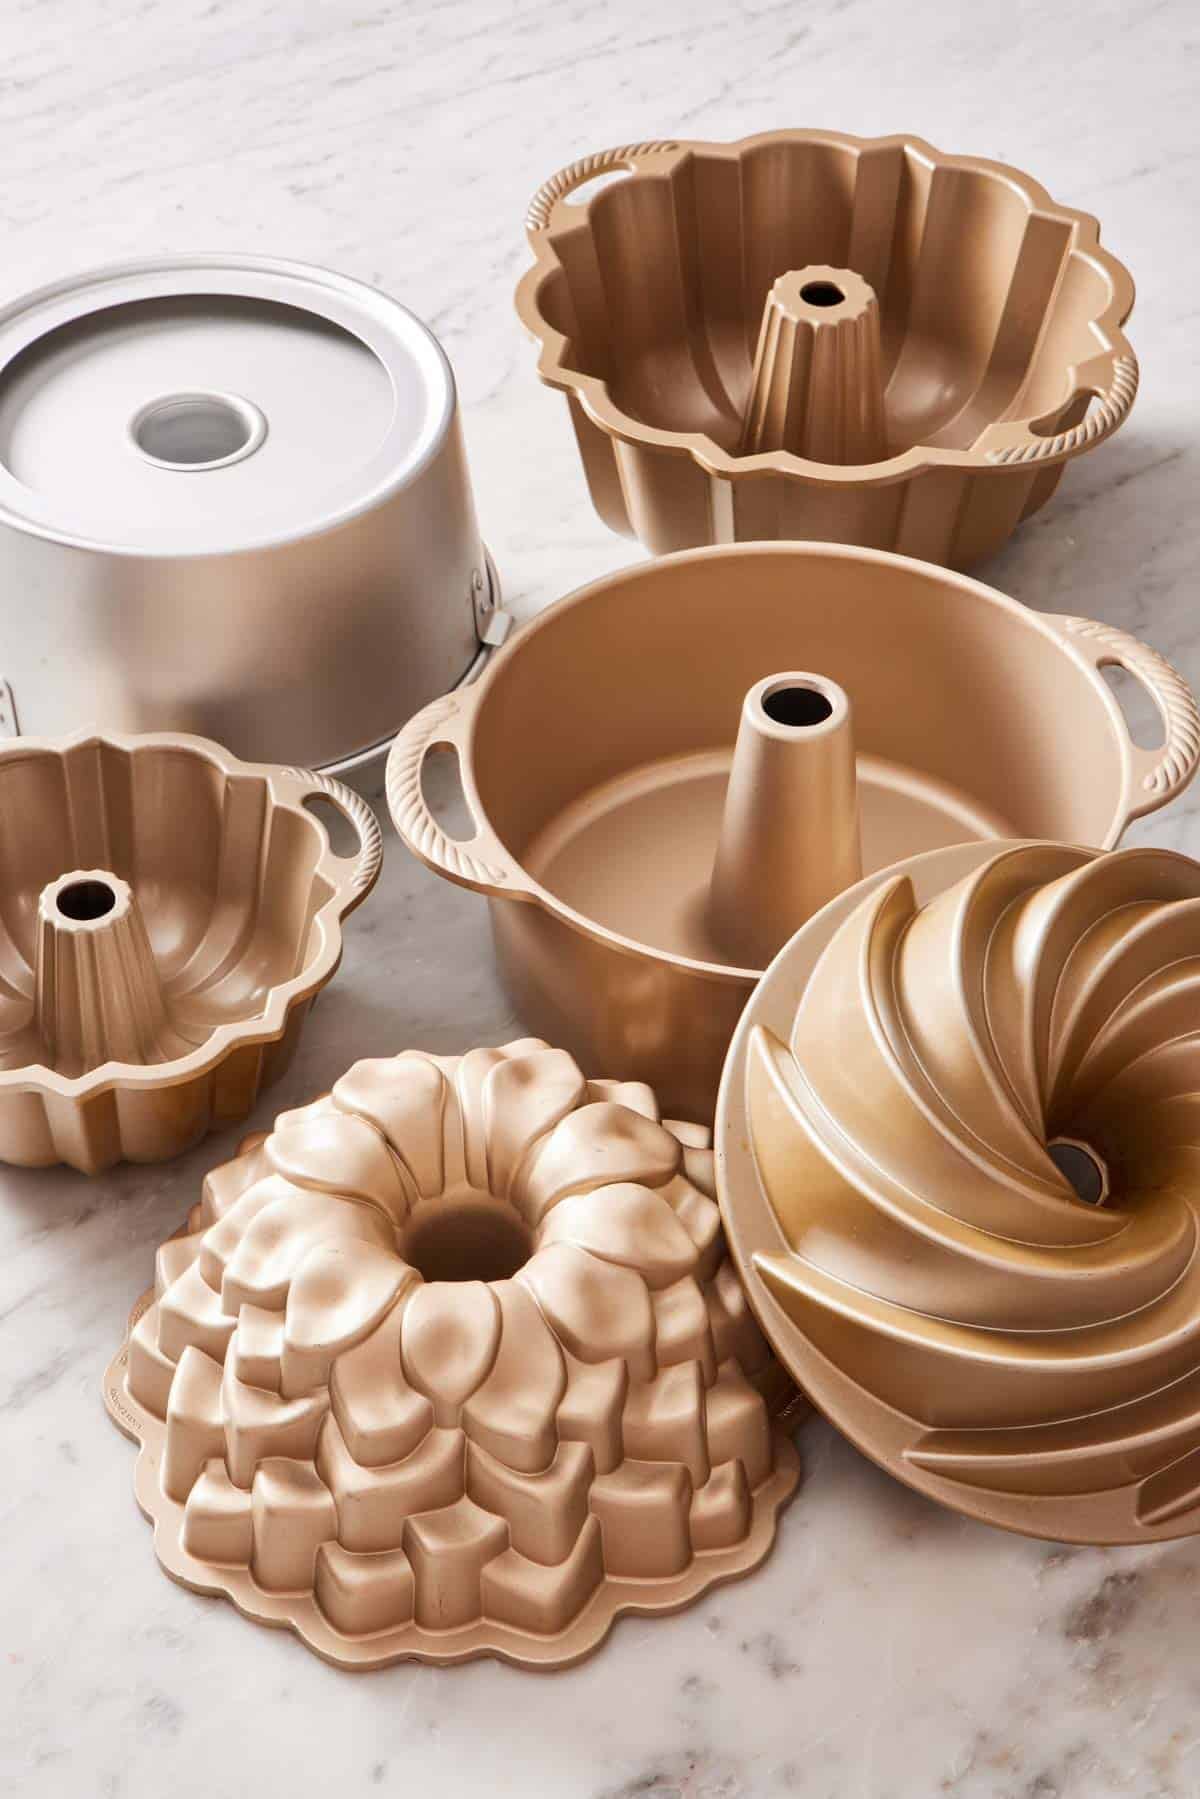
Three brands cover most of the Bundt pan market:
- Nordic Ware. The original American Bundt pan, we just discussed! Their cast aluminum pans have heavy walls (better heat distribution than thin aluminum), the nonstick coatings on the modern lines hold up well, and the design library for different patterned pans is enormous. The Anniversary, Heritage, Crown, Charms, Bavarian, and dozens of seasonal pans are all beautiful. The Anniversary is what I reach for most often—its classic fluted shape has enough detail to look beautiful without being so intricate that releasing the cake becomes a nightmare. Nordic Ware pans cost more than some alternatives ($35-50 for standard sizes, more for specialty designs) but are worth it. If you’re buying your first real Bundt pan, this is the brand I recommend.
- Wilton. More affordable ($15-25 range for comparable sizes). These pans have thinner walls than Nordic Ware and nonstick coatings that wear out faster. They are fine for occasional use. Heat distribution is less even with the thinner walls and dark pan coatings, so expect more browning on the bottom and around the center tube.
- Anolon, Cuisinart, USA Pan, and the rest. Mid-tier brands competing on price and nonstick durability. Quality varies between brands. The USA Pan aluminized steel Bundts are well-reviewed for durability and even baking. Most of the others land somewhere between Nordic Ware quality and Wilton quality at a corresponding price point.
There are also a few material and finish options to know about that can affect how your Bundt cakes turn out:
- Silicone Bundt pans. These are tempting because they promise a clean release without greasing, but in practice, they have two problems: the walls are flexible enough that an unsupported silicone pan can lose its shape when you move it from counter to oven (you have to place them on a baking sheet before filling), and they don’t conduct heat as efficiently as metal. Your cake will bake more slowly and brown less in silicone. They are useful as a backup, but not as a primary pan.
- Dark interior vs light interior. Older Bundts had bright silver interiors, but many modern designs have darker interiors (charcoal grey, near-black coatings). Dark coatings absorb more radiant heat and bake faster. If you bake the same recipe in a light pan and then a dark pan, the dark pan’s cake will be done 5 to 10 minutes earlier and have a darker, crustier exterior. Start checking for doneness 10 minutes earlier than the recipe says when using a dark-interior pan.
- Cast iron. This is an older style of pan that has more recently been reproduced by Lodge. Cast-iron Bundt pans bake with exceptionally crisp crusts because they retain heat well, which is great for pound cakes if you like a sugary, browned exterior. They have to be seasoned periodically and cared for in a very specific way, so I find them to be more work than I want. But, if you love cast iron, this is a good option! Most recipes baked in a normal aluminum pan can be baked in cast iron, knowing the crust will be a bit firmer and darker.
How to Grease a Bundt Pan
This step matters the most when you are using a Bundt pan. Just like I discovered when I first started baking Bundt cakes and my cake stuck, don’t use butter alone to grease a Bundt pan.
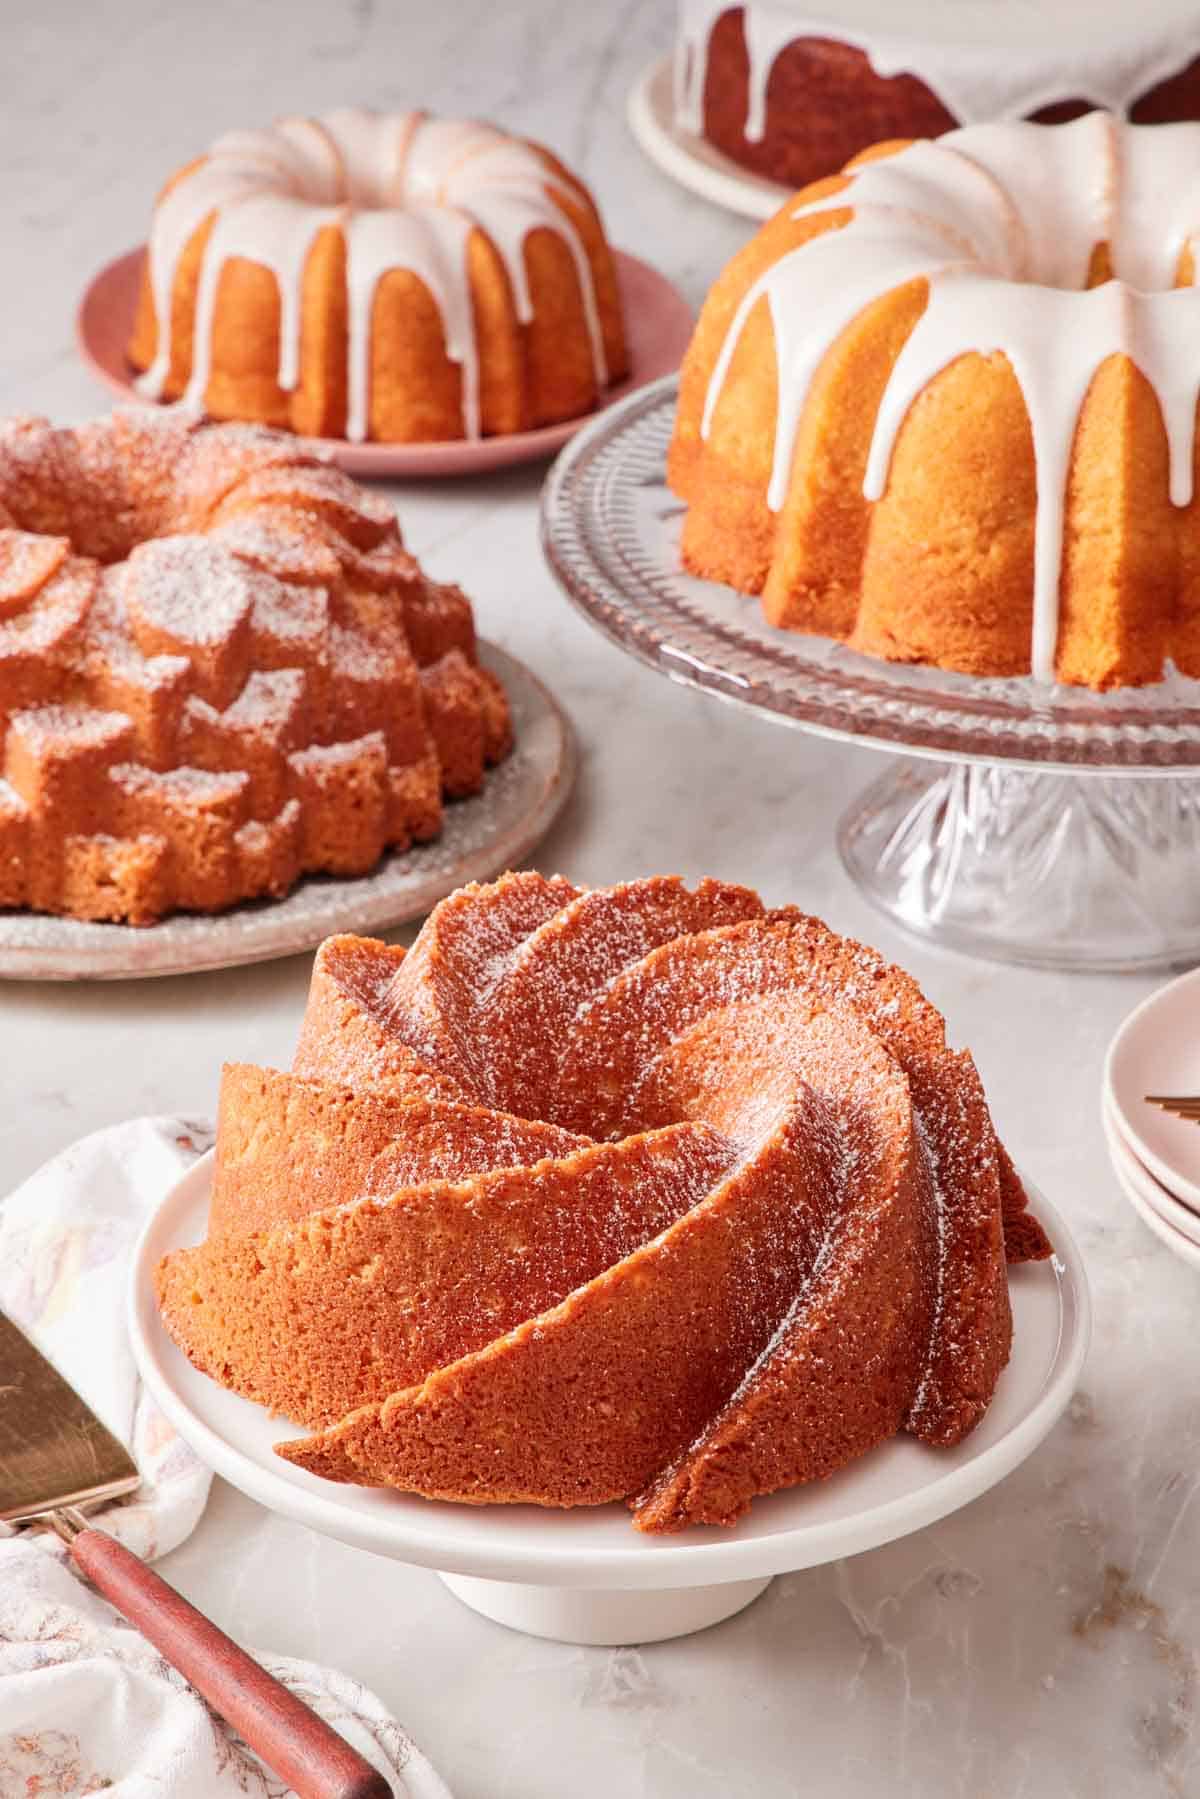
I tested this to show you the difference and why this matters. I made my sour cream pound cake in the same Nordic Ware Anniversary pan, and baked one cake in the pan greased only with butter, and one cake in the pan buttered and floured. You can see in the images below that the butter-only pan made the entire top of the cake stick and tear away, splitting the cake in half when I inverted it. The pan with butter and flour released perfectly without any tears in the crust or cake. This flour barrier provided the surface for the cake batter to cling to instead of the pan.
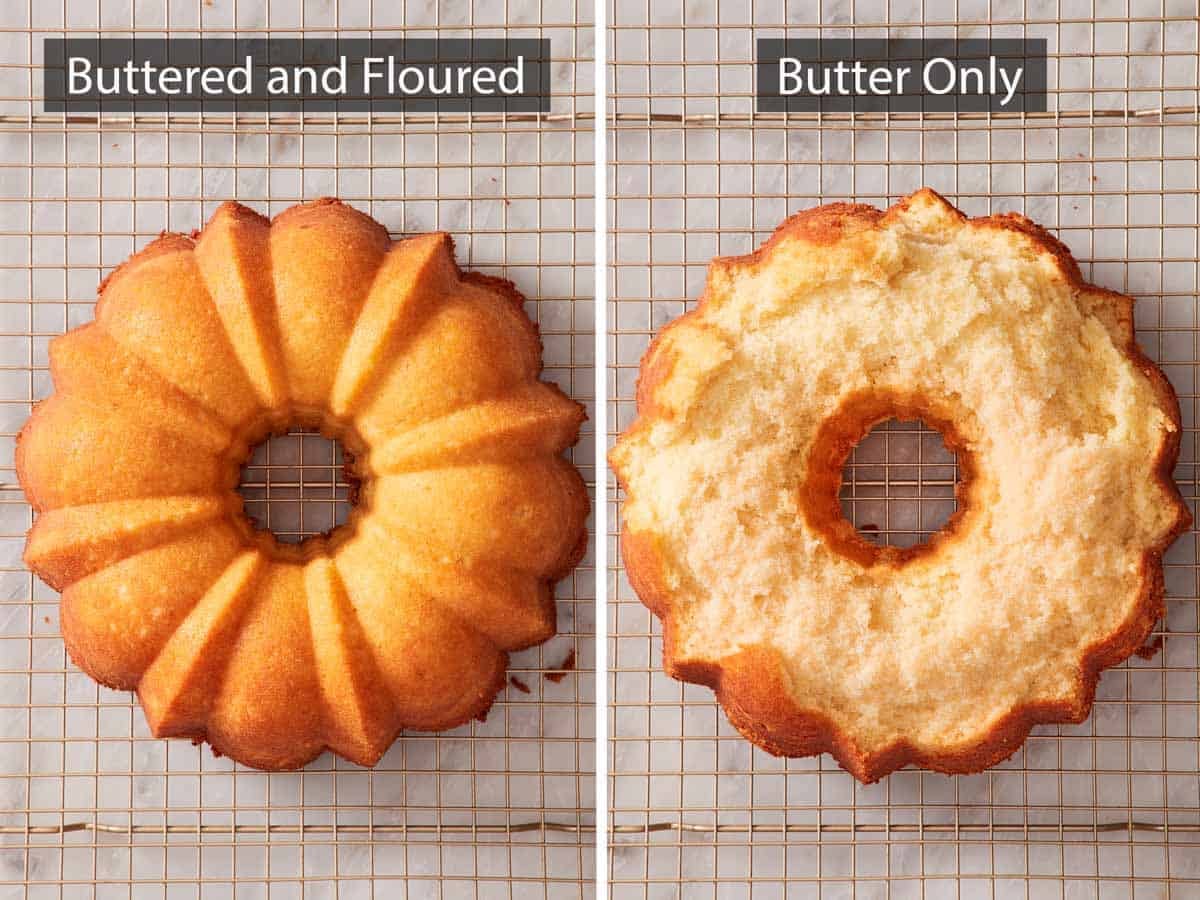
Why? The milk solids in butter act like glue with the sugar in the cake batter once heated and increase sticking, not decrease it. The layer of flour adds a little coating for the batter to hold onto instead of the pan’s surface, so it releases easily.
Here’s how to properly grease a Bundt pan for a cake that will cleanly release from the pan:
Butter and flour. This is the gold standard and the classic way to prepare a Bundt pan. (You can also use shortening in place of butter.)
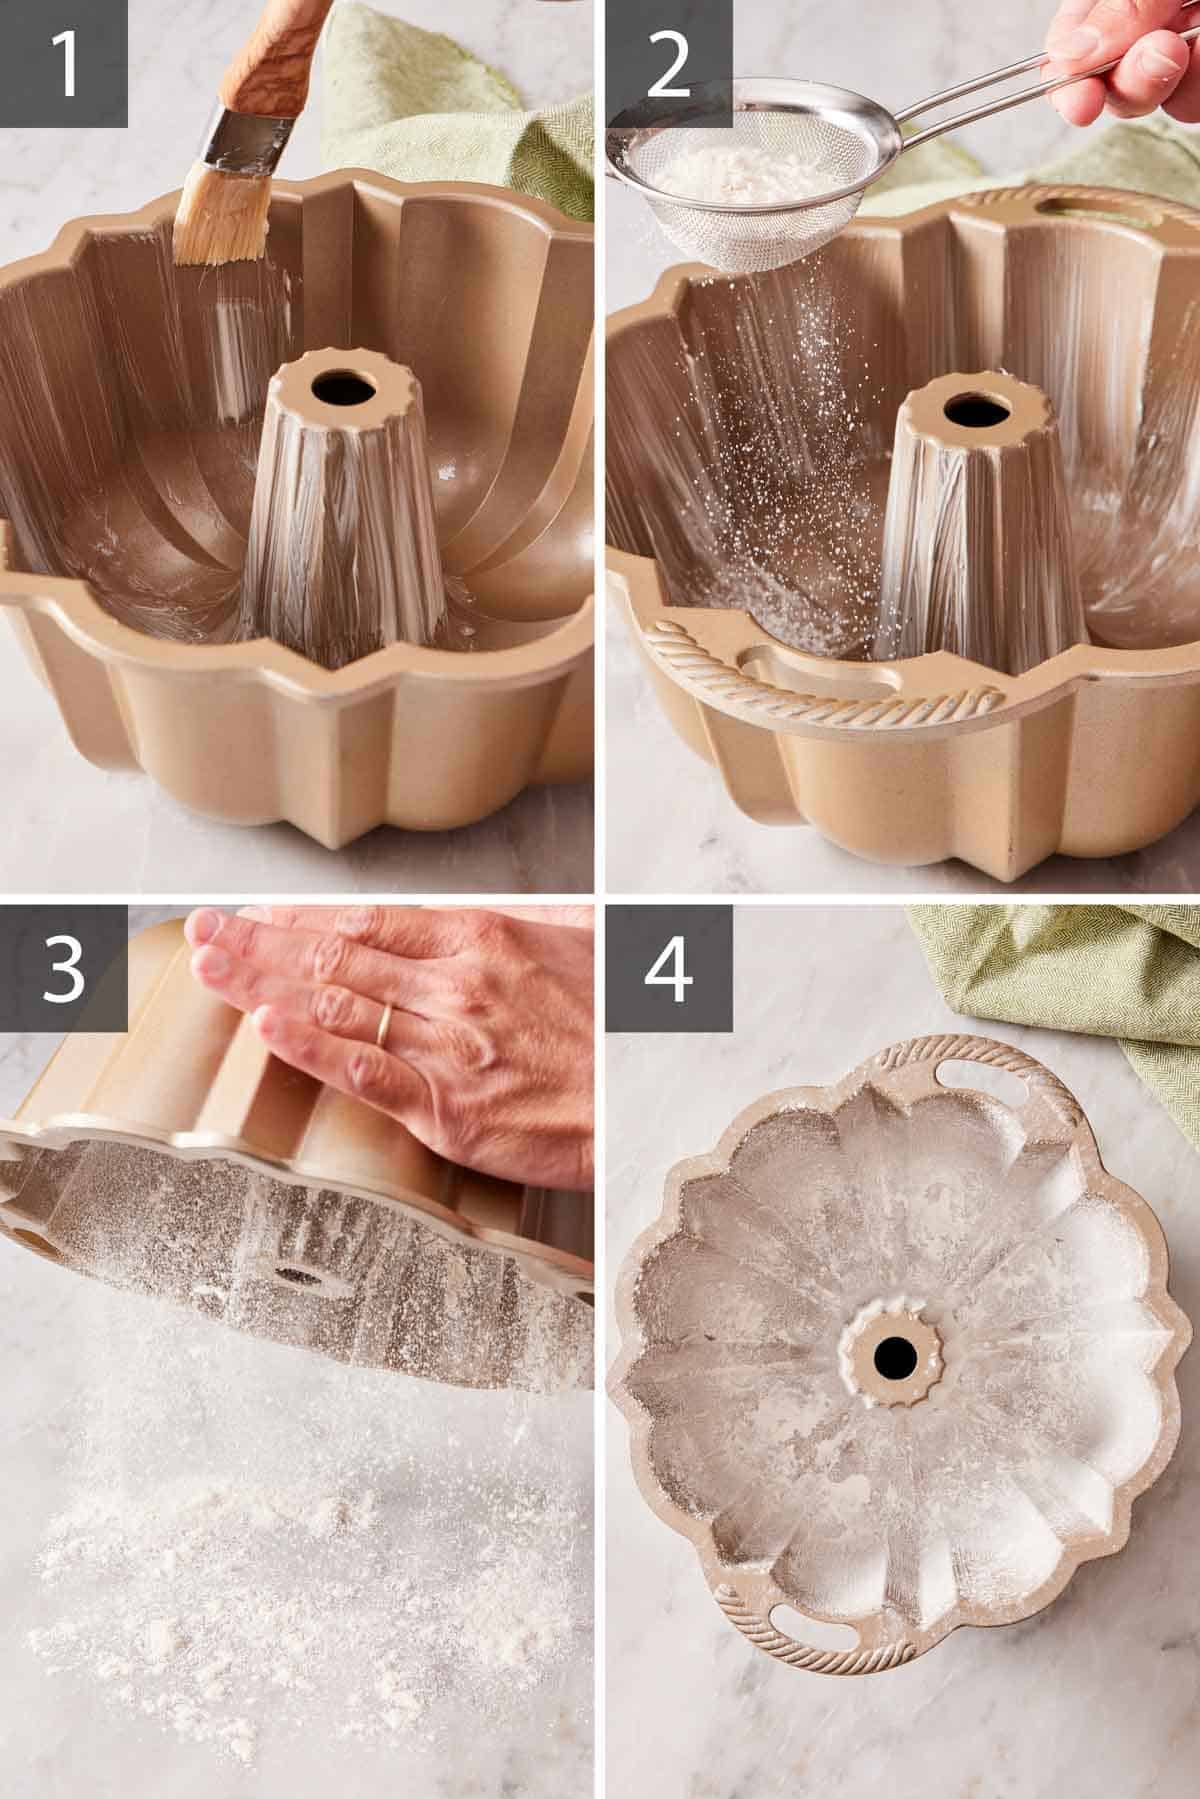
1. Take very soft (room-temperature) butter, dip a pastry brush in it, and paint every interior surface of the pan—the bottom, the sides, every flute, every ridge, and the center tube. The butter fills the small surface imperfections in the pan that batter would otherwise grip. Don’t be sparing; a thin, even coat covering 100% of the surface is what you want.
2. Then, place a few tablespoons of flour in a fine mesh sieve or sifter and sprinkle it throughout the pan.
3. Tap the pan and rotate it to completely coat the butter with flour. Then, invert it and tap it to knock out any excess flour that didn’t stick.
4. You are left with a thin coating of butter and flour, creating a physical barrier between the batter and the pan to prevent sticking.
Nonstick baking spray with flour in it. This is essentially the same thing as using butter and flour together, but it comes already combined in one convenient spray! Baker’s Joy is the most common brand, but other brands, like Pam, work great too. The flour in the spray acts as a barrier between the batter and the pan, just like the butter and flour method. Coverage is excellent on intricate pans because the spray gets into every nook. For most home bakers, this is the most foolproof option, and what I’ve come to use most often because it’s easier and faster than brushing butter.
One note on timing: do not spray your pan until right before you add your batter! I was testing my vanilla Bundt cake one day, and sprayed my pan at the start of the recipe, just like I normally do when prepping cake pans. It sat for 10 minutes while I made the batter. When my cake was baked, and I went to invert it, some parts of the crust stuck to the sides, and the top had a distinct line where the pan started to curve. I discovered that the spray slowly slid down the sides of the pan and pooled in the bottom while I was making the batter. I now spray the pan right when my batter is done to prevent this.
What NOT to do: don’t use cooking spray without flour, don’t use butter alone, and don’t skip the center tube (the most common sticking point is the center tube—bakers grease the bowl and sides of the pan and forget the tube). Don’t use a pan with a worn nonstick coating; nonstick that’s been scratched or has visible wear is no longer reliable, and at that point, you’re depending entirely on the grease. This goes back to my example from when I was first baking Bundt cakes. I used a worn-out pan, and the batter clung to the bare spots where the coating was missing, causing my cake to stick and tear in spots when inverted.
The Four Ways Bundt Cakes Go Wrong
It bakes unevenly—golden top, dense interior. A heat distribution problem with the pan, from thin walls or a dark coating. Dark pans absorb heat faster, and the bottom cooks hard before the center sets, preventing it from rising as much as needed. Drop your oven temperature 25°F when using dark-interior Bundt pans, and start checking for doneness early (10-15 minutes before the recipe indicates). A thin pan can also produce this outcome by allowing the edges of the cake to heat up very quickly; a heavier-walled pan distributes heat more evenly.
It sticks to the pan. This is typically a grease problem. Either insufficient coverage (missed the center tube or a few flutes), the wrong coating (not using flour or baking spray), or a worn pan coating. Next time, check your pan’s nonstick coating for imperfections before greasing it thoroughly with butter and flour or baking spray with flour. (See the next section for tips on releasing a stuck Bundt.)
It sinks in the middle. There are three possible causes. An under-baked cake—the structure didn’t set before you pulled it out. Be more careful with your bake time and use a toothpick test to make sure the center is done. Check the toothpick at the deepest part of the cake, not at the surface; a Bundt is much taller than a layer cake, and the inside can be raw long after the top looks set. Too much leavening—the cake rose more than the gluten structure can hold. Use fresh, accurately measured baking powder or baking soda, and be mindful of other ingredients. If your recipe calls for milk, but you swap it with buttermilk, you are adding acid, which can overreact with the leaveners. Too much liquid relative to flour—the gluten structure isn’t strong enough to hold the cake up. Use weight measurements for the flour rather than volume cups.
There is a dense streak through the cake. This indicates the cake was underbaked. If you cut your cake and notice a wet or denser streak running through the slice, it can either mean the cake structure wasn’t set, so it sank slightly when cooling and formed a compact layer. Or, that portion didn’t bake long enough to rise and stayed wet and dense. This doesn’t always mean the cake isn’t delicious! Some people love it and consider it a feature of pound cake, referring to it as a “sad streak.” Despite the melancholy name, they actually like the slightly denser texture this creates and will purposefully underbake the cake by 10-15 minutes.
One thing people think can be an issue, but isn’t: the cake develops a thick “foot” on the bottom. A foot is the dense, domed ring of cake that forms on what was the top of the pan during baking (becoming the bottom of the cake after you invert it) and is taller than the edges.
This foot development varies depending on the recipe and isn’t necessarily an indicator of a baking issue. Some recipes are designed to bake flat on the bottom, but some thicker pound cake-style batter will naturally develop this foot because it takes longer for the batter in the center to cook than the edges. You can trim the foot off with a serrated knife before serving if you want the bottom of your Bundt cake to be perfectly flush with your plate.
How to Get a Stuck Bundt Cake Out of the Pan
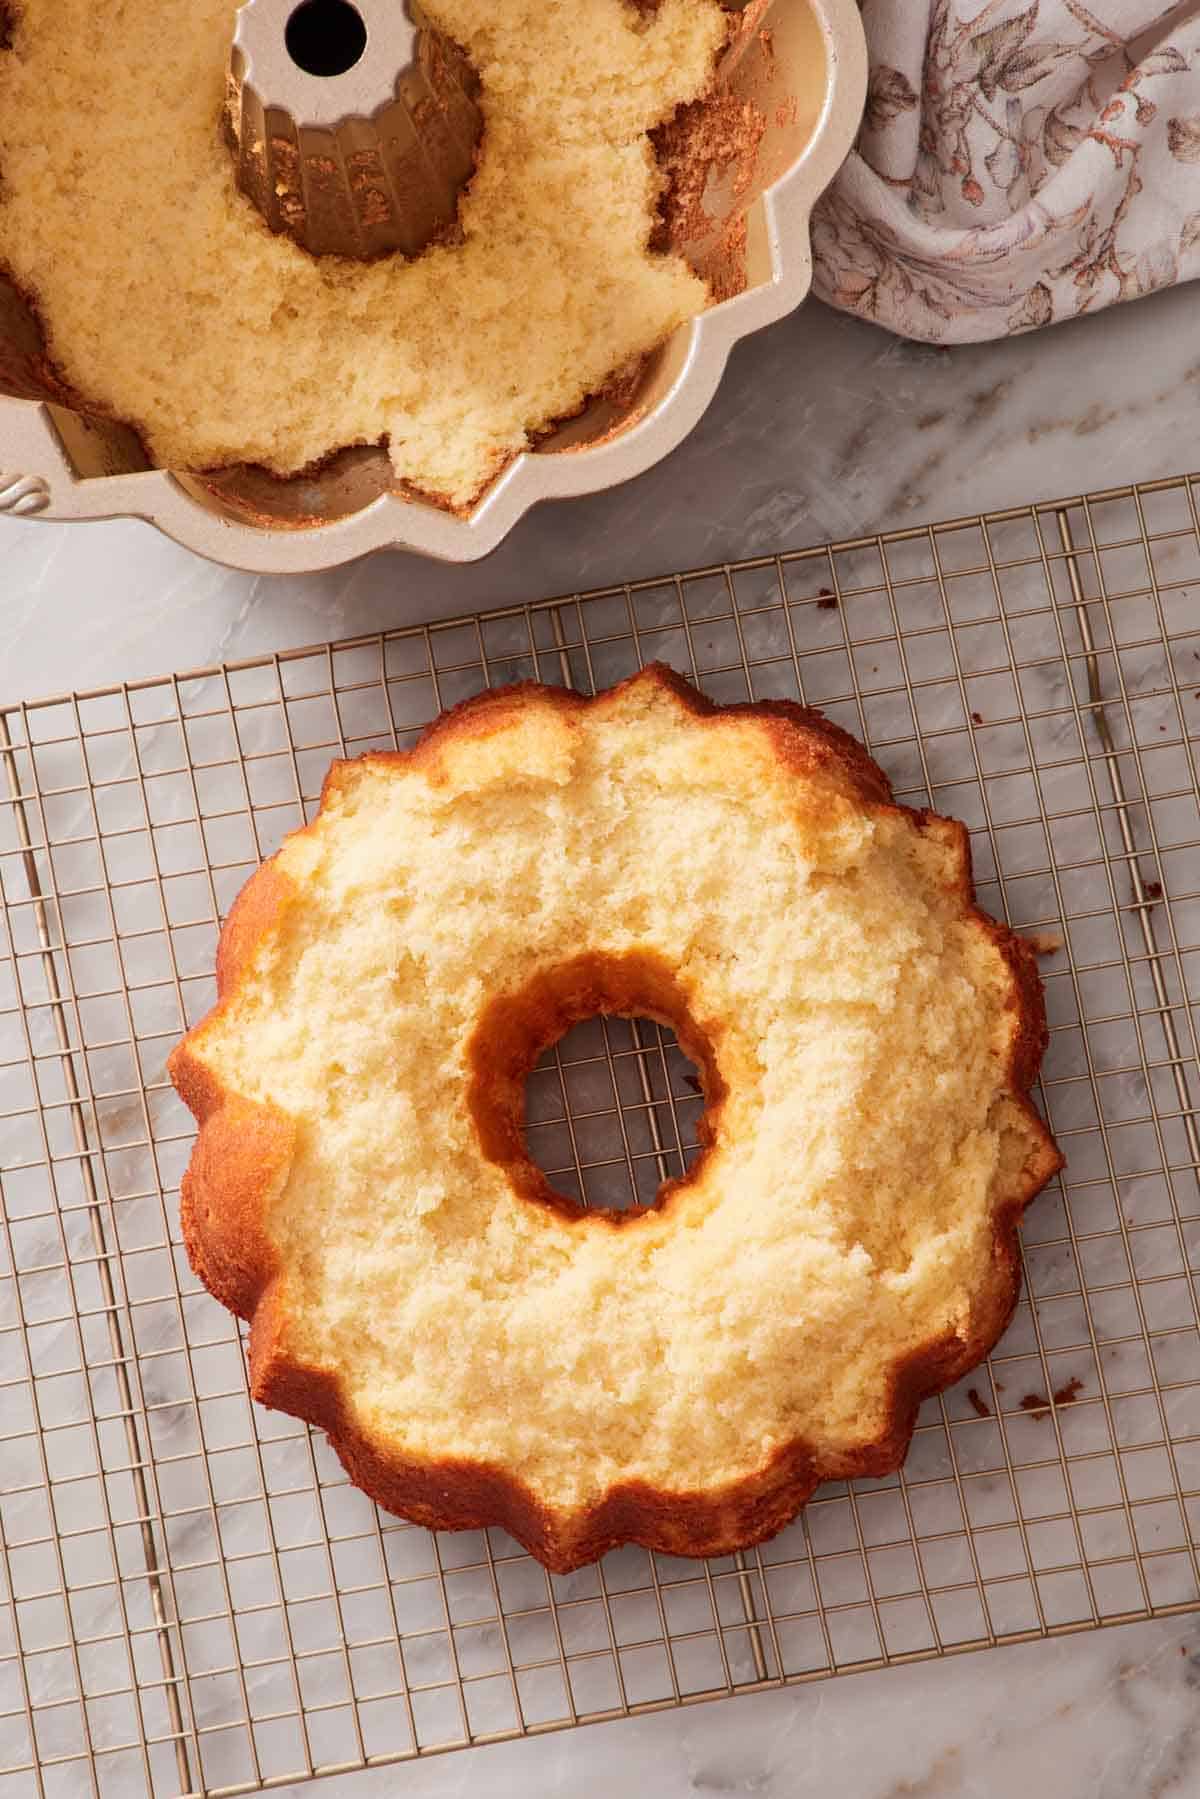
This is the advice most people miss when writing about Bundt cake, and what I wish someone had written for me when I had my first Bundt cake disasters! If the cake doesn’t release on the first inversion, don’t panic! Go through each of these steps first:
Step one: wait. Make sure the cake cools in the pan for the time the recipe specifies, usually 10 to 20 minutes. Releasing too early is more common than releasing too late. The cake has to firm up enough to support its own weight; if it’s still hot, it can tear apart when you invert. You will also likely notice your cake pulls away from the pan slightly within the first few minutes out of the oven. This is naturally releasing, which will help you invert it cleanly. You also shouldn’t wait too long—past about 30 minutes. The cake re-bonds to the pan as it cools and gets harder to release.
Step two: loosen the edges if needed. If there isn’t a small gap between the pan and edges of the cake, carefully run a thin offset spatula or a butter knife around the outer edge of the cake and around the center tube. (Be gentle, so you don’t scratch your nonstick coating.) You’re trying to break the surface contact between the cake and pan, not slice into the cake.
Step three: invert with confidence. Place your cooling rack on top of the inverted pan, hold both firmly together, and flip them in one motion. Set them down on the counter with the cake side up (pan now on top). Wait 10 seconds; you should hear or feel a small release as the cake settles onto the rack. Lift the pan straight up.
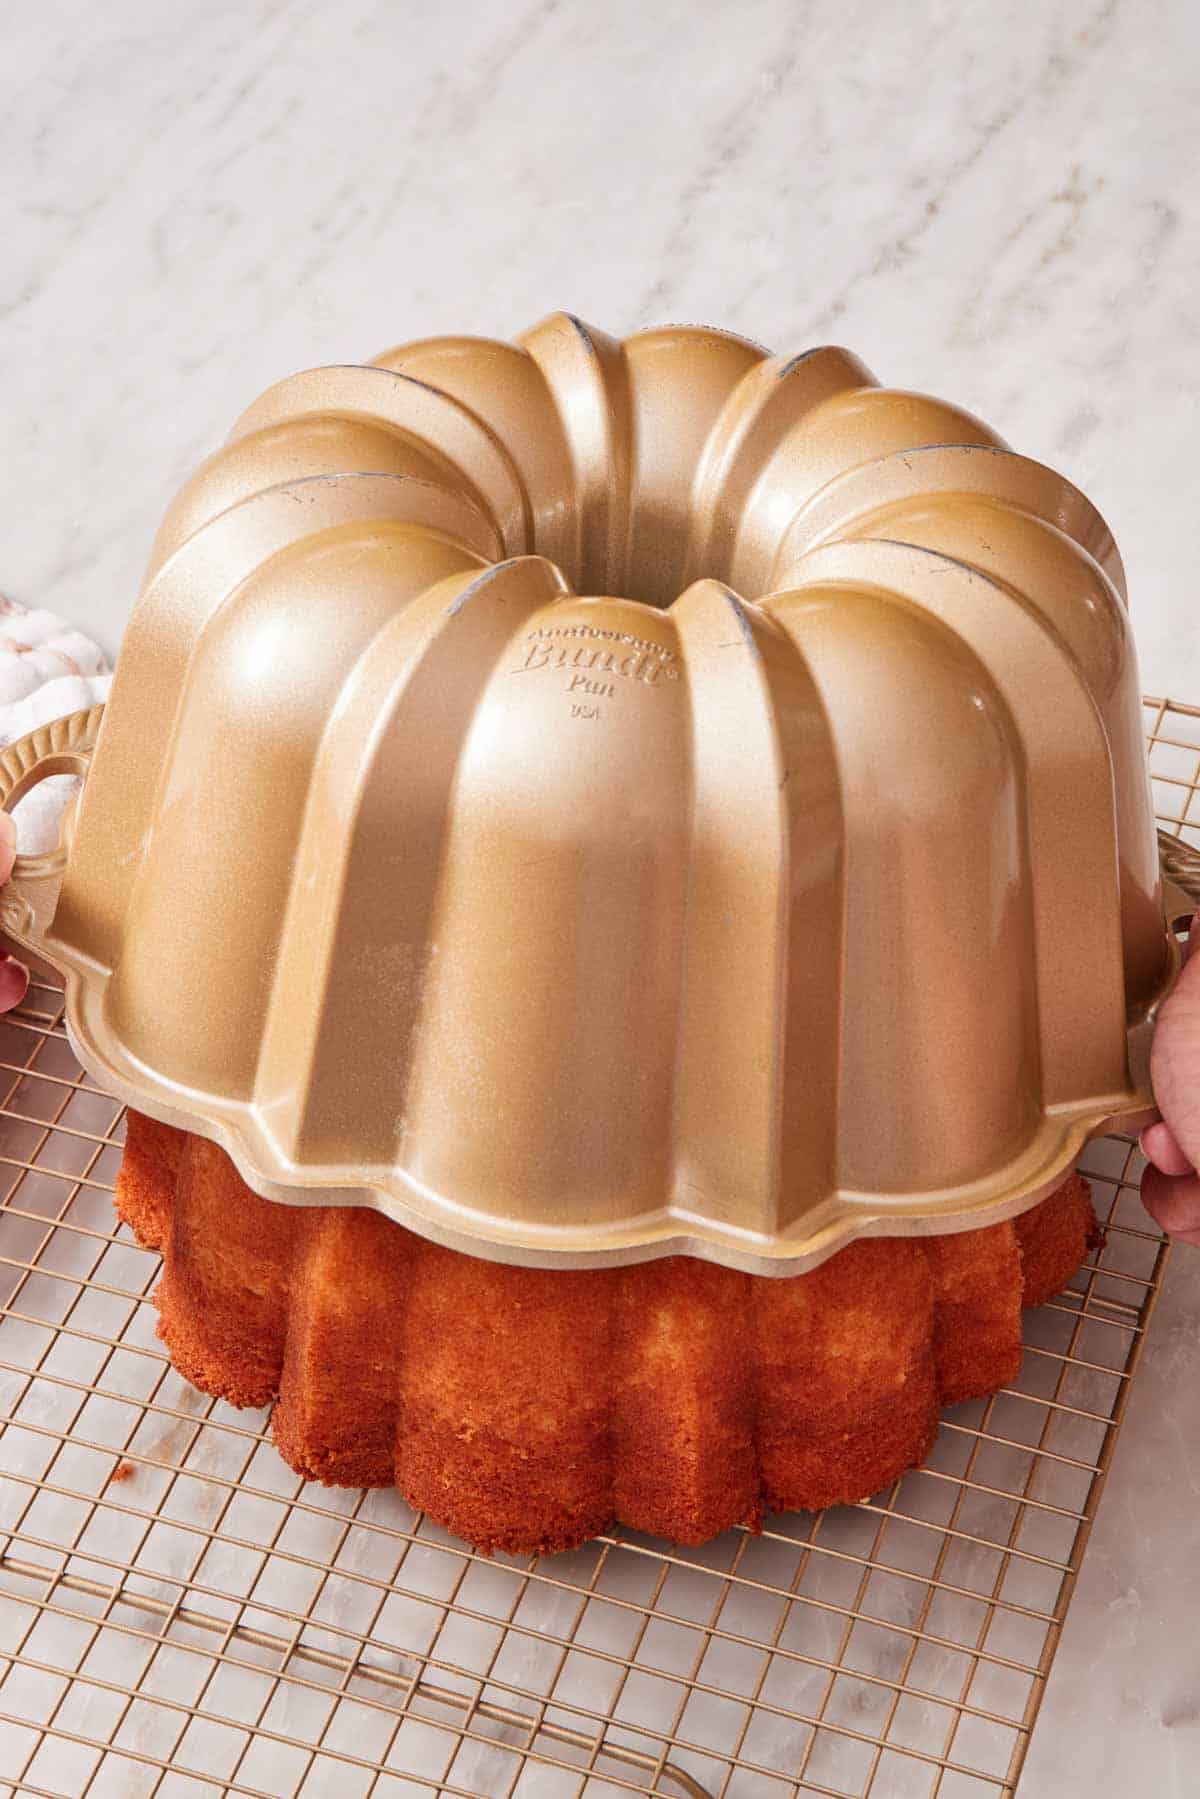
If it still doesn’t come out: rewarm the cake pan. Fill your sink or a wide baking dish with very hot water—almost boiling—to a depth of about an inch. Place the upright pan (cake still inside) in the hot water so the rounded bottom of the pan is submerged about an inch. Wait 5 to 10 minutes, then dry the bottom of the pan, place the wire rack on top, and invert it. The heat softens the fat at the pan’s surface, and the cake should release.
If the steam trick doesn’t work either, the cake is going to come out in pieces, and that’s okay. Glaze covers a multitude of cracks. Trim the worst spots, glaze heavily, and call it rustic. If your cake splits in half, turn it into a trifle, cake cups, or cake pops! Every baker has had a stuck Bundt, including me! A stuck cake still tastes delicious and isn’t worth throwing the cake away over.
Glazes, Dustings, and Finishes
Bundt cakes almost never get layer cake-style buttercream frosting. The pan’s design is the visual interest, and covering it with a thick frosting defeats the point. These are my favorite finishes:
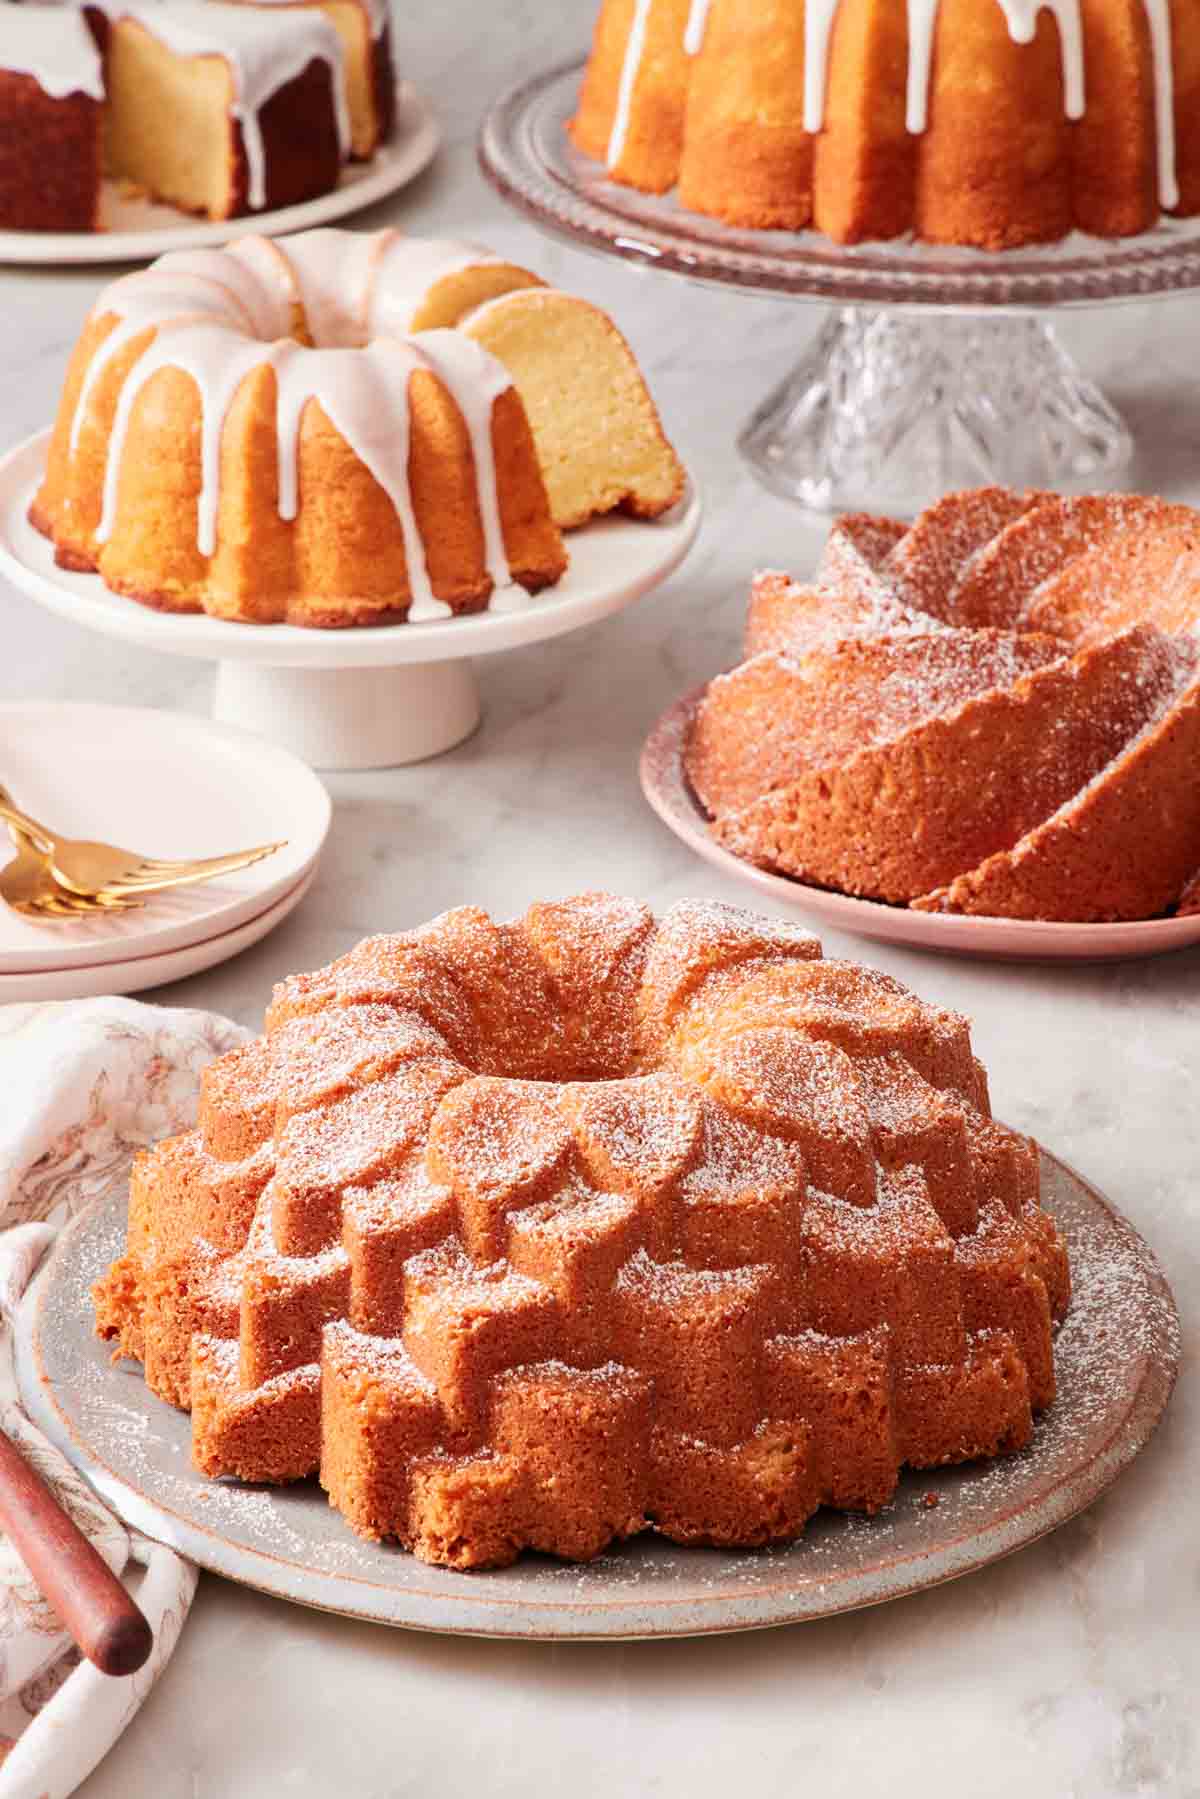
Powdered sugar dusting is the simplest finish, perfect for showing off the pan’s design. Sift powdered sugar through a fine-mesh strainer once the cake has cooled completely. Re-dust right before serving if the sugar disappears (it can dissolve into a moist cake over a few hours).
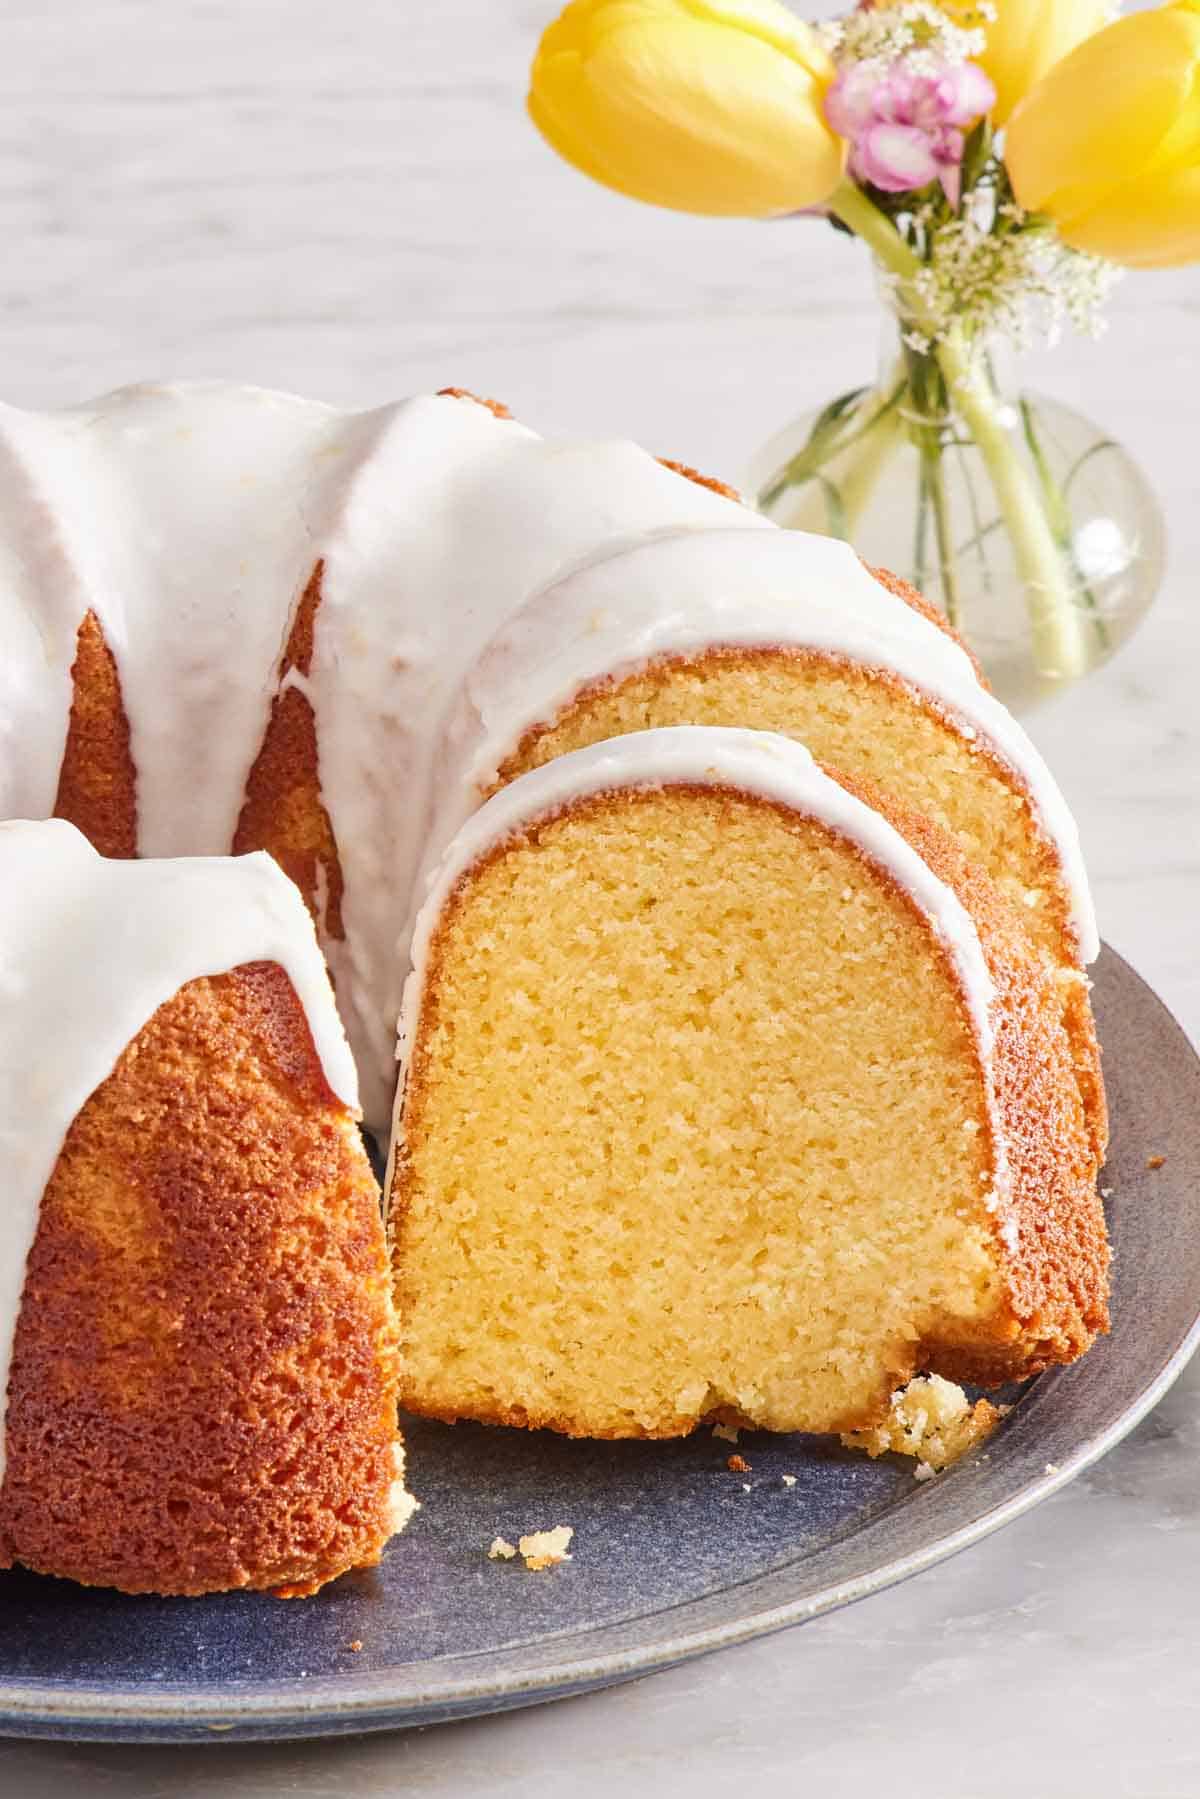
Glaze is the most common Bundt finish! This thin, pourable mixture of powdered sugar and liquid (milk, citrus juice, espresso, water with extract) is drizzled over the cake after it cools. The glaze runs down the flutes, settles into the design, and sets to a soft sheen. The right consistency can vary depending on how thick a coating you want. Glazes a little thinner than honey, or coating the back of a spoon, will drip off easily. A thick, spoonable glaze will barely drip and form a thick coat that sits on top of the cake. Try my lemon glaze on your next Bundt cake.
Ganache is a delicious chocolate option! Use hot cream and chopped chocolate to make an easy ganache, stir it until smooth, and pour it over the cake. It sets firmer than a powdered sugar glaze, giving a deep chocolate finish to any flavor of cake you’d like.
A flavored syrup soak is the bakery trick for keeping Bundts moist. Pour some syrup onto the hot cake, then, after unmolding, while the cake is still slightly warm, brush a thin layer of warm simple syrup all over the exterior. The syrup absorbs into the crust and keeps the cake noticeably moister for several days. This is how I make my rum cake! You can also make a plain, simple syrup and add flavor to the syrup with citrus zest, liqueur, or vanilla.
FAQ
Use soft butter or shortening applied with a pastry brush, then dust with flour, or a baking spray with flour in it (like Baker’s Joy or Pam). Don’t use butter or grease alone—you need the flour layer to form a physical barrier between the cake and the pan. Cover every interior surface, including the center tube. Let the baked cake cool 10 to 20 minutes in the pan before inverting; releasing too early tears the cake, releasing too late re-bonds it to the pan.
Fill the pan with water to the top rim, pour the water into a liquid measuring cup, and that’s your pan’s capacity. Most home Bundt pans are 10-cup or 12-cup capacity (6 to 8 cups of usable batter volume). Most Bundt recipes are written for 10- to 12-cup pans, so if yours measures in that range, you can follow recipes directly.
Sometimes, but not always. The batter chemistry has to suit a Bundt pan. Layer cake recipes built around lots of whipped air or high amounts of leavener (delicate vanilla layer cakes, chiffon-style cakes, classic chocolate cake) collapse in Bundts. Pound-cake-style and thicker butter-cake recipes generally convert well. It’s always best to follow any conversions given in the specific cake recipe.
It is easier to convert a Bundt cake to loaf or round cake pans, though. Match the batter volume to the pan’s usable capacity. A 10- to 12-cup Bundt cake has 6-8cups of batter, which can make two 9×5-inch loaf pans or two 9-inch round cakes.
Not quite. Pound cake is a specific cake type that can be baked in different types of pans, while a Bundt cake is any type of cake batter baked specifically in a Bundt pan. A pound cake baked in a Bundt pan is both a pound cake and a Bundt cake. You can bake other cake batters (chocolate cakes, spice cakes, lemon cakes) in a Bundt pan, and they’re Bundts, not pound cakes.
More Tutorials To Try
Check out these other Baking Academy lessons to increase your cake-baking skills:
- Academy: The 5 Main Cake Mixing Methods — learn what distinguishes different types of cakes by how their batters are made.
- Academy: How to Bake Flat Cake Layers — an easy trick for stable and tall stacked layer cakes.
- Academy: Baking Pan Sizes & Conversions — everything you need to know about converting recipes to different cake pans.
- Academy: How to Freeze Cakes — the best way to prep cakes ahead of time or save leftover frosted cakes for months.
- Academy: How to Line a Cake Pan with Parchment Paper — never have a cake stick to your pans again with this easy pan lining tutorial.






