
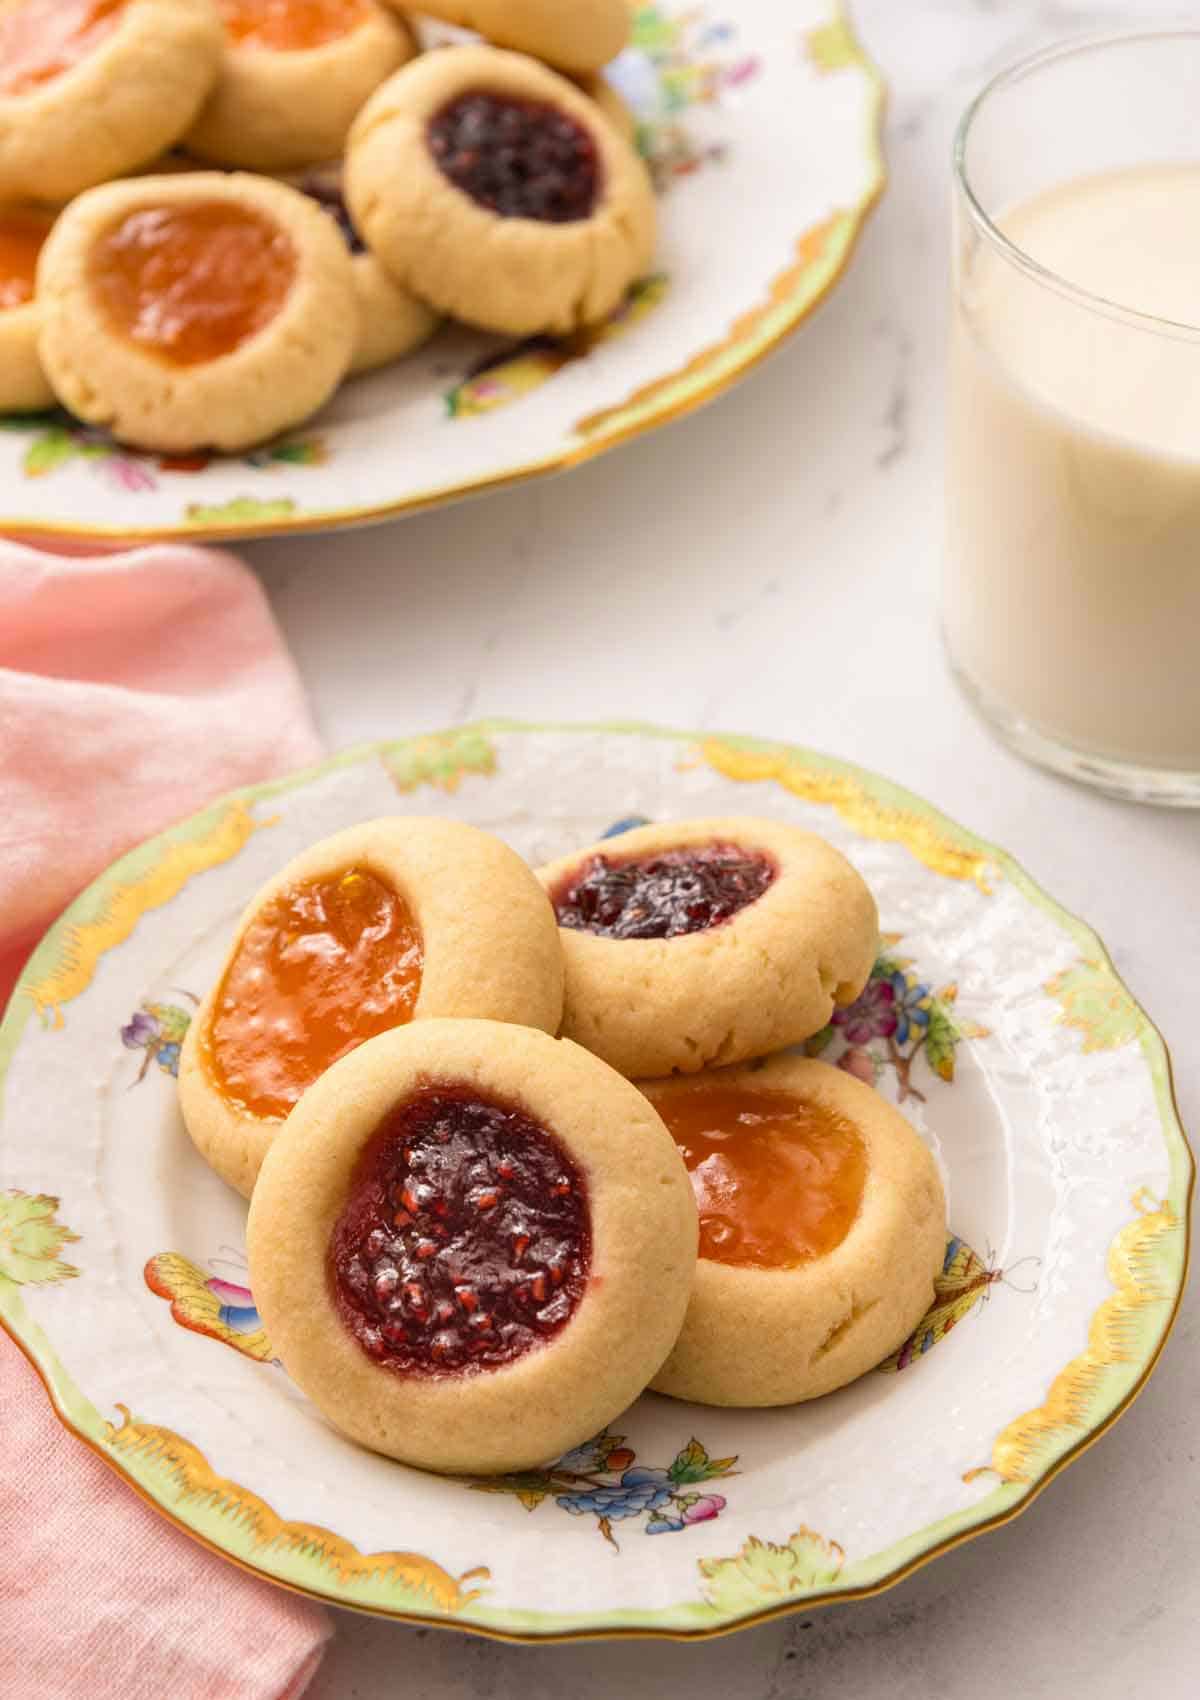


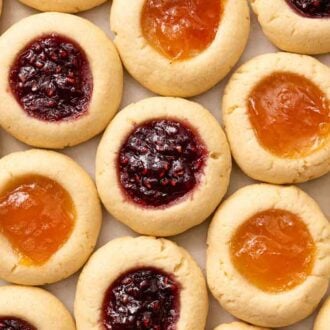
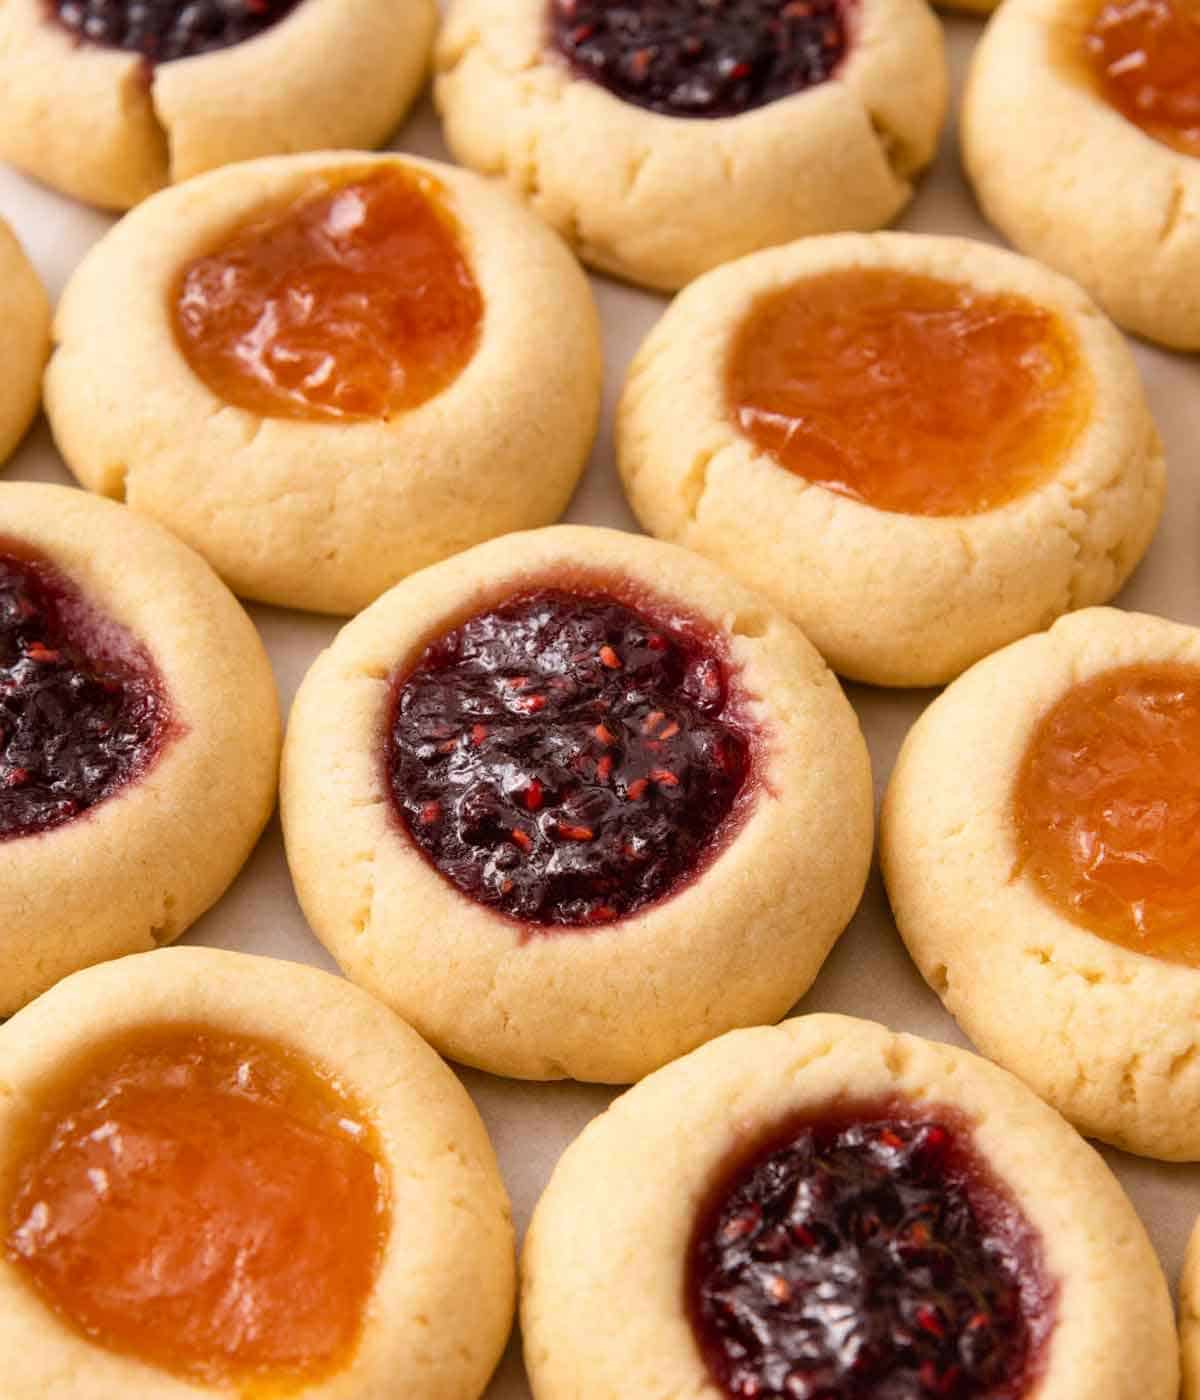
My easy thumbprint cookies have a melt-in-your-mouth texture, similar to shortbread, with a thick, sweet fruit jam filling. While jam is the classic filling for these holiday cookies, you can get creative and fill them with caramel, chocolate ganache, and more! Plus, this thumbprint cookie recipe can be shaped and frozen before baking. When you’re ready, just fill them with jam, pop them into the oven, and voilà! You have a crowd-pleasing sweet treat to share during the busy holiday season.
One common issue many have had with making thumbprints is that the dough cracks when you press into the center. I have rigorously tested this recipe and learned a quick and simple way to troubleshoot this! I’ll walk you through how, along with all of my other tips and tricks, to make the perfect thumbprint cookies this holiday season.
A reader, Jayne, says: “These have always been my favorite cookie! Your directions were PERFECT! I used a Fig & Ginger Jam for half, and Apricot Jam for the other. Fun to make and eat!” ★★★★★
Table of Contents
Key Ingredients & Substitutions
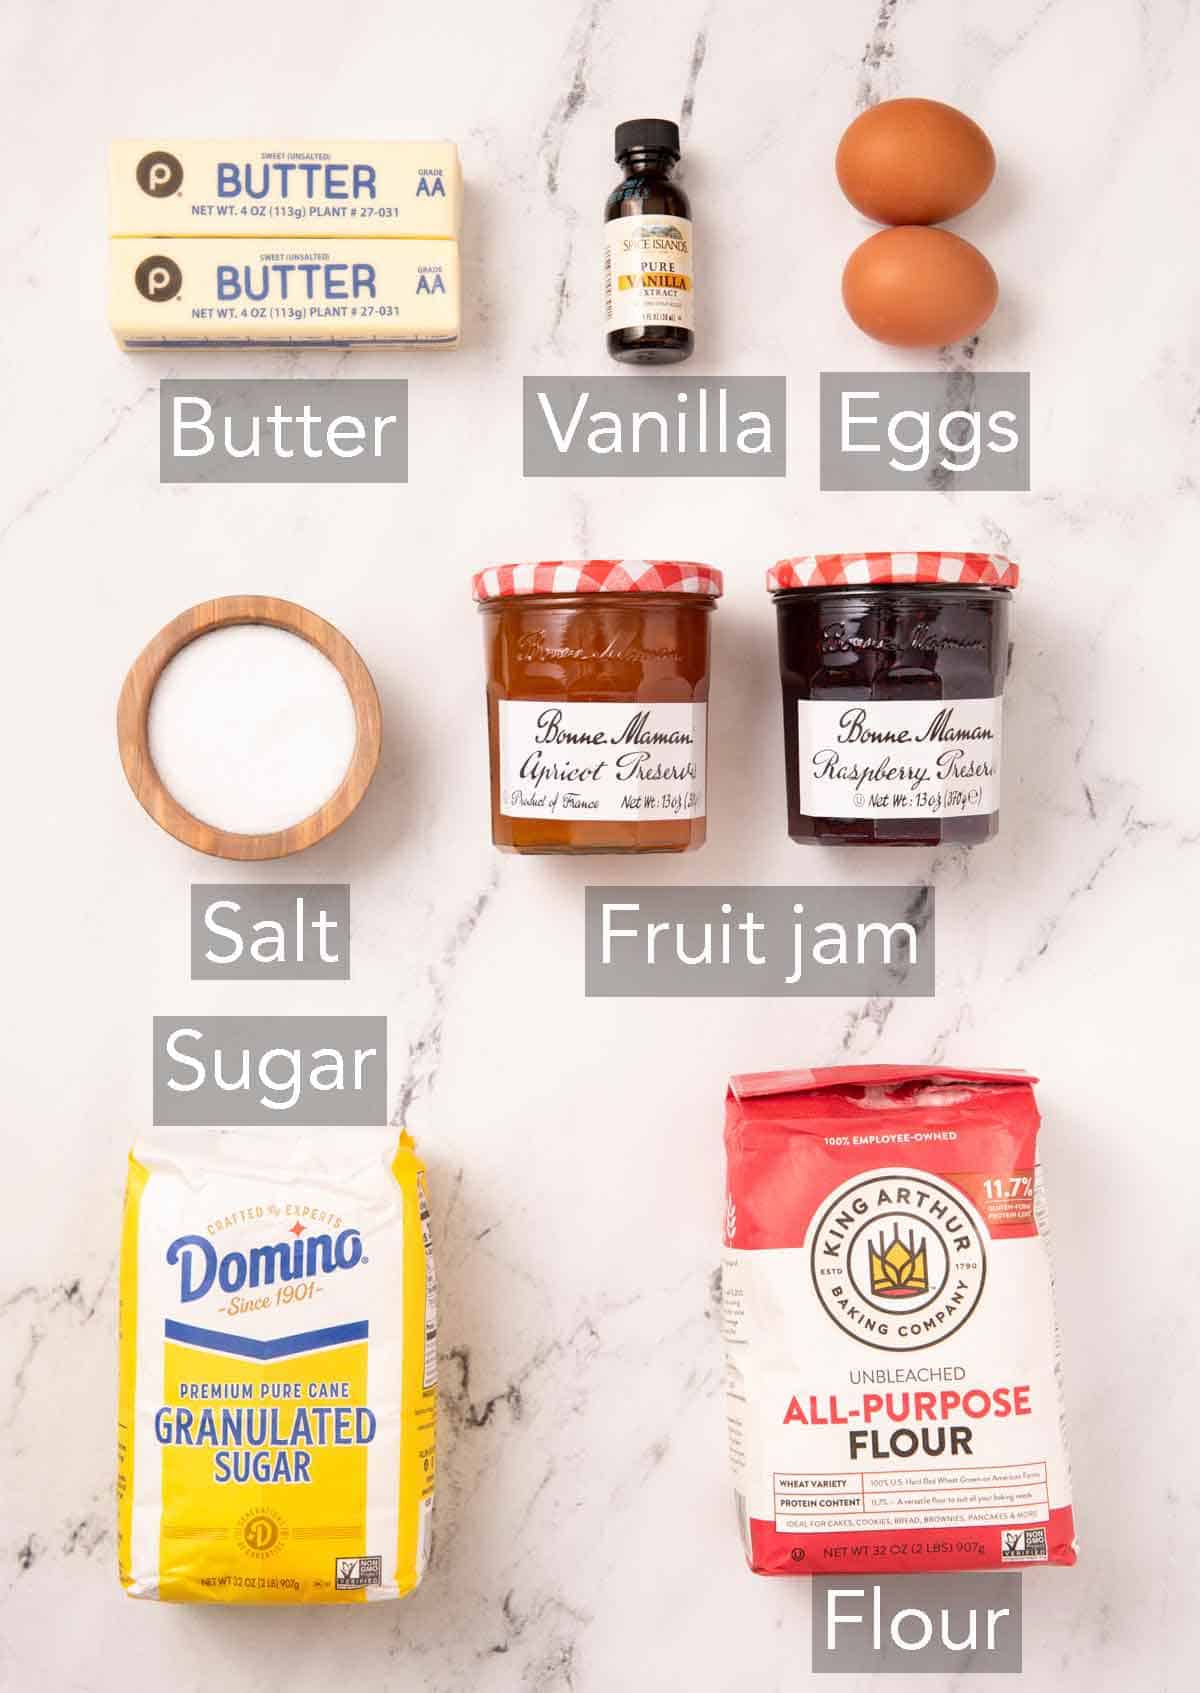
These are the main ingredients you need to make the best thumbprint cookie recipe. You can find the full list of ingredients and measurements in the recipe card below.
Butter — softened butter gives these cookies their signature crisp yet tender texture that’s similar to shortbread cookies. I recommend using unsalted butter for the best results, as the amount of salt in salted butter can vary quite a bit between different brands. And since these thumbprint cookies contain added salt, using salted butter can cause the buttery cookie to turn out salty.
Sugar — granulated sugar (aka white sugar) adds sweetness and moisture to the cookies. Its neutral flavor is perfect as it doesn’t overpower the flavor of the jam filling.
Egg yolks — using only the yolks adds richness and structure to the dough, so the cookies bake up with the perfectly dense texture without getting too puffy. (Save the egg whites for a batch of easy meringue cookies!)
Jam — use your favorite jam for the filling! Some options are strawberry jam, raspberry jam, blueberry jam, or apricot jam. I don’t mind the texture of seeds in jam, but if they bother you, just use a seedless variety, or press the jam through a fine mesh sieve. Since the indent in the cookies is not very big, I recommend avoiding very chunky fruit preserves as they won’t fit well and can overflow. But if that’s what you have on hand, just puree or strain them first for a thinner consistency.
Thumbprint Cookie Variations
Classic thumbprint cookies are perfectly delicious as-is, but there are several ways to change them up to suit your preferences. Add a sugar coating for extra sweetness, roll them in nuts for crunch, and more! Here are my favorite thumbprint cookie variations:
- Roll in sugar: Before pressing the well in the center, roll each dough ball in granulated or plain sparkling sugar. Or, for a festive look, roll them in colorful sanding sugar.
- Roll in nuts or coconut: Just like with the sugar, you can roll the dough in very finely chopped nuts like pecans, hazelnuts, or pistachios. Or, try desiccated coconut or finely chopped sweetened shredded coconut.
- Drizzle with a glaze: Finish off the cooled cookies with a little drizzle of glaze. Try the citrusy glaze from my lemon cookies.
- Use other fillings: Swap the jam in the center for bright lemon curd, caramel sauce, or ganache. To use these fillings, bake the cookies without a filling, then re-press the centers with the back of a teaspoon when they are hot out of the oven. Cool and then fill, chilling or letting the cookies sit until the filling is set if needed.
Press Different Shapes In The Center
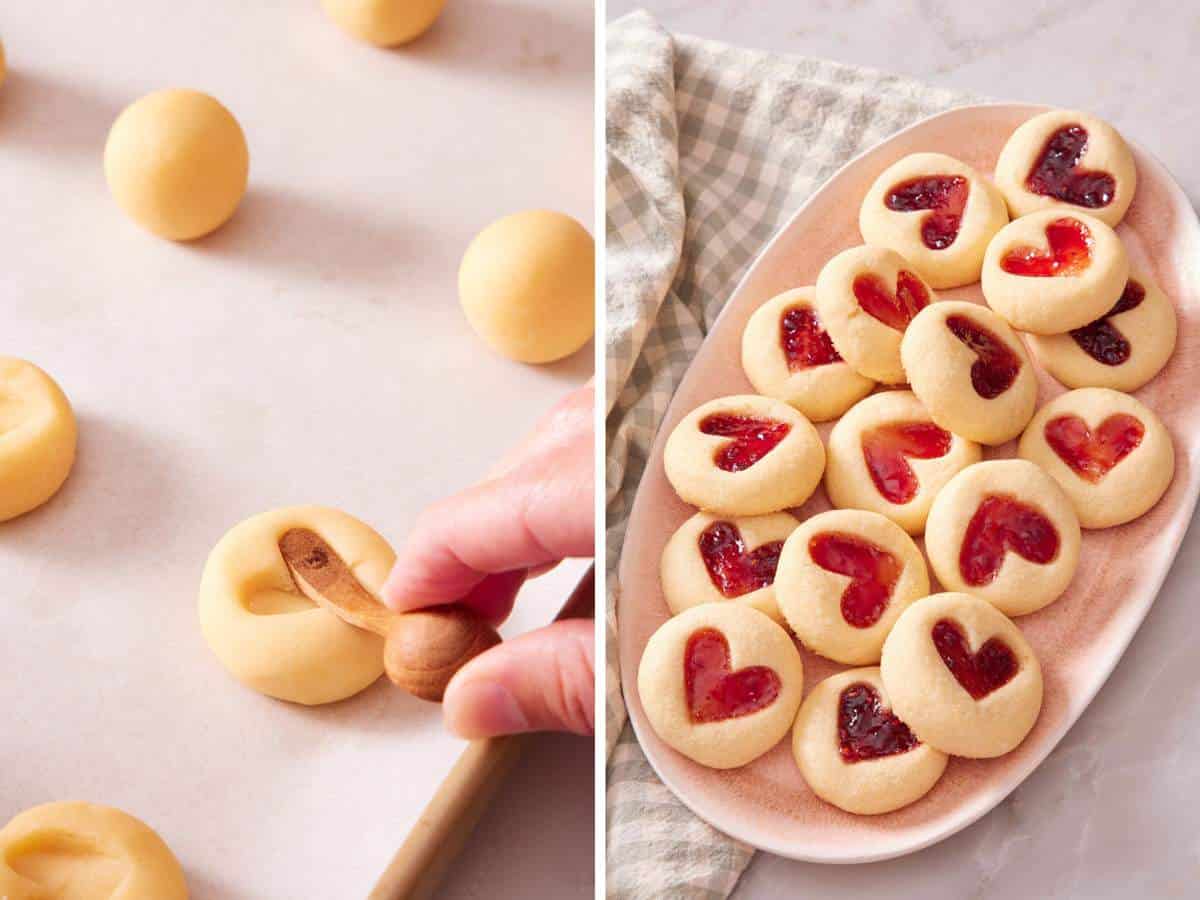
You can use small stamps or the end of a small spoon or chopsticks to form other shapes in the center of each thumbprint! This is a really fun way to customize them for specific holidays. For Valentine’s Day, I like to press hearts into the centers for jam-filled heart thumbprint cookies.
To make a heart shape without a stamp, use the end of a small teaspoon, chopstick, or other utensil about ¼ inch wide. Press it at an angle in the center of the dough ball, then press it again, mirroring the first mark (making a “V” shape). You can see how to make heart-shaped centers in the image below, and how cute they are once filled with jam and baked!
Troubleshooting and FAQs
I start by rolling one test dough ball and try indenting it with either your thumb or the back of a spoon. If it cracks, then try one of these simple fixes:
Mix 1 tablespoon of milk or water into the dough to soften it, then roll and press one dough ball again. Add another tablespoon if needed. One tablespoon usually does the trick to moisten the dough just enough without making it sticky, but this can vary depending on how precisely you measured the flour.
When adding the indentation in the center, don’t just press straight down. Wiggle your thumb or teaspoon as you press down to disperse the pressure, so the indentation is made more gently.
Rolling the dough between your palms is also a big help for preventing cracks, as it warms the dough. This little bit of added heat makes it more pliable, helping it to develop a well for the jam filling without cracking when pressed.
Chilling the shaped cookie dough helps the cookies hold their shape while baking and prevents large cracks from forming if they spread too much. Freezing the dough for 30 minutes will be the fastest option, but you can freeze or chill it for a couple of days before baking; be sure they are tightly covered with plastic wrap so the dough doesn’t dry out.
If you don’t have time to chill them, you can bake them straight away, but keep in mind that they may spread more, and if large cracks do form, the jam can leak out.
Can I add the jam before chilling the dough?
No, I don’t recommend it. The cookie dough will absorb moisture from the jam as it chills, which can cause the cookies to spread more and discolor. Instead, fill the cookies before baking.
Pro Tips For The Best Thumbprint Cookies
Weigh the flour correctly. Using too much or too little flour will affect how the cookies turn out. For the most accurate flour measurement, weigh it using a kitchen scale. If you don’t have one, fluff the flour in its container and spoon it into your measuring cup, then level off the top with a knife. This will prevent you from inadvertently overpacking the measuring cup.
Use room temperature ingredients as they are easier to blend together to make the cookie dough. It’s easier to separate eggs while they’re cold, but leave the yolks out (covered) for about 30 minutes after separating so they lose their chill. I recommend setting the butter out about an hour or so before you start working on this recipe. If you forget, check out my guide for how to soften butter quickly!
Be careful not to over-whip the butter and sugar. Overwhipping the butter can cause the cookies to puff and spread because it incorporates more air. While in many recipes, you want to beat the two together until light and fluffy, for these cookies, you just want the mixture to be creamy and well combined.
Roll the dough smoothly between your palms. Rolling the dough into a smooth ball is key to preventing cracks when you indent the dough. If there are already cracks in the dough ball, the pressure added when pressing into the centers can cause those cracks to become larger.
If you’re having difficulty filling the centers with jam, you can transfer the jam to a piping bag to pipe the jam into the cookies.
How To Make Thumbprint Cookies
Below, I’ve highlighted portions of the recipe in step-by-step process images along with instructions for making jam thumbprint cookies. You can find the full set of instructions in the recipe card below.
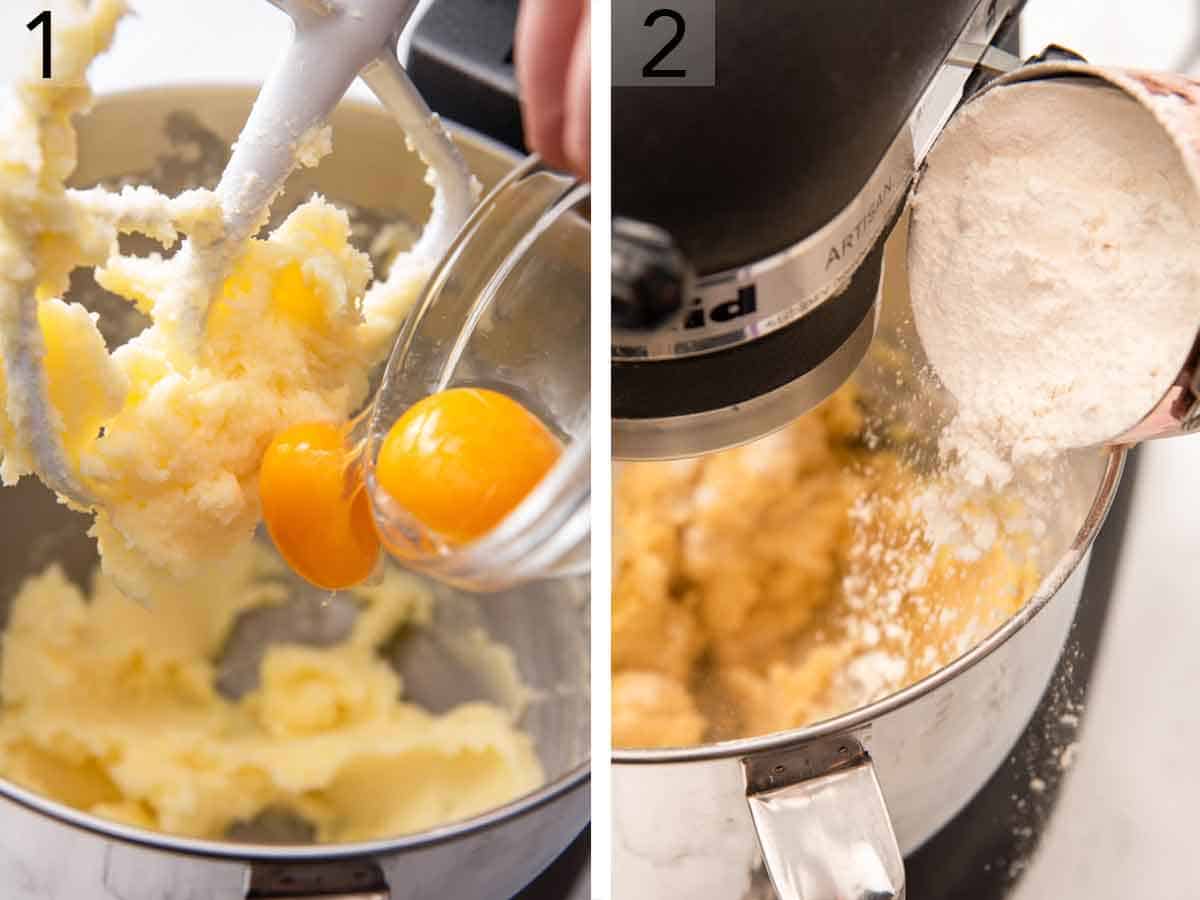
1. Beat the butter and sugar in a large bowl until creamy (not fluffy!) using an electric mixer or in the bowl of a stand mixer fitted with the paddle attachment. The mixer should be on medium speed. Then add the egg yolks, vanilla extract, and salt, and beat to combine.
2. With the mixer on low, gradually add the flour and beat just until combined. This means you want to mix just until you see all of the streaks of flour disappear and be fully incorporated. Once that happens, stop mixing. Overmixing can cause more gluten strands to develop, ruining the texture of the cookies and making them tough instead of tender.
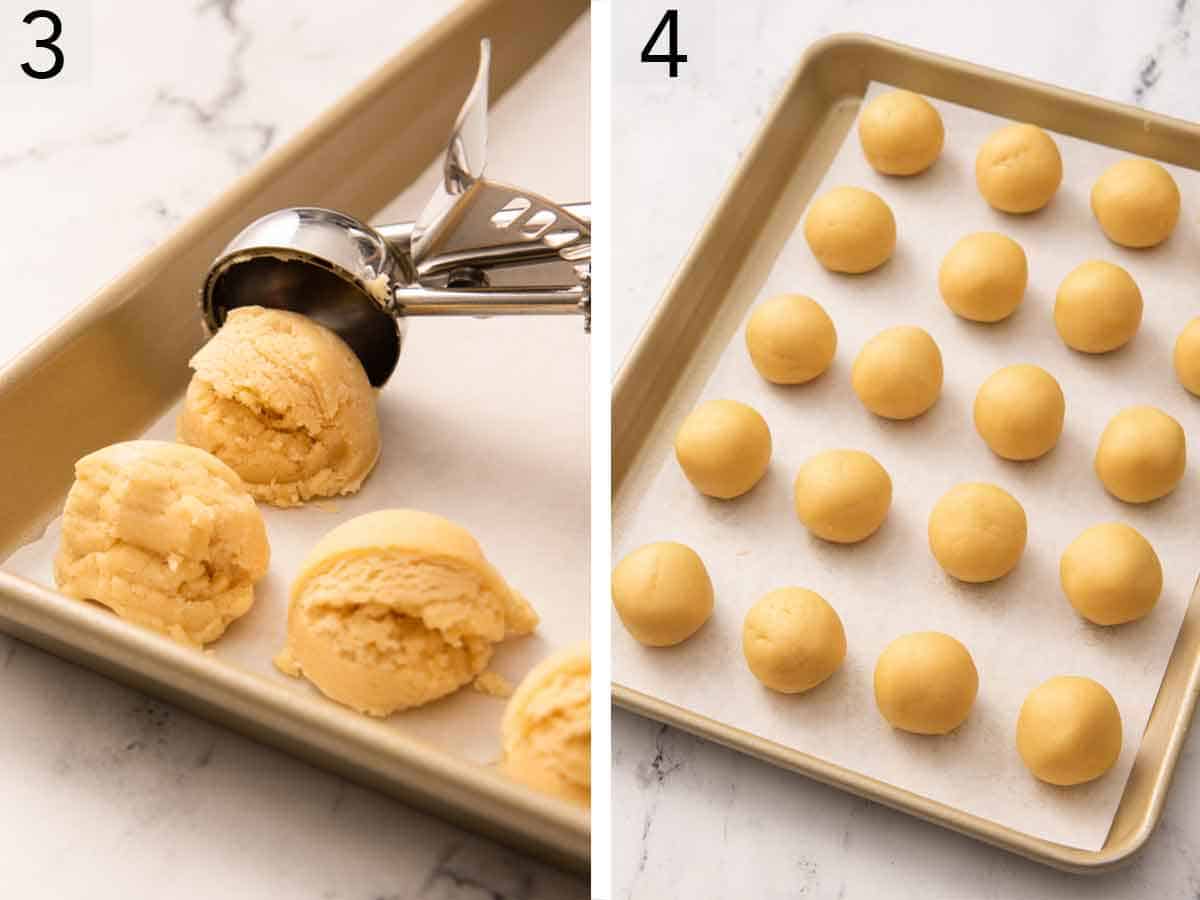
3. Scoop 1 tablespoon-sized portions of cookie dough. I like to use a #60 spring-loaded scoop for exact portioning.
4. Roll each one into a smooth ball between your palms and place onto a lined baking sheet or plate.
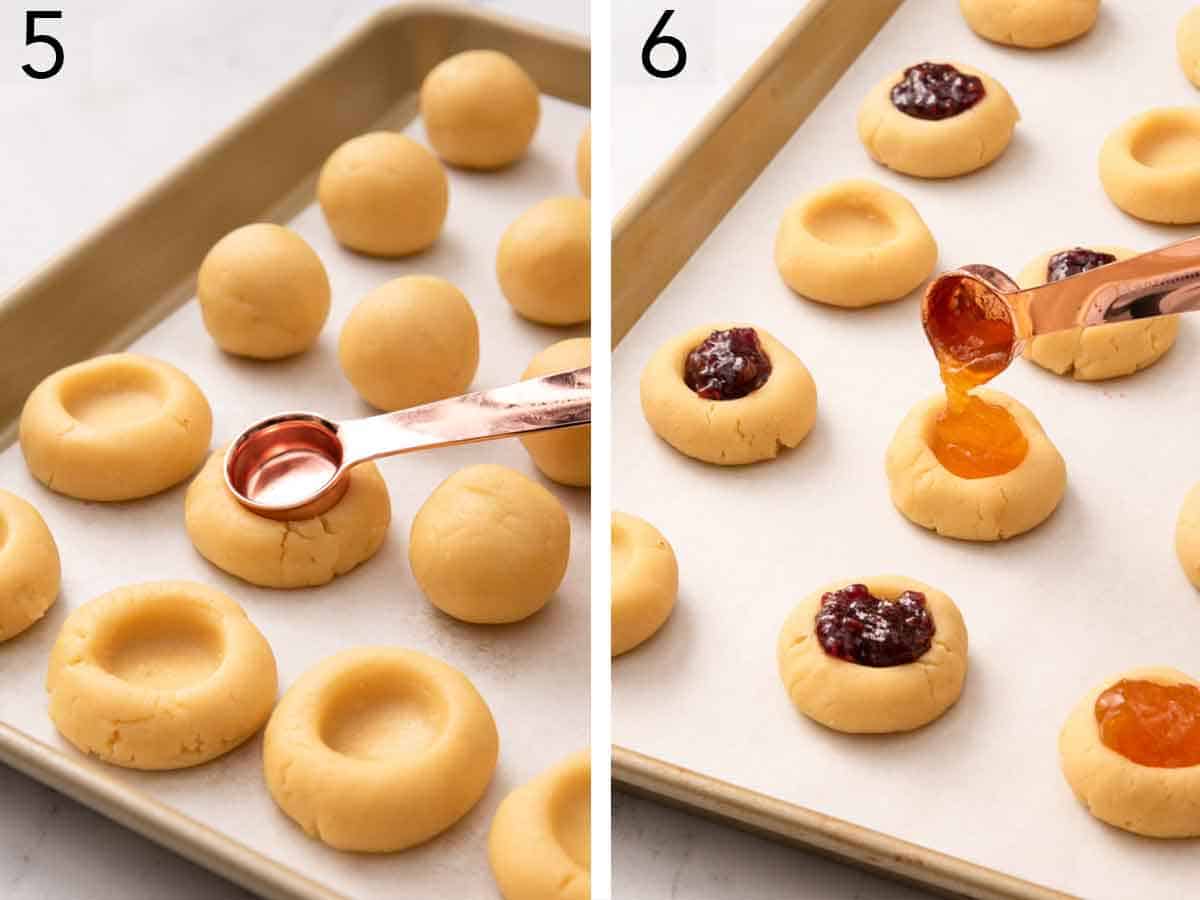
5. Gently press your thumb or the back of a teaspoon into the center of the ball to create a cavity. Then freeze the dough for 30 minutes or refrigerate for 1 hour.
6. Divide the prepared and chilled cookie dough between two large baking sheets lined with parchment paper. Space them 2 inches apart on the prepared baking sheets. Then fill each with about ½ teaspoon of jam (feel free to use different types of jam for 1 batch of cookies). Bake one cookie sheet at a time at 375°F for 12 to 14 minutes. Let the thumbprint cookies cool completely on the baking sheet before enjoying.
Thumbprint Cookie Recipe
Video
Equipment
- Mixer
Ingredients
- 1 cup unsalted butter softened (227g)
- ¾ cup granulated sugar (150g)
- 2 large egg yolks
- 1 teaspoon vanilla extract
- ½ teaspoon salt
- 3 cups all-purpose flour (360g)
- 1 tablespoon milk or water only if needed
- ⅓ cup fruit jam (strawberry, raspberry, or apricot jam)
Instructions
- In a large mixing bowl or the bowl of a stand mixer fitted with the paddle attachment, beat the butter and sugar together on medium speed until creamy, about 1 minute.
- Add the egg yolks, vanilla, and salt, and beat until well combined. While mixing on low, gradually add in the flour and beat just until combined. Stop and scrape down the bowl as needed during mixing. Test the dough by balling up about a tablespoon of the dough, then press your thumb into the center. If the dough forms large cracks, mix 1 tablespoon of milk or water into the dough.
- Scoop a 1 tablespoon-sized portion of the dough and roll it into a smooth ball between your palms (If desired, toss in granulated sugar to coat the outside.) Place the dough ball on a parchment- or wax paper-lined sheet or plate, and immediately press your thumb or the back of a teaspoon into the center of the ball to create a cavity. (Gently wiggle as you press to help prevent any cracks. If any do form, press them back together.) Continue rolling and shaping the remaining dough balls. Freeze for 30 minutes or refrigerate for 1 hour. (They can stay in the fridge for up to 2 days before baking, or frozen for up to 3 months.)
- Preheat the oven to 375°F. Line two large baking sheets with parchment paper.
- Working with one sheet at a time, place the frozen dough on the cookie sheet 2 inches apart. Fill with about ½ teaspoon of jam. (Thumbprints should be very full but not overflowing.)
- Bake one sheet at a time for 12 to 14 minutes or until the edges are just starting to turn brown. Let cool completely on the baking sheet. Store in an airtight container for up to 1 week.
Notes
- Storage: The baked cookies keep well in an airtight container at room temperature for up to 1 week.
- Add citrus zest to the dough: Add up to 1 teaspoon of citrus zest, such as orange, lemon, or Meyer lemon, to the cookie dough to pair with the flavor of jam you choose (i.e., strawberry jam with lemon zest, raspberry jam with orange zest, apricot jam with Meyer lemon zest).
- Add almond extract for a nutty flavor. Replace ½ teaspoon of the vanilla with the almond flavoring.
- There is no limit to the type of jam you can use. I love the colors and flavors of strawberry, apricot, and raspberry, but you could explore other flavors like fig, blackberry, and guava.
Nutrition
Storage
Storing: Store thumbprint cookies in an airtight container at room temperature for up to 1 week (though I’d be surprised if they last that long!).
Freezing: Freeze baked cookies in a freezer-safe container for 2 to 3 months. Separate layers of cookies with a sheet of parchment paper or wax paper to prevent the cookies from sticking together due to the jam. Thaw on the counter for a few hours before digging in.
Can I freeze unbaked cookies?
Yes! Roll and shape the thumbprints, but do not fill the cookie dough yet. Flash freeze the prepared dough on a lined baking sheet until solid, then transfer to a freezer-safe container for up to 3 months.
To bake from frozen, simply arrange the frozen thumbprints on the baking sheets, fill with jam, and bake. Increase the bake time by 2 to 3 minutes to account for the frozen cookie dough.
More Cookie Recipes To Try
Try one of these delightful classic cookies next!
Spritz cookies are so festive and fun! Not to mention soft, buttery, and simple. Use a cookie press to create intricate shapes like wreaths and teddy bears. Perfect for your holiday cookie platter!
My sugar cookies have tender middles and slightly crisp edges, and are sturdy enough to decorate with royal icing or buttercream.
Green Grinch cookies are so easy to make from scratch. They’re tender, cakey, and irresistible! My sons love them, especially while we’re watching The Grinch!
Rainbow cookies are composed of colorful layers of almond cake with jam spread between, then coated in chocolate.
Whip up a batch of crisp chocolate biscotti to enjoy with a hot cup of coffee. Or give them as hostess gifts this holiday season!
If you’ve tried this thumbprint cookies recipe, then don’t forget to rate it and let me know how you got on in the comments below. I love hearing from you!
Nelda says
I absolutely love these! My family and friends go nuts for these. I have made them several different sizes and they always come on soft and not crumbly. Great recipe.
harpy says
Delicious, made 40 cookies
Helena says
When followed correctly this is an epic thumbprint cookie! I made sure to keep my jelly extremely firm and cold before putting it in the cookie. My husband had the epic idea to use the back and of a pestle handle, from a mortar and pestle set I had, to make the depressions into the cookies. After turning them into balls I let them warm up a bit before actually making the indentations and very little cracking if any happened which was very easy to fix. It’s no joke to not leave them in any longer (until you see a peek of brown at the bottom), as they really do finish on the cookie tray! Love your website, every recipe I’ve tried has been great!