
This post may contain affiliate links. Please read our disclosure policy.
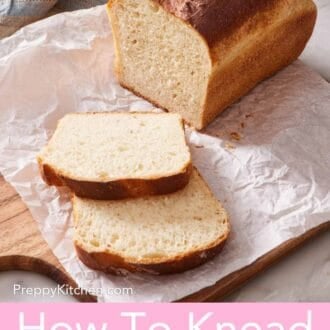

Learn How To Knead Dough by hand or in a stand mixer! In this simple tutorial post, I answer all your questions about kneading dough so your bread turns out perfect every time.
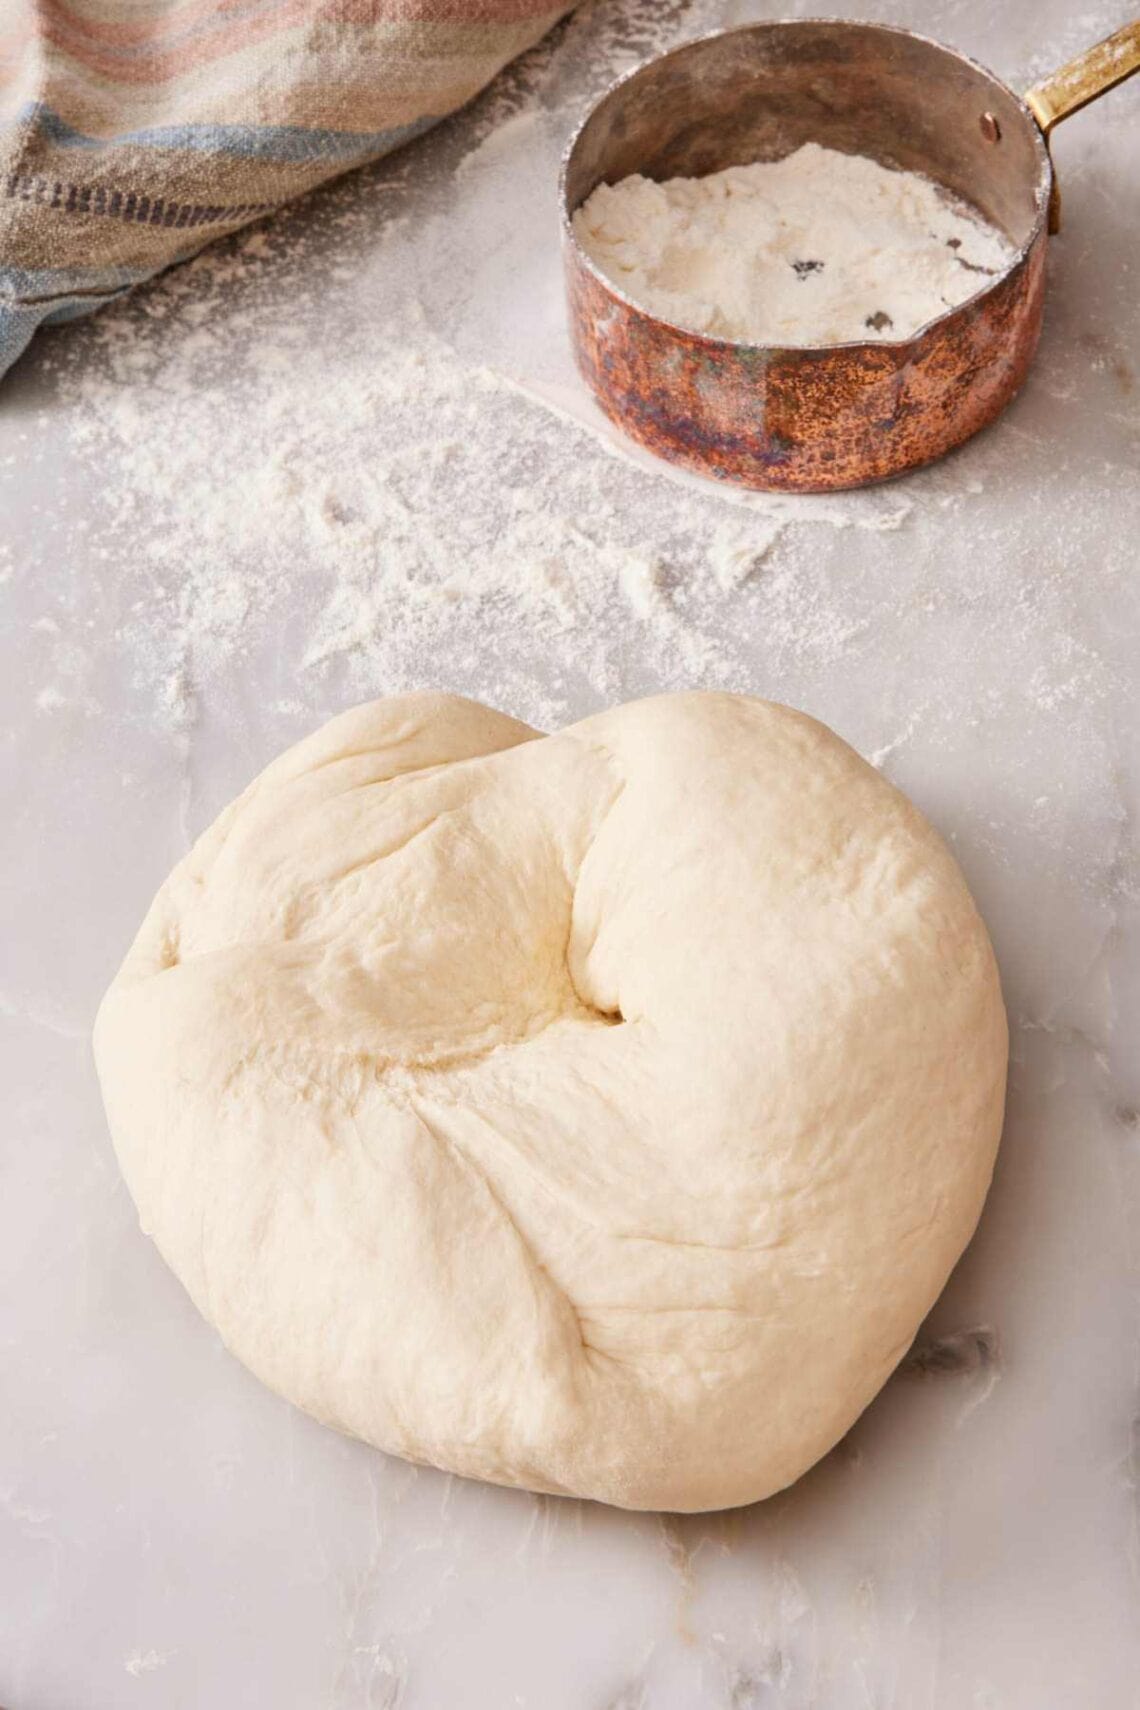
If you want to learn how to knead dough like a pro, this easy guide is for you! Whether you want to knead dough by hand or in a stand mixer, I have plenty of information to help you do both with professional results. I share visual cues to look for while kneading the dough, which doughs are better suited to a stand mixer rather than hand-kneading, and much more! You’ll be able to confidently knead all types of dough, from buns to loaves to pizza crust, with this tutorial.
“The step by step images were SO helpful! I took up bread baking recently but couldn’t get the hand kneading technique quite right until now. Thank you for sharing images and all of your pro-tips in this post!”
Jim
Why Do You Knead Dough?
Kneading quickly develops the gluten in flour. When the flour proteins (gliadin and glutenin) mix with water they form gluten, and continued kneading works those proteins into a strong, mesh-like network throughout the dough. This network traps the bubbles produced by yeast, helping the dough rise and giving you the right texture when baked.
A strong gluten network is important when you start proofing bread and other yeasted doughs, as it contributes to chewiness and airiness. Without kneading, many breads or baked goods that use yeast would turn out dense or flat.
How Is No-Knead Bread Different?
In no-knead bread, the gluten will develop naturally with time as the proteins react with the moisture in the dough. However, this typically means the dough needs a lot of time to rest, or it often uses a simpler technique of folding the dough over itself several times, like with sourdough bread. For a no-knead bread like my artisan bread, the dough benefits from overnight chilling, allowing the gluten to develop. It’s an easy way to make a delicious loaf of crusty bread if you have the time to wait.
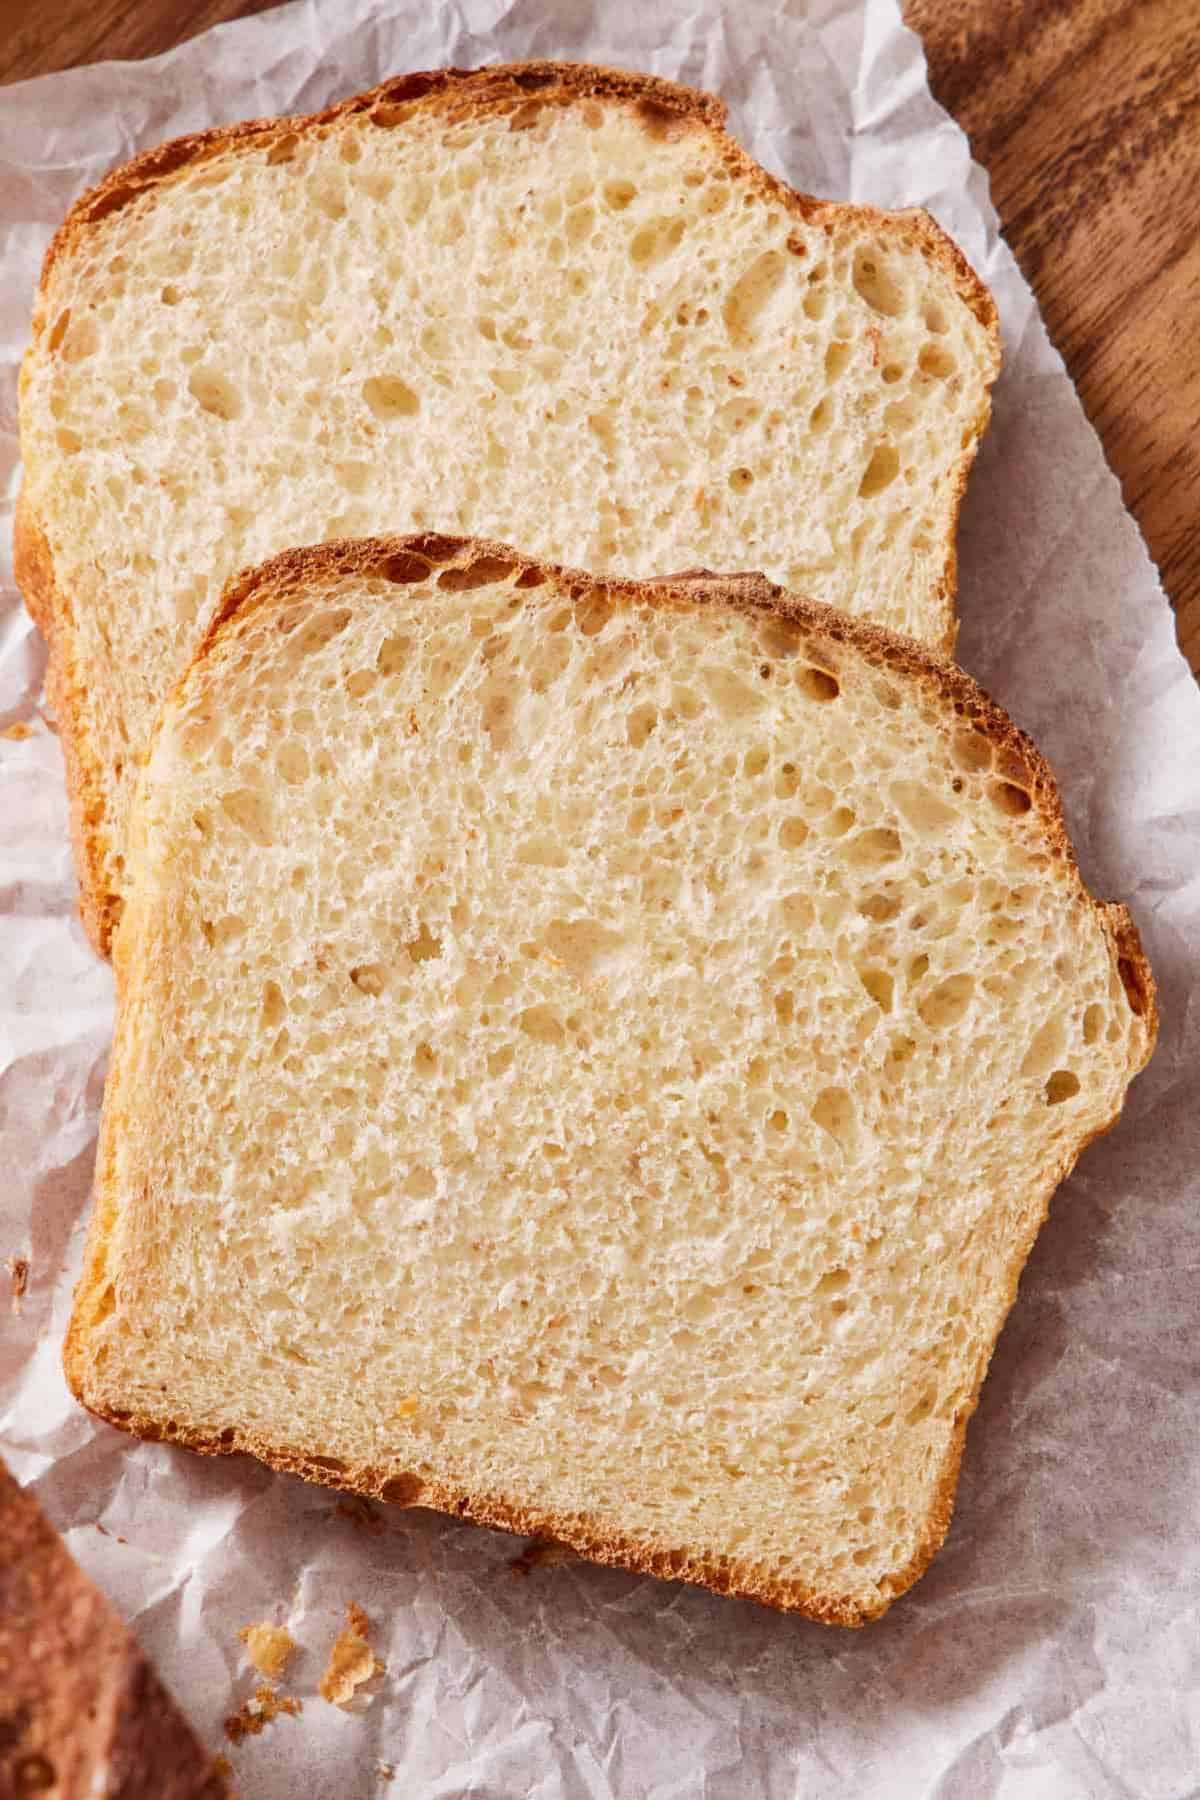
No-knead breads also bake with a more open crumb structure because larger gas bubbles from the yeast are trapped in the dough rather than dispersed during kneading. That technique is perfect for intentionally airy breads like focaccia, which gets its signature texture and appearance from very large bubbles trapped in the dough.
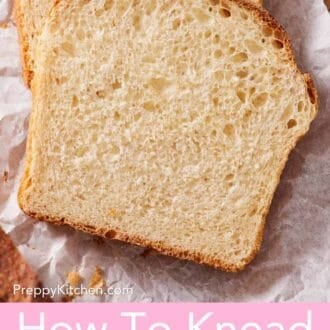
Kneading will strengthen the gluten structure faster and redistribute gas bubbles, resulting in a tighter crumb, so it’s the ideal technique for things like sandwich bread slices. I don’t recommend skipping the kneading process in recipes written that way, unless the recipe provides a specific alternative no-knead method.
Equipment
Here are the basic tools to help you knead dough:
- A digital scale. Volume measurements for flour can be off by 20%, dramatically altering the hydration of the dough, making it feel completely different and changing the texture once baked. A scale is vital for accurate measurements.
- A clean work surface. About 2×2 feet of counter space is ideal for hand kneading dough.
- A dough whisk or wooden spoon. This is for initially mixing dough by hand. A dough whisk is flat and specifically designed to mix thick or stiff dough. A wooden spoon is excellent if you don’t have a dough whisk.
- A bench scraper. The single most useful tool for hand kneading. It lifts sticky dough off the counter (reducing the temptation to add more flour), helps get dough out of your stand mixer bowl, and is essential for dividing dough cleaning to shape things like hamburger buns or dinner rolls.
- A stand mixer with a dough hook. Optional in general but transformative for enriched doughs. My KitchenAid Artisan mixer handles up to about 6 cups (720g) of flour comfortably, without putting too much strain on the motor. (This can, of course, vary by recipe and how stiff or loose the dough is.)
How To Knead Dough By Hand
Many doughs that are stiffer or less hydrated can be kneaded by hand. It’s a great way to make bread without any special appliances, and it can be quite therapeutic! There’s a meditative rhythm to hand-kneading that you don’t get from machine-mixed dough. Here’s a step-by-step guide with images to show you the best technique for kneading dough by hand.
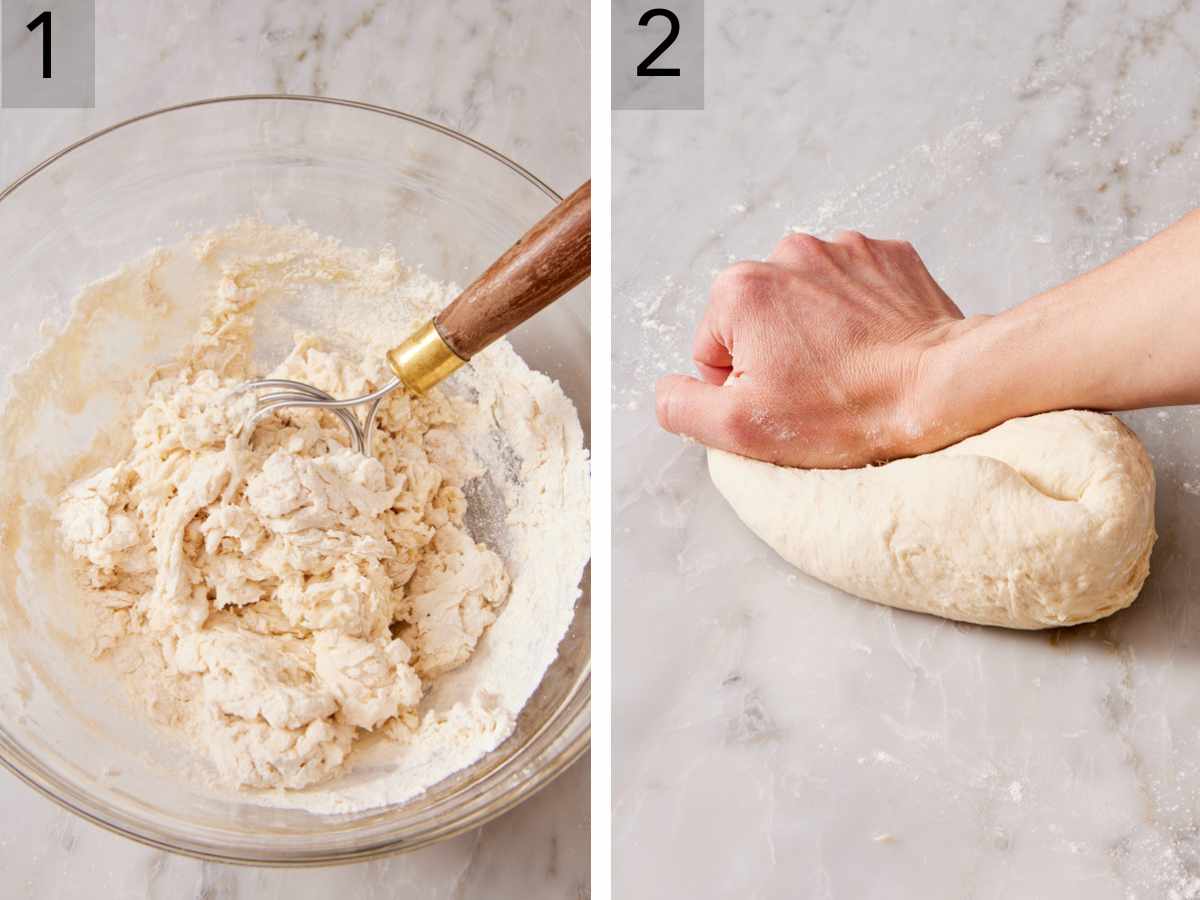
1. Mix the dough in a bowl with a spoon or dough whisk. (The recipe you’re following will tell you exactly what to do.)For this example, I made my white bread recipe.
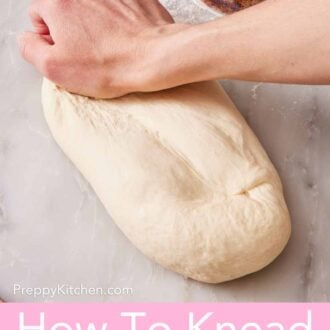
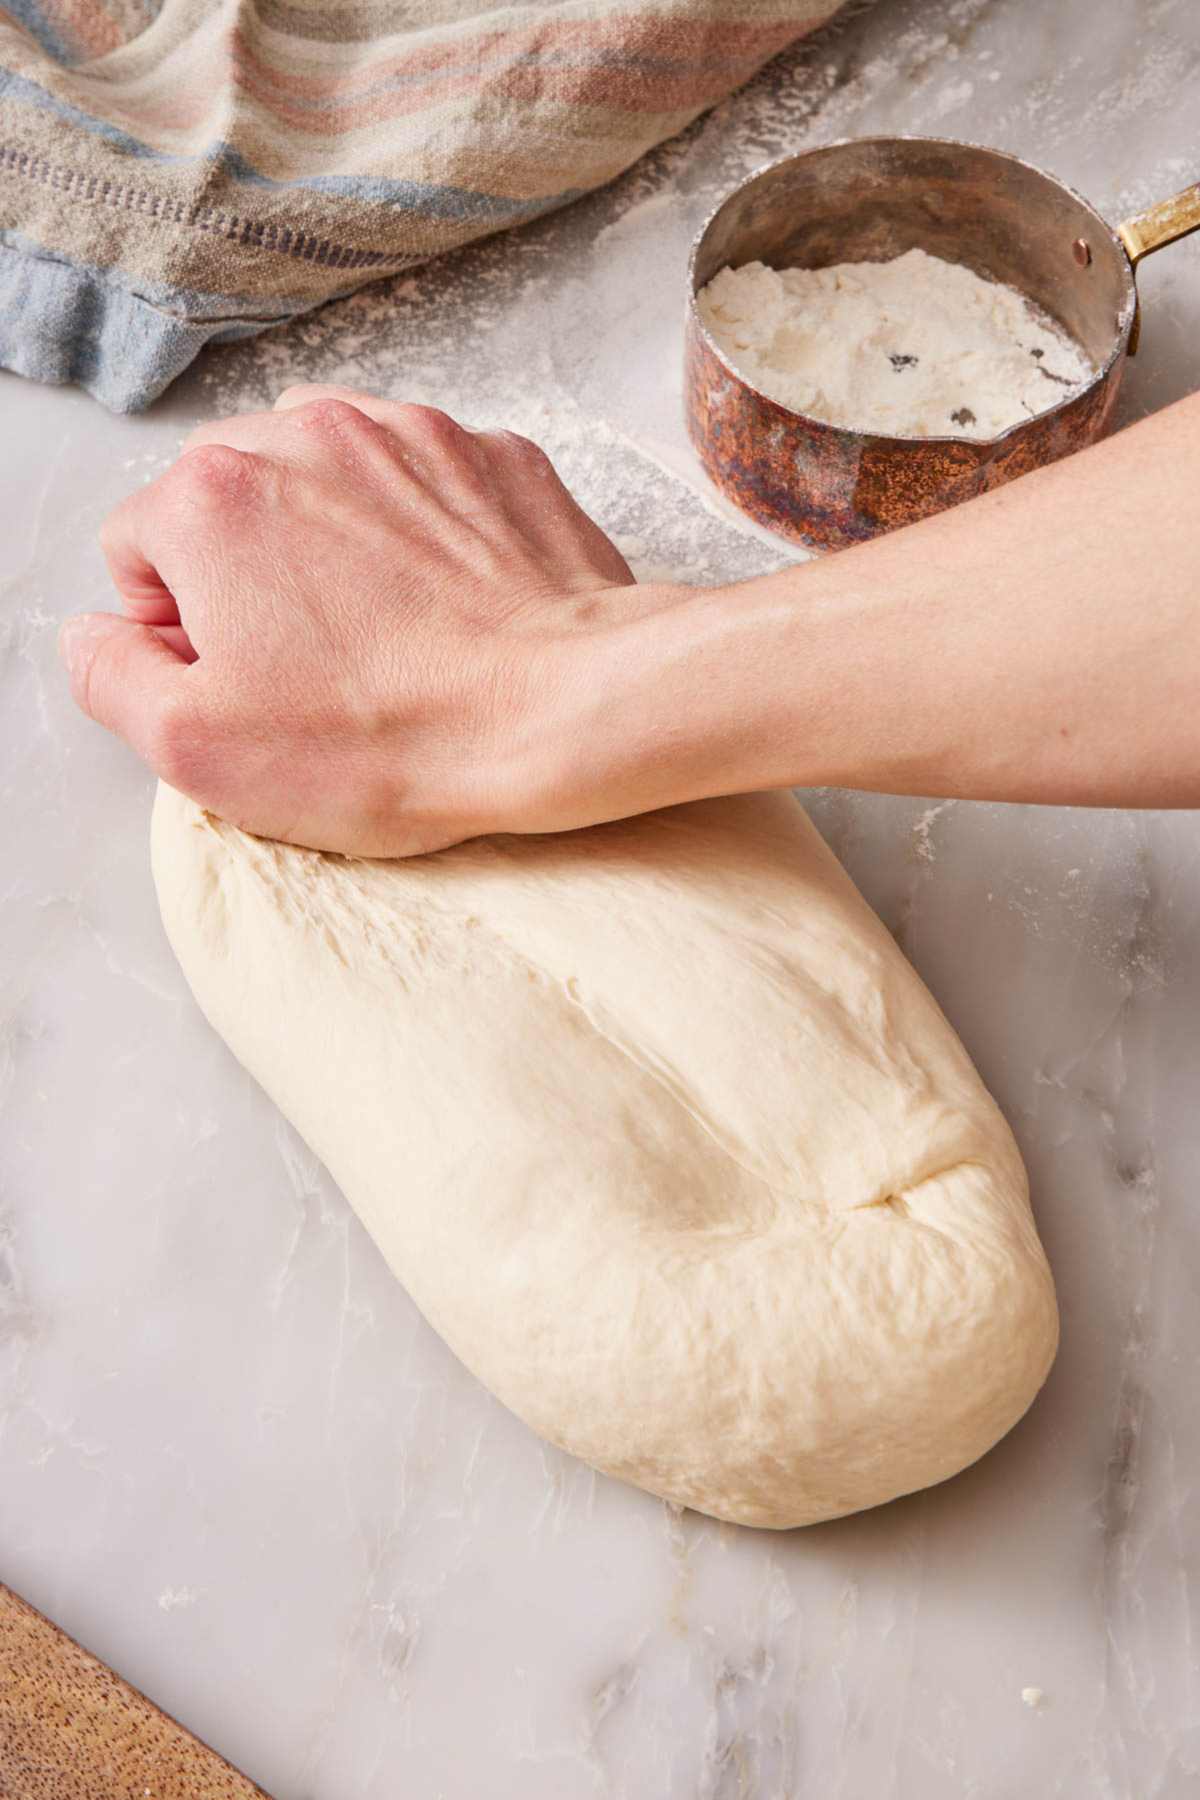
2. Push. Lightly flour your work surface and your hands to prevent sticking, and turn the dough out onto the surface. Place your palm in the center of the dough and push it away from you. Press hard enough to stretch the dough, but not break it. You will need more or less force depending on how stiff the dough is.
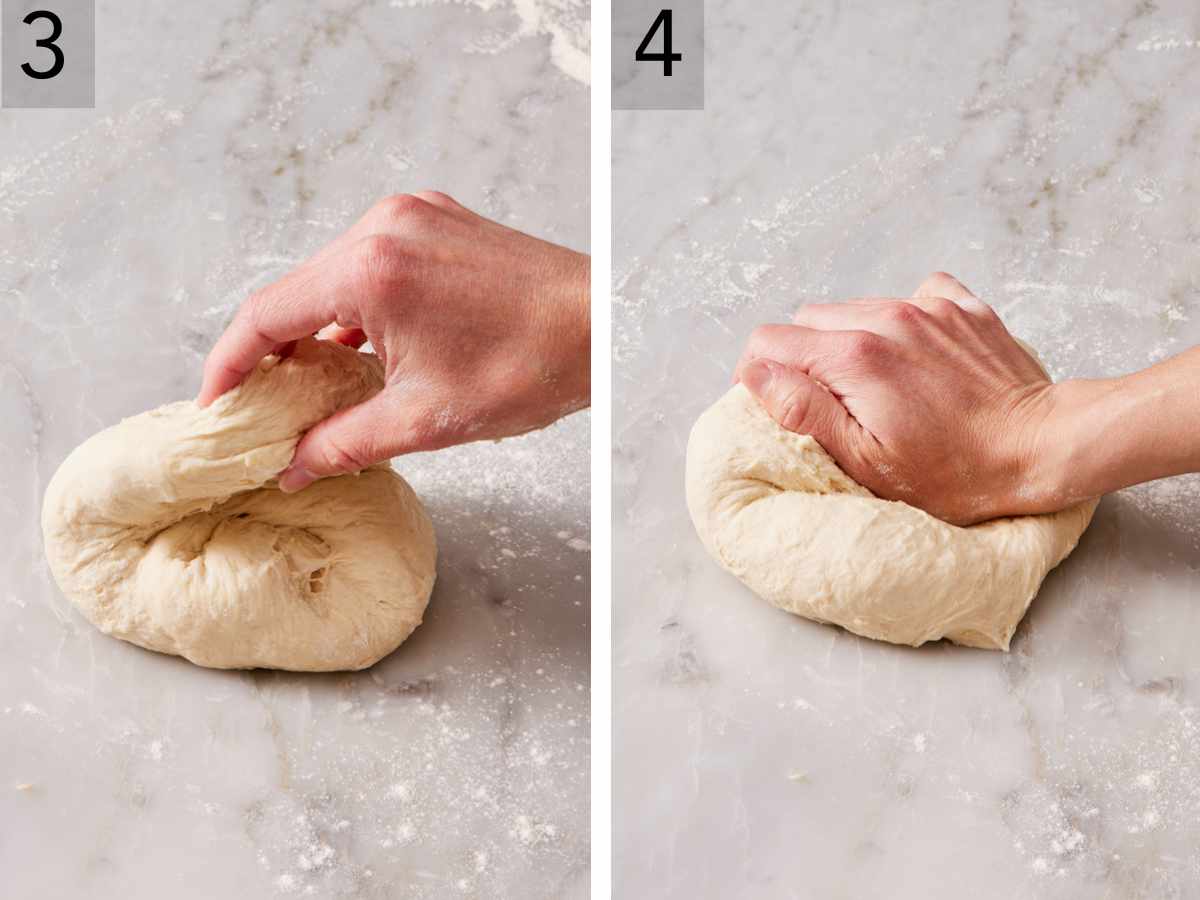
3. Fold and turn. Grab the side of the dough you just pushed out and fold it back on itself, towards you, and rotate the ball slightly. You can move clockwise or counterclockwise, as long as you move in the same direction every time.
4. Repeat. Press the dough with your palm again, pushing the dough away from you. Then fold it back and rotate it again. Continue repeating this pattern: push, fold, rotate.
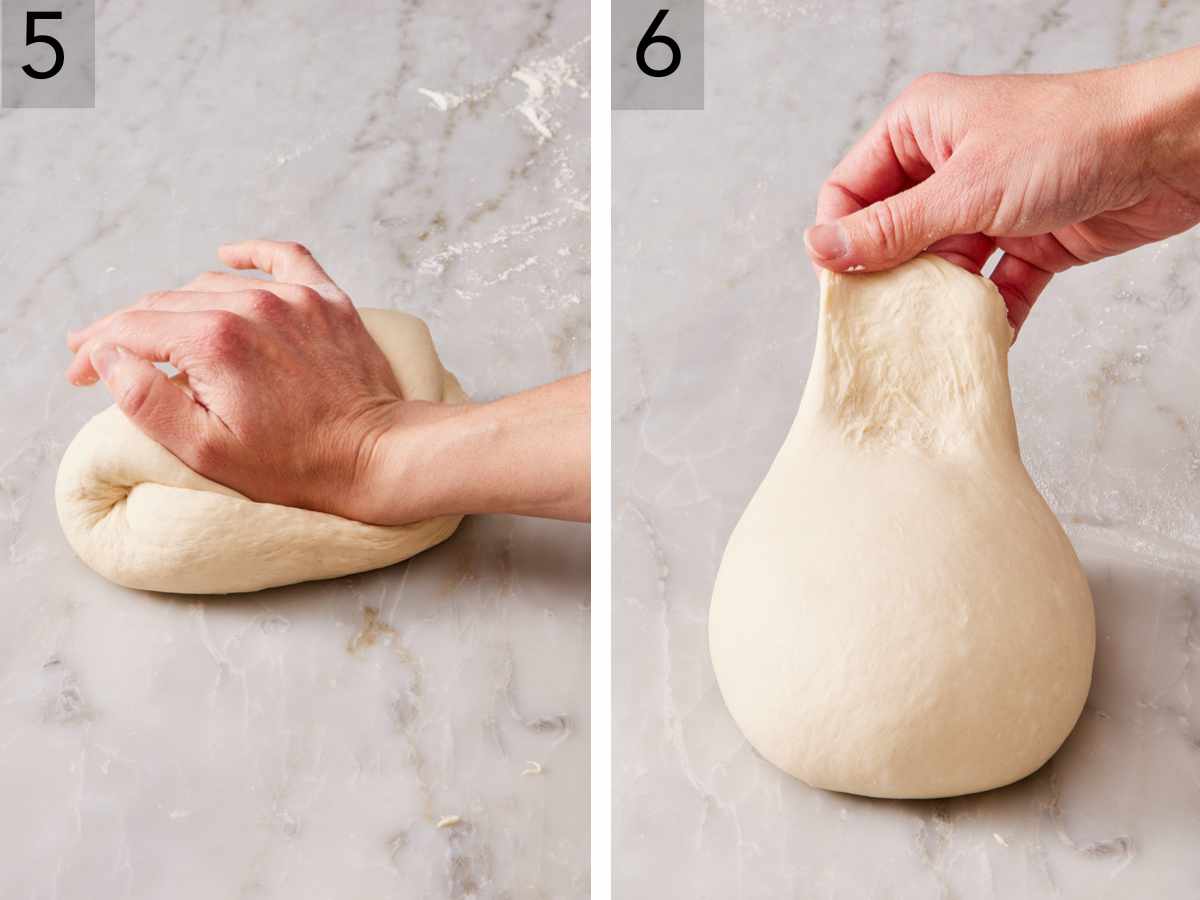
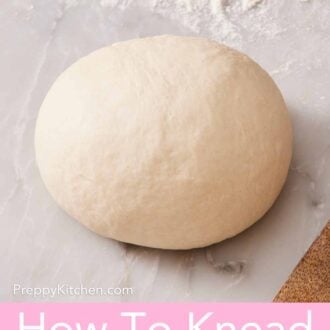
5. You’ll notice that the dough will become smoother and bouncier as you continue kneading it. Once you learn the motion, you can get into a rhythm and work the dough somewhat quickly.
6. After about 5 to 10 minutes of kneading, the dough will turn smooth and elastic. This is an estimate; the exact time will depend on the dough itself and how quickly you’re able to knead it. In my testing on white bread dough, I was ready to perform the windowpane test in around 7 minutes.
The single biggest mistake I see beginners make is adding flour every time the dough feels tacky. A slightly tacky dough becomes great bread. Dough you’ve buried in flour becomes a dense brick. Try to use your bench scraper to lift the dough off the counter instead of reaching for the flour bag if it sticks, and only add a light dusting of flour to keep it from sticking and clumping on your hands as needed.
Can I knead any dough by hand?
It depends on the texture and consistency of the actual dough you’re working with. Most doughs that you can make in a mixer can be kneaded by hand, like cinnamon rolls. Stiffer doughs like my bagels or pizza dough are easily done by hand or mixer.
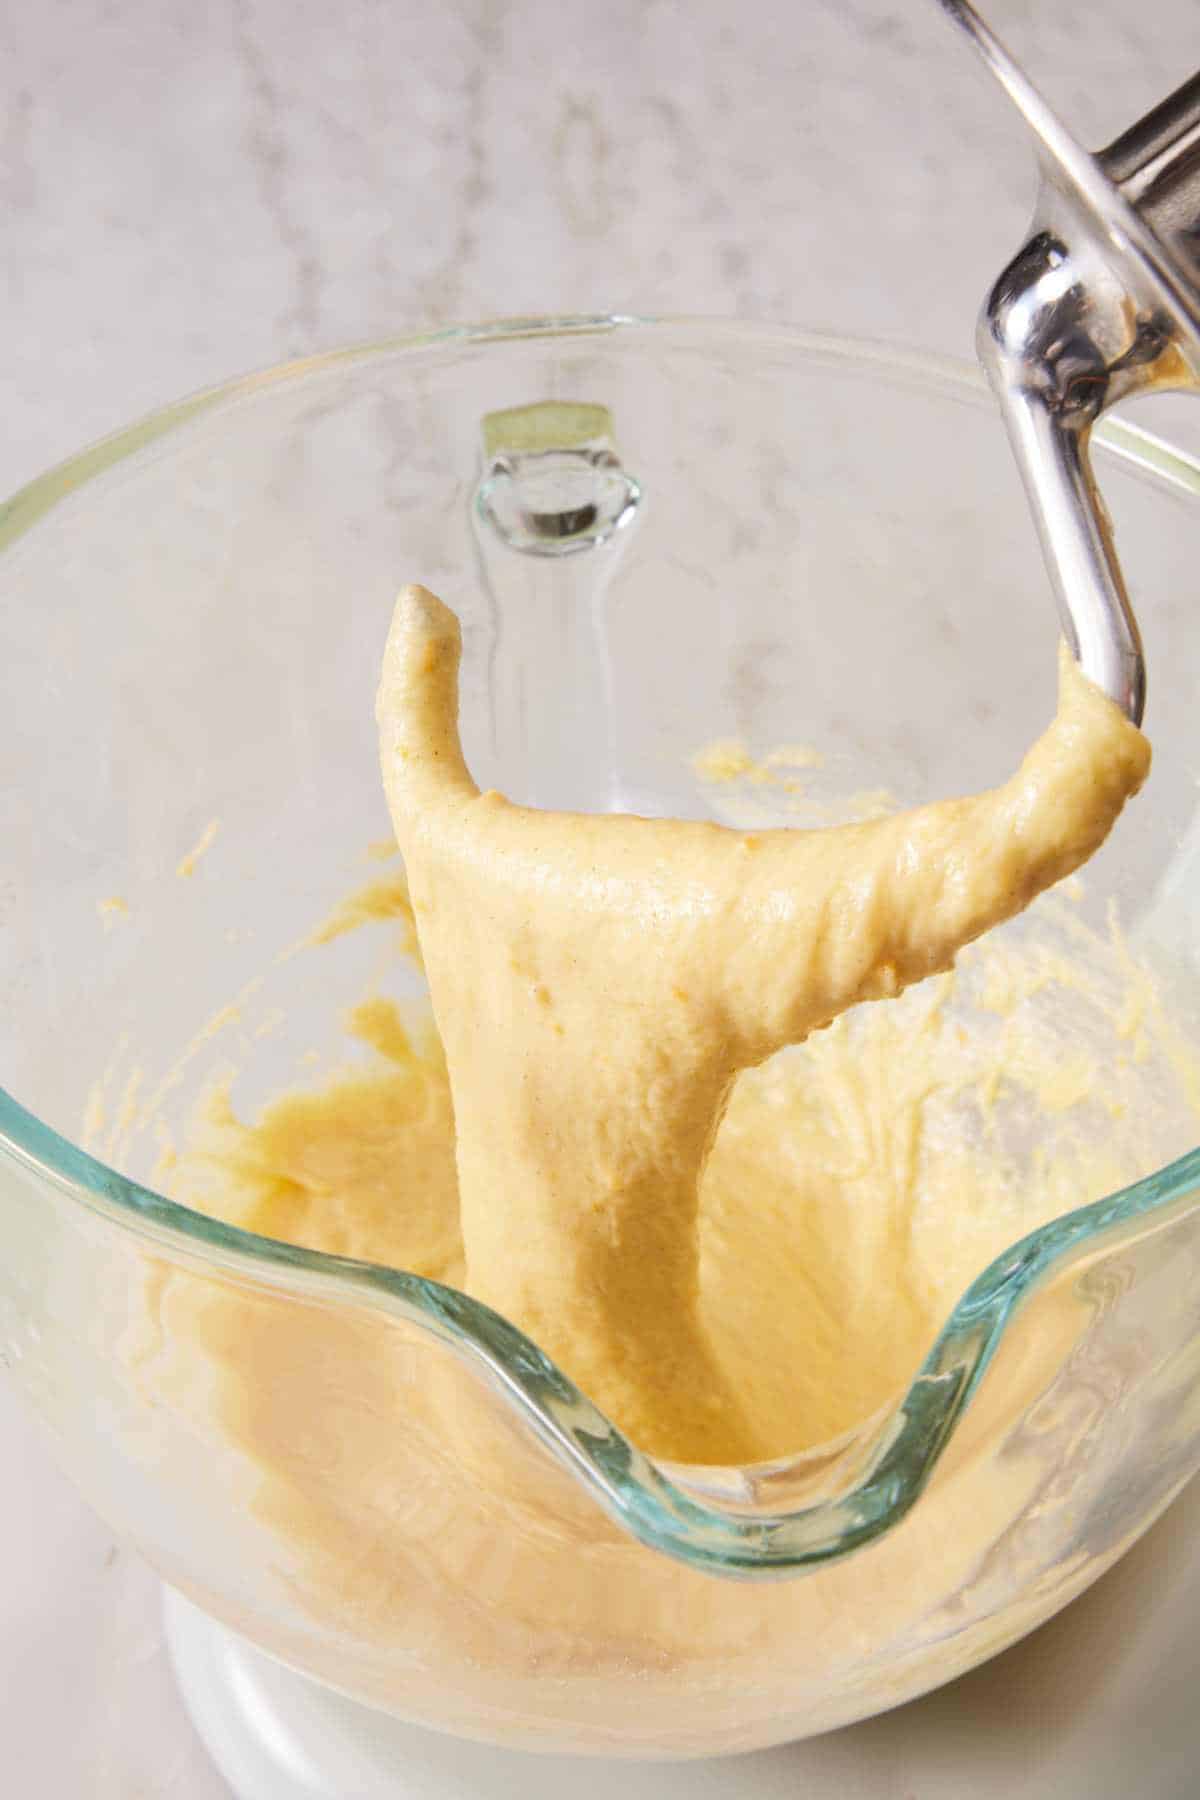
However, some doughs are too soft and sticky for hand-kneading. Doughs with higher hydration, like English muffins, or richness from eggs and butter, like brioche bread (pictured below), make the dough slack, and they really need the mechanical action of a dough hook to come together. Most recipes will tell you which method to use.
Pro Tips For Kneading Dough By Hand
Lightly flour your surface. This prevents the dough from sticking to your counter or hands, and makes it easier to work with. You want just enough that the dough moves freely, but not so much that it builds up a coating or dries the dough out.
Add flour only as needed. You need some to prevent sticking, but you don’t want to add too much to the dough that you change the hydration and texture. A heavy hand is a common reason why many beginning bread makers end up with loaves that turn out denser or drier than expected.
How To Knead Dough With A Stand Mixer
A stand mixer makes the work of kneading dough so much easier and hands-free, especially for enriched doughs and bigger batches.
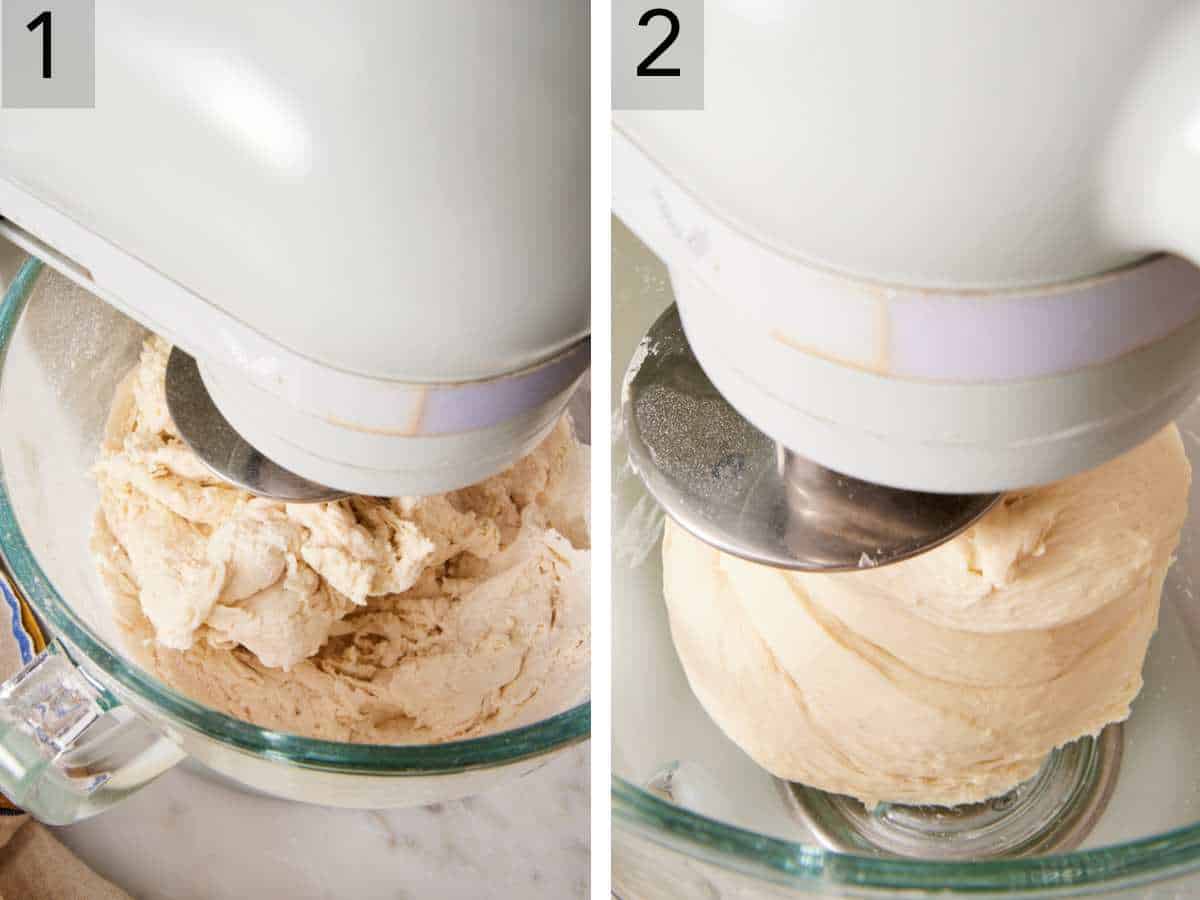
1. Start off the dough in the mixer as directed in the recipe. I usually start mixing on “Stir” or the lowest setting to combine all the ingredients. Be sure to lock down the mixer head so it doesn’t pop up and down.
2. Continue mixing the dough with the dough hook on low or medium-low speed (not above 2) until it is smooth and elastic. Most doughs will start to ball up around the dough hook (as you can see in the image above and in my rye bread recipe) or slap the side of the bowl when they’re close to being done.
Finish by hand if you can. Even 30 seconds at the end lets you feel the dough in a more tactile way. The mixer can fool you and overknead it, but feeling the elasticity and texture of the dough can be a good indicator on when it is actually done.
Pro Tips For Kneading With A Stand Mixer
Kneading times are an estimate. The power and speed of your mixer can determine how long it takes your dough to mix. As you get more experienced with making dough, you’ll learn what kneaded dough looks and feels like and will be able to go from there.
Don’t knead the dough at a high speed. Dough is thick and makes your mixer work hard. Unless your mixer states otherwise, you shouldn’t run it above medium-low (setting 2) or you risk damaging the gears. I use a Kitchenaid Artisan stand mixer and have tried mixing doughs on speed 4 and 6 (medium to medium-high). For softer doughs, it worked, but it still risked overworking the mixer’s gears and motor and the head felt very warm by the end. For stiffer doughs, the mixer became unsteady and wobbled or shuffled across the counter. All of my recipes’ kneading times are done at low or medium-low speeds for these reasons. Yes, it takes a little bit longer than it would if you were mixing at higher speeds, but it’s worth it!
Some doughs may stick to the bowl, even when they are done. Softer doughs like milk bread won’t clean the bowl and will still stick to the bottom and some on the sides. The recipe you’re following should tell you this, so you know not to wait for it to become unstuck.
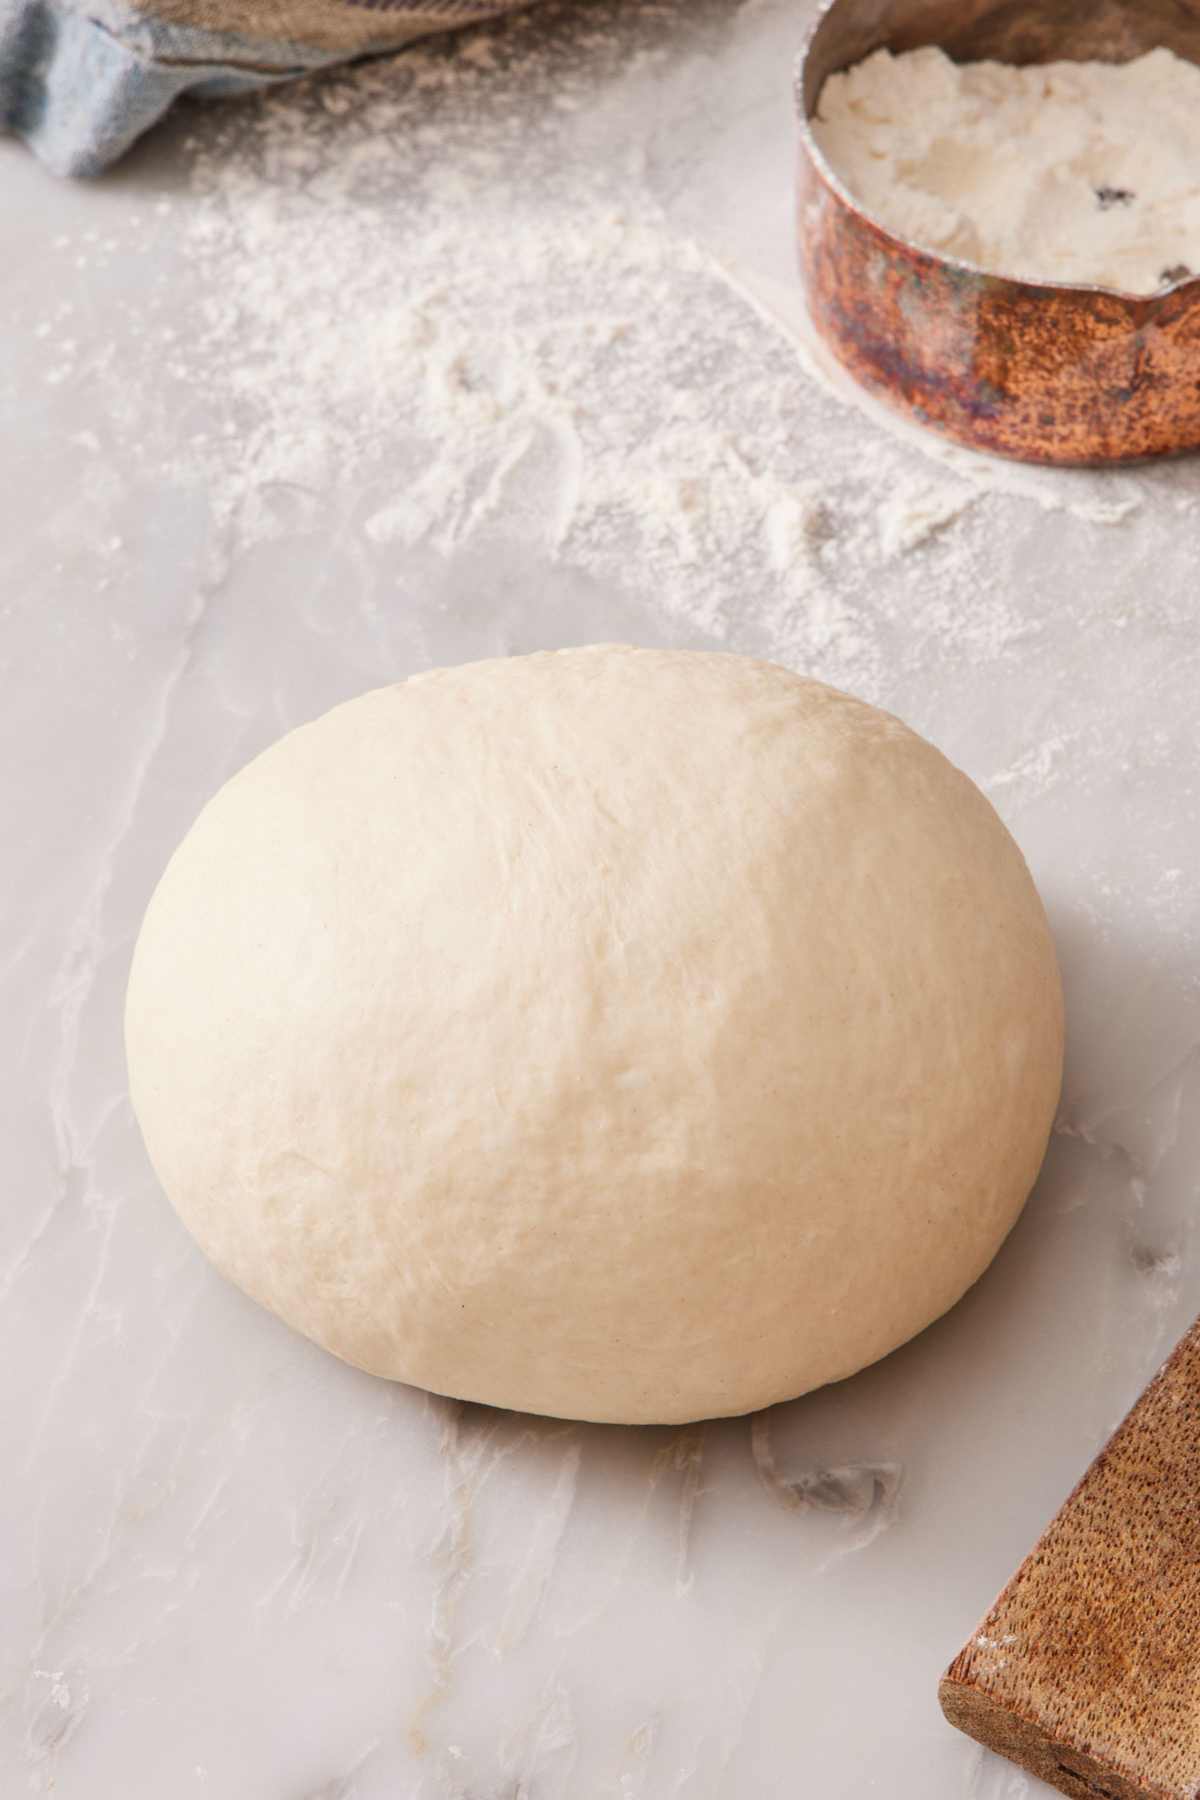
How Long Should You Knead?
The dough should be stretchy or elastic, which is how you can tell if the gluten network has developed enough. Time is a good guide, but the windowpane test (below) can tell you what it actually feels like. I have tested hundreds of bread recipes over the years, and put together a good general list of kneading times to use as a starting point:
| Dough Type | By Hand | Stand Mixer (low speed) |
| Lean (white bread, baguette) | 8-10 min | 5-8 min |
| Enriched (brioche, challah) | Not recommended | 8-12 min |
| Pizza dough | 7-10 min | 5-7 min |
| Whole wheat | 10-12 min | 7-9 min |
| No-knead (artisan bread) | 0 min | 0 min |
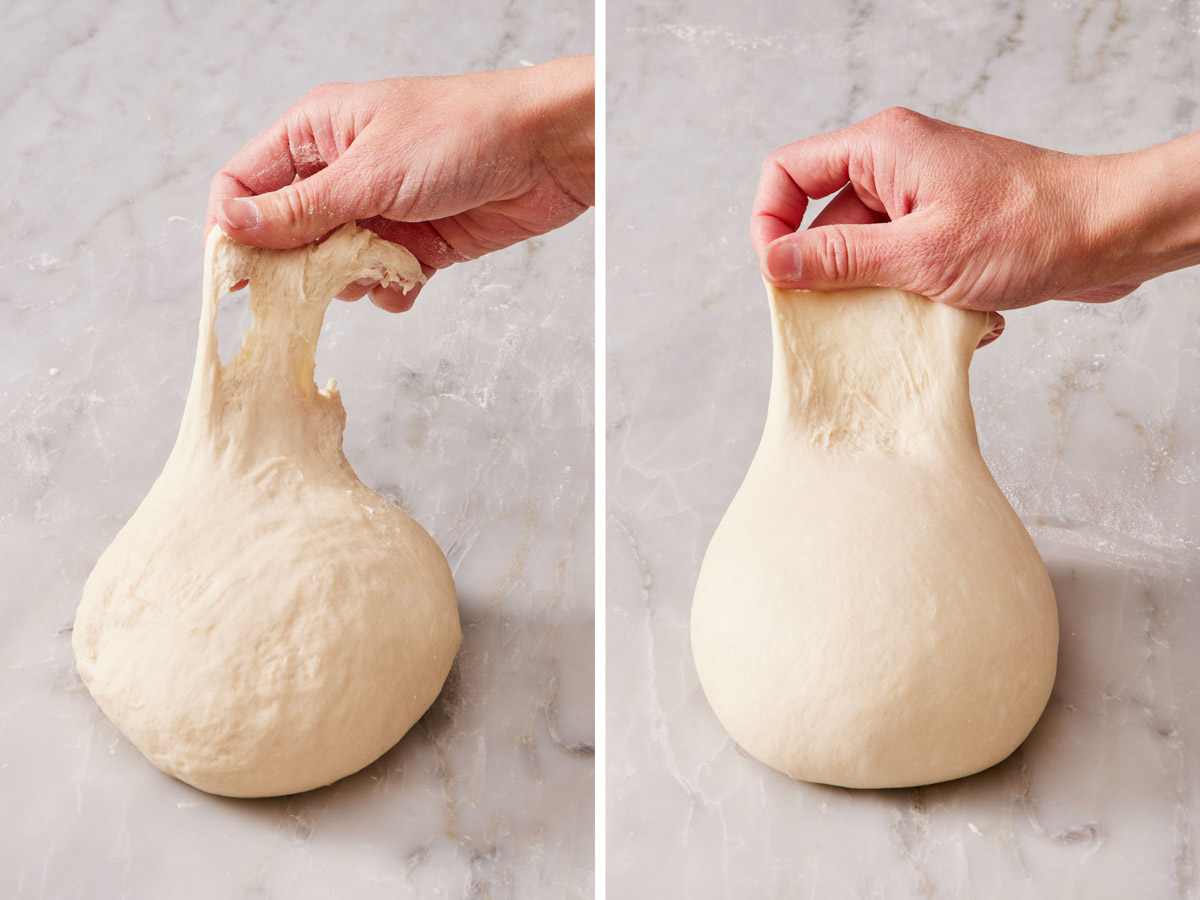
You can do a quick test by stretching a piece of the dough away from the ball. If it stretches but tears, the gluten needs more time to develop. Continue kneading for a minute or so and test it again. If the piece stretches away easily without tearing, and the dough feels smooth, bouncy, and elastic, do the window pane test.
Keep in mind that the longer a dough kneads, the warmer it can get, either from friction in the mixer or from the warmth of your hands. This will cause the yeast to grow a bit faster, so your bread proofs more quickly. (Go more in depth on temperature affecting rise times in my Academy lesson on Proofing Bread.) If you want to check it, insert an instant-read thermometer into your kneaded dough. Ideally, it should be within a few degrees of 75°F. If it’s much warmer than that, check your dough 15 to 20 minutes earlier than the rise time indicates, or place it in a cooler spot in your kitchen to rise.
The Windowpane Test
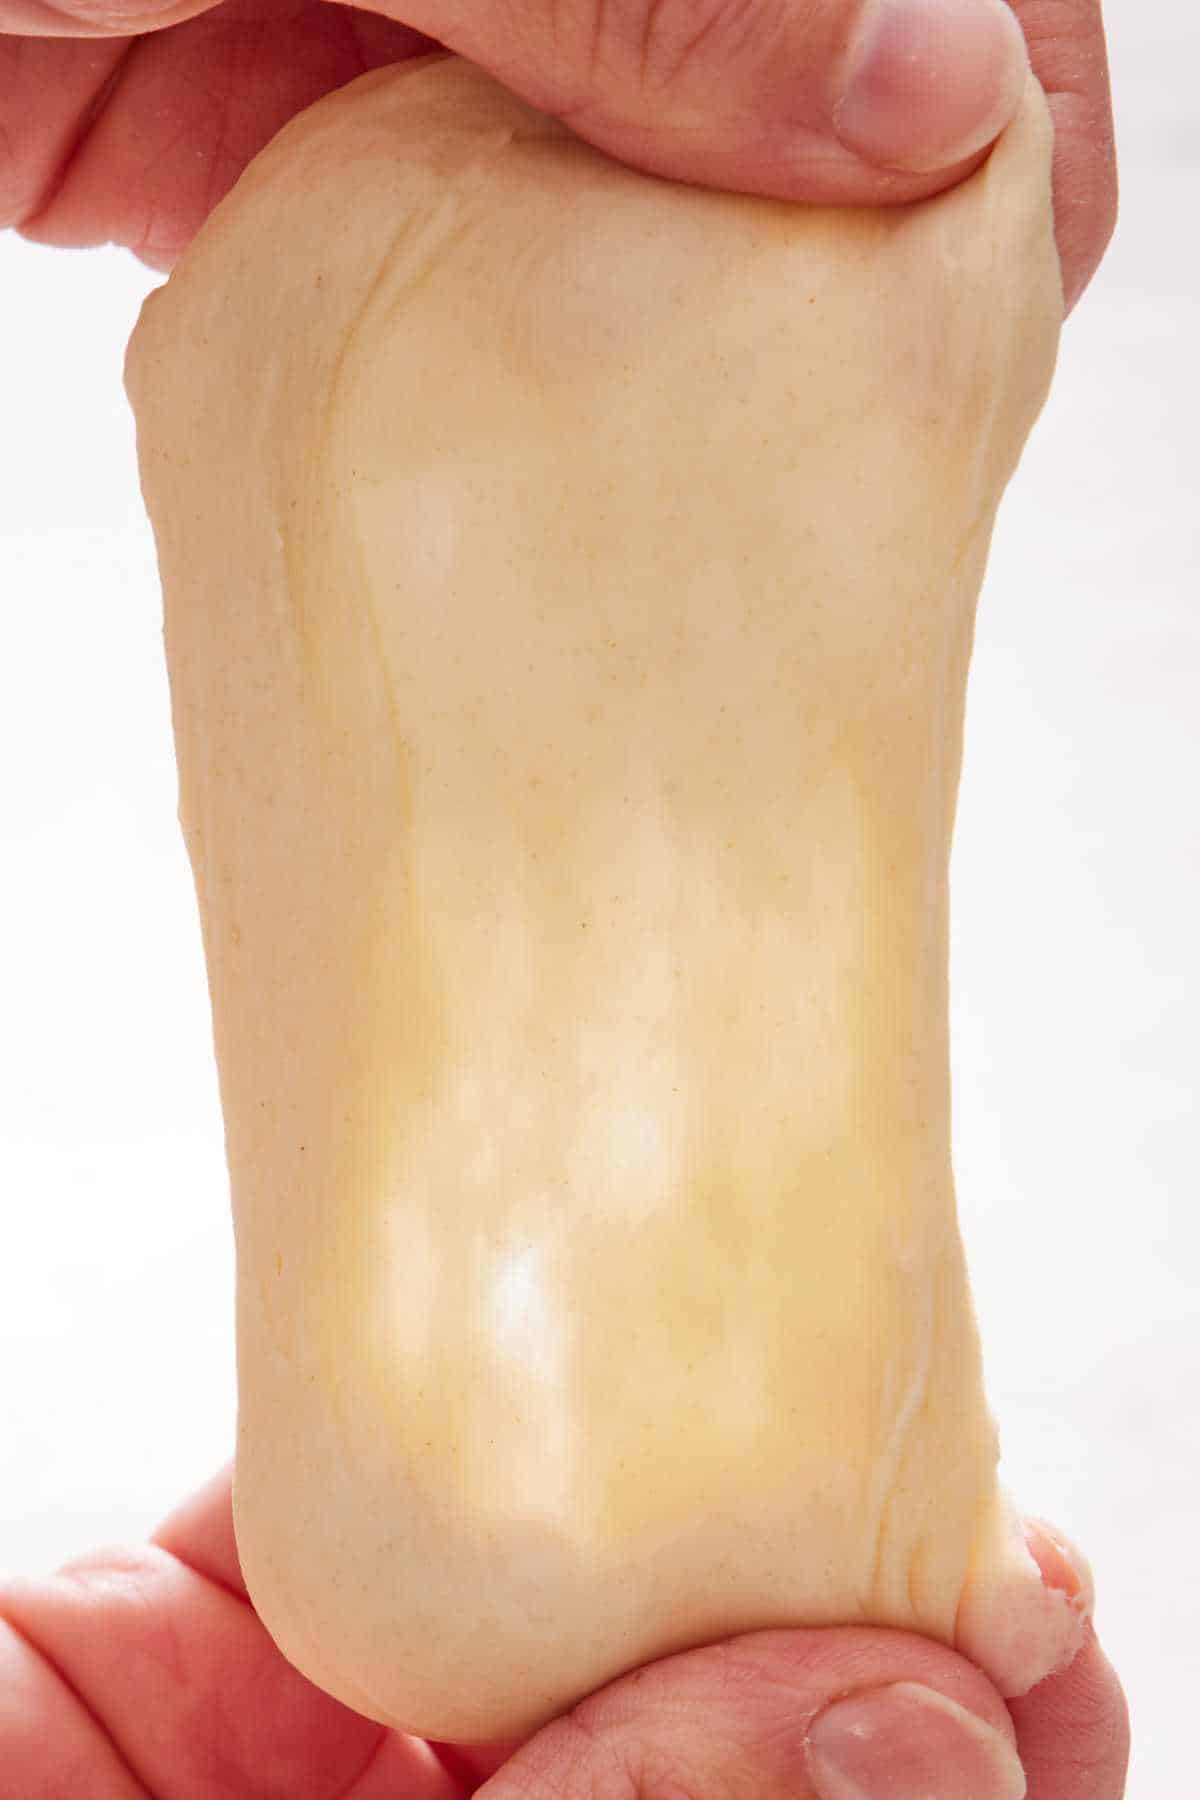
The most reliable test for fully-developed gluten! Once you’ve done it a few times, you’ll know exactly what your dough should look like and won’t need a timer. I use it on every dough except very slack ones, where high hydration or enrichment makes the test misleading.
Pinch off a piece of dough about the size of a golf ball and stretch it gently between your thumbs and forefingers.
- Tears immediately: under-kneaded. Keep going for 2 to 3 more minutes.
- Stretches into a thick, opaque sheet: almost there. 1 to 2 more minutes.
- Stretches thin enough to see light through it without tearing: ready. That’s the windowpane!
Over-Kneaded vs. Under-Kneaded Dough
Over-kneading is almost exclusively a stand mixer problem. By hand, your arms typically get tired before the gluten overdevelops. (I’ve personally never over-kneaded dough by hand.)
| Sign | Under-kneaded | Over-kneaded |
| Texture | Lumpy, sticky, shaggy | Dense, stiff, difficult to knead by hand |
| Stretch test | Stretches out but tears easily | Springy and feels resistant to stretching. Tears apart when stretched. |
| Shaping | Doesn’t hold its shape; too loose and floppy | Resists shaping; too springy and dense and to flatten out |
| Fix? | Keep kneading | Let it rise for longer—gluten relaxes and more bubbles form a lighter texture; you may need to start over |
Why over-kneading happens: The gluten network becomes so strong (tight) that it has no stretch or give. Once baked, the bread will be dense and crumbly. Worst case, if you don’t like the resulting loaf, turn it into breadcrumbs!
My Dough Is Too Sticky: What Do I Do?
The answer depends on which type of “sticky” you have:
- Sticking to your hands but the dough feels strong: Normal. Wash and dry your hands before adding more flour. Sometimes dough can build up on your hands, making the dough stick to them.
- Wet and slack, never coming together: Hydration is too high, which is usually a measuring error. Add flour 1 tablespoon at a time. Stop the moment it pulls together.
The 30-second test: Scrape the dough off your hands, cover the dough, and walk away for 5 minutes. If it tightened up more on its own, it was just under-developed or needed time for the flour to hydrate. If it is still slack, it’s a hydration problem—add a bit more flour.
Frequently Asked Questions
That’s almost always a hydration problem: either too little water or the wrong flour. Bread flour has more protein than all-purpose and will form more gluten (making a stronger dough). Weigh your ingredients with a digital scale. Also, remember that some doughs are looser than others and not all will form a tight ball.
No-knead recipes use time instead of mechanical action. Gluten develops on its own during a 12-18 hour rise. That’s great for rustic bread or fluffy flat breads. For sandwich loaves, brioche, and most rolls, you still need to knead the dough.
The dough should feel smooth and supple, spring back when poked (the indent rebounds, not holds), and be tacky but not actively sticking to a clean, dry hand.
Two potential problems: (1) You may not have proofed the bread for long enough. After kneading, the yeast needs time to grow and produce carbon dioxide bubbles so the bread can rise and bake with a fluffier texture. (2) You may have overkneaded the dough. If you work it too much, you will make the gluten network so strong and tight that it is hard for the dough to expand during rising and baking.
Yes, briefly, in 30-60 seconds in pulses for some doughs. A food processor is too aggressive for most yeasted breads, but it works for pizza dough, since it is a lean dough intended to bake up flat and doesn’t need as firm a gluten structure to hold its shape. In other words, it’s more forgiving. I recommend looking for recipes specifically for a food processor for the best results, though. And always follow your manufacturer’s guidelines for kneading dough, like using a dough blade.
Put the bowl on top of the fridge or in the oven with just the light on. Don’t go above 110°F or you’ll start killing the yeast.
More Tutorials To Try
I have many more tutorials to make baking and bread-making a breeze!
- Academy: How To Proof Bread—the next step after kneading. Covers temperature, the poke test, and how to tell when dough is ready to bake.
- Academy: How To Activate Yeast—covers everything from making sure your yeast is fresh to activating it correctly.
- Academy: How To Make Sourdough Starter—the foundation for any wild-yeast bread. Once you make your first starter, you’ll be hooked.
- Academy: How To Measure Ingredients—takes the guesswork out of every recipe.
- Academy: How To Make Buttermilk—homemade in a few minutes with just 2 ingredients.
- Academy: How To Soften Butter—for any enriched dough where you forgot to set the butter out.
If you’ve tried this “how to knead dough” recipe, then don’t forget to rate it and let me know how you got on in the comments below. I love hearing from you!






