
This post may contain affiliate links. Please read our disclosure policy.
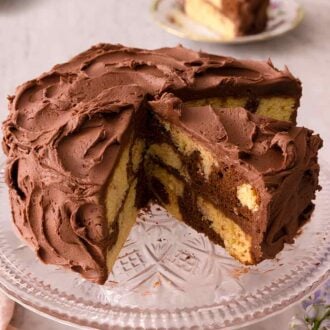
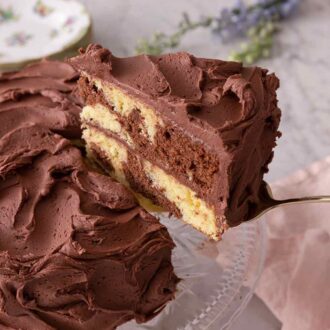
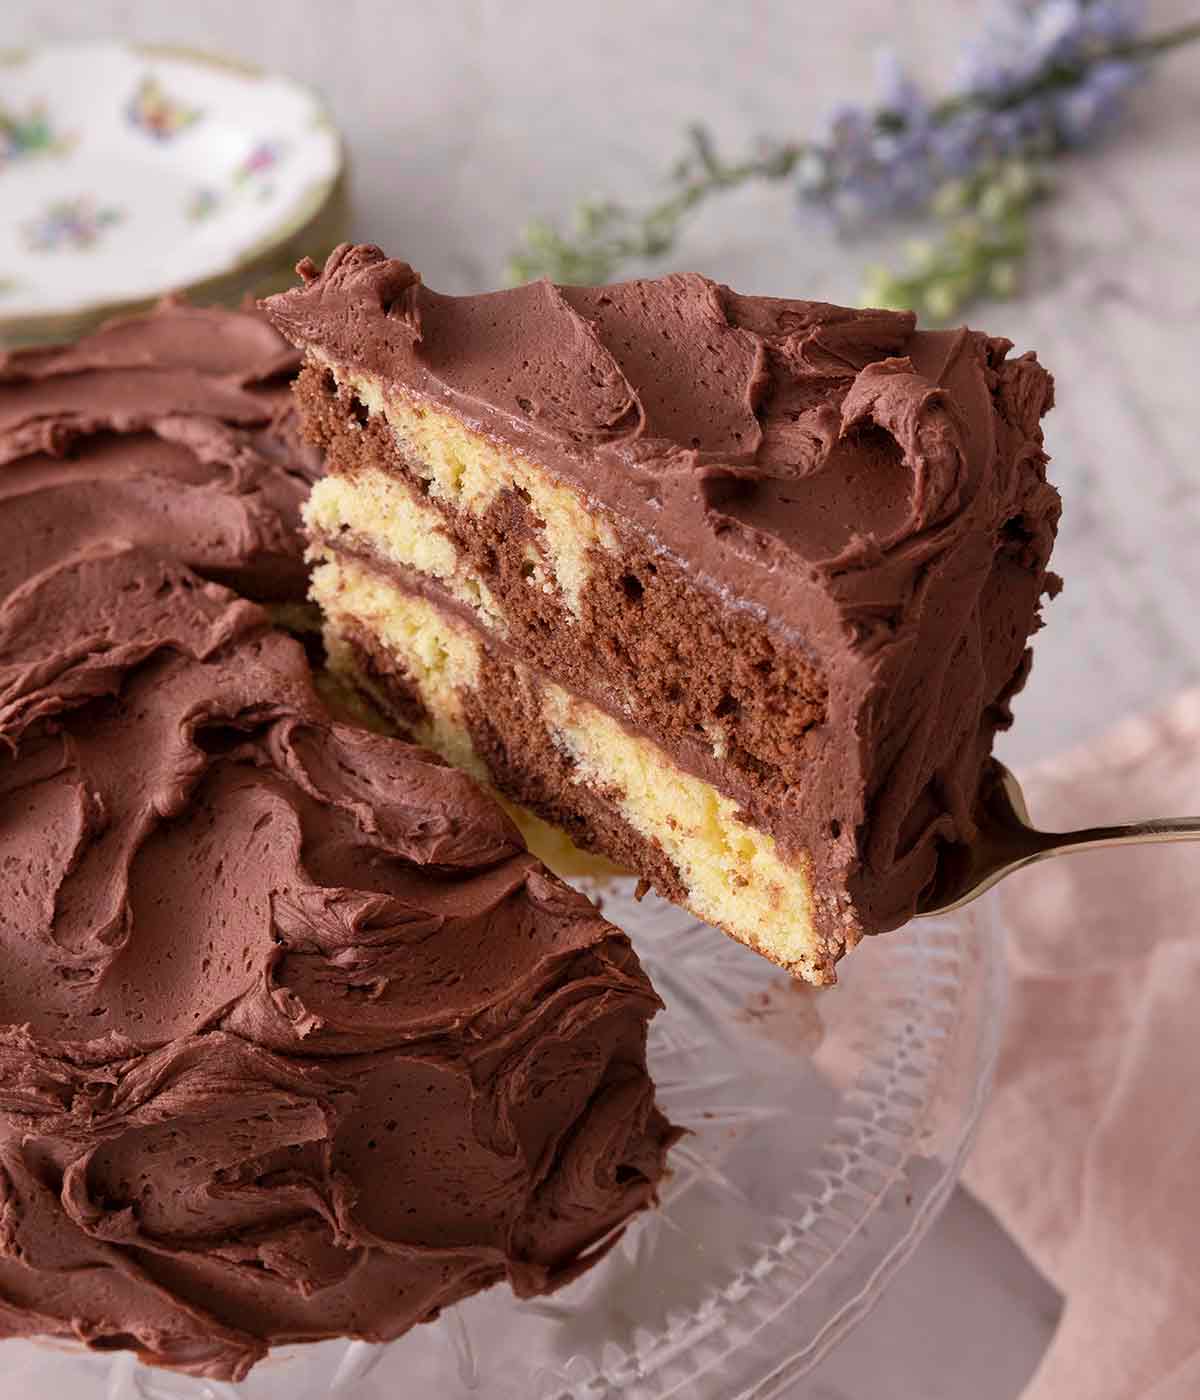
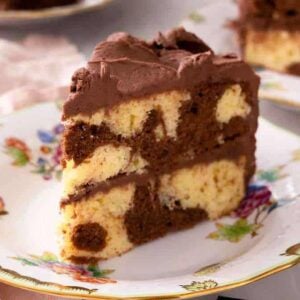
Moist and fluffy, this Marble Cake is so easy to make! This simple two-layered cake has a silky homemade chocolate buttercream sandwiched in-between and frosted all around. Skip the box mix the next time you’re craving cake and make this from scratch with only a few simple ingredients.

The best of both worlds, this marble cake has a vanilla batter swirled together with a chocolate batter, so you don’t have to choose! Marbled cake is perfect for any occasion, as you only need simple, everyday ingredients, and the steps are straightforward.
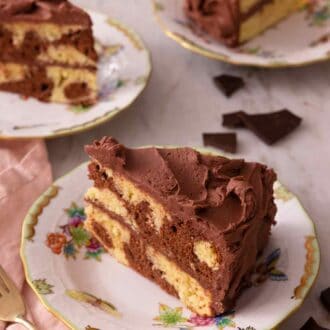
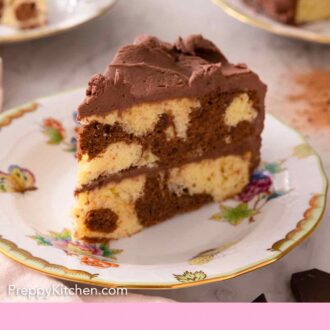
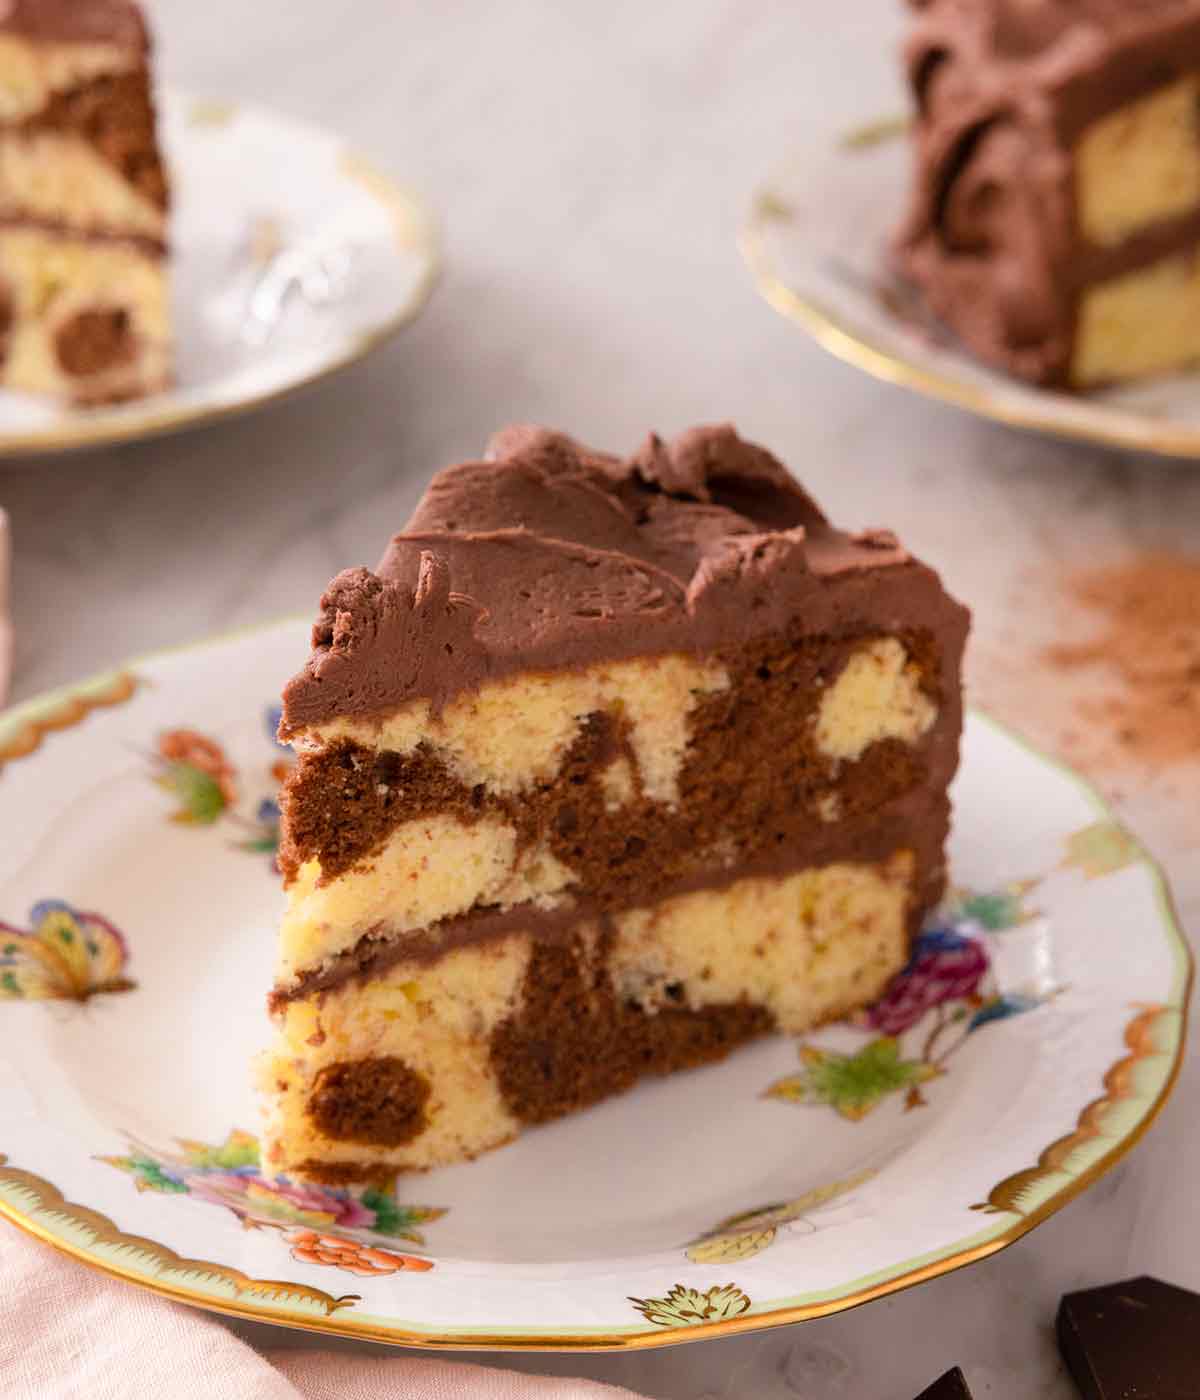
This chocolate and vanilla marble cake is so delightful as every bite is soft, tender, and will melt in your mouth. Since the base of the batter is the same, you don’t have to make two separate batters from scratch. See my step-by-step recipe tutorial below with all the tips you need to make it flawlessly. It’s so easy you’ll want to make it again and again! Want another half and half treat? Try my Black and White Cookies.
WHAT YOU NEED TO MAKE THIS RECIPE
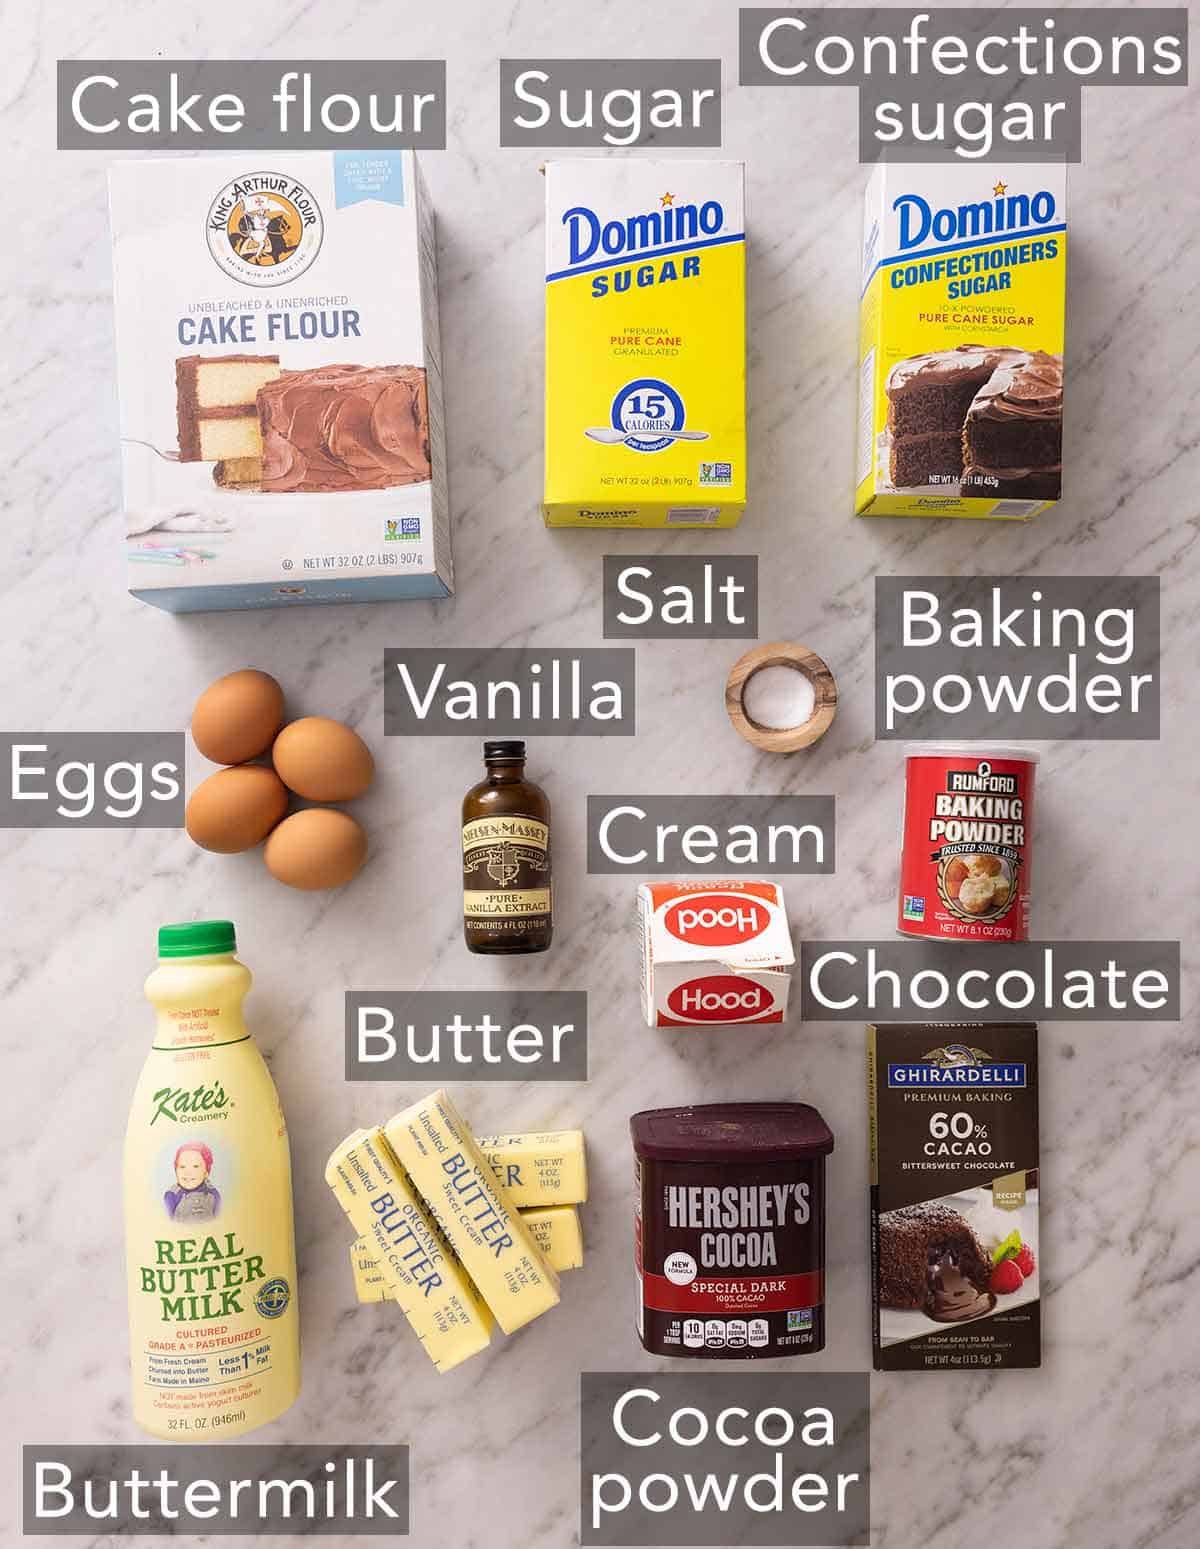
Butter — as the butter is for both the cake and buttercream, be sure to use unsalted butter. The amount of salt in salted butter is not consistent between different brands, so it’s best to add salt as needed. Be sure to set out the butter beforehand, as it needs to be at room temperature so you can cream it easily. Room temperature means you can press into the butter, and it’ll yield to the touch.
Cake flour — compared to all-purpose flour, cake flour has a lower protein content and is more finely milled, which helps to make this cake more light and airy.
Buttermilk — using buttermilk in cakes gives a tangy flavor to them and adds fluffiness and moisture. If you do not have any, you can make your own by following the steps in my How to Make Buttermilk guide.
Chopped dark chocolate — I recommend chopping up a chocolate bar instead of using chocolate chips as chips have less cocoa butter and contain added stabilizers. The chocolate bar will melt smoother in comparison to the chips as well.
HOW TO MAKE A MARBLE CAKE
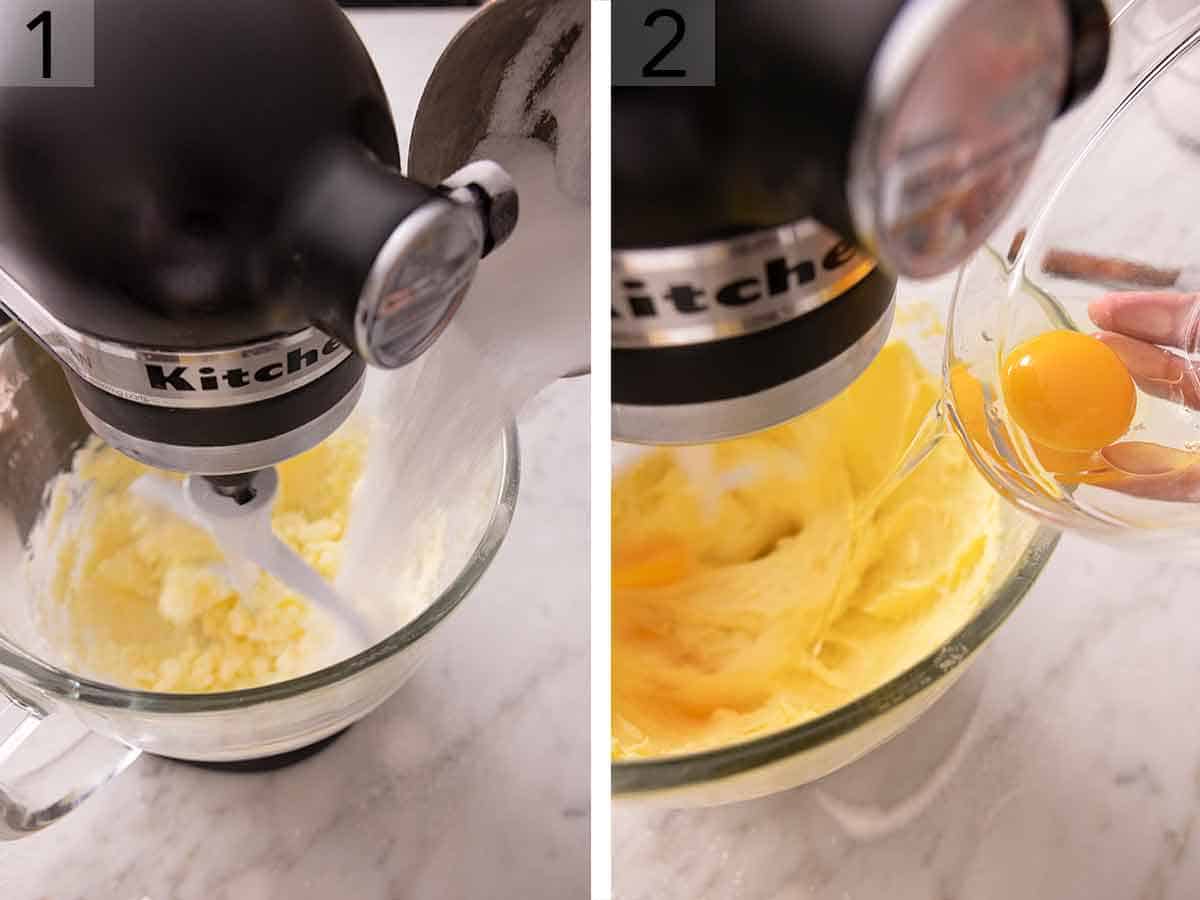
1. In a stand mixer fitted with the paddle attachment, beat butter on medium speed until creamy and pale yellow. Add the sugar and continue to beat the mixture until it’s light and fluffy, about 3 minutes.
2. Add the eggs, one at a time, beating until well combined before adding the next.
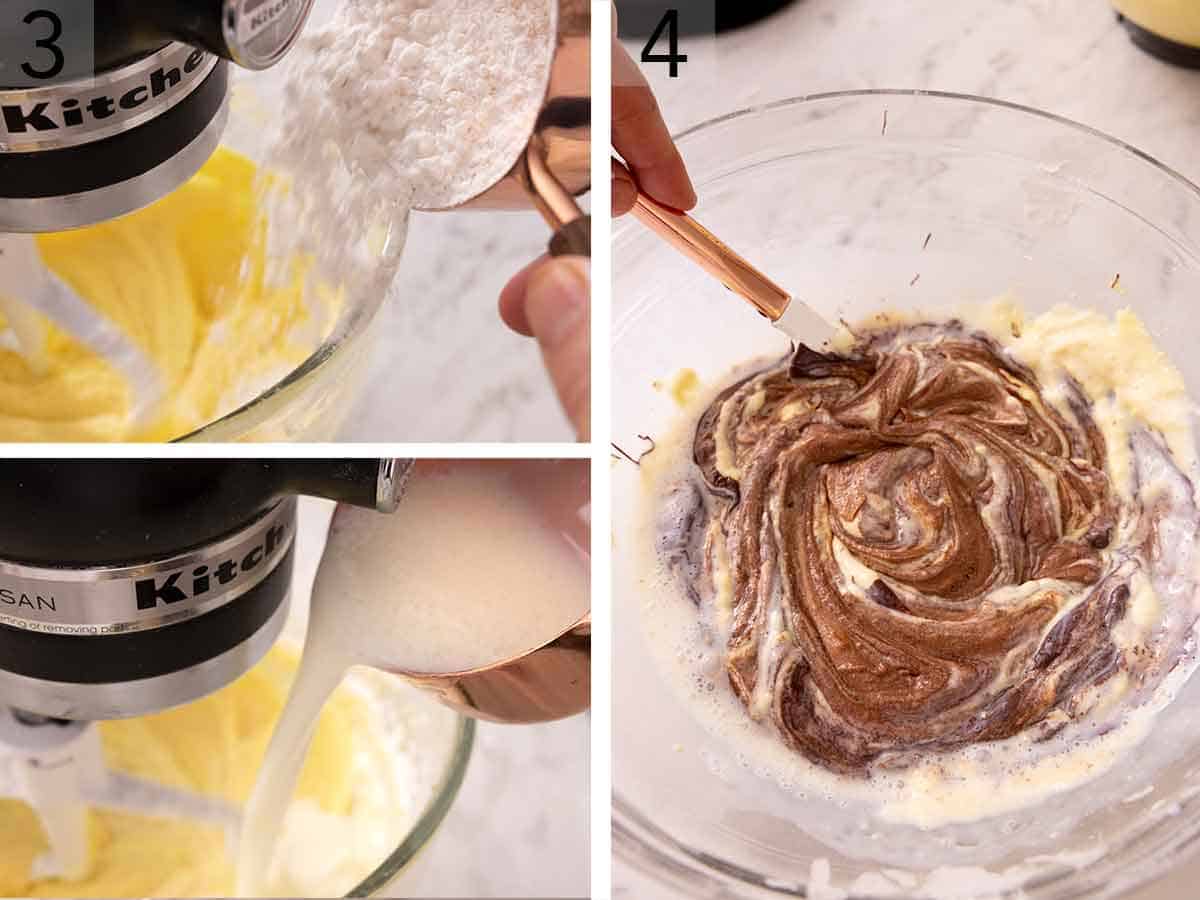
3. With the mixer on low, add one-third of the mixture of flour, baking powder, and salt. Alternate with half of the mixture of 1 cup buttermilk and vanilla. Then continue alternating with the remaining flour and milk mixture.
4. Reserve 1½ cups of batter in a large bowl before dividing the remaining batter among the two prepared cake pans. Melt the chocolate, add it to the reserved batter with the remaining ¼ cup buttermilk, and stir until combined.
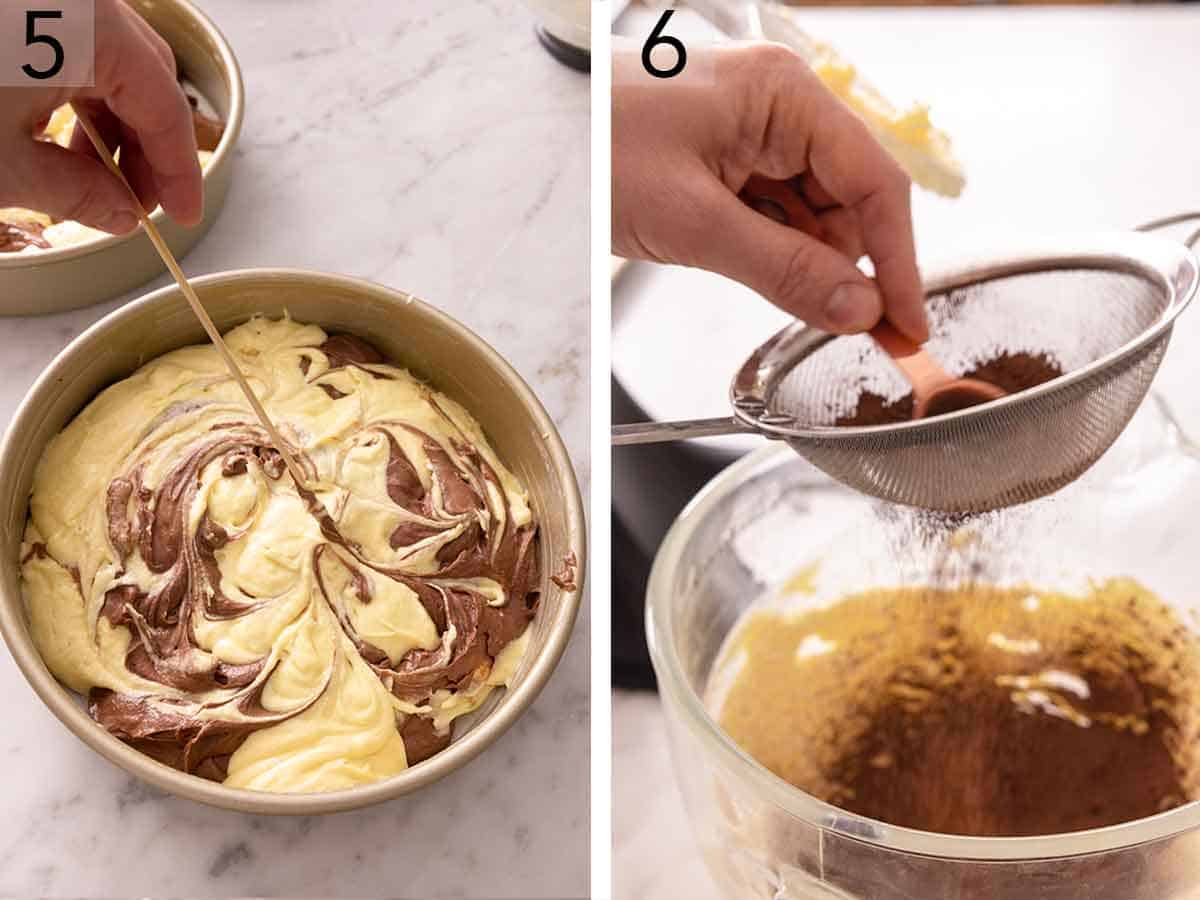
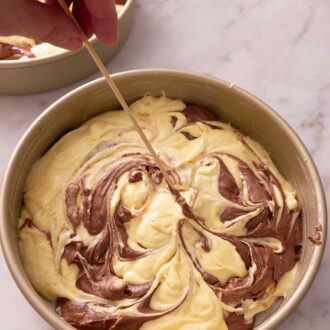
5. Dollop the chocolate batter over the plain batter in the pans and gently swirl both batters together to make a marbled effect. Bake for 30 to 35 minutes before letting the cakes cool in the pans for 20 minutes. Remove and cool completely on a wire rack.
6. Make the chocolate buttercream by beating the butter and then sifting in the cocoa powder and salt. Once mixed, beat in the confectioner’s sugar a few tablespoons at a time. Then, beat in the cream and vanilla until the buttercream has formed.
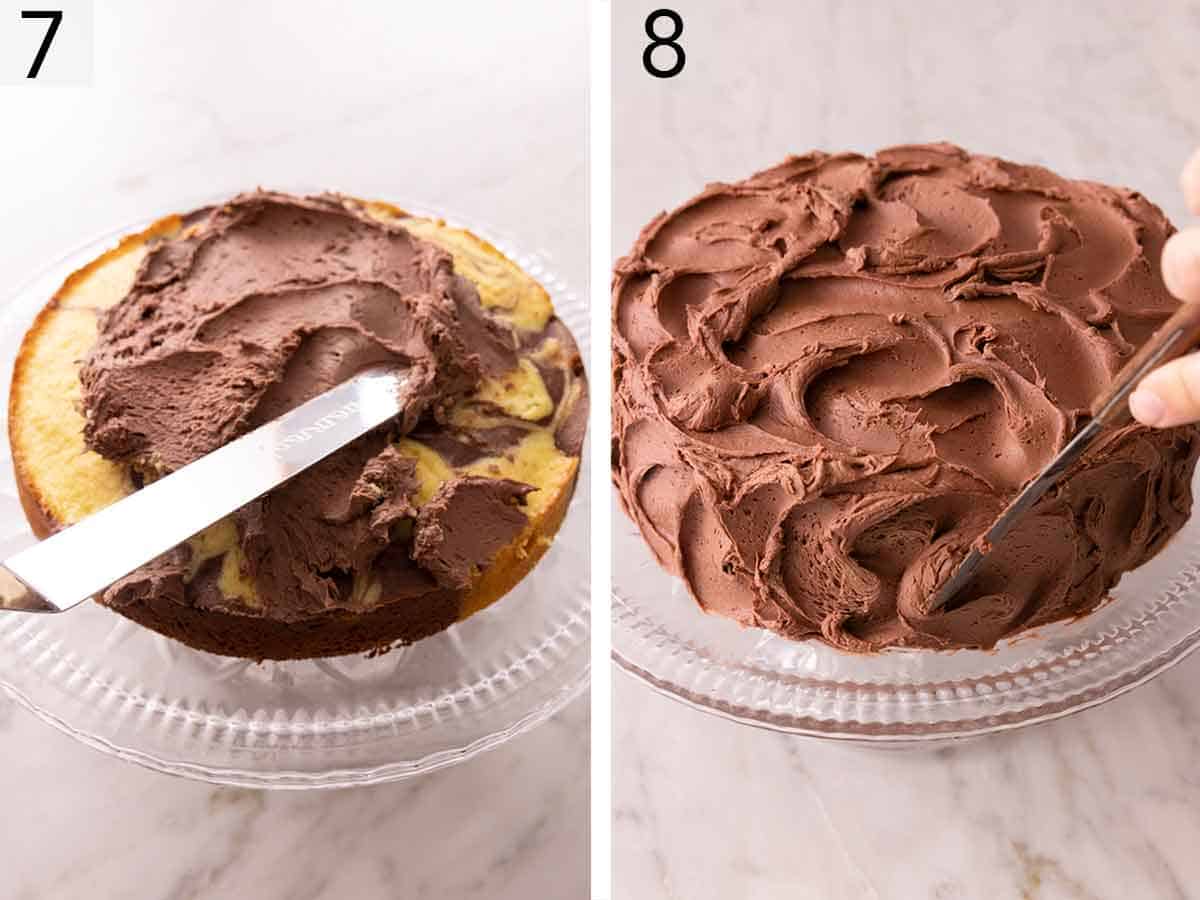
7. Trim the cooled cakes if needed and then place one cake layer on a cake stand and spread ½ cup frosting over the top.
8. Place the other cake layer on top. Spread the remaining frosting all over the top and sides of the cake. Chill for at least 1 hour or until ready to serve.
PRO TIPS FOR MAKING THIS RECIPE
- I use cake strips to help the marble cake layers come out evenly. Cake strips work by keeping the edge of the pan cooler to ensure that the entire cake rises at the same rate. This helps prevent a dome from forming in the middle of the pan. You can purchase cake strips or check out my post on How to Get Perfect Flat Cake Layers to learn how to make your own.
- I love using high-quality Dutch-processed cocoa powder for this marble cake. Dutch-processed cocoa powder is darker and less acidic compared to regular cocoa powder. My go-to brands are Hershey’s and Ghirardelli.
- When measuring the cake flour, I recommend using a scale. However, if you don’t have one, make sure to fluff the flour first and then spoon it into your measuring cup. Level off the cup with the back of a knife to ensure you don’t overpack the flour.
- The eggs should be at room temperature to ensure they incorporate into your batter evenly. It’s also why we add them one at a time to the batter. If you forgot to bring out your eggs, you can quickly bring them to room temperature by placing the eggs in a large bowl and covering them with warm tap water for 5 minutes.
- Avoid over-swirling the cake batter. If you over-swirl the batter, you lose the marble effect as the chocolate and vanilla batter will start combining.
- Be sure to allow the cake to fully cool before you start frosting the cake, so the buttercream doesn’t melt.
- Want to use a different frosting? Try my Cream Cheese Frosting, Mocha Frosting, or Swiss Meringue Buttercream instead.
- Lightly tap the filled cake pans on the counter before baking to remove any air bubbles in the batter.
FREQUENTLY ASKED QUESTIONS
How do I make the marble effect?
The easiest way to make the marbled effect is by making rounded vertical zig-zags motions (similar to figure 8s) from one side of the cake pan to the other.
Can I make this ahead of time? How do I store leftovers?
Yes, you can make this marble cake ahead of time. You can store it covered at room temperature for up to two days. If you’d like to keep the cake for longer, store it in the fridge. Allow the cake to come back to room temperature before serving.
Can I freeze this?
You can freeze the frosted marble cake or individual slices for up to 2 months. When ready to enjoy, thaw overnight in the refrigerator and then bring to room temperature before serving. If the cake is unfrosted, you can freeze it for up to 3 months. I recommend wrapping the cake layers in plastic wrap and then aluminum foil before freezing.
Can I turn this into cupcakes?
You can definitely make marble cupcakes instead! Fill the cupcake papers about ¾ the way up. I usually use an ice cream scooper. Next, bake the cupcakes for 5 minutes at 375F. Then, reduce to 350F and bake another 10 to 12 minutes or until the springy to the touch.
If you’ve tried this Marble Cake, then don’t forget to rate the recipe and let me know how you got on in the comments below, I love hearing from you!
Marble Cake
Equipment
- 9-inch round cake pan
Ingredients
For the Marble Cake:
- 2¾ cups cake flour (330g)
- 2 tsp baking powder
- ½ tsp kosher salt
- 1 cup unsalted butter room temperature (227g)
- 1¾ cups granulated sugar (350g)
- 4 large eggs room temperature
- 1¼ cup whole buttermilk room temperature and divided (300mL)
- 1 tbsp vanilla extract
- 4 ounces dark or semi-sweet chocolate chopped (113g)
For the Chocolate Buttercream:
- 1½ cups unsalted butter room temperature (340g)
- ¼ tsp fine salt
- ⅓ cup unsweetened or Dutch processed cocoa powder (33g)
- 1½ lbs confectioners’ sugar about 5¾ cups (675g)
- 1 tsp vanilla extract
- 5 tbsp heavy whipping cream (75mL)
Instructions
- Preheat the oven to 350F. Butter and flour 2 (9-inch) cake pans and line the bottoms with parchment paper. Wrap the pans with cake strips.
For the Marble Cake:
- In a large bowl, whisk together flour, baking powder, and salt.
- In a large mixing bowl or the bowl of a stand mixer fitted with the paddle attachment, beat butter on medium speed until creamy. Add the sugar and beat until light and fluffy, about 3 minutes. Add the eggs, one at a time, beating until well combined before adding the next.
- In a large liquid measuring cup, whisk together 1 cup buttermilk and vanilla.
- With the mixer on low, add one-third of the flour mixture. Alternate with half of the buttermilk mixture, and continue alternating with the remaining flour and milk mixture.
- Reserve 1½ cups (330g) of batter in a large bowl. Divide the remaining batter among the two cake pans.
- Melt the chocolate in the microwave in 20 second intervals, stirring between each, until smooth. Or melt in a double boiler. Add to the reserved cake batter along with the remaining ¼ cup buttermilk, and stir until fully combined.
- Dollop the chocolate batter over the plain batter in the pans. Using the tip of a knife, swirl both batters together.
- Bake for 30 to 35 minutes or until a toothpick inserted into the center comes out clean. Let the cakes cool in the pans for 20 minutes. Remove and cool completely on a wire rack.
For the Chocolate Buttercream:
- In a large bowl or the bowl of a stand mixer fitted with the paddle attachment, beat the butter on medium speed for about 2 minutes, until nice and creamy.
- Sift in the ¼ cup of cocoa powder. Add the salt and mix on low just until combined. Scrape the bowl down.
- With the mixer on low, beat in the confectioner’s sugar a few tablespoons at a time.
- Then, beat in the cream and vanilla. Turn speed up to medium and beat until the frosting is well combined and fluffy about 1 minute.
For the Assembly:
- Trim the tops of the cakes to create level layers if needed.
- Place one cake layer on a cake stand or plate. Spread about ½ cup frosting over the top. Place the other cake layer on top. Spread the remaining frosting all over the top and sides of the cake. Make swoops with a spoon or offset spatula, or decorate as desired. Chill for at least 1 hour or until ready to serve.
Notes
- I use cake strips to help the cake layers come out evenly. Cake strips work by keeping the edge of the pan cooler to ensure that the entire cake rises at the same rate. This helps prevent a dome from forming in the middle of the pan. You can purchase cake strips or check out my post on How to Get Perfect Flat Cake Layers to learn how to make your own.
- I love using high-quality Dutch-processed cocoa powder. Dutch-processed cocoa powder is darker and less acidic compared to regular cocoa powder. My go-to brands are Hershey’s or Ghirardelli.
- When measuring the cake flour, I recommend using a scale. However, if you don’t have one, make sure to fluff the flour first and then spoon it into your measuring cup. Level off the cup with the back of a knife to ensure you don’t overpack the flour.
- The eggs should be at room temperature to ensure they incorporate into your batter evenly. It’s also why we add them one at a time to the batter. If you forgot to bring out your eggs, you can quickly bring them to room temperature by placing the eggs in a large bowl and covering them with warm tap water for 5 minutes.
- Avoid over swirling the cake batter. If you over-swirl the batter, you lose the marble effect as the chocolate and vanilla batter will start combining.
- Be sure to allow the cake to fully cool before you start frosting the cake, so the buttercream doesn’t melt.
- Want to use a different frosting? Try my Cream Cheese Frosting, Mocha Frosting, or Swiss Meringue Buttercream instead.
- Lightly tap the cake pans on the counter before baking to remove any air bubbles.
Nutrition
Have you tried this recipe? Tag me today!
Mention @preppykitchen and tag #preppykitchen!


