
You won’t have to buy overpriced cake pops again with this easy recipe! It only requires a handful of ingredients, and with my step-by-step photos and tips, you’ll be making cafe-worthy cake balls in no time. Originally published in 2021, I have since retested the recipe and updated this post with some helpful troubleshooting guidelines. Plus, I answered common reader questions to help you decorate these bite-sized desserts effortlessly, added flavor variations ideas, and provided my expert tips on how to get a perfectly smooth coating. This recipe makes for great gifts or a weekend project with kids, too!
A reader, Stephanie, says: “First time making cake pops and this was such an easy and successful recipe! Can’t wait to show these off at my daughter’s 1st birthday party!” ★★★★★
Key Ingredients
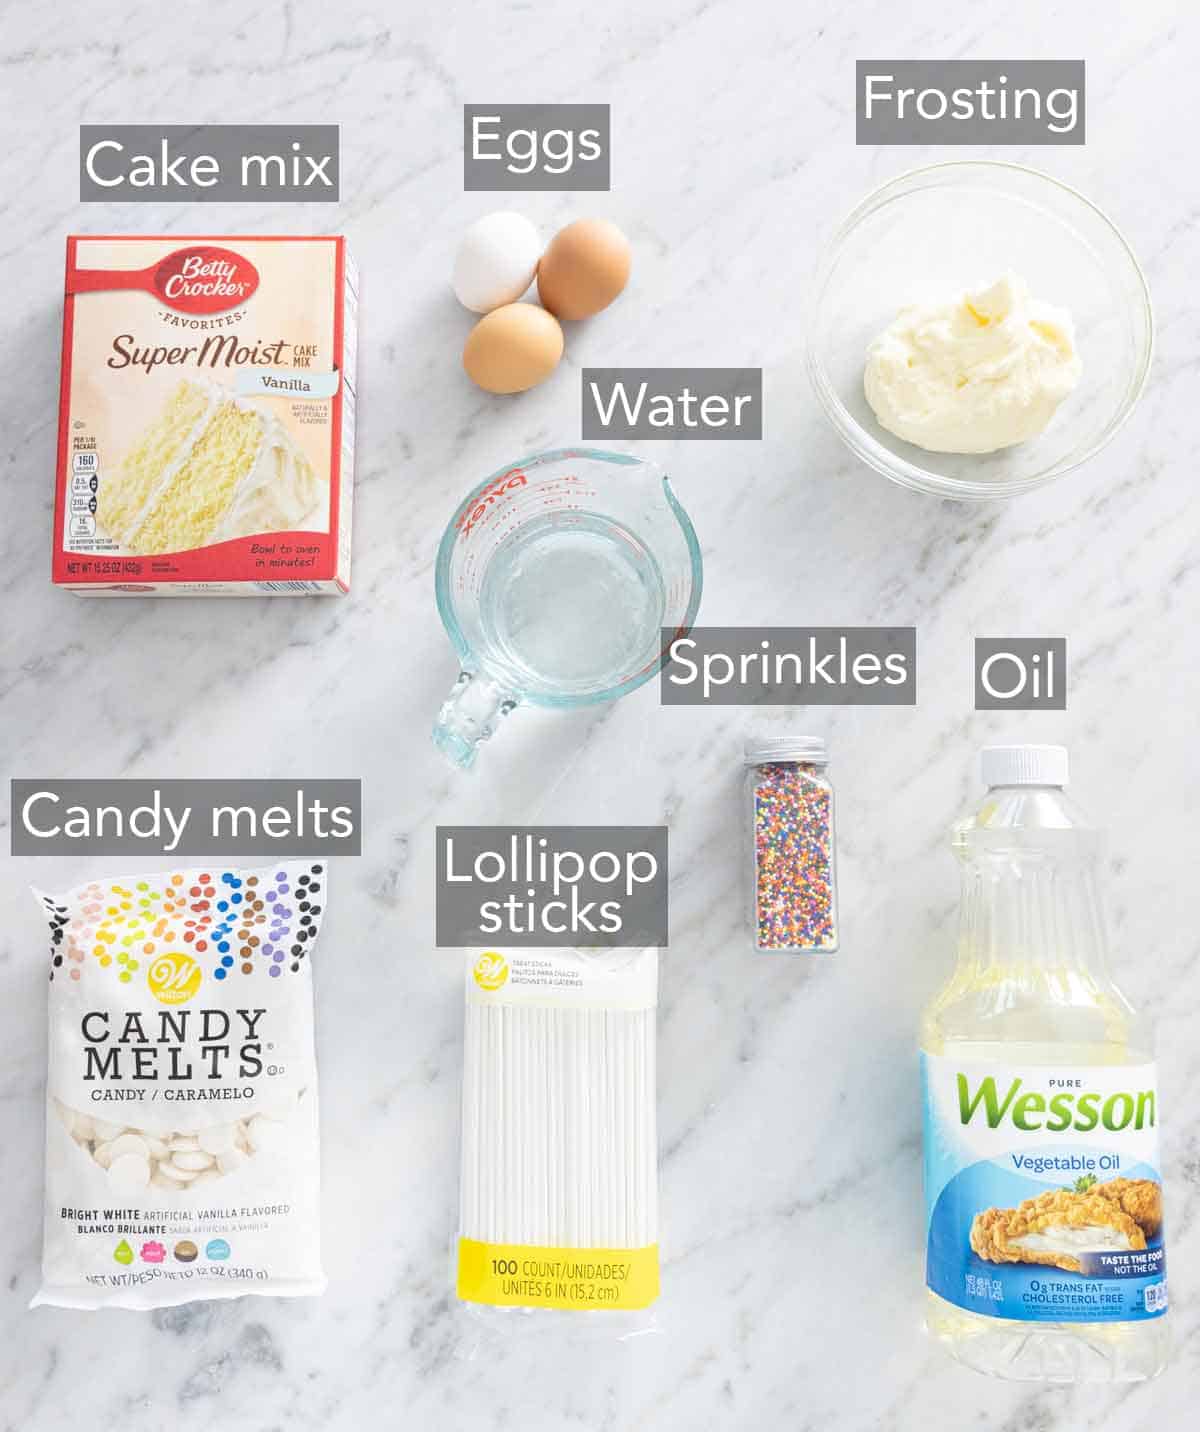
These are the main ingredients you need to make homemade cake pops. You can find the full list of ingredients and measurements in the recipe card below.
Vanilla cake — I use a box cake mix for these cake balls for convenience. However, if you prefer to make a vanilla cake or have leftovers, you can use that as well because nothing beats homemade cake. You can also make this with other cake flavors. (More ideas below!)
Frosting — you can use homemade vanilla frosting (great use for leftovers) or store-bought frosting. I prefer homemade for the flavor, but sometimes convenience wins! Of course feel free to use chocolate frosting or cream cheese frosting instead.
Candy melts — once melted and dipped, candy melts will set up with the same look and texture as chocolate. It’s easier to use than chocolate, as you can skip tempering it. Careful not to scorch the melts, or they’ll harden too quickly to work with.
Sprinkles — Buy your favorite from a store or follow my recipe on easy homemade sprinkles.
How To Make Any Flavor Cake Pops
This recipe works with just about any classic cake mix or homemade cake flavor and complementary frosting, so have fun! Just bake your favorite cake in a 13×9-inch sheet and proceed with the recipe as instructed. I love strawberry cake with strawberry buttercream, chocolate cake with chocolate buttercream or raspberry frosting, and lemon cake or red velvet cake with vanilla frosting. You could also make pumpkin cake or spice cake with vanilla frosting. So many options!
My one note is to avoid cakes with chunky mix-ins so you have a smooth cake ball mixture once the frosting is mixed in. You can however mix in some sprinkles if you want a fun surprise inside! Check out my Pumpkin Cake Pops or Halloween Cake Pops for other flavor variations and decorating ideas.
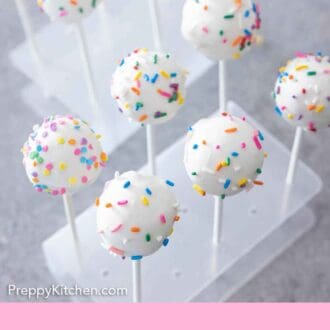
Cake Pop Holder Options
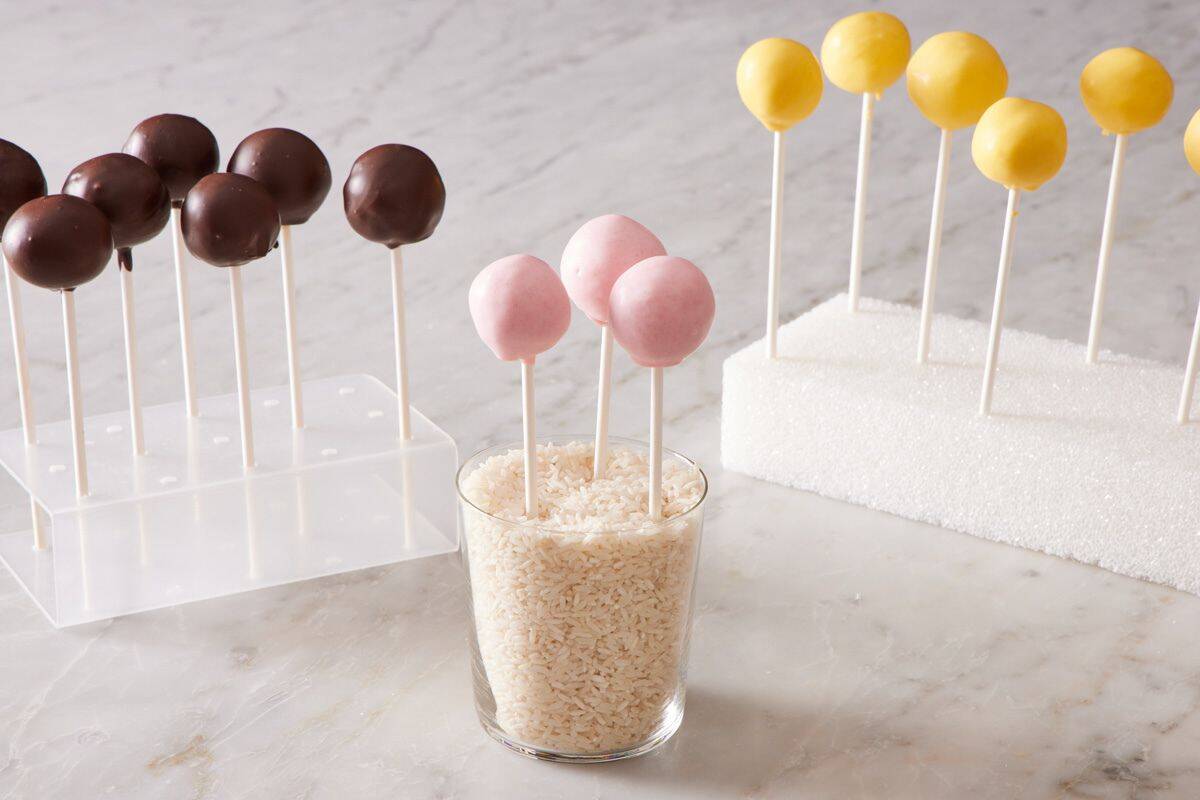
Before you get started with dipping, you want to make sure you have a way to hold the cake pops upright until the coating hardens. If you set them on the coating, they will form a flat spot, or if they are leaning at an angle, the decorations can droop to one side. You can buy cake pop stands that will hold your pops upright. If you don’t want to purchase anything specialty, try one of these easy DIY ideas!
- Styrofoam block or box: Poke tiny holes in a styrofoam block or into the bottom of a 4 to 5-inch-deep cardboard box, spacing the holes at least two inches apart. Insert the lollipop stick of a decorated cake pop into each hole.
- Dried rice or beans: Fill a 4 or 5-inch-tall glass or jar with dried rice or small beans. Make sure it’s a few inches deep at least to hold the cake pops upright.
Once the coating is set, you can then place the cake pops in plastic wrappers or in jars to hold them upright. Alternatively, you can place the cake ball-side down on a wax or parchment-lined baking tray to dry. This will give them a flat side but make them easier to transport if you’re traveling with them.
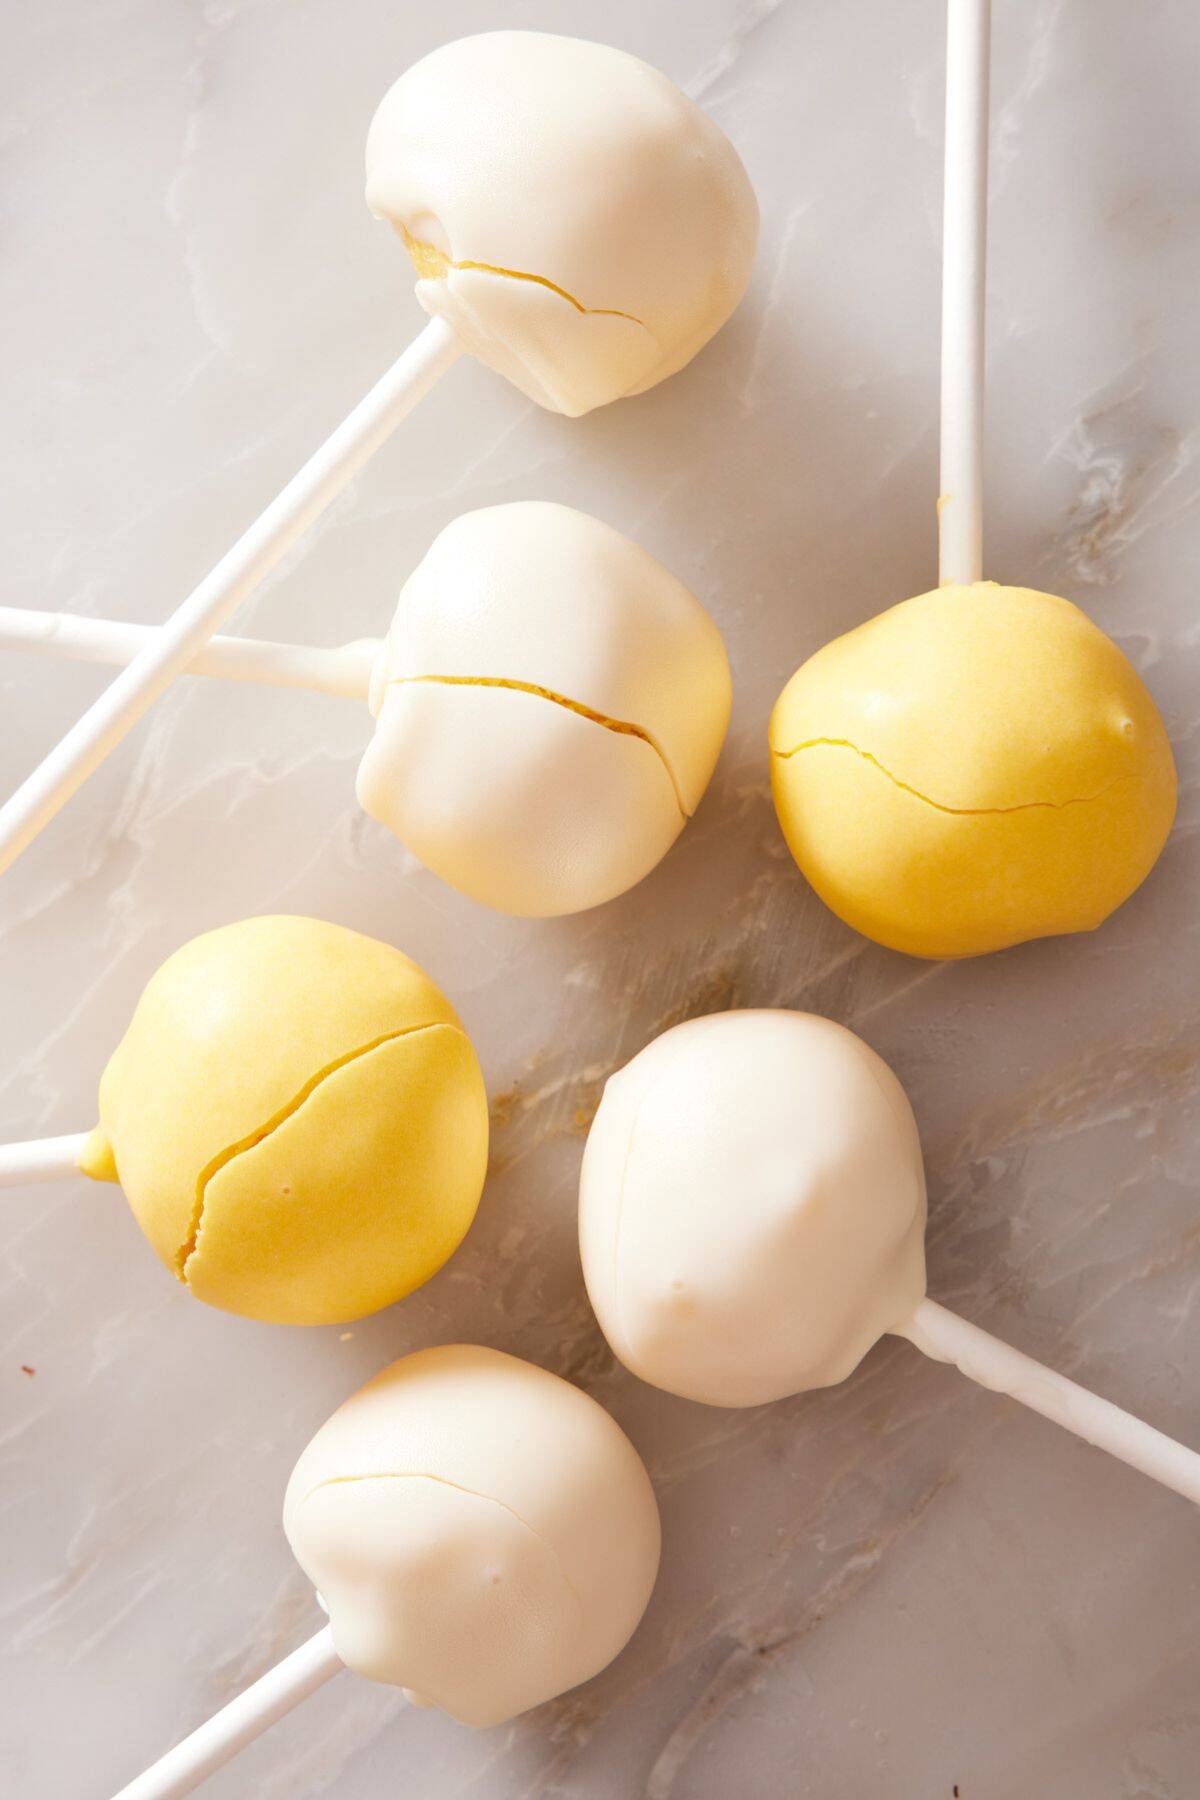
How To Avoid a Cracked Coating
This is one of the most common issues to troubleshoot when making cake pops! I’ve run into this issue myself several times, so I retested the recipe to figure out exactly what causes this to happen. My conclusion is all about temperature! You need to be mindful of the temperature difference between the cake pops and the candy melts. If the cake pops are too cold and the coating is too hot, the ball of cake will actually expand as it warms up and crack the coating.
To avoid the cracking, freeze the cake balls for the stated time. If you freeze them for longer, let them sit out for 10 to 15 minutes to warm up slightly. Also, make sure the coating isn’t super hot when you dip your cake into it. Allow your coating to cool for a few minutes before dipping.
Pro Tips For Making This Recipe
Let the cake cool completely before you begin to crumble it. If the cake is too warm, it’ll keep the frosting that binds warm, making it difficult for the cake pops to stay together. If you have the time, make the cake a day ahead of time, so it has sufficient time to cool.
As the cake and frosting are soft when first rolled into balls, it’s too difficult to coat them right after shaping. Be sure to allow time for the cake balls to chill before coating them.
The more finely you can make the cake crumbs, the more evenly they will roll and hold their shape. You don’t want large chunks of cake poking out!
Want to make this cake pop recipe more colorful? Add some gel food coloring to the candy melts. Keep in mind that gel food coloring is more concentrated, so you can add less, whereas liquid food coloring may thin out the frosting if you add too much to it.
How To Make Cake Pops
Below, I’ve highlighted portions of the recipe in step-by-step process images along with instructions for making the perfect cake pops. You can find the full set of instructions in the recipe card below.
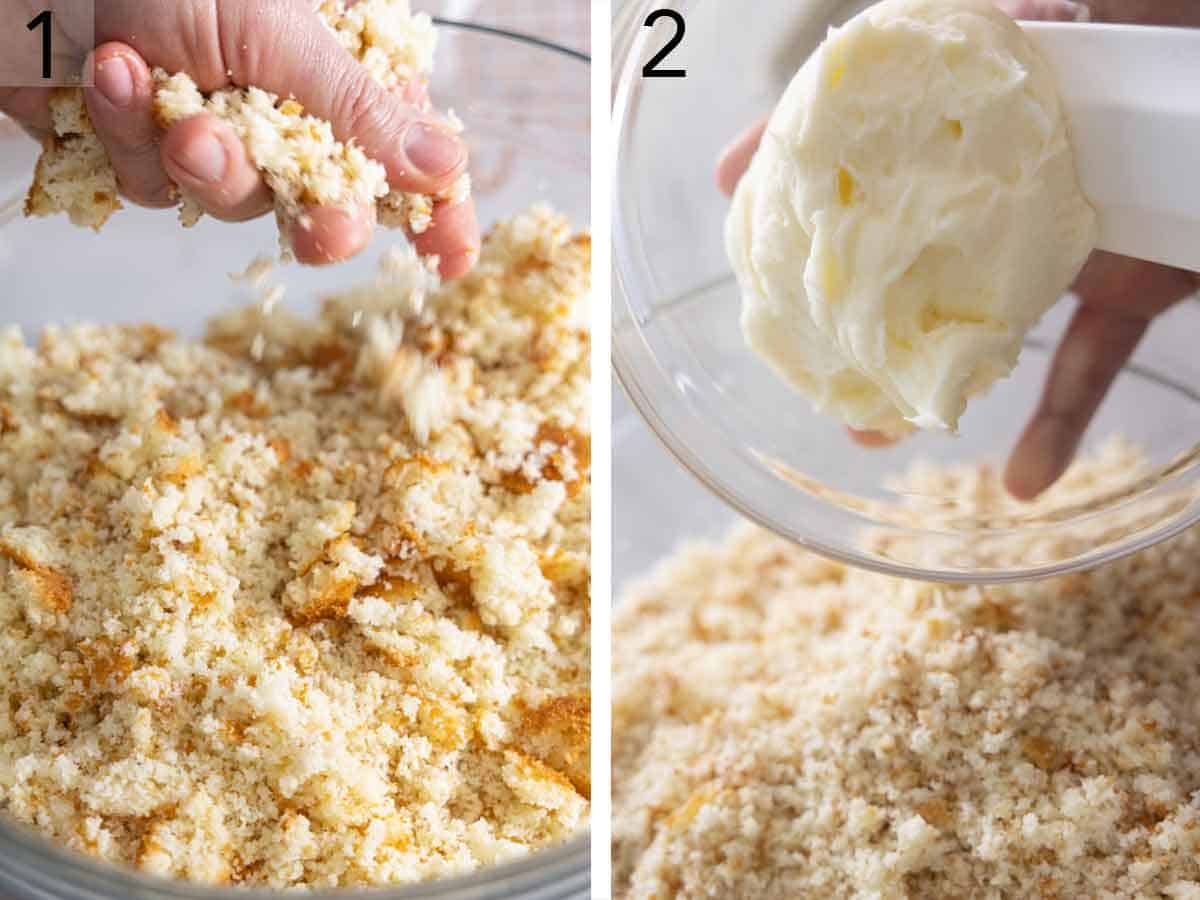
1. Crumble cooled cake into a large bowl.
2. Add frosting and stir with a wooden spoon until the mixture resembles wet sand but is not smooth.
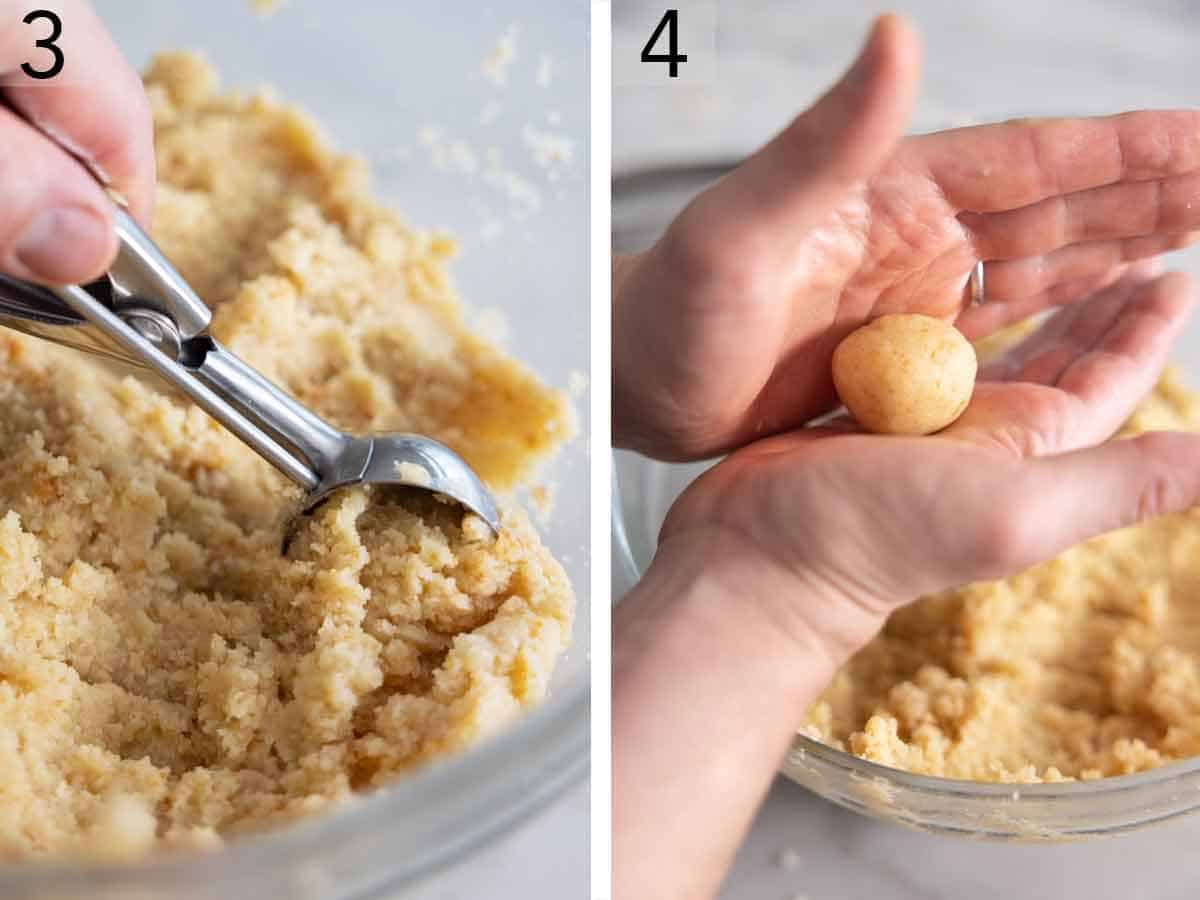
3. Use a cookie scoop to portion out the cake mixture.
4. Roll the mixture into 1-inch balls.
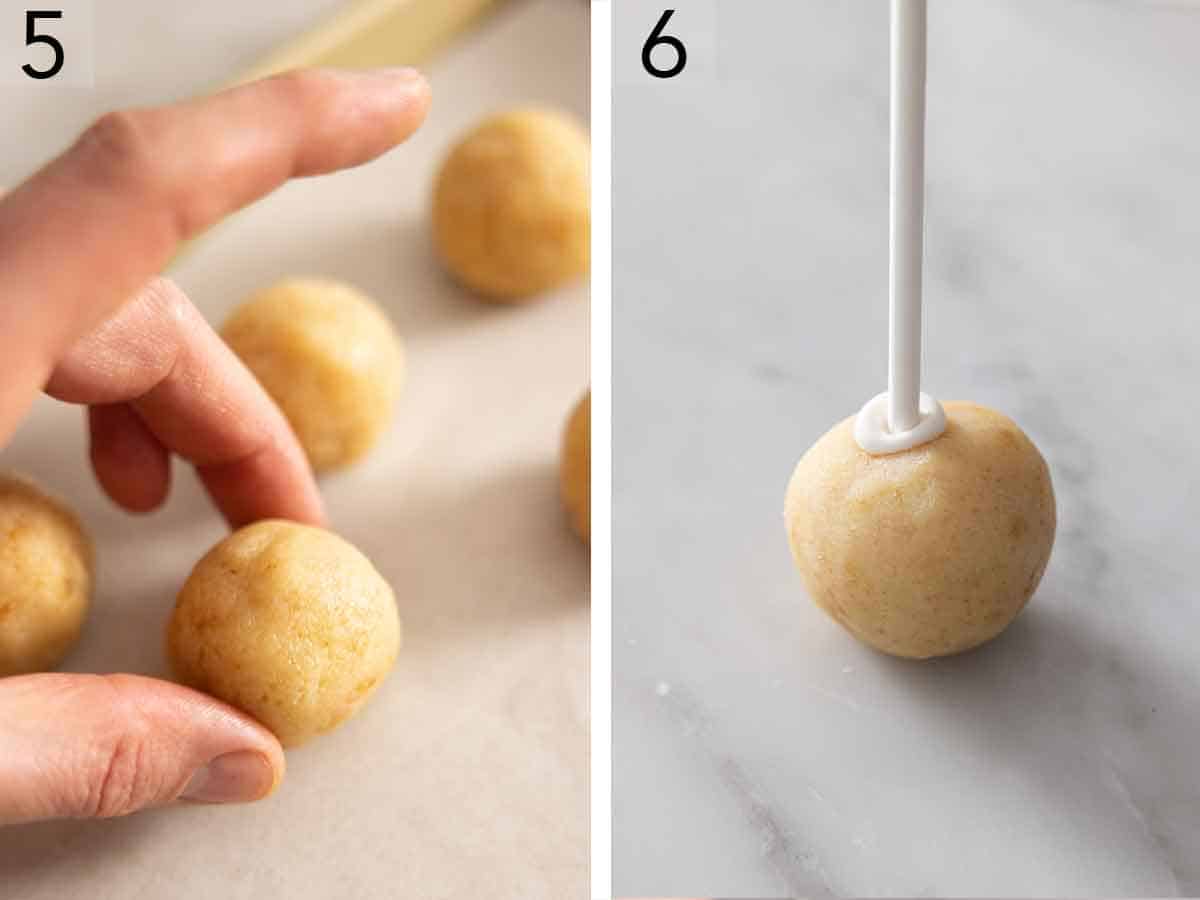
5. Place the rolled balls on a lined plate. Refrigerate for at least 4 hours or freeze for 30 minutes.
6. Melt candy or chocolate wafers according to the package instructions. Dip the tip of a lollipop stick in the melted chocolate and insert about halfway into a cake ball.
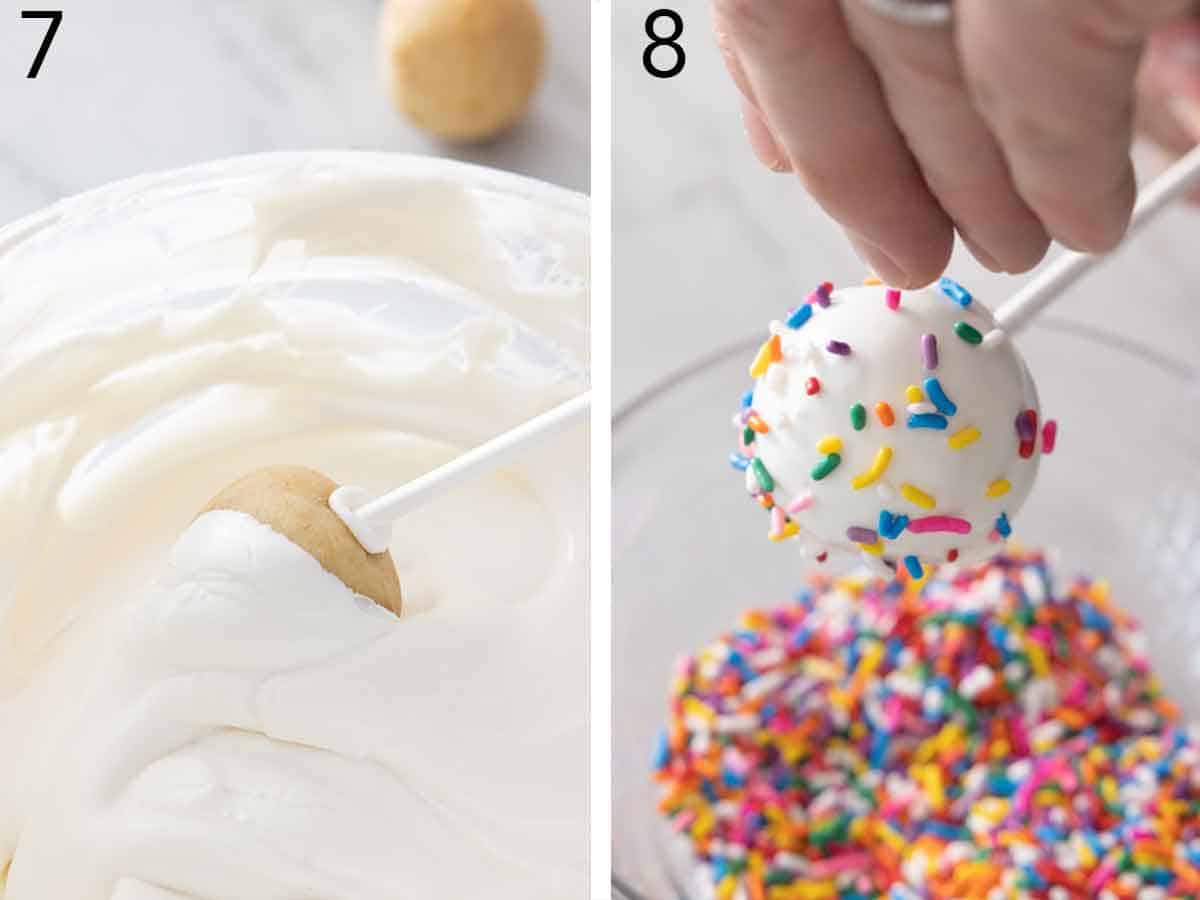
7. Dip the cake ball into the chocolate. Remove and gently tap on the side of the cup to let excess coating drip off.
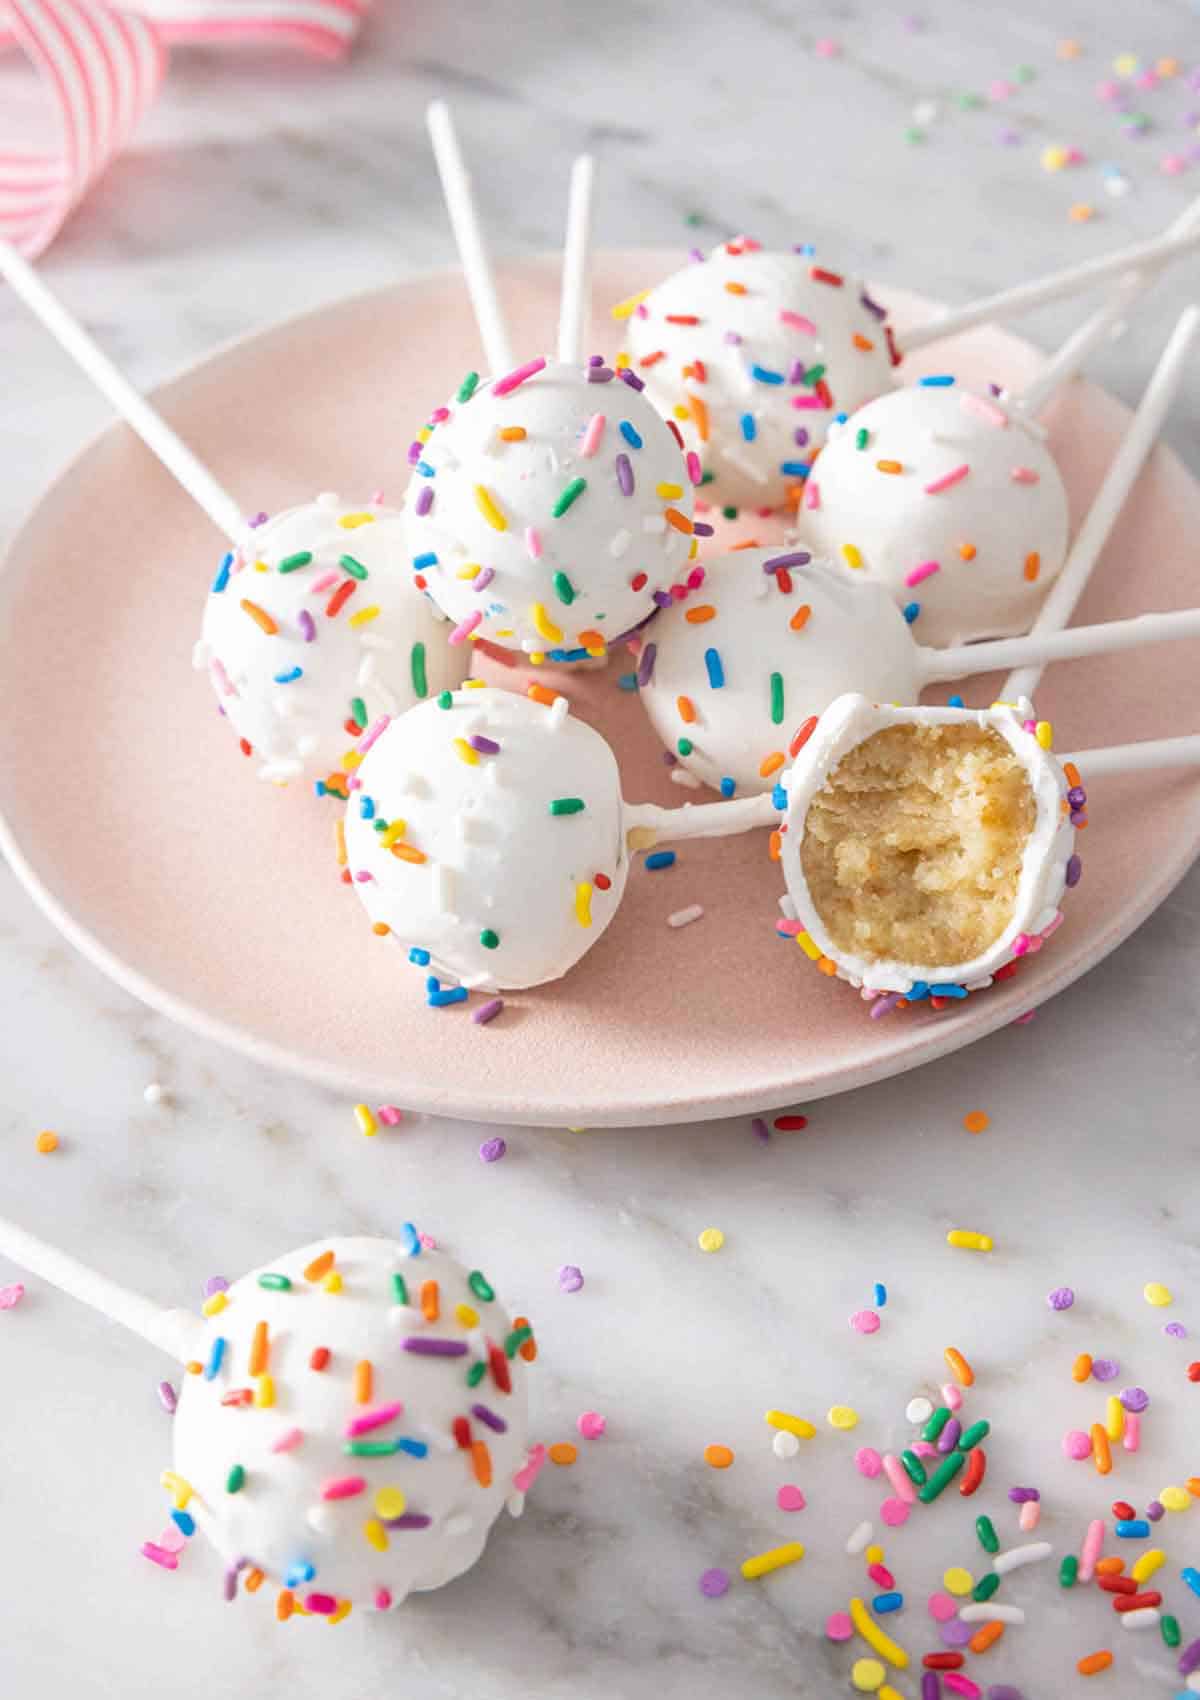
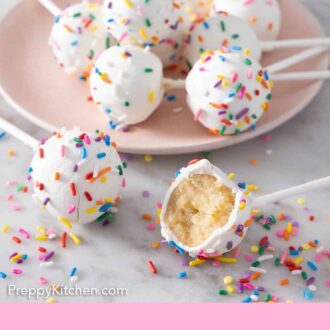
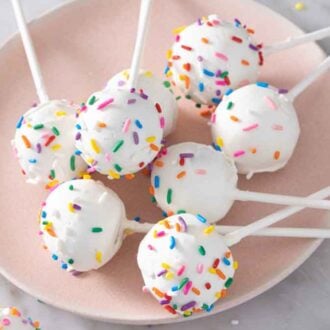
8. Decorate with sprinkles if desired. Place upright and let stand until the coating is set.
Cake Pops Recipe
Video
Equipment
- Cookie scoop
- 38 Lollipop sticks
Ingredients
- 1 (15.25-ounce) box vanilla cake mix
- 1 cup water (240ml)
- ½ cup vegetable oil (120ml)
- 3 large eggs
- 1 cup frosting
- 12 ounces candy melts or chocolate melting wafers
- sprinkles for decorating (optional)
Instructions
Make the Cake Balls:
- Preheat the oven to 350°F. Grease a 9×13-inch cake pan with baking spray.
- In a large bowl, whisk together the cake mix, water, oil, and eggs until well combined. Pour the batter into the prepared pan, and bake according to package directions. Cool the cake completely.
- Line a small baking sheet or plate with wax or parchment paper. (Make sure it can fit in your fridge.)
- Crumble the cooled cake into a large bowl. Add the frosting to the crumbled cake and stir with a wooden spoon or beat on low speed with a hand mixer until the mixture is crumbly and resembles wet sand. It should not be pasty. (If using a hand mixer, this will only take about 30 seconds.)
- Scoop the cake mixture and roll into 1-inch balls (about 1 tablespoon each). Place the balls on the lined baking sheet (it’s okay if they touch). Refrigerate for at least 4 hours or freeze for 30 minutes.
Coat the Cake Pops:
- Once the cake balls have chilled, melt the candy melts or chocolate wafers according to the package instructions, and place in a 2-cup liquid measuring cup or tall drinking glass.
- Pull a few cake balls out, leaving the others in the fridge as you work so they stay cold (keeping them cold helps the coating set quickly). If they were frozen, move them to the fridge. Dip the tip of a lollipop stick in the melted coating and insert it about halfway into a cake ball. Dip the cake ball into the coating, making sure to cover the base where the stick and cake ball meet, and turn to coat. Remove and gently tap on the side of the cup to let excess coating drip off.
- Decorate with sprinkles if desired. Place the decorated cake pop upright in a cake pop holder, and leave until the coating is set, 30 minutes to 1 hour. Rewarm the coating as needed while you continue coating the rest of the cake pops.
Notes
- If the candy melts are too thick to coat smoothly, stir in vegetable oil or melted vegetable shortening, ½ teaspoon at a time, to thin out the coating. The consistency of candy melts can really vary by brand, so this may or may not be necessary for what you have!
- If you have leftover melted coating, you can put it in a piping bag and pipe decorations onto the cake pops once the main coating has hardened. This is a fun way to personalize them for celebrations, holidays, or themed events.
Nutrition

Make Ahead And Storage
Make Ahead or Freeze: If you’re making cake balls ahead of time, you can keep un-dipped cake balls in the refrigerator for up to 2 days in an airtight container. You can also freeze uncoated cake balls for up to 2 months. When ready to enjoy, let them thaw at room temperature for 20 minutes before dipping.
Storage: After they are dipped and decorated, store them in an airtight container in the refrigerator for up to a week. You can also freeze coated cake balls for up to 1 month. Thaw them for 30 minutes to an hour at room temperature before eating them.
Frequently Asked Questions
If you don’t have candy melts or prefer to use chocolate, try chocolate melting wafers (my favorite is Ghirardelli Vanilla or Dark Chocolate flavor). You can also melt good-quality dark or white chocolate bars. As mentioned previously, it can be tricky to get a hard coating since melted chocolate should be tempered in order to form a hard texture. However, if this doesn’t concern you, then chocolate is a delicious option!
Don’t skip dipping the cake pop sticks in the candy melts before inserting them into the ball. This helps the sticks stay put in the balls as they harden. Not inserting the lollipop stick deep enough will also cause them to fall off as well— be sure they go in about halfway through the cake ball. Finally, make sure your lollipop sticks aren’t too thin, as you need a thick enough stick to hold the weight of the cake balls.
This is a wild reaction that took me by surprise when it first happened to me! This occurs when two conditions coexist— there is a gap in the coating (typically near the bottom against the stick), and the temperature between the cake and coating is too drastic. If there is a hole in the coating, the cake will push out of that hole instead of cracking the coating. Be sure you fully encase your cake balls and mind the temperature between each.
More Cake Recipes To Try
Cake one of these other festive cake recipes for your next party!
My funfetti cake has three tall layers of soft vanilla cake dotted with rainbow sprinkles and coated with classic American buttercream. It’s the perfect celebration cake for birthdays!
This elegant crepe cake is a showstopper that can be made without ever turning on the oven! Make the crepes, then stack them with a layer of whipped cream cheese between each one and top with fresh fruit.
My decadent and fudgy devils food cake recipe is super moist and rich, and covered in a delicious chocolate buttercream frosting.
This no-bake dirt cake is such a fun recipe to make with kids, or to take to a classroom party. You can make one large cake or make it in individual serving cups.
A southern classic on any holiday dessert table, the hummingbird cake is packed with flavor and moisture from bananas, pineapple, nuts, and spices.
If you’ve tried this cake pops recipe, then don’t forget to rate it and let me know how you got on in the comments below. I love hearing from you!
Sarah says
I’ve been making these the past few years for my Galentine’s Day party and they are always a hit! 🙌🏽
Denise Ivory says
Great recipe and hints!
Rabitdos says
This is such an amazing recipe I love it and so did my family when that tried it definitely recommend and for people out there who are looking for a cake pop mix recipe or a sweet treat this is the one! 😊👍🏾👍🏾👍🏾
grant says
I loved it it was good.
Pat Subleski says
I have found with making cake pops that if i use a Ghirardelli melting wafers, the chocolates a little bit thinner, and they turn out fantastic, also they taste better than any of the other melting wafers I’ve tried.