
This post may contain affiliate links. Please read our disclosure policy.

A bakery-worthy frosted cupcake comes down to three things: the right piping bag setup, a frosting at the right consistency, and a few techniques that take five minutes to master. This guide covers all three, including the five main piping techniques, the exact piping tips that produce each look, and the small adjustments that separate a good swirl from a great one.
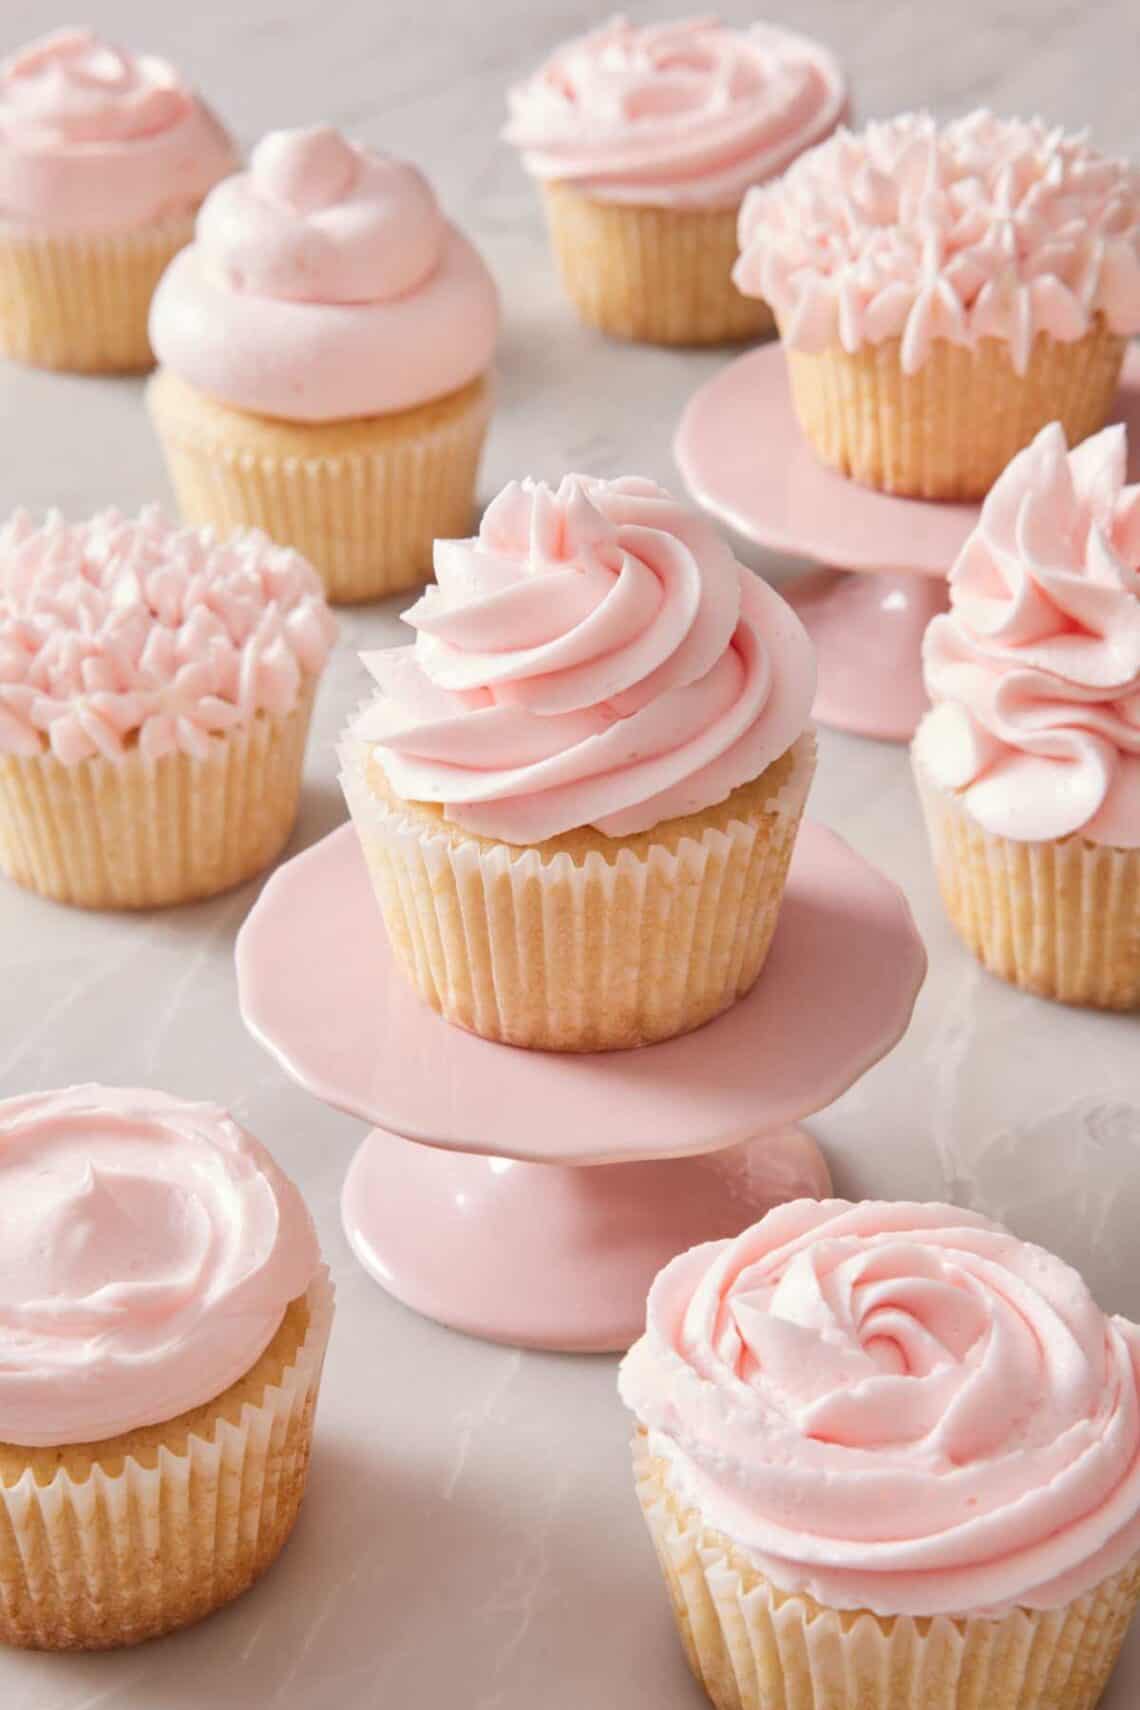
A frosted cupcake is one of the most iconic baked goods. They’re little canvases that show off your decorating skills with maximum visual reward for minimum effort. Once you know the technique, you can frost a dozen cupcakes in under 10 minutes. And it doesn’t take a pastry-school education to get there: with a few good piping tips, the right frosting consistency, and a couple of professional-level adjustments, you can make cupcakes that look like they came out of a bakery window.
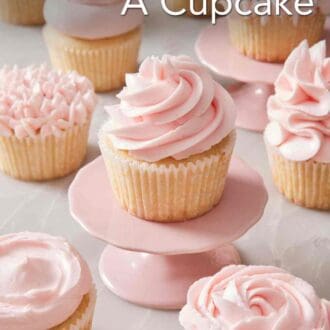
In this lesson, I’ll cover everything from the piping bag basics (what size to use, how to fill it, why “burping” matters) through the five core decorating techniques (the classic swirl, the rosette, the ruffle, the hydrangea, and the no-piping swoop). Plus, I show you the differences between open star, closed star, and French star piping tips, how to handle adding final decorations like sprinkles and edible flowers, and how to troubleshoot the most common piping problems. By the end, you’ll have reliable skills that produce consistent results every time.
“I made a batch of buttercream frosting ahead of time to let the flavors meld and added a few drops of yellow food coloring for brightness. Following these tips, my cupcakes came out beautiful! I did the classic swirl with a French star tip. Every swirl held its shape, and the color was even throughout.”
Candace
Secrets To Successful Cupcake Decorating
Before we dive into the techniques, there are two steps you have to do before you ever start frosting:
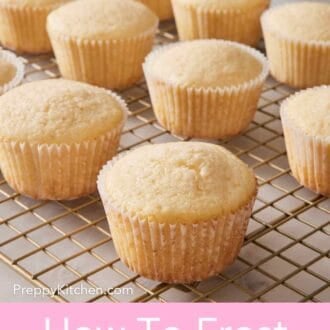
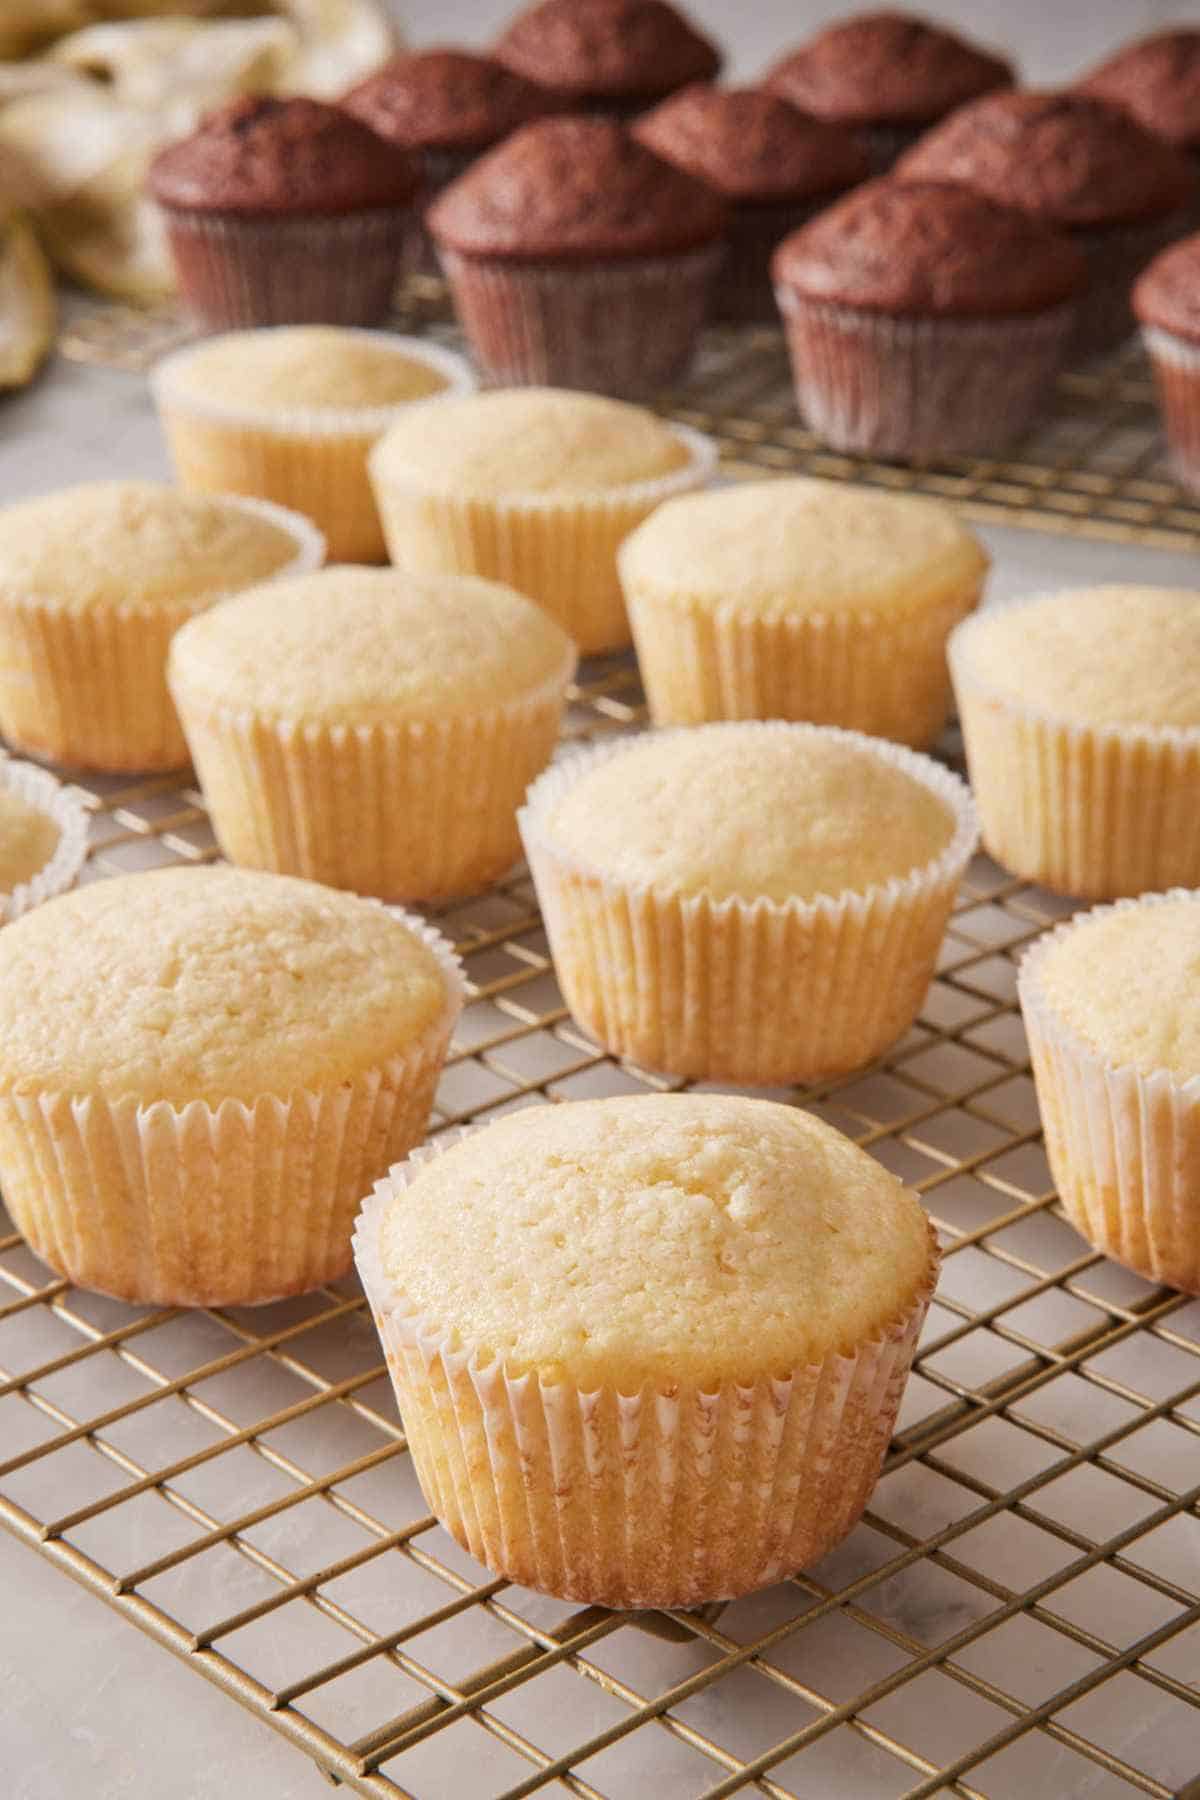
Cool the cupcakes completely. Frosting on a warm cupcake is the most common reason a beautiful piping job collapses or slides off the cupcake. Buttercream contains a lot of, well, butter, and warm cake melts that butter on contact, turning your firm swirl into a runny puddle within minutes.
Wait until your cupcakes are truly at full room temperature. Touch the bottom of the cupcakes to tell. If it feels even slightly warm, give it more time. About 1 hour on a wire rack typically does it. For impatient bakers (or rushed dinner parties), you can transfer cupcakes to the freezer for 15-20 minutes to cool them fast.
Gauge your timing. Frost cupcakes as close to serving as you can. Buttercream is at its most beautiful and stable in the first few hours after piping—the swirls are sharp, the color is vibrant, and the texture is creamy. After 24+ hours covered at room temperature, the surface starts to crust slightly and lose its shine. For a dinner party, frost the day of. For a bakery-style stack to take to a friend’s house, frost no more than 4-6 hours ahead for the best presentation.
A professional baker’s detail worth knowing: frost all the way to the edge of the cupcake. Some bakers leave a ring of bare cake around the rim. This shows the cake off, but it also exposes that ring to air, and the cake dries out faster. Frosting that covers the entire top edge keeps the crumb moist. Pipe as far to the edge as you can without the frosting slumping off the sides.
Essential Equipment
You don’t need a professional pastry kit. Three pieces of equipment cover almost every technique:
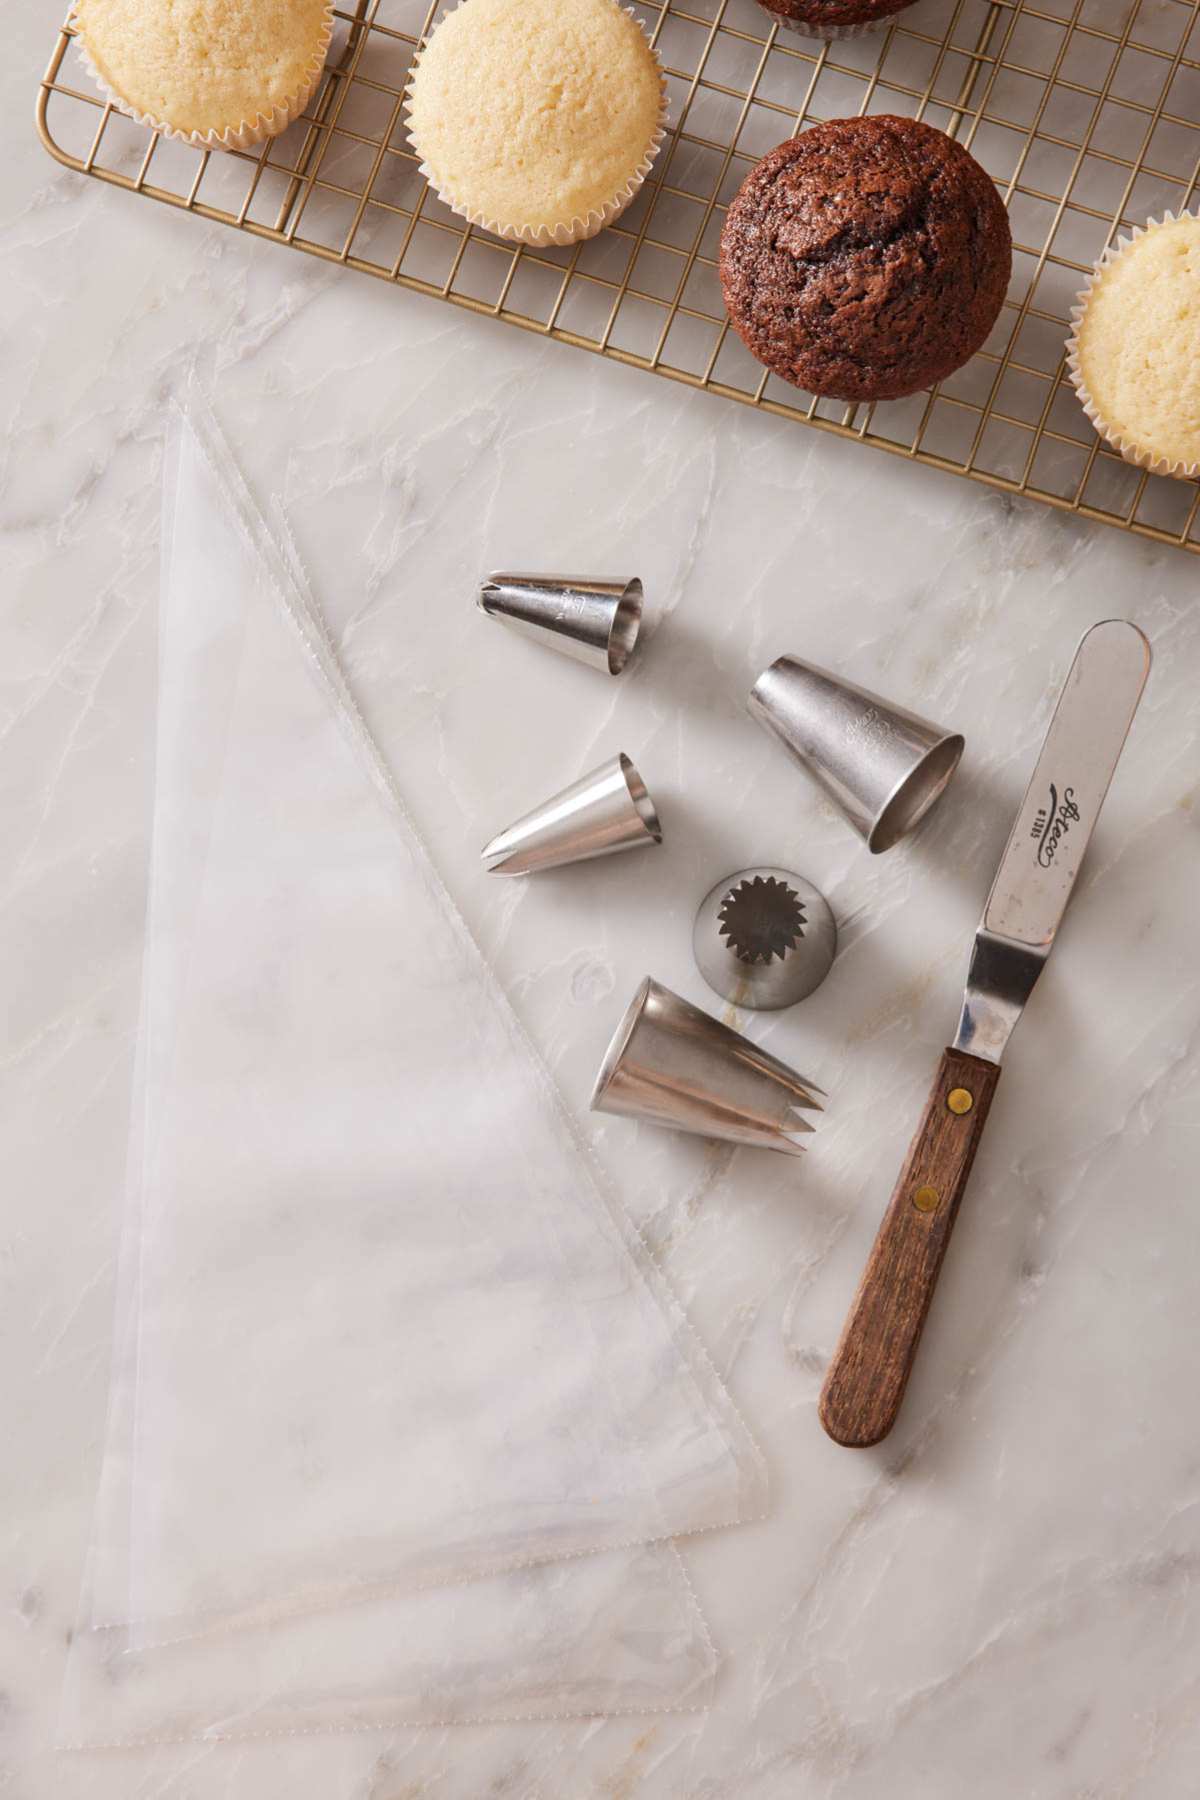
Piping bags — disposable plastic piping bags are the standard. Buy 16-inch or 18-inch bags (this size holds a full batch of frosting and gives you room to seal and grip the back without your hand crowding the tip). Reusable cloth or silicone bags work too, but disposables are easier and don’t trap residual frosting flavor between uses. If you plan on piping a lot of cupcakes, buy a roll. It’s more cost-efficient, and the roll keeps them tidy in storage. Look for professional-grade or “anti-burst” labeling. Some cheaply made ones can burst at the seams from the pressure of the frosting.
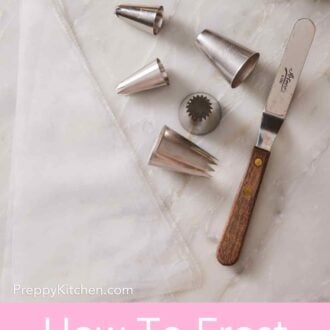
Piping tips — you will want a large piping tip to cover the cupcakes well. A good starter set is six large tips: an open star (Wilton 1M or Ateco 829), a closed star (Wilton 2D or Ateco 845 or 849), a French star (Wilton 4B or Ateco 864), a large round (Wilton 1A or Ateco 808), a petal (Wilton 104 or 127 or Ateco 127), and a leaf tip (Wilton 352). The Ateco and Wilton 6-piece sets cover most of these and are the kit I’d recommend if you’re starting from scratch. Tips are individually priced at $3-8 each, so a kit is a meaningful savings.
Offset spatula (optional but useful) — a small offset spatula (4-inch is the right size for cupcakes) is what you use for the no-piping “swoop” method, and also for cleaning up minor frosting smudges or smoothing the base of a piped swirl. It’s one of my most used kitchen tools (and so versatile for others using outside frosting) that it’s worth the $5. You can get them from any baking supply store or online.
Coupler (optional) — a coupler lets you swap piping tips while keeping the same bag of frosting. They are useful if you’re going to use multiple tips on the same batch or frosting color. Reminder: standard couplers don’t fit the larger tips (1M, 1A, 849). Those tips are wide enough that you can just drop them straight into the bag. Couplers are mostly for smaller writing tips and standard star tips. Make sure the coupler will fit the large base of your piping tips before purchasing.
Choosing Your Frosting
Not every frosting pipes the same. Here’s the quick framework:
| Frosting Type | Key Characteristics | Best For |
| American buttercream | The most common cupcake frosting. Made with powdered sugar, butter, and a splash of milk or cream. Pipes beautifully and holds its shape at room temperature. It can feather or get jagged on very thin edges if it is too dry or stiff. The default for most home bakers—sweet, simple, easy to make and pipe | Excellent for all types of decorative piping tips, even with finer details like French star or Russian flower piping tips. Ideal for making buttercream flowers. See my vanilla buttercream recipe for the classic version, plus flavored variations: chocolate buttercream, strawberry buttercream, Oreo frosting. |
| Swiss or Italian meringue buttercream | Made from egg whites cooked with sugar, then whipped with butter. Less sweet than American, silky-smooth texture. Pipes with a softer edge, but holds detail beautifully. Slightly more advanced to make. | Very stable and works especially well with closed star, Russian ball, petal, or ruffled piping tips. Both my Swiss meringue buttercream and Italian meringue buttercream recipes have full guides if you’re new to the technique. |
| French buttercream | Made with egg yolks cooked with sugar, then whipped with butter. Rich and custardy, holds piped detail fairly well, but is softer than American or Meringue. Has a natural pale yellow color. Underrated and so delicious! | Larger, less detailed piping tips work best (closed or open star, large ruffles). It gets soft fast, so keep it chilled or in a cool environment. See how to make French buttercream. |
| Cream cheese frosting | Softer than American buttercream and slightly tangy. Pipes nicely with enough sugar added, but doesn’t hold sharp detail as well. Refrigerate piped cupcakes if not serving immediately. | Use piping tips with larger teeth, like open or closed star tips. See cream cheese frosting. |
| Chocolate ganache (whipped) | Heavy cream and chocolate melted together, then whipped until pipeable. Decadent, dense, holds shape. | Piping tips with larger openings work well like all star tips, open round, Russian ball, or ruffles. See chocolate ganache for the base recipe. |
The frosting must be the right consistency to pipe well. Too soft, and the swirls collapse on contact with the cupcake. Too stiff, and the frosting tears as it leaves the tip. The ideal piping consistency: stands up in a peak when you lift the spatula, but bends slightly at the top. If your frosting is too soft, beat in more powdered sugar, a ¼ cup (30g) at a time. If it’s too stiff, beat in milk or cream a teaspoon at a time. Test by dipping a spatula in, pulling it out, and seeing if the peak holds.
You can also slightly warm or cool the frosting by grazing the outside of the bowl with a kitchen torch or hair dryer for a few seconds, or popping it in the freezer for 2-3 minutes. Beat again and check the consistency.
Coloring The Frosting
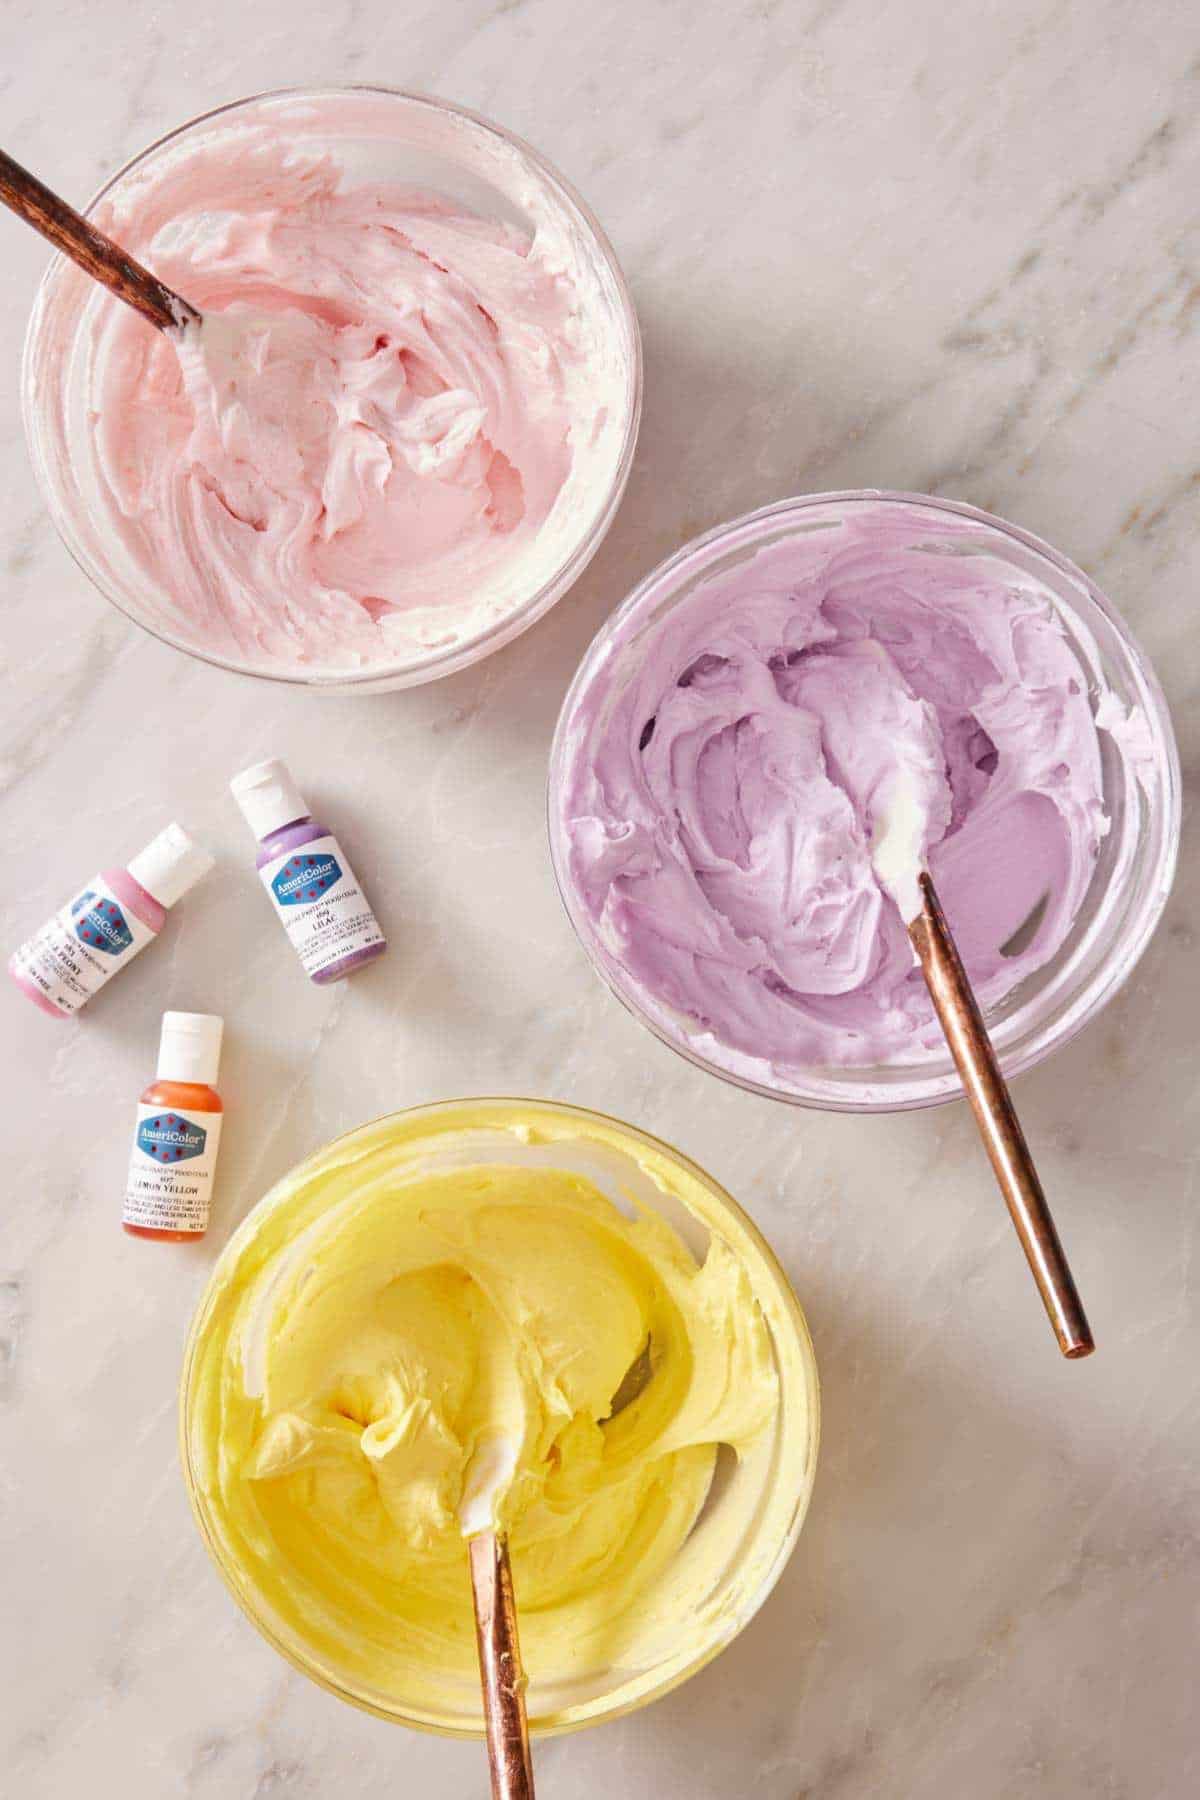
If you want colored frosting, use gel food coloring, not liquid. Gel coloring is concentrated, so a small amount produces vivid color without thinning the frosting. Liquid food coloring (the kind in the small dropper bottles in the baking aisle) requires a much larger amount to achieve the same intensity, and can soften your frosting to the point where it won’t pipe, or you have to add more sugar, throwing off the flavor balance.
How to color:
1. Add gel coloring sparingly. Start with 1-3 drops, mix thoroughly, then add more if needed. It’s easier to add color than to take it away.
2. Use a toothpick for very small amounts. For pastel colors, dip a clean toothpick into the gel and stir it through the frosting. This is the trick I use when I want a soft pink, mint, or buttercream yellow.
3. Color in a separate bowl, then transfer. If you’re piping multiple colors on the same batch of cupcakes, divide your frosting first, color each portion separately, then transfer each to its own piping bag.
4. The color may darken slightly as it sits. If you want a specific shade (say, a deep red for Christmas cupcakes), color the frosting, cover it, and let it sit for 30 minutes before filling your piping bag—the color often deepens. You can then adjust if needed.
For multi-color swirls (like a sunset gradient or a rainbow effect), use the double piping bag technique: color two or three separate batches of frosting, transfer each to its own smaller bag, and snip the tip, then drop all the bags into a single larger piping bag with one tip at the end. When you squeeze, the colors come out together in a swirl.
Tips For Using A Piping Bag
A few small adjustments make piping dramatically easier:
Use a large piping bag. 16- or 18-inch bags are standard. Smaller bags require constant refilling, which slows you down and creates more cleanup. (Reserve these for fine or small detail work.)The bigger bag fills with one batch of frosting and lets you grip the bag with your hand at the end, away from where the frosting is.
Don’t cut the opening too big. Cut just enough off the tip of the piping bag to let the decorative end of the tip fit through. If you cut too much, the tip will fall through the hole. Test: drop the tip into the bag, push it down toward the cut opening, and confirm only the decorative end (or about half of the whole piping tip) protrudes through. If the wider opening tries to slip through, you cut too much and will need a new bag.
Don’t overfill the piping bag. Fill the bag about ⅔ full. This leaves enough room at the top to twist the bag closed and grip it with your hand. Overfilling makes the bag awkward to grip and increases the chance of frosting squeezing out the top as you pipe.
“Burp” the bag to remove air. After filling, gently squeeze the bag to push frosting toward the tip and force any air pockets out. Pipe a small test swirl on a piece of parchment to confirm the frosting is flowing evenly without air bubbles. Air bubbles in your bag will cause your swirl to skip or split mid-pipe. Burping helps prevent this.
Hold the bag perpendicular to the cupcake when piping. With your dominant hand gripping the bag at the twist point, hold the bag straight up and down so the tip is directly above the cupcake. This gives you the most control over pressure and direction, and will result in straight swirls, not lopsided ones.
Squeeze with your dominant hand, guide with your non-dominant. The dominant hand applies even pressure to the bag; the non-dominant hand rests at the tip end to guide it precisely. Don’t squeeze with both hands at once—this is a common piping mistake. The lower hand should guide, not squeeze.
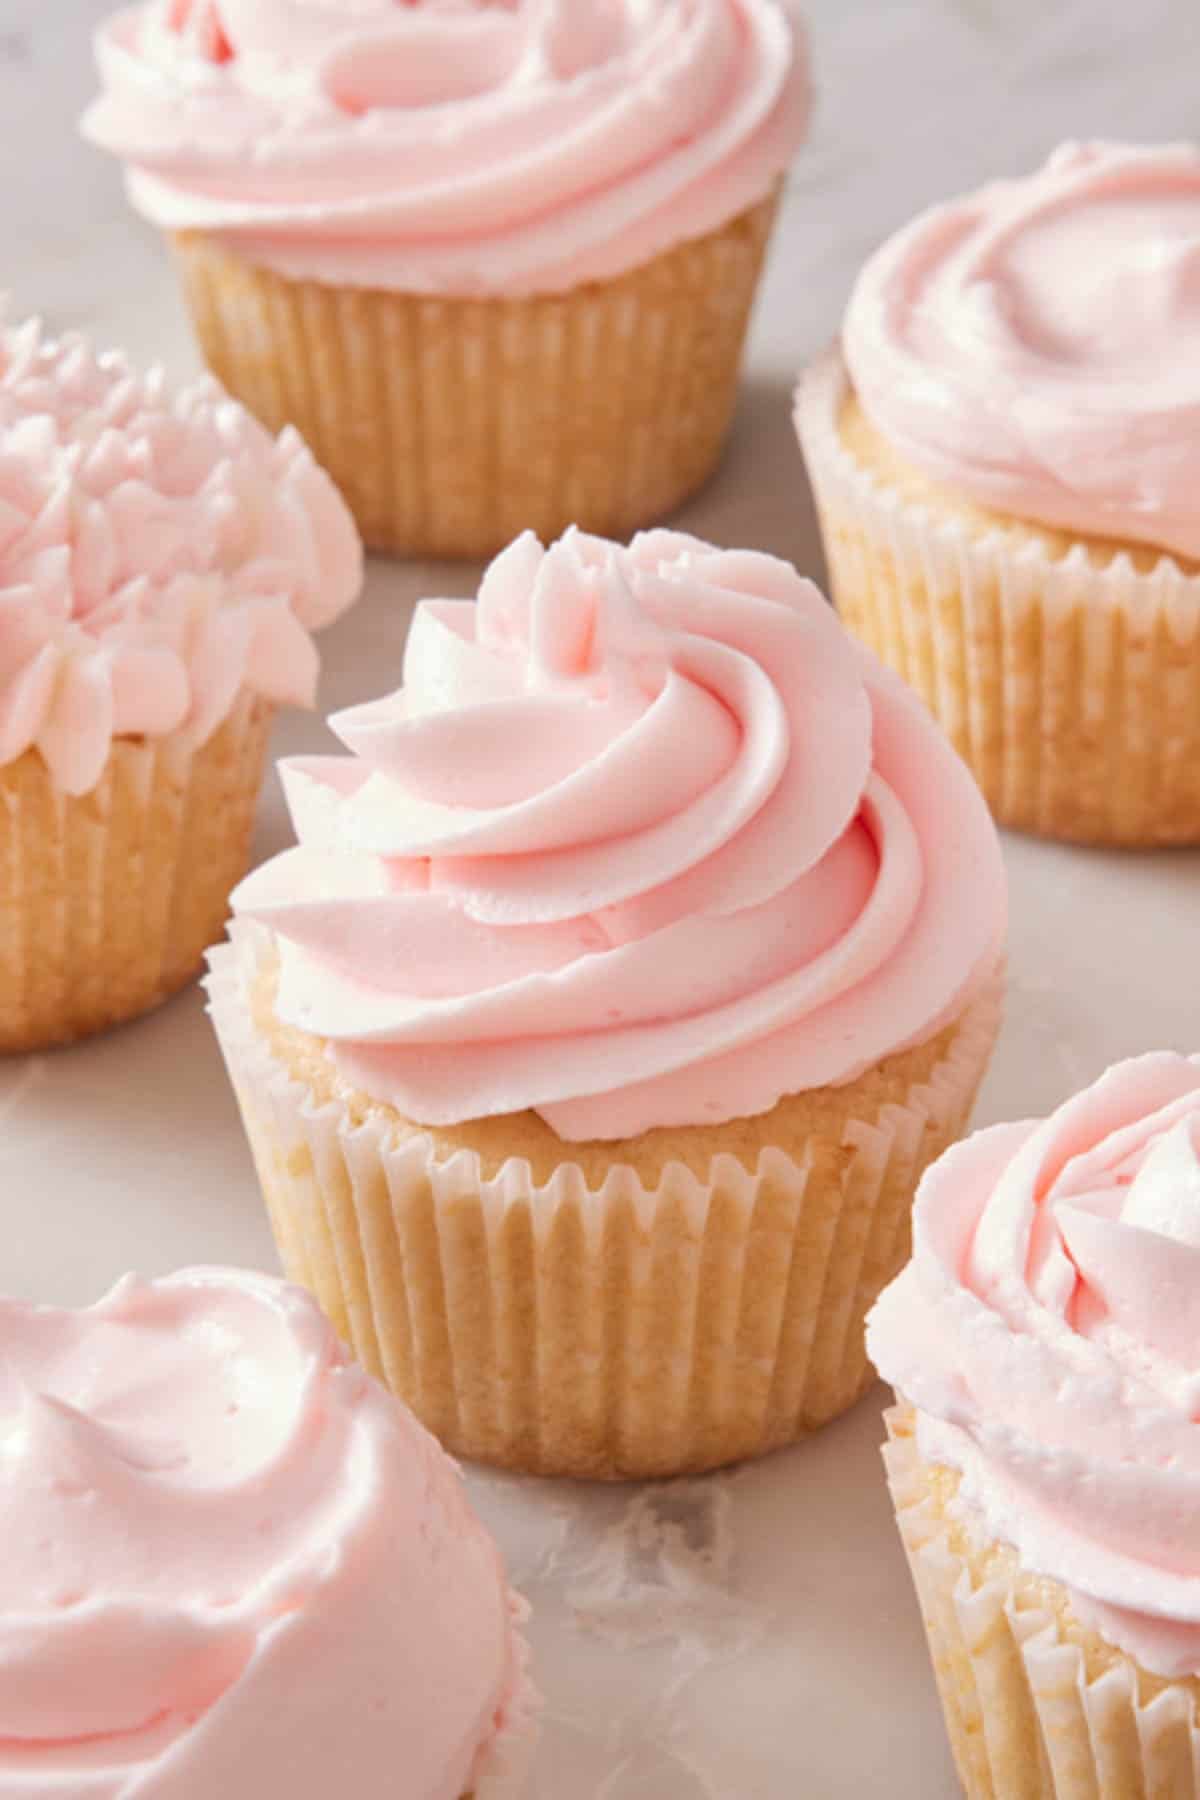
5 Essential Techniques For Frosting Cupcakes
These five techniques cover the vast majority of cupcake decorating you’ll ever do. They build on each other, so once you can do the classic swirl, the rosette is a small variation; once you can do the rosette, the hydrangea is a small variation. Practice each one a few times on a piece of parchment paper before committing to your real cupcakes. (You can scrape the frosting tests off the parchment and return it to the piping bag for your actual cupcakes!)
The Classic Swirl
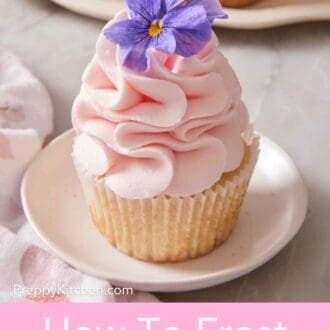
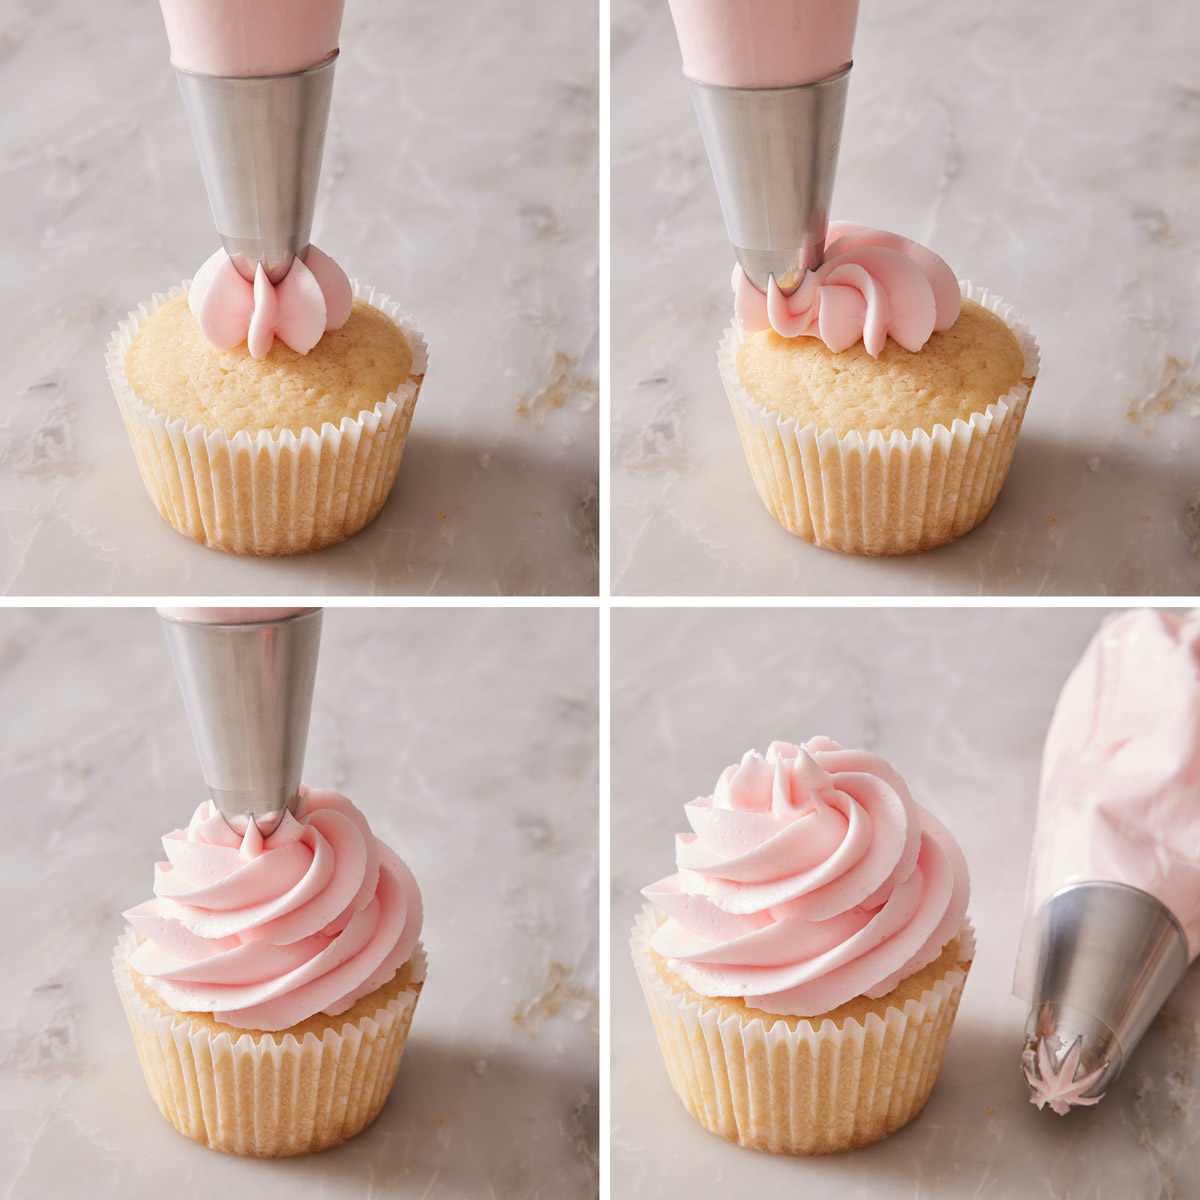
The most iconic cupcake look—a tall, ridged swirl rising from the cupcake top. Use an open star (Wilton 1M / Ateco 829) for a textured, ridged finish, or a closed star (Wilton 2D / Ateco 845 or 849) for a tighter, more refined swirl. For this demo, I use an Ateco 845 closed star tip.
Technique:
1. Hold the bag perpendicular to the cupcake.
2. Start with a small dollop of frosting in the center of the cupcake. Pipe a small mound (about ½ inch tall) right in the middle. This dollop fills the void at the center of your final swirl so the frosting doesn’t collapse inward as you pipe.
3. Starting at the outer edge of the cupcake, pipe in a circle around the dollop, working inward.
4. Continue spiraling inward and slightly upward. Once you make the first full rotation, pipe the second one on top of the first, but slightly closer to the center so the rotation is smaller. Use a singular, fluid motion (don’t stop between rotations), and make the circles a bit smaller as you move up, creating the pointed or pyramid-like shape. I usually do two or three full rotations, depending on how tall I want the swirl.
5. Finish at the center of the cupcake by stopping pressure and lifting the tip straight up to make a clean break.
The Swirl is essentially a mounded, layered spiral. And the center-dollop trick is the professional baker’s detail that I see many tutorials skip. Without it, the center of your swirl can hollow out, and the whole shape can collapse on itself. Always start with the dollop!
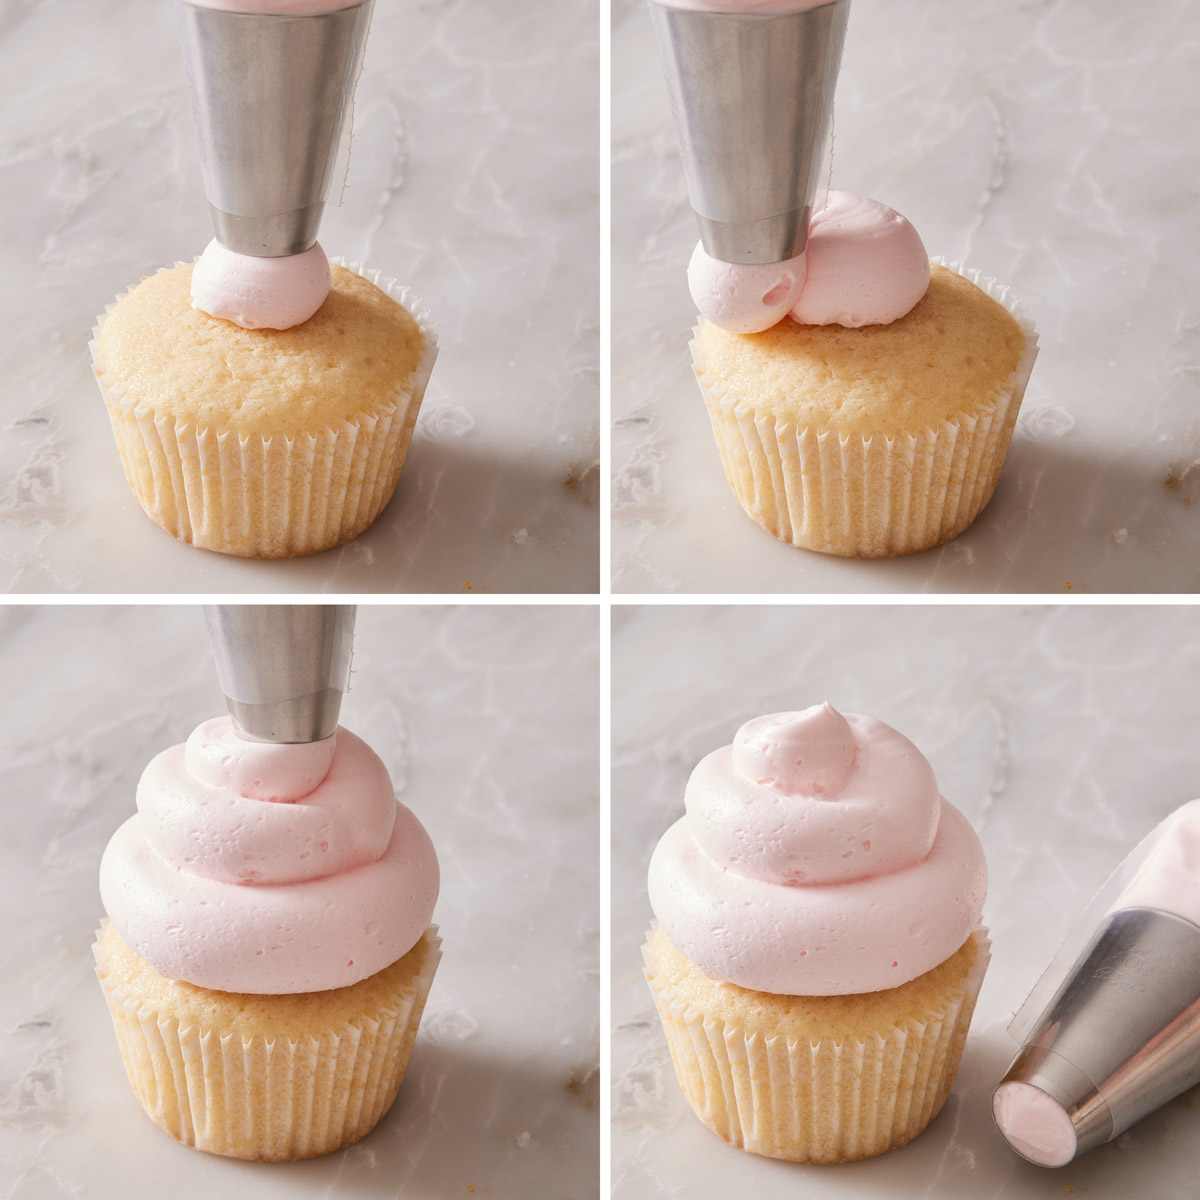
You can make this same swirl with a plain round tip for a very clean look. I love this one when I’m adding a garnish on top that I want to be the star, or I’m using marshmallow frosting. I used an Ateco 809 large open round tip for this demo.
The Rosette
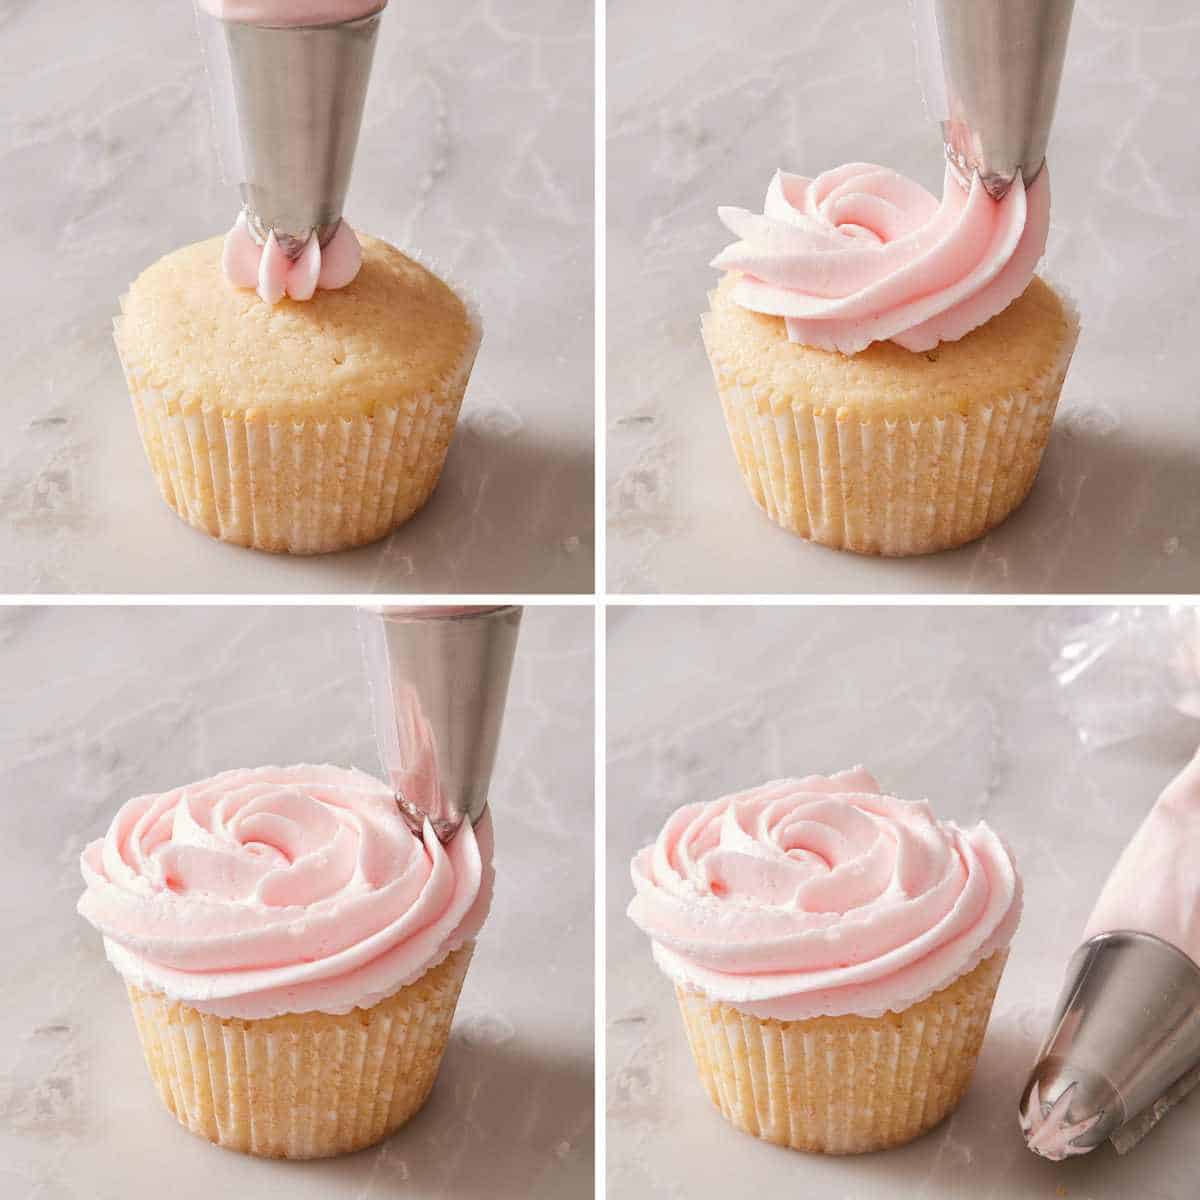
A spiral that looks like a rose flower, with the petals working outward. Use the same closed star tip (Wilton 2D / Ateco 845) for the most rose-like appearance. You will want a large tip, but one that isn’t too big, so you can make 3 full rotations on top of the cupcake. A tip roughly ½ inch in diameter at the decorative point works great. For this demo, I used an Ateco 845 closed star tip.
Technique:
1. Hold the bag perpendicular to the cupcake.
2. Start in the center of the cupcake. Pipe a small dollop, then begin spiraling outward. I like to do this in one fluid motion, so there is no break in the frosting spiral.
3. Rotate the piping tip in a circle around the center dollop, expanding the spiral as you go. Do not stack the frosting this time. You want a single layer of frosting on your cupcakes for the rose shape.
4. Continue until you reach the outer edge of the cupcake.
5. Release pressure and lift away.
The rosette and the classic swirl are mirror images: the swirl spirals from outside in; the rosette spirals from inside out. Both techniques use the same tip, just in opposite directions.
The Ruffle
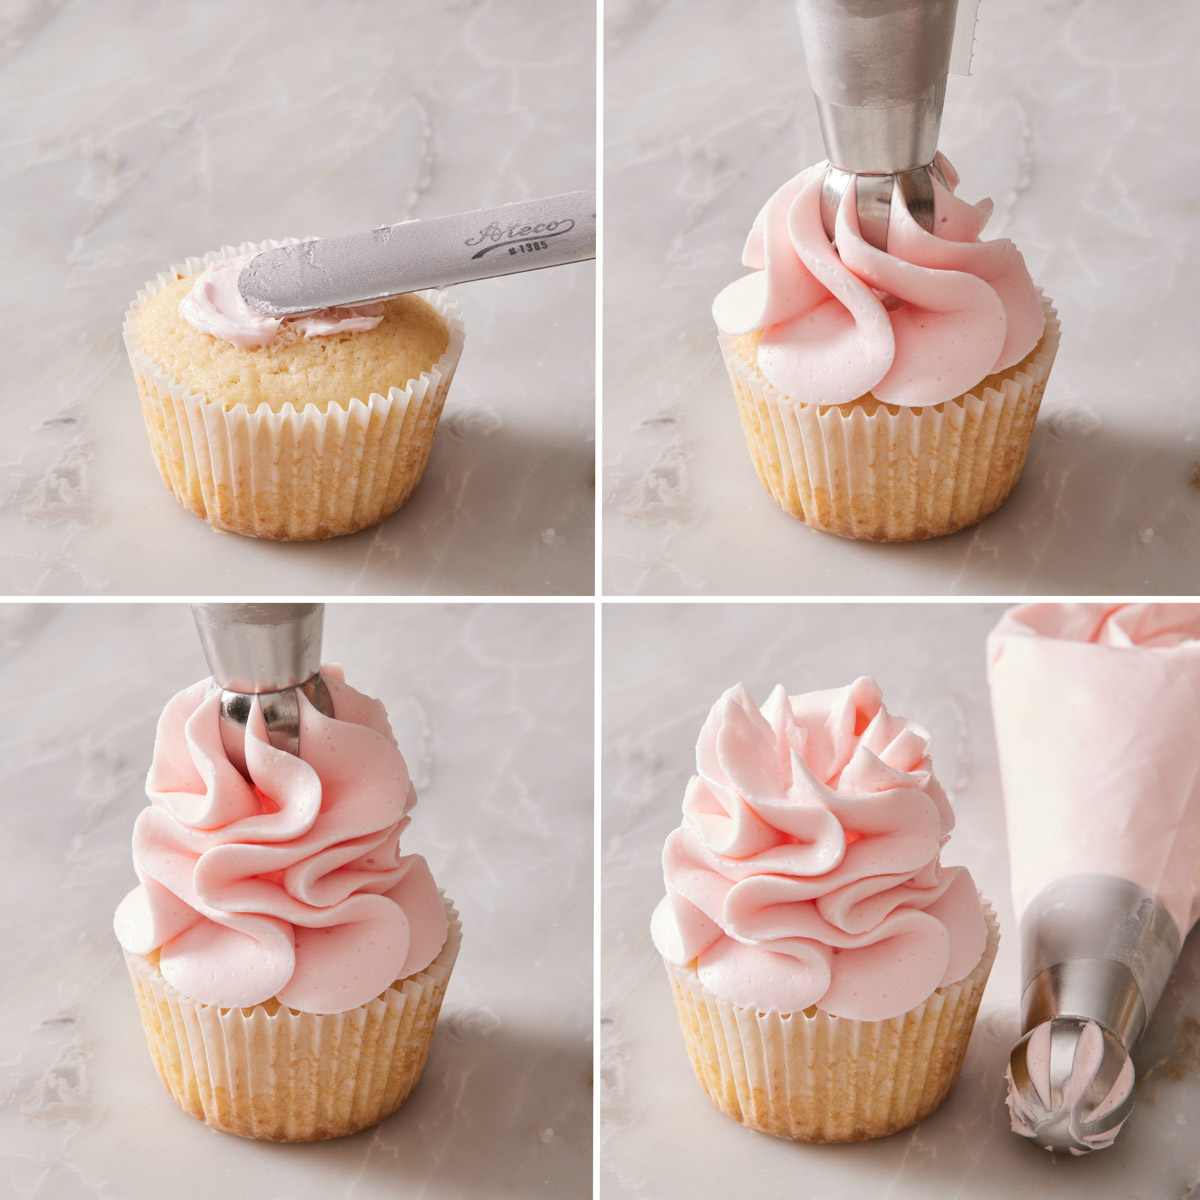
A frilled, ribbon-like effect that looks like a flower’s outer petals or a stack of rippling fabric. Use a closed star (Wilton 2D / Ateco 845 or 849) or a large Russian ball. For this demo, I used a large russian ball. (This is a specialty tip, but if you like this look, it’s worth getting!)
Technique:
1. Smear a small amount of frosting on the center of the cupcake. This will give the piped frosting something to stick to when you start lifting up the bag.
2. Place the tip directly in the center of the cupcake, holding the bag straight up/perpendicular to the cupcake. Begin squeezing.
3. Squeeze the frosting until it reaches the edge of the cupcake, then slowly start lifting the bag while you continue to squeeze.
4. Apply continuous pressure as you move the bag upwards in a straight motion. This will create a tall mound of frosting, and the ruffles will layer on top of each other.
5. When you have reached the height you like, stop squeezing and lift the bag straight up for a clean break. You may have a small dimple in the center on top—this is the perfect place for a garnish! I like to add a piece of fresh fruit, an edible flower, a stemmed cherry, or a chocolate espresso bean.
Ruffles take slightly more practice than swirls because there is some technique in coordinating the pressure and movement for a gorgeous ruffle. But it produces a distinctive, more decorative look, perfect for tea-party cupcakes or wedding-style desserts.
The Hydrangea
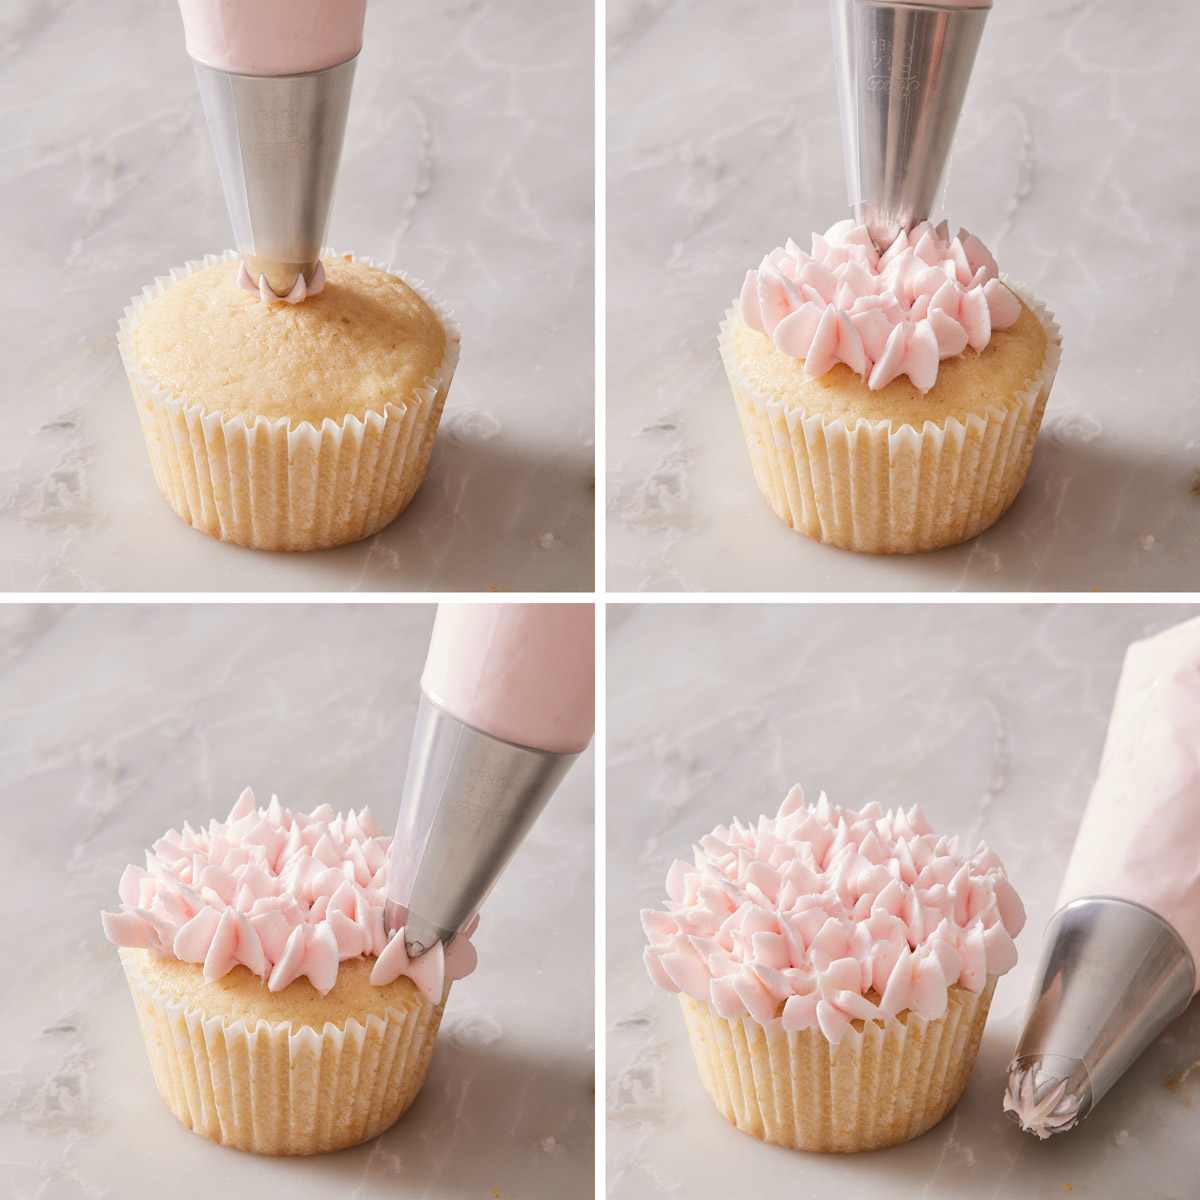
Multiple small stars clustered together to form a flower-like dome on top of the cupcake. This technique looks complex but is genuinely simple. Use a medium closed star (Wilton 30 / Ateco 844), large closed star tip (Wilton 2D / Ateco 845), or a Russian flower tip (a special tip that produces a flower shape in one squeeze). For this demo, I used an Ateco 844 tip.
Technique:
1. Hold the bag perpendicular to the cupcake.
2. Pipe a small star directly in the center of the cupcake (squeeze, lift, release).
3. Pipe more small stars around it, working outward in a circle. Each star is one squeeze-and-lift motion.
4. Continue until the entire top is covered with overlapping small stars.
To level it up: The hydrangea look works especially well with two slightly different colors of frosting. For example, a base of light blue with a few darker blue stars scattered through to the edges gives a more realistic look. The variation also prevents the cupcake from looking flat.
The Swoop (Piping Optional!)
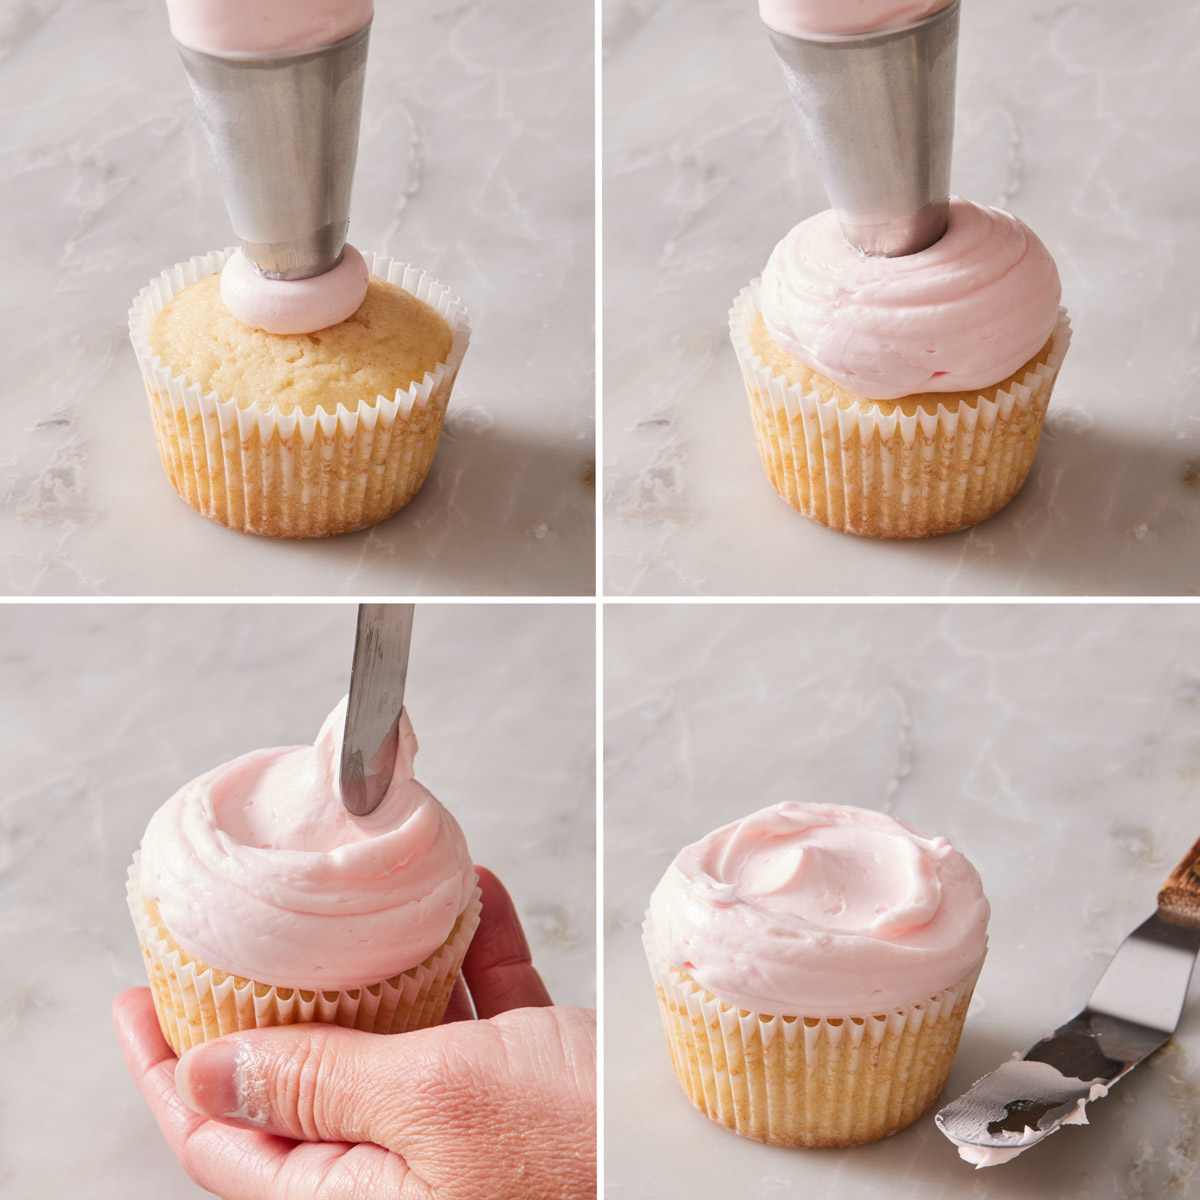
For when you don’t have fancy piping tips, don’t have time, or want a more rustic look. The swoop uses an offset spatula or the back of a spoon.
Technique:
1. For no piping: Use a triggered cookie scoop or a spoon to dollop about 1½ to 2 tablespoons of frosting onto the center of the cupcake. I like using a cookie scoop because it gives a nice, rounded shape to start. To pipe: Use an open round tip, or simply cut ½ inch off the tip of a piping bag and pipe a large dollop on top to cover the cupcake.
2. Use the back of a small offset spatula (or a butter knife or spoon) to spread the frosting outward to the edges, if needed. You can start in the center of the dollop and apply light pressure down and out to push the frosting towards the edge, without disturbing the whole mound.
3. As you reach the edges, press down slightly while moving in a spiral pattern—this creates a subtle swirl pattern as you smooth the frosting.
4. Finish with a small swoop or peak at the top by rotating the spatula at the center.
The swoop is what professional bakeries use for a “rustic” look, and it’s the technique I’d recommend for new home bakers who don’t yet own piping bags. The result looks intentional and bakery-worthy without special skills or tools. It’s also the fastest!
The Differences Between Star Piping Tips
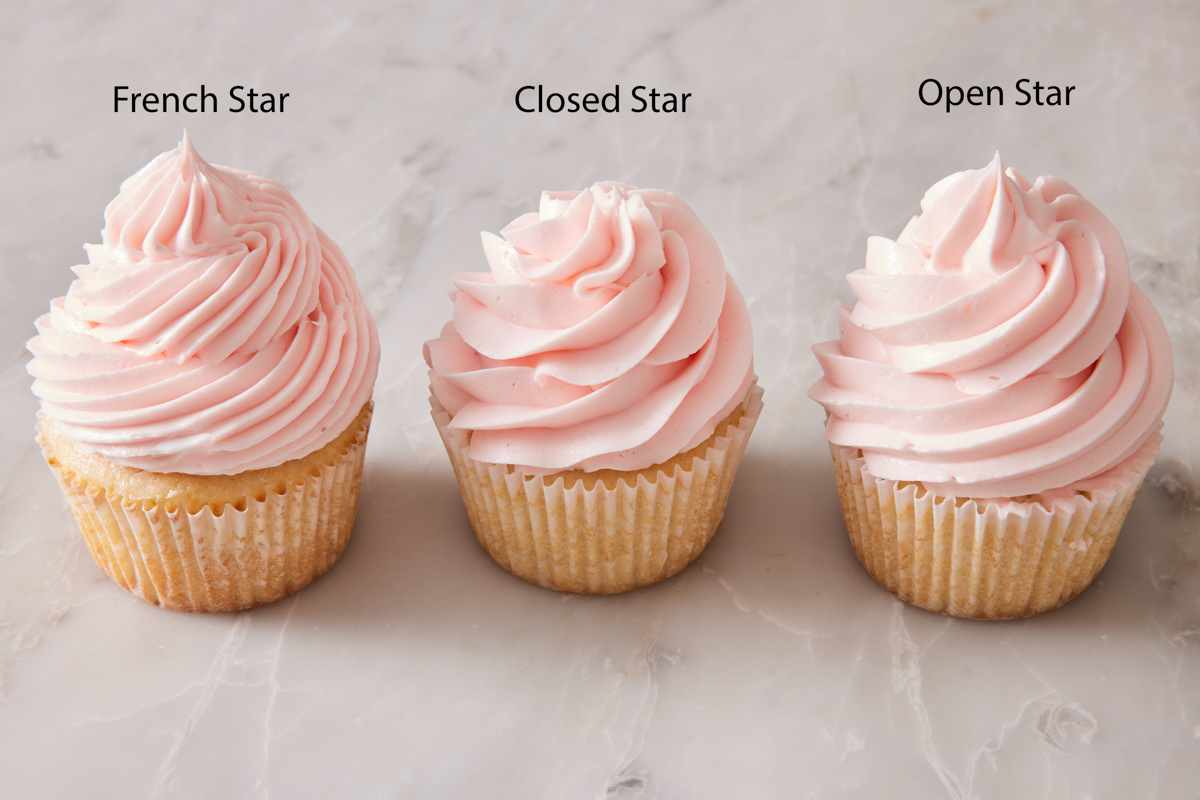
The three categories of star tips produce piping with different-sized ridges, creating visually distinct swirls and other decorations. Knowing which is which helps you match the look to the cupcake style you want:
| Tip Type | Visual Effect | Best For |
| French Star (Wilton 4B, Ateco 869) | Open star shape with many small teeth/points close together (16-18 points); ridges look almost feathered and elegant | When you want something between the bold open star and the refined closed star; best for swirls |
| Closed Star (Wilton 2D, Ateco 845) | Deeper, thinner ridges, more refined, slightly ruffled looking (Number of teeth range by tip size) | Elegant cupcakes; most adaptive for rosettes, hydrangeas, ruffles, and swirls |
| Open Star (Wilton 1M, Ateco 829) | Bold, sharp ridges spaced wider apart (typically 6-10 points; can vary by size) | Classic bakery swirl |
The Wilton 1M and Ateco 829 are the most commonly used and are great options to have. The Wilton 2D and Ateco 845 are my go-to tips for an easy yet elegant cupcake—slightly more refined than the 1M. (I use them on my vanilla cupcakes, for example.) The Ateco 845 is the same shape as the 849 but slightly smaller. I prefer the 845 for more general use, including mini cupcakes or when you want a more delicate swirl. (849 is great for regular cupcakes or large dollops on top of layer cakes, but is less versatile because of its size.)
Other Piping Tips To Try
Beyond star tips, three other tip categories produce distinctive looks and are worth trying out if you want something different:
Petal tip (Wilton 104 or 127 or Ateco 127) — used for a flat ruffle technique. Also great for piping flower shapes (roses, daisies) on top of cupcakes. The teardrop shape is the giveaway.
Russian flower tips — special tips that produce a complete flower shape (rose, peony, hydrangea) in a single squeeze. The shape is built into the tip itself, so you just press, lift, and release. These are great for someone who wants impressive results without learning hand techniques. You can learn all about using them in my Russian piping tips guide!
Leaf tip (Wilton 352) — produces a V-shaped leaf with a pointed tip. Used to add green leaves around piped flowers on top of cupcakes. Adds a lovely botanical detail.
Troubleshooting Common Issues
Frosting is too stiff. If your frosting tears as it comes out of the tip, or if you have to squeeze hard to extract any frosting at all, the consistency is too thick. Beat in more milk or cream a teaspoon at a time, until the frosting is soft enough to flow but still holds its shape.
Frosting is too runny. If your swirls collapse, slump, or won’t hold their shape on the cupcake, the frosting is too soft. Add powdered sugar a quarter cup at a time, beating between additions, until the frosting holds a peak when you lift a spatula. It also might be too warm. You can cover the bowl and pop it in the fridge for 5-10 minutes, then beat again to see if it stiffens up. Watch for over-stiffening—once you go too thick, you’ll have to add liquid back or let it warm back up.
My frosting has air bubbles. Tiny air bubbles in the frosting cause swirls to skip or split mid-pipe, or give the frosting a foamy look. (This is not the same as large pockets in the piping bag from filling it.) To fix: take the frosting out of the piping bag, transfer it to a stand mixer, and beat on Stir or low speed (paddle attachment, not whisk) for 1-2 minutes. Low speed pushes air pockets out; high speed adds more. Refill the piping bag and burp it again before piping.
Clogged piping tip. Almost always caused by a chunk of butter that didn’t fully incorporate, or clumps in powdered sugar that weren’t sifted before mixing. To fix mid-pipe: stop, remove the tip, push the chunk through, and rinse the tip if needed. Prevention: sift powdered sugar before adding to the frosting; ensure butter is fully softened before mixing.
The frosting is melting on the cupcake. Either the cupcakes are too warm (let them cool another 15-20 minutes), or the frosting itself is too warm (refrigerate the piping bag for 10 minutes, then continue). On a hot day, both can happen at once. On a really warm day, I like to chill my cakes before frosting them to help the icing hold.
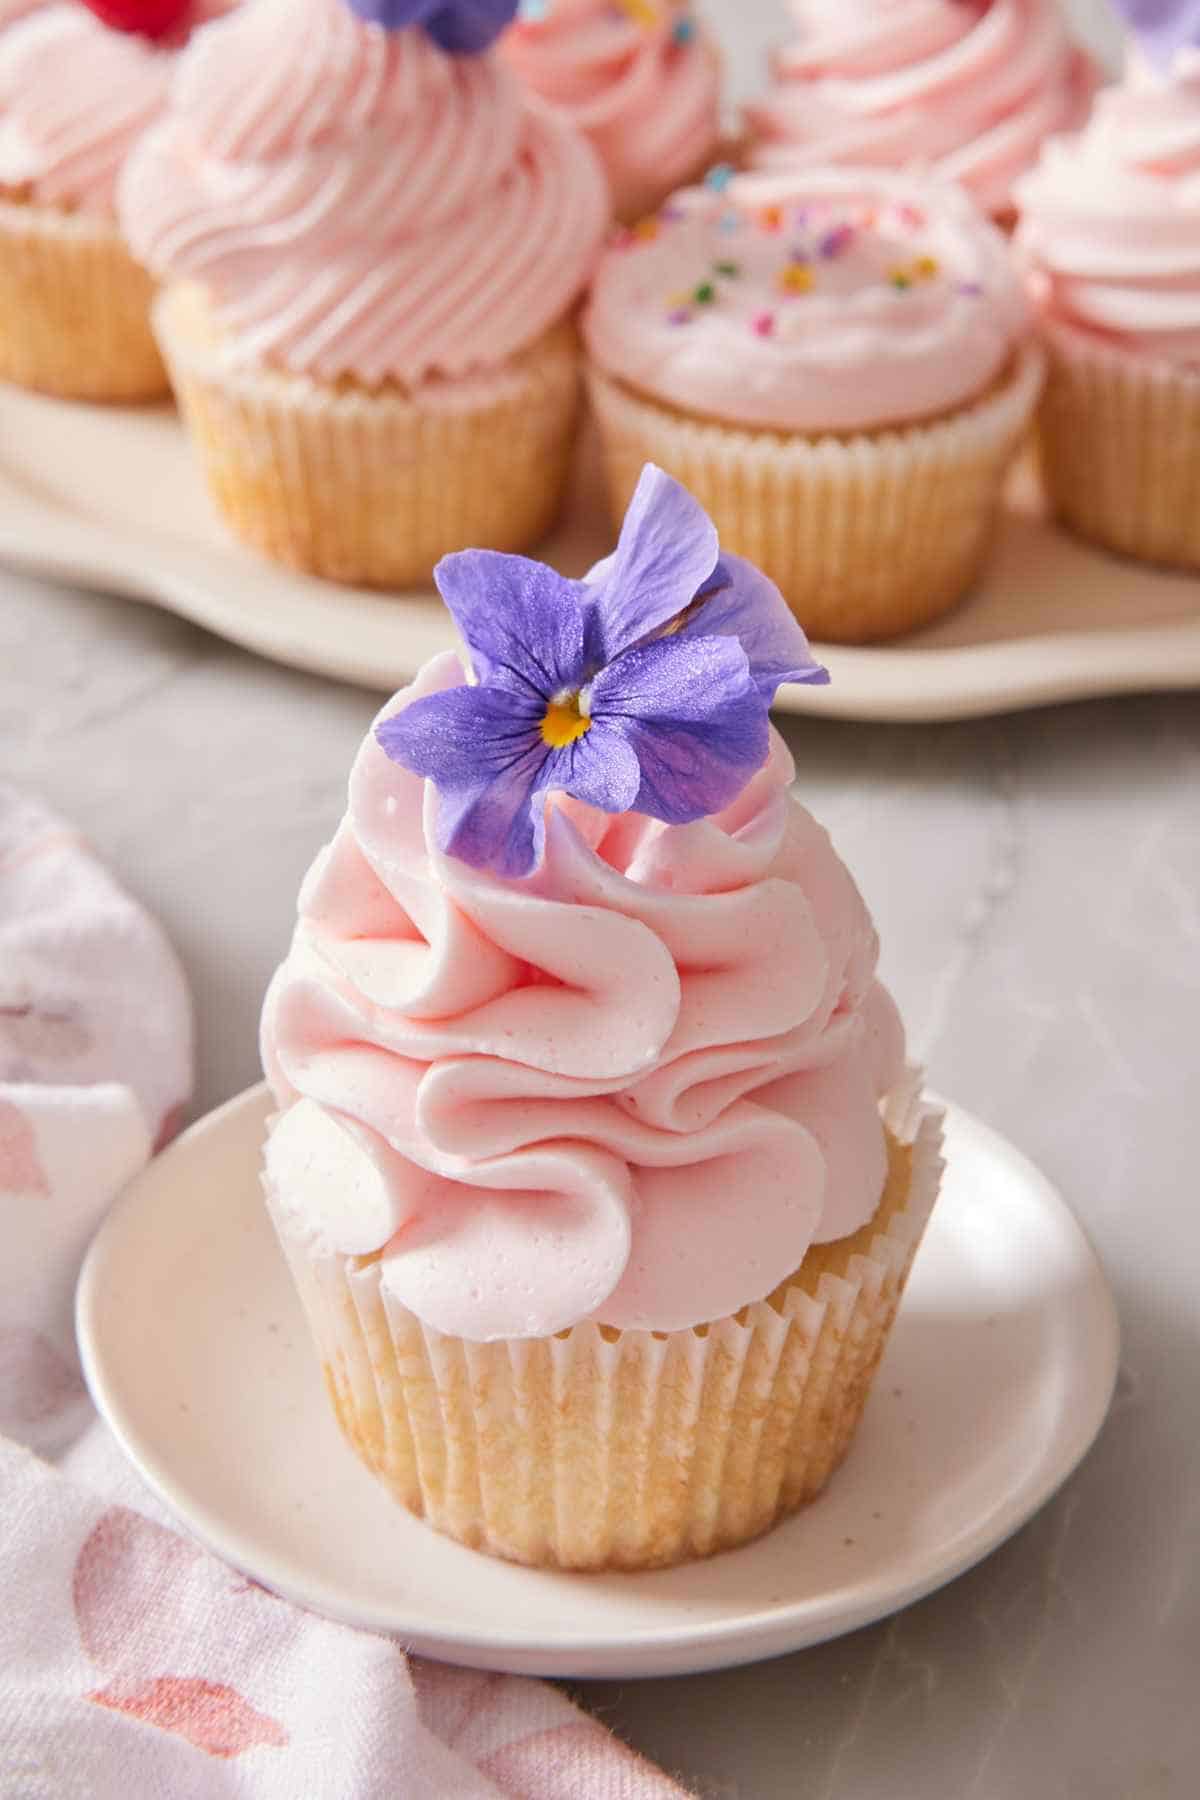
Adding Final Decorations
Decorations are what take a frosted cupcake to the next level. It’s an easy way to dress them up for specific holidays or occasions. A few of my pro-tips for adding additional toppings:
Add decorations within a few minutes of piping. Sprinkles, candies, and edible flowers stick to fresh frosting easily. Frosting that’s started to crust means they will slide right off. Pipe a few cupcakes, then go back and add decorations while the frosting surface is still tacky.
Keep freshness in mind. If you are adding edible flowers or fresh fruit, frost and decorate the cupcakes shortly before serving them, or keep them refrigerated afterward.
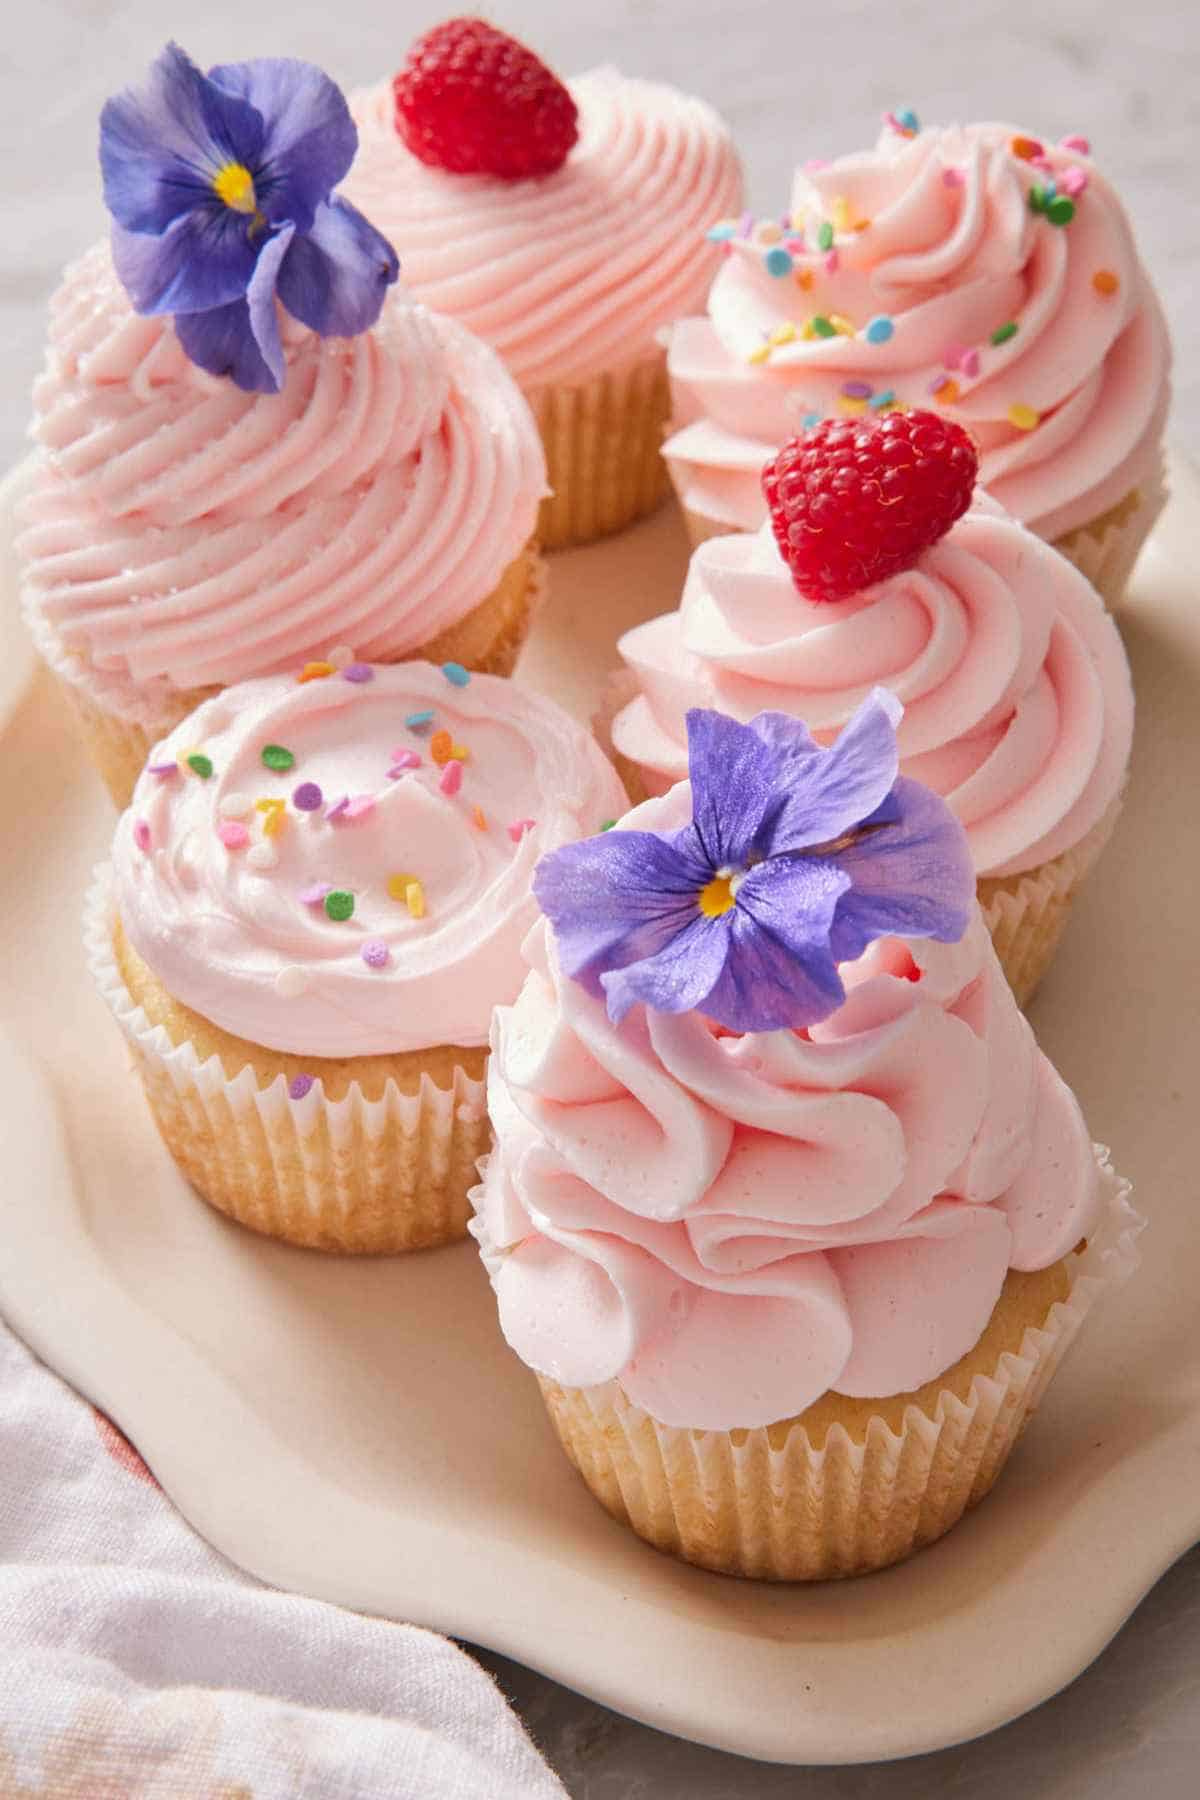
My favorite decoration options:
- Sprinkles — classic, fast, available in any color/shape combination. Buy a variety jar from Wilton as a good starter set.
- Candies — chocolate-covered espresso beans (great for tiramisu cupcakes), mini M&Ms, candied citrus zest, miniature chocolate truffles.
- Fresh fruit — a single raspberry, a slice of strawberry, a few blueberries, a thin lemon slice. These add color and can be used as a flavor cue.
- Edible flowers & herbs — pansies, violets, chamomile flowers, mint leaves, rosemary. Excellent for tea parties and weddings. Source from a reliable specialty grocer or farmer to ensure they’re food-grade.
- Buttercream piped accents — small piped flowers, leaves, or shapes in a contrasting color. The lemon wedge on my lemon cupcakes is a fun example!
FAQs
The swoop method (no piping bag required, just a small offset spatula or the back of a spoon) is the fastest and most foolproof. It produces a rustic, intentional look that’s bakery-worthy without any piping skills. See the Swoop section above for the technique.
Ideally, the day of serving. Freshly piped frosting is at its most beautiful—sharp swirls, vibrant color, creamy texture. After 24+ hours at room temperature, even when covered, the surface starts to crust and lose shine. For a dinner party or special occasion, frost the day of. For traveling cupcakes (taking to a friend’s house, sending to school), 4-6 hours ahead is still great.
Yes, in a pinch. Fill a sturdy gallon-size ziplock about ½ full of frosting, push the frosting toward one corner, snip the corner off (small cut for thin lines, larger cut for thicker frosting), and pipe. You can also fit a piping bag in the corner of the bag, if you’d like.
Caution: Zip-top bags aren’t as strong as piping bags, so they can split under pressure. Plus, the zipper is bulky and can make them a bit hard to squeeze. It’s useful for a quick last-minute frosting job, but invest in real piping bags if you make cupcakes more than occasionally.
Yes, and it’s a smart way to prep! Make and color frosting a few days ahead (check your specific recipe for storage time), store covered in the fridge, then bring to room temperature and re-whip briefly before transferring to a piping bag. The flavor often improves with the rest. Citrus zest in particular gets stronger with time, which is why some bakers (like reader Candace in the review at the start of this lesson) deliberately make frosting ahead.
More Cupcake Tutorials And Recipes To Try
Cupcake technique tutorials:
- Academy: Cupcake Pan Sizes & Types — choosing the right pan for your cupcake style; standard, mini, or jumbo.
- Academy: How To Freeze Cupcakes — the flash-freeze method that works for both unfrosted and frosted cupcakes so you can save cupcakes for months.
- Academy: How To Measure Ingredients Correctly — accurate measurements matter for the best cupcakes with flat tops to hold your piped frosting.
Cupcake recipes ready for a beautiful swirl:
- Moist Vanilla Cupcakes — my most popular cupcake recipe. I use sour cream for moisture that lasts for days.
- Chocolate Cupcakes — moist, fluffy, deeply chocolate. Pairs perfectly with chocolate or vanilla buttercream.
- Strawberry Cupcakes — fresh strawberry cake with strawberry buttercream.
- Carrot Cake Cupcakes — perfect with cream cheese frosting.
- Coconut Cupcakes — tropical and buttery.
If you’ve read this lesson on How to Frost a Cupcake, then don’t forget to rate it and let me know how you got on in the comments below. I love hearing from you!






