
This post may contain affiliate links. Please read our disclosure policy.
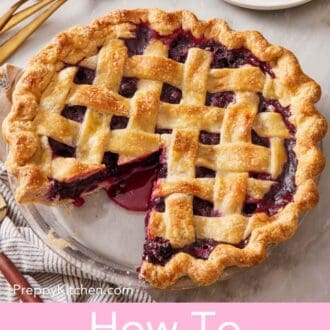
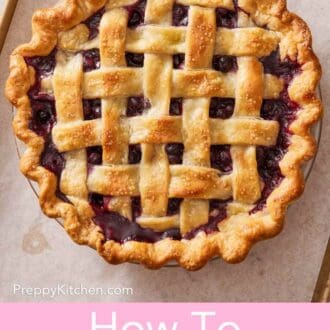
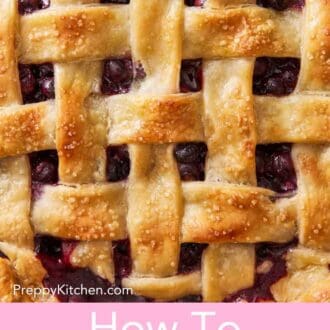
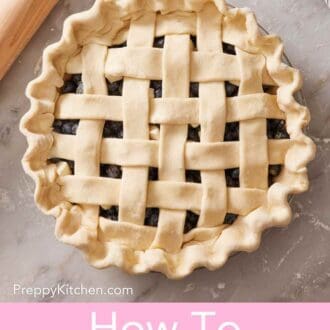
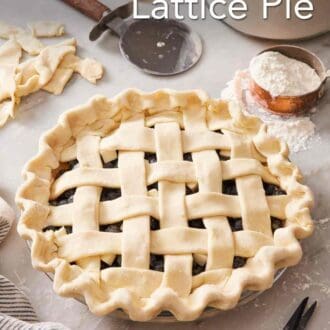
A lattice top is the single most impressive-looking thing you can do to a pie crust, and one of the easiest (trust me!). This guide walks through the over-under weave, the cold-dough trick that makes everything go smoothly, exact strip widths, and which pies actually benefit from a lattice (and which don’t).
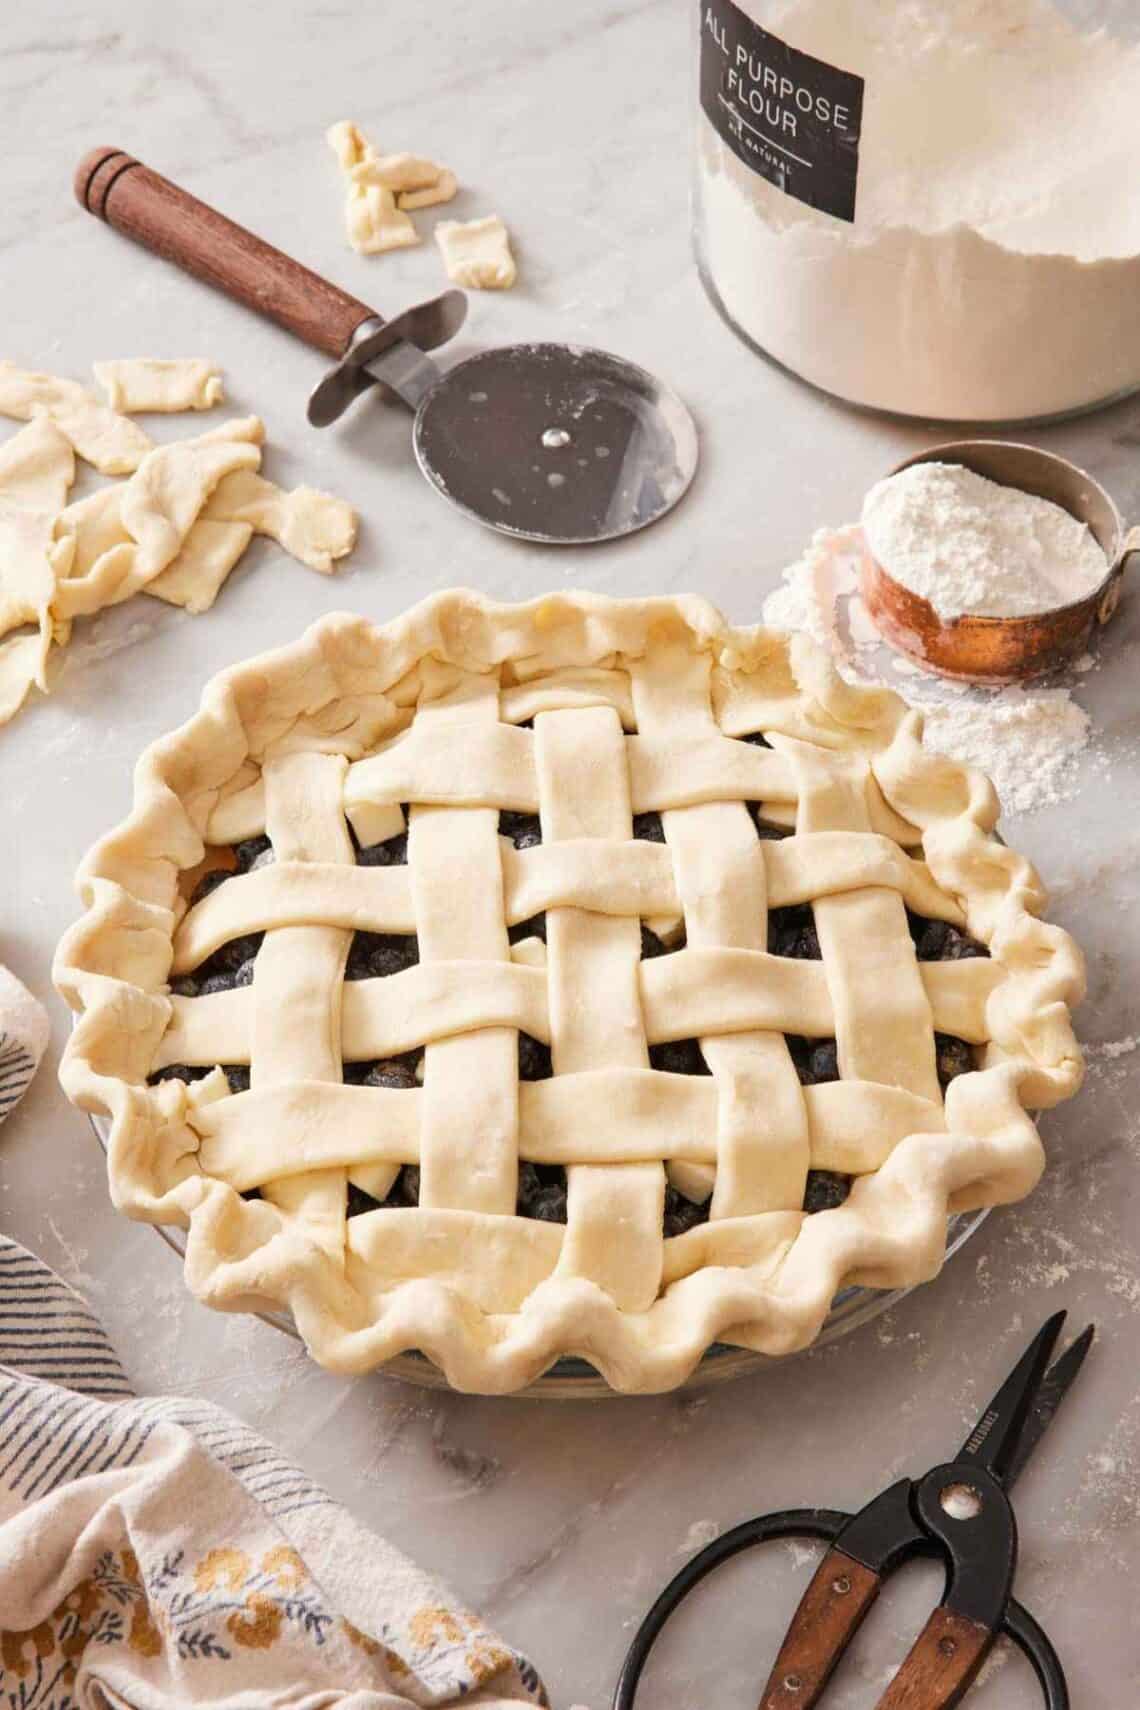
A lattice pie crust looks like an advanced bakery technique, but it isn’t. The first time I made one, I assumed I would spend an hour fumbling with strips of dough and end up with a tangled mess. The actual time, once I’d cut the strips, was about 5 minutes. A lattice is just a basic basket-weave pattern made by folding alternating strips back, laying a perpendicular strip down, then folding the original strips back over the top. Repeat until done. The whole thing is very methodical once you see it work once.
In this lesson, I’ll cover what a lattice pie crust actually is and why bakers use one, the exact tools you need (only three), the step-by-step weave, and the cold-dough test that explains why some bakers nail it, and others fight torn strips the whole way. Plus, you’ll learn the right strip width for the look you want, which pies are best suited to a lattice top, and how to troubleshoot the common problems like torn strips, sinking tops, and filling bubbling through. By the end, you’ll be able to lattice any double-crust fruit pie with confidence.
“I could never understand how a lattice worked until I followed this tutorial. My apple pie looked stunning and rustic in the best way. Thank you for so many step-by-step images! Also, keeping my dough cold did make a big difference in how easy the strips were to fold.”
Hannah
What Is A Lattice Pie Crust?
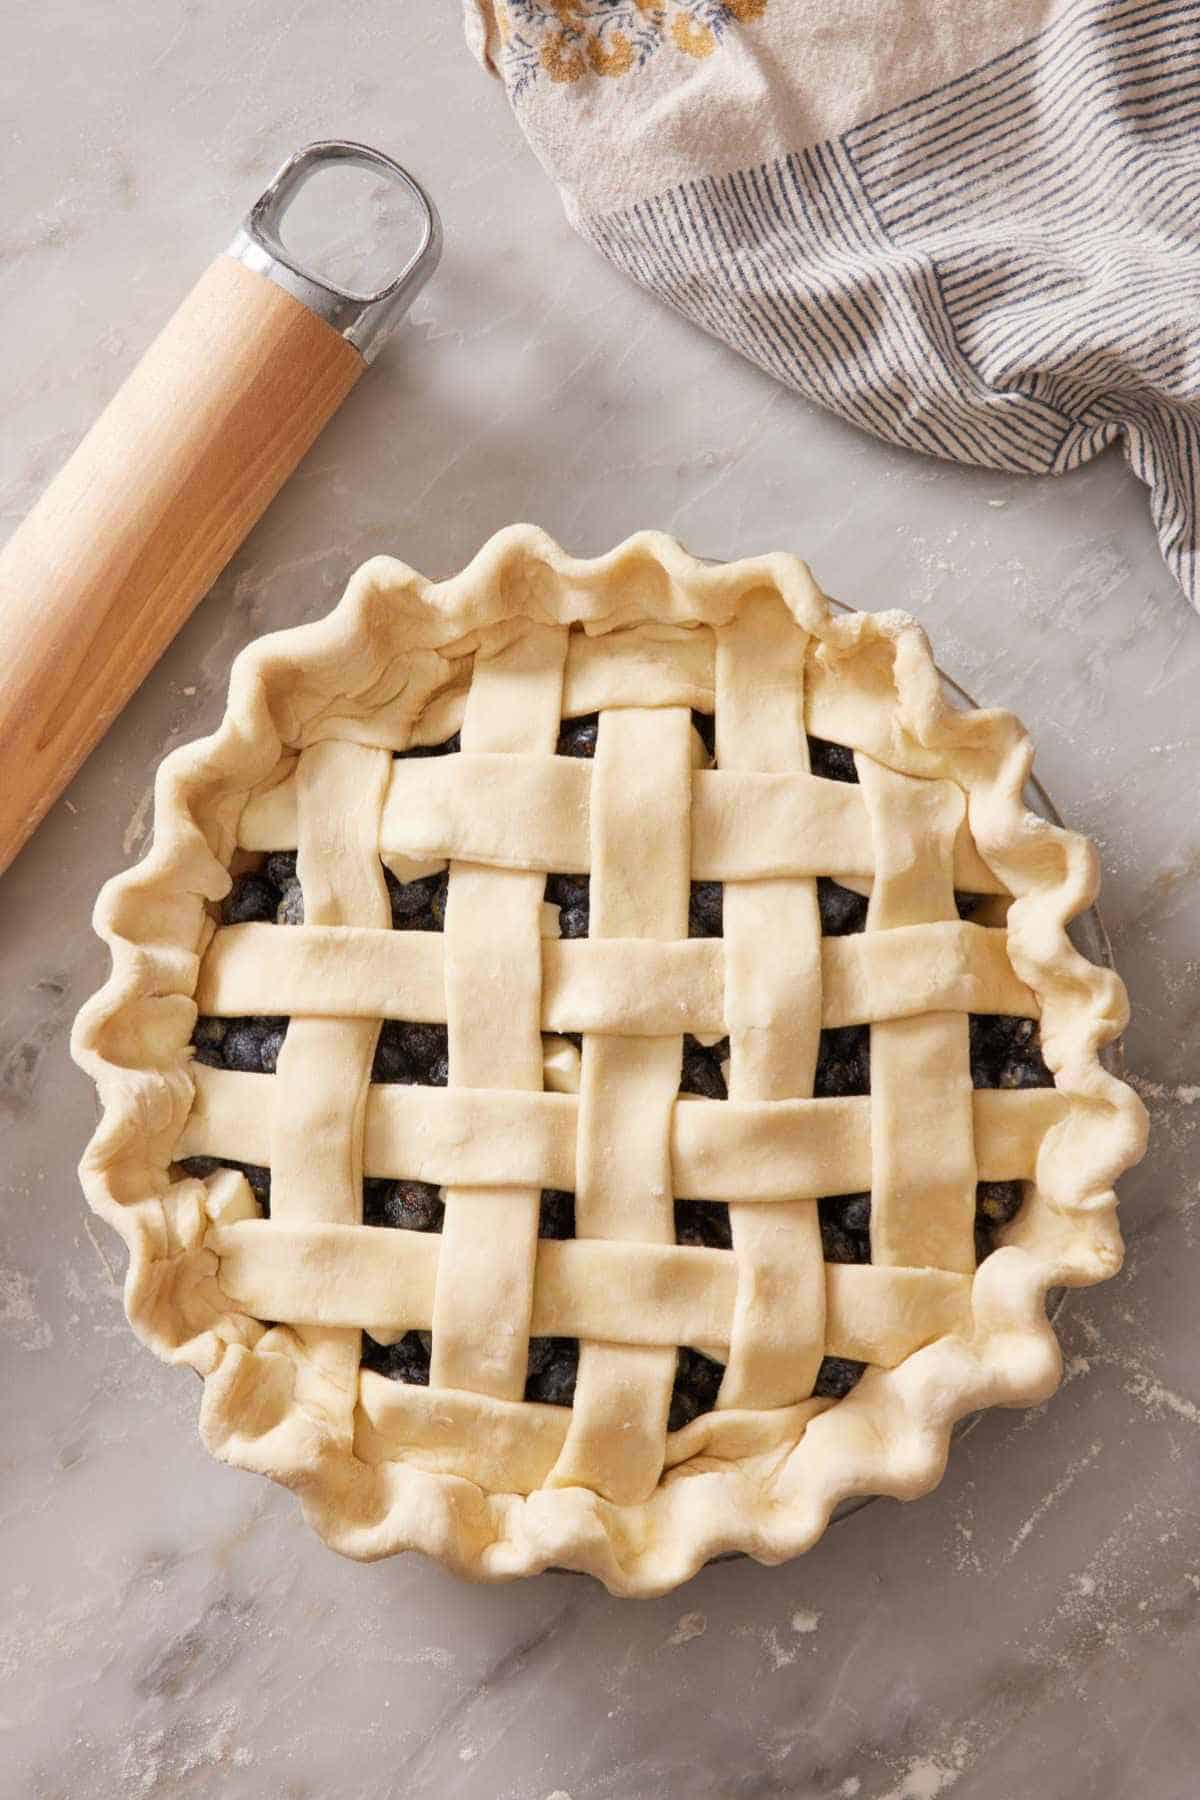
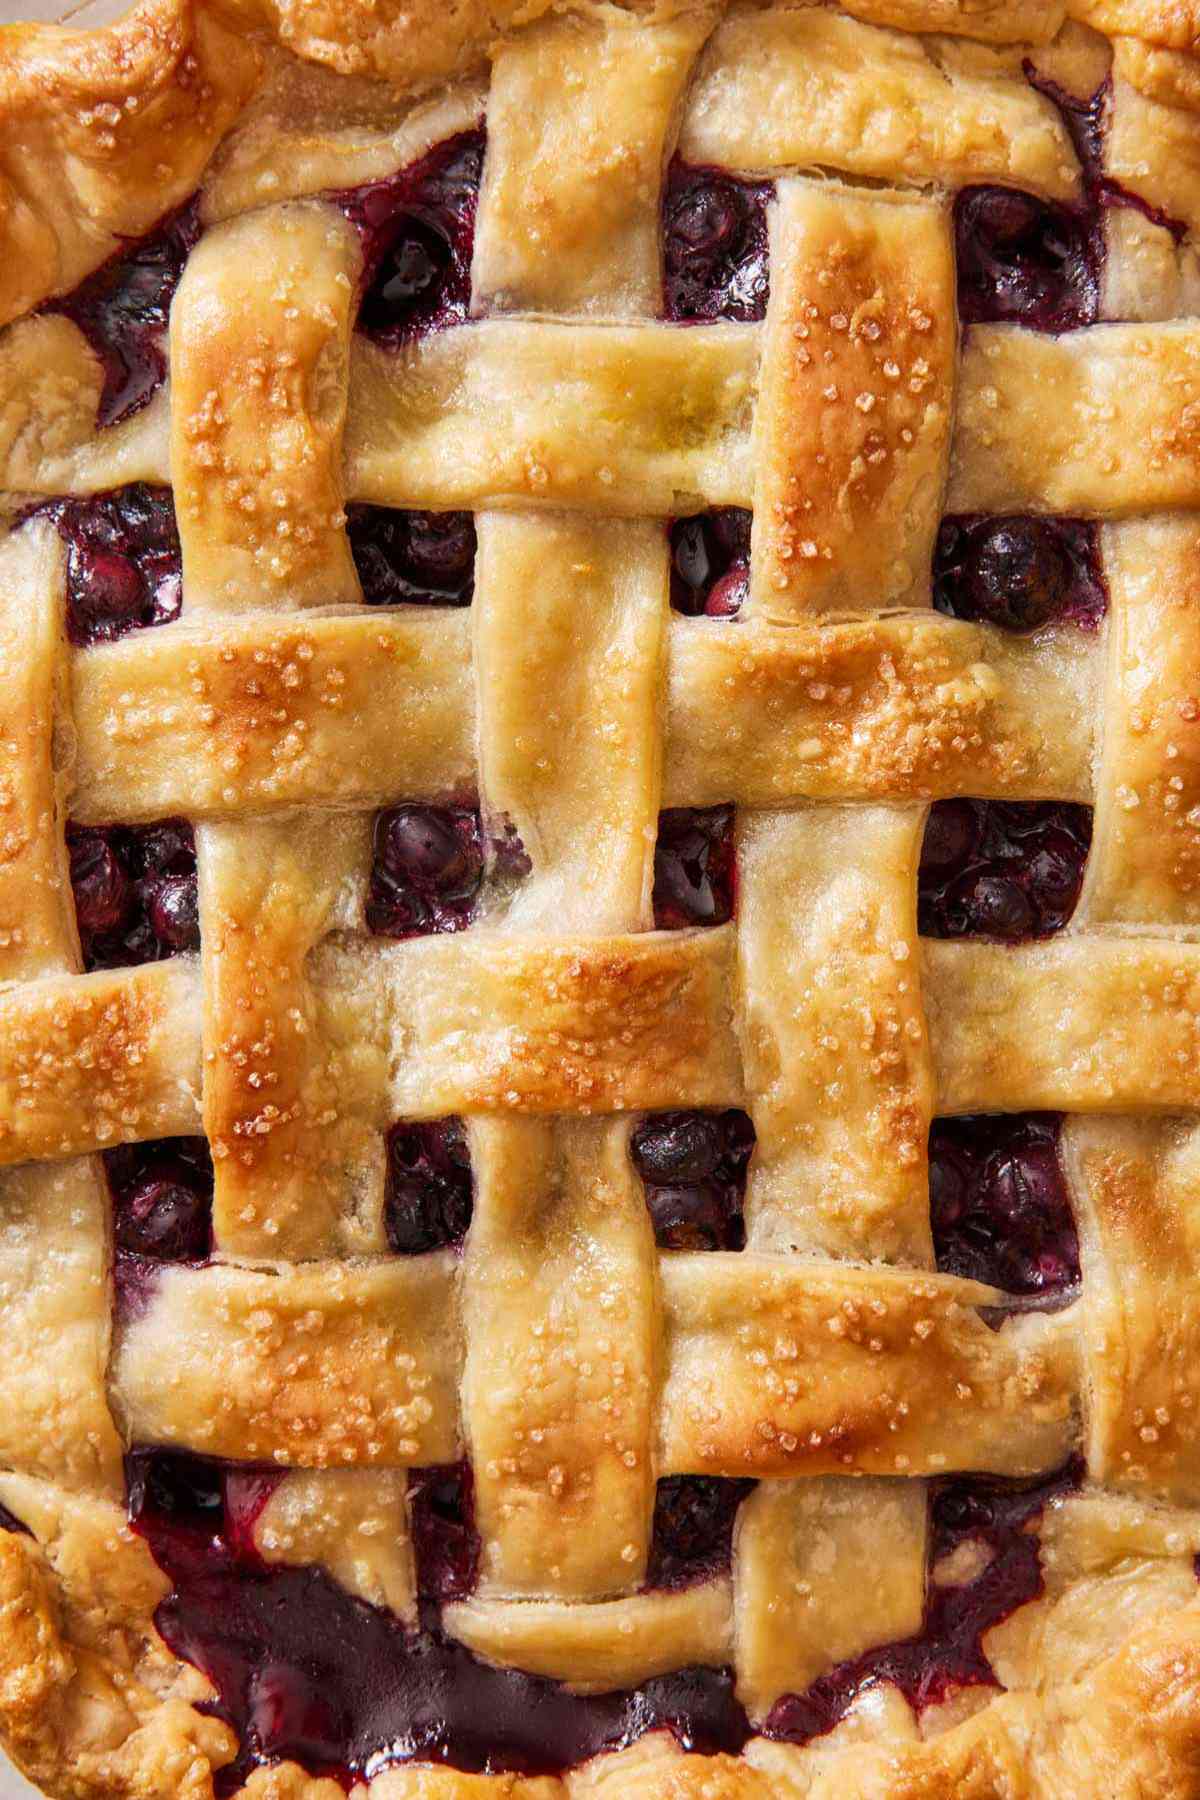
A lattice pie crust is a double-crust pie with a woven top instead of a solid sheet of pie dough. Strips of pie dough are cut and woven together into a basket-weave pattern, leaving small open windows where the filling shows through.
A lattice serves two functions, with the second one mattering more than people realize:
- Visual impact: A lattice top is one of the most distinctive looks in baking. Even a slightly crooked weave reads as “made from scratch with care.”
- Steam release: Fruit fillings produce a lot of steam during baking. With a solid top crust, the steam either escapes through small slits you cut or stays trapped, which can soften the underside of the crust and produce a soggy bottom layer. A lattice pie has built-in steam release across the entire top. This produces a crisper top crust, a less soggy bottom crust, and a fruit filling that thickens properly rather than staying watery.
Releasing steam is why a lattice is a better choice than a solid top for most fruit pies. The function is the real reason to use one, but the look is a great bonus.
Essential Tools To Lattice Pie
You don’t need anything special. Three tools cover almost every lattice job:
- Ruler or tape measure — to keep your strips uniform in width. The lattice looks better when the strips are consistent.
- Pizza cutter, pastry wheel, or sharp knife — for cutting the strips. A pizza cutter or smooth pastry wheel is faster and produces cleaner edges than a knife if you have one. A pastry wheel with a fluted edge gives the strips a decorative scalloped edge, which is pretty if you want it, but optional.
- Kitchen shears — for trimming the overhang once the lattice is woven. A knife works too, but shears are faster and let you see what you’re cutting.
Optional but useful: a lattice pie crust cutter or roller (a tool that cuts a continuous lattice pattern from one rolled-out sheet of dough). I don’t recommend buying one unless you make lattice pies frequently. The manual weave produces a sturdier, more attractive lattice because the strips are independent pieces with full structural integrity at every crossing point.
How To Make A Lattice Pie Crust
Roll out one disc of pie dough into a circle (or square) larger than your pie pan. The dough should be about ⅛-inch thick, the same thickness you rolled for the bottom crust.
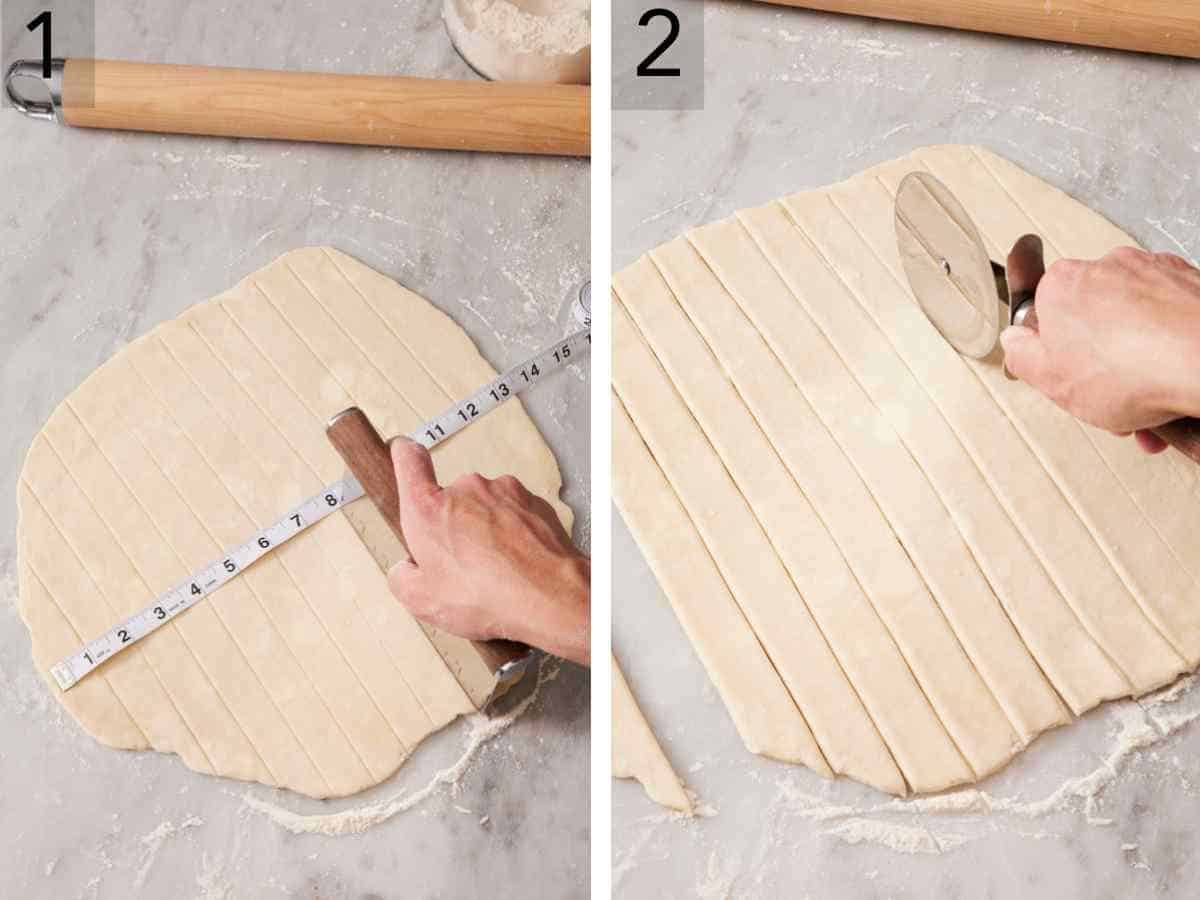
1. Cut the strips. Place a ruler or tape measure across the dough. Use a bench scraper or knife to score lines 1 inch apart from edge-to-edge of the dough.
2. Then, cut along the scored lines, producing long parallel strips. For a standard 9-inch pie, you’ll typically end up with 10-13 strips of varying lengths. The longest strips come from the middle of the rolled-out dough; the shorter ones from the edges. Save the longest strips for the center of the lattice since the middle of the pie has the longest distance to span.
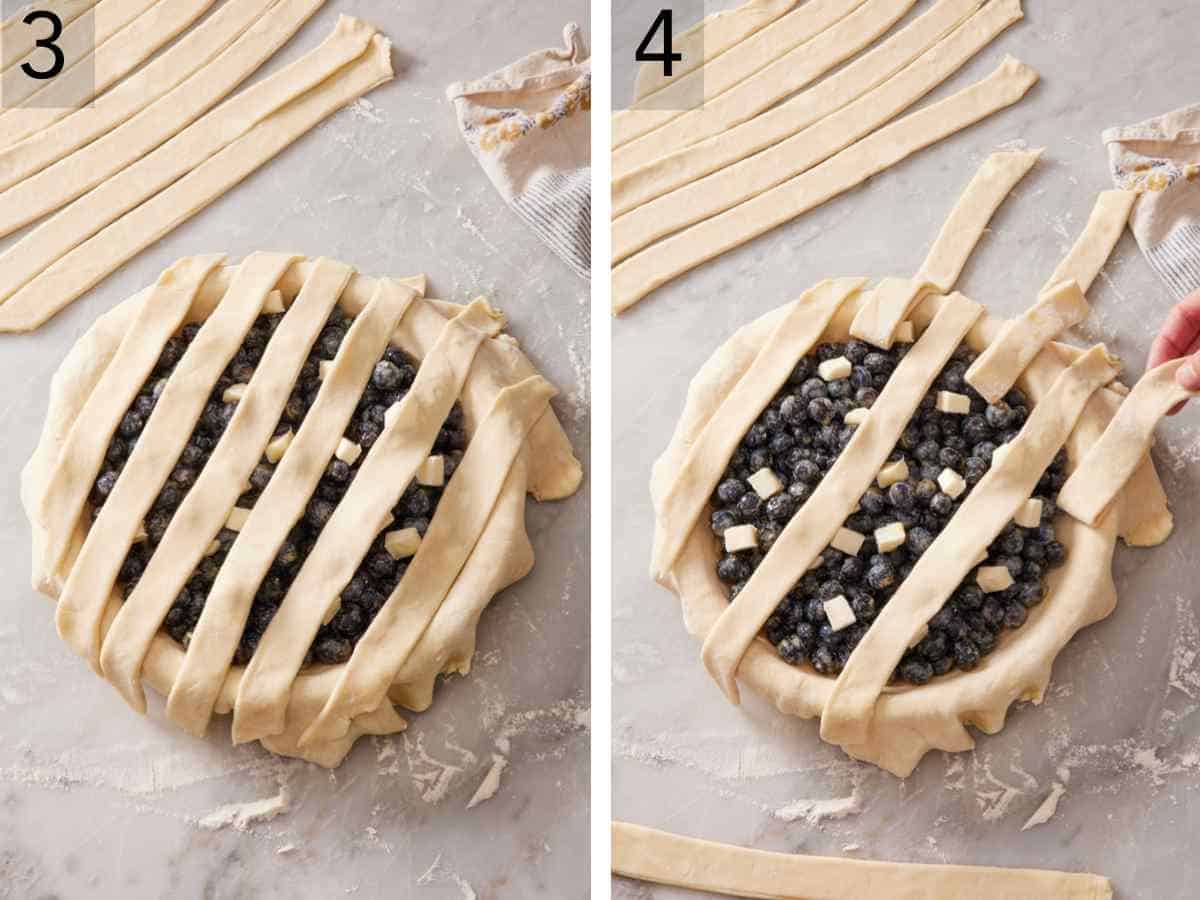
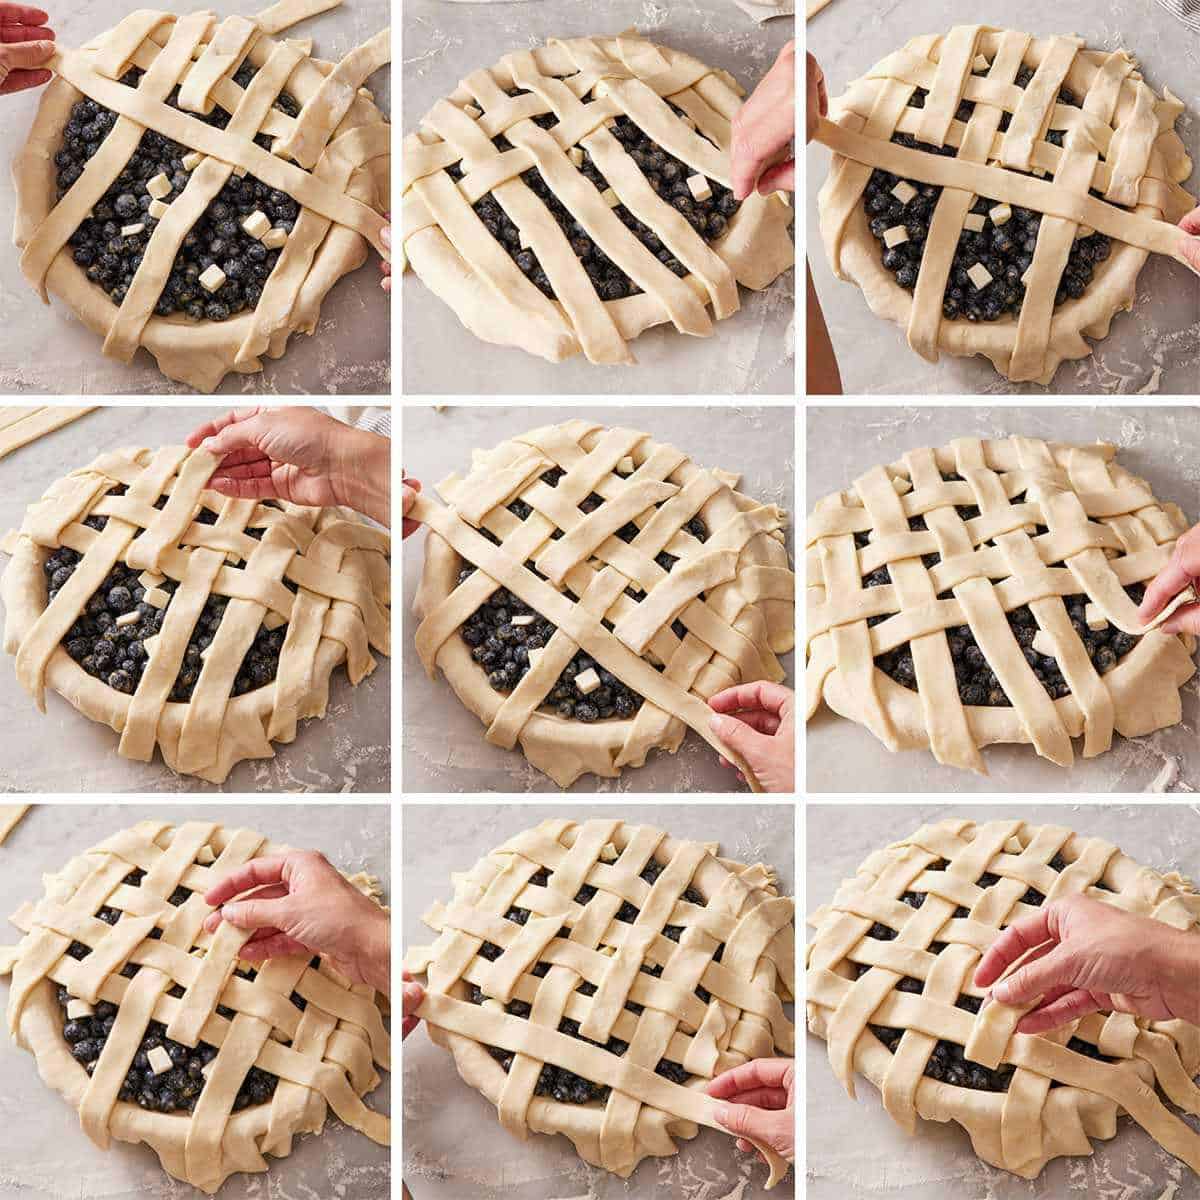
3. Lay the first set of strips. Place 5-6 strips on top of the pie filling, parallel to each other and evenly spaced apart. These strips run in one direction.
4. Begin the weave. Starting with the second strip from one edge, fold every other strip back toward the center of the pie, leaving them folded in half.
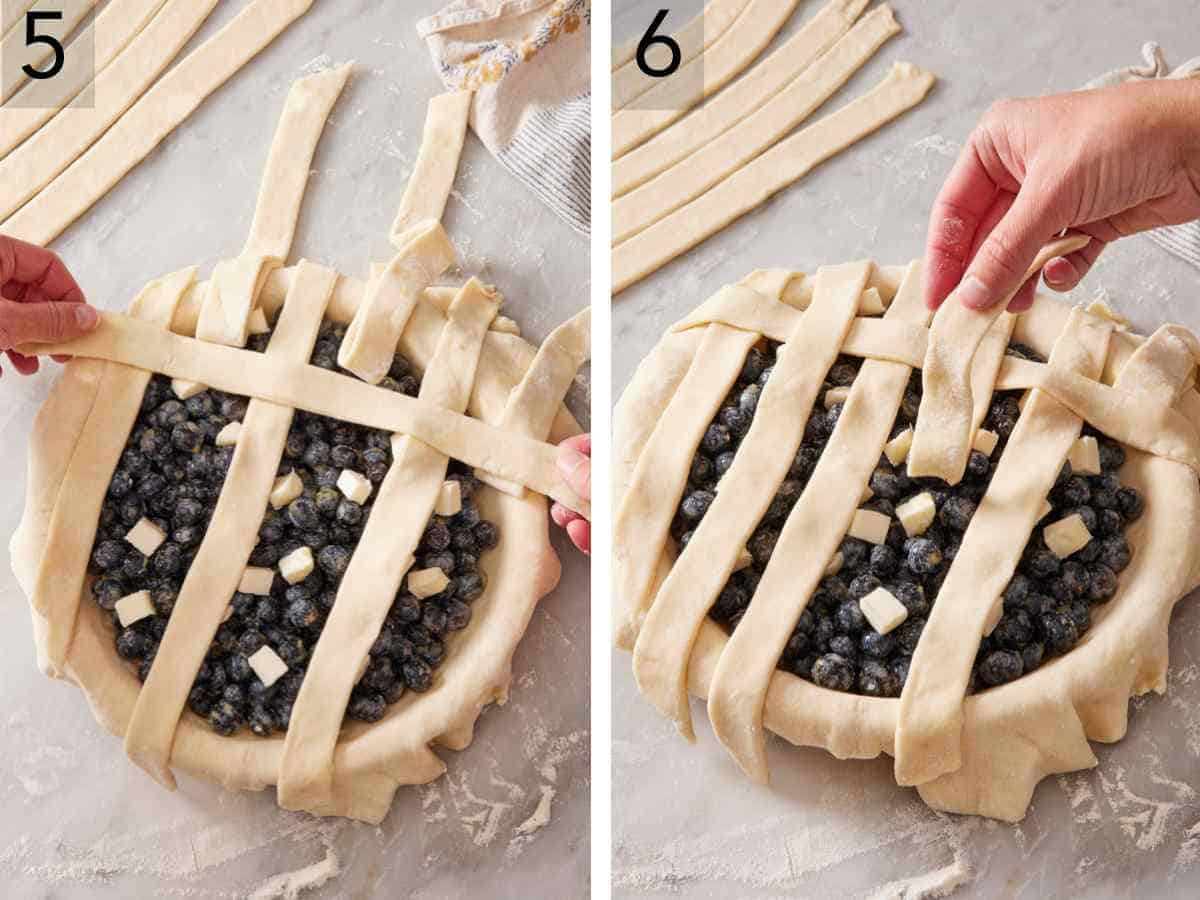
5. Lay a perpendicular strip. Take a strip from your remaining pile and lay it perpendicular to the parallel strips, close to the base of the folds. This is your first cross-strip. (It will lie on top of some strips that are still flat on the filling.)
6. Unfold the strips back over the cross-strip. Return the strips you folded in step 3 to their original position. They now lie on top of the perpendicular strip you just placed.
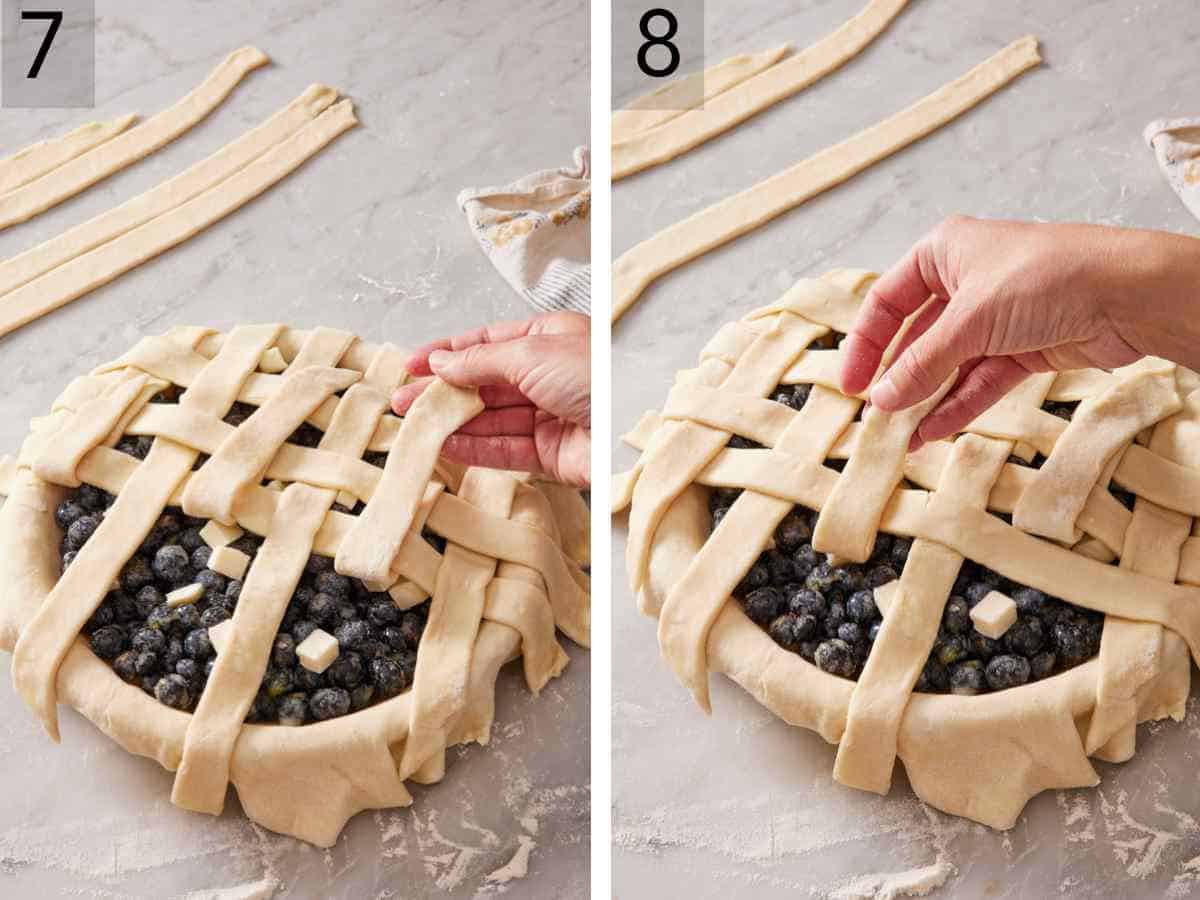
7. Switch which strips are folded. Now fold back the OTHER set of alternating strips (the ones you didn’t fold in step 3). Lay another perpendicular strip parallel to the first cross-strip, spaced about ¾ inch to 1 inch away. Unfold the strips back over.
8. Repeat. Continue alternating: fold one set back, lay a cross-strip, unfold, fold the other set back, lay another cross-strip, unfold. Work outward toward both edges of the pie.
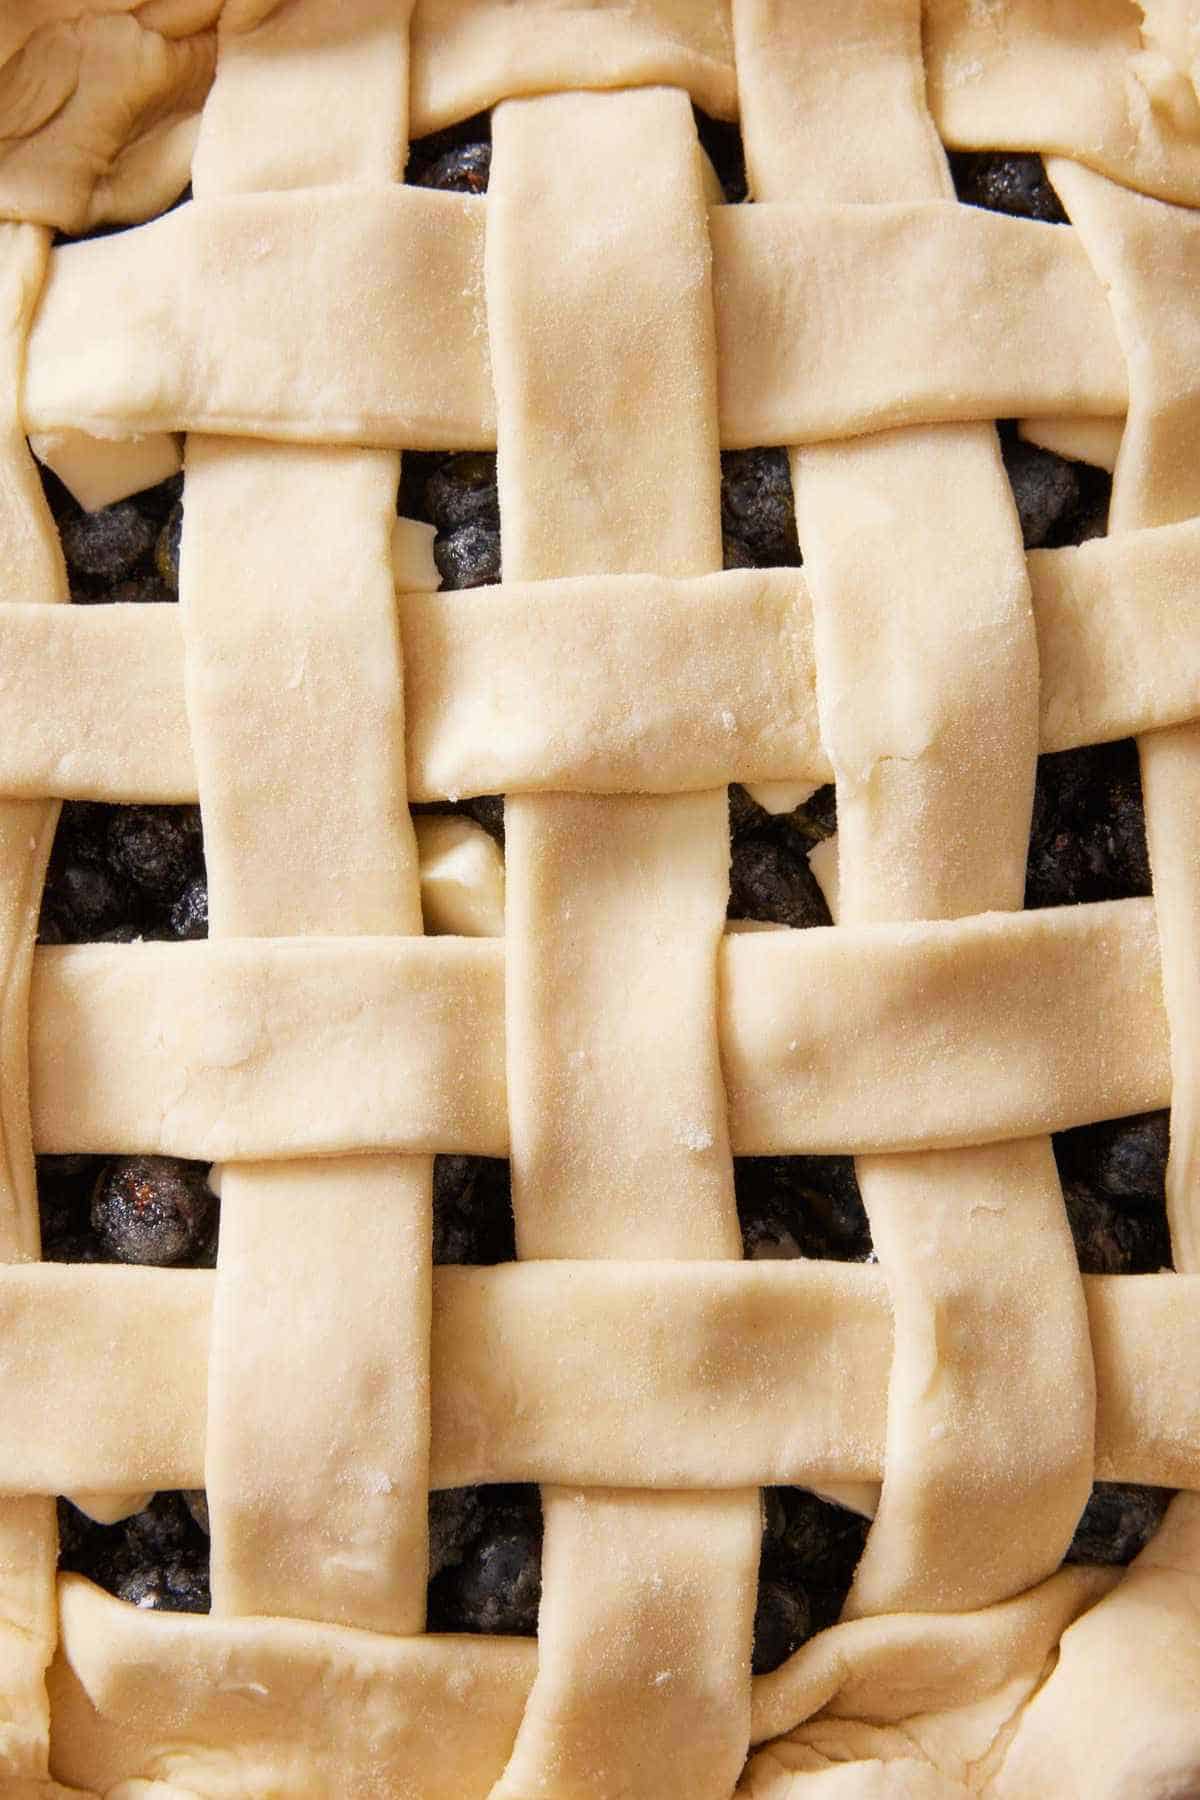
When you’ve reached the edges and the lattice is complete, you’ll have a beautifully woven top with each strip going over and under in a basket-weave pattern. The whole weaving process should take about 5 minutes once you’ve done it once or twice.
Strip Width: Which Size Is Best?
Strip width changes the look of your lattice meaningfully. These are the three most common sizes that I use and how they compare:
| Strip Width | Look | Best For |
| ½-inch | Delicate, intricate, more strips visible. Modern bakery aesthetic. Takes longer (more strips to weave). | Fancy presentations, when you want the lattice to be the star. Use 20-24 strips. |
| ¾-inch | Balanced, clean lines without being fussy. | Looks intricate and impressive, but faster to execute. Use 14-16 strips. |
| 1-inch | Bolder, rustic. Faster to weave. More substantial mouthfeel. The “sweet spot” for most pies. | The default for most home bakers. Rustic-style pies, deep-dish pies, and beginners who want fewer strips to manage. Use 10-12 strips. |
1-inch strips are the most common starting width and the easiest for first-timers, which is what I’d recommend if you’ve never latticed before. Move down to ¾-inch once you’re comfortable; ½-inch when you want a showstopper.
Crimping The Edge
Once the lattice is woven, you have a fair amount of overhang from both the bottom crust and the lattice strips. Here’s how to finish:
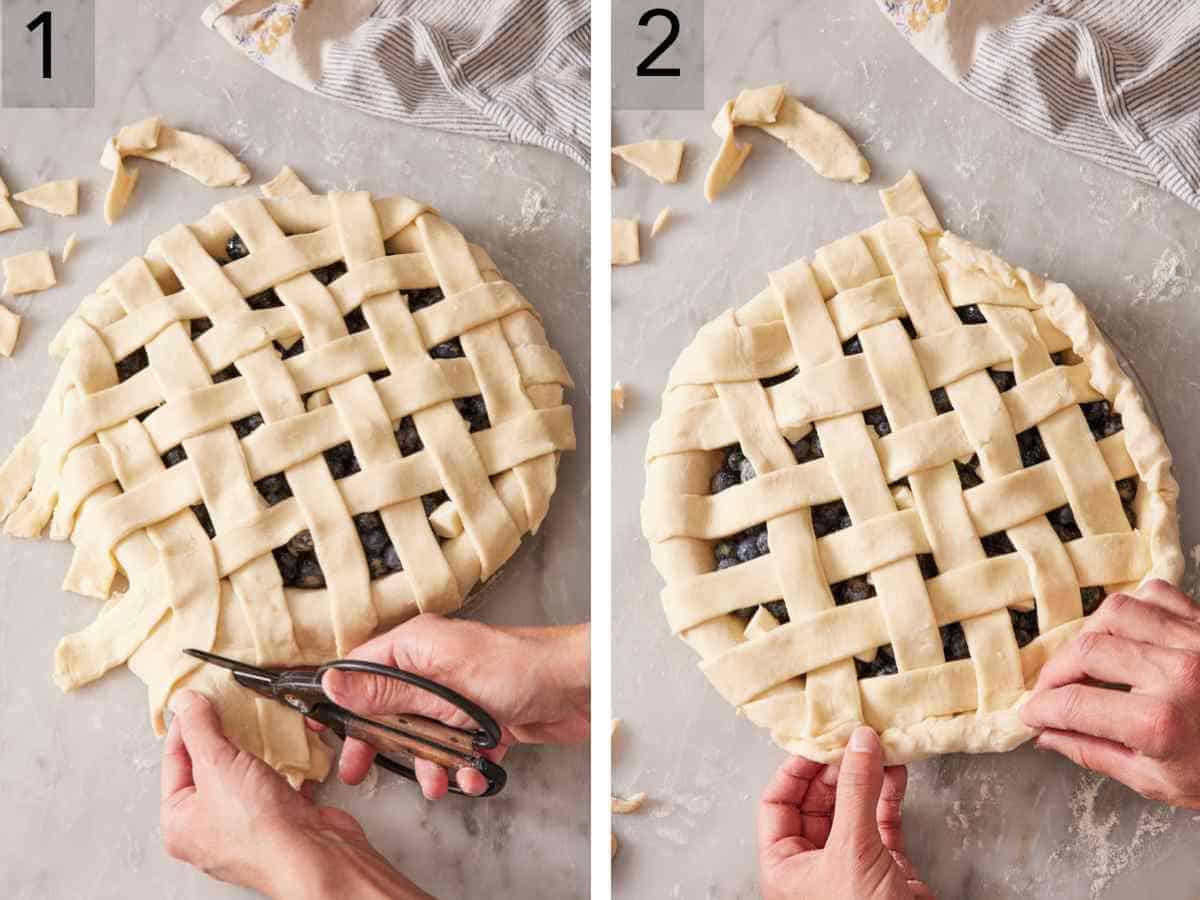
1. Trim. Use kitchen shears to trim the excess to about 1 inch beyond the edge of the pie pan. Trim both the bottom crust and the lattice strip ends together to even them up.
2. Tuck. Fold the excess up and over itself, pressing gently to seal the lattice strip ends to the bottom crust. This is slightly different from how you would crimp a pie crust on a single or solid double-crust pie (folding the excess under itself). By folding the excess on top, it creates a smooth, raised edge that will hold the crimp design.
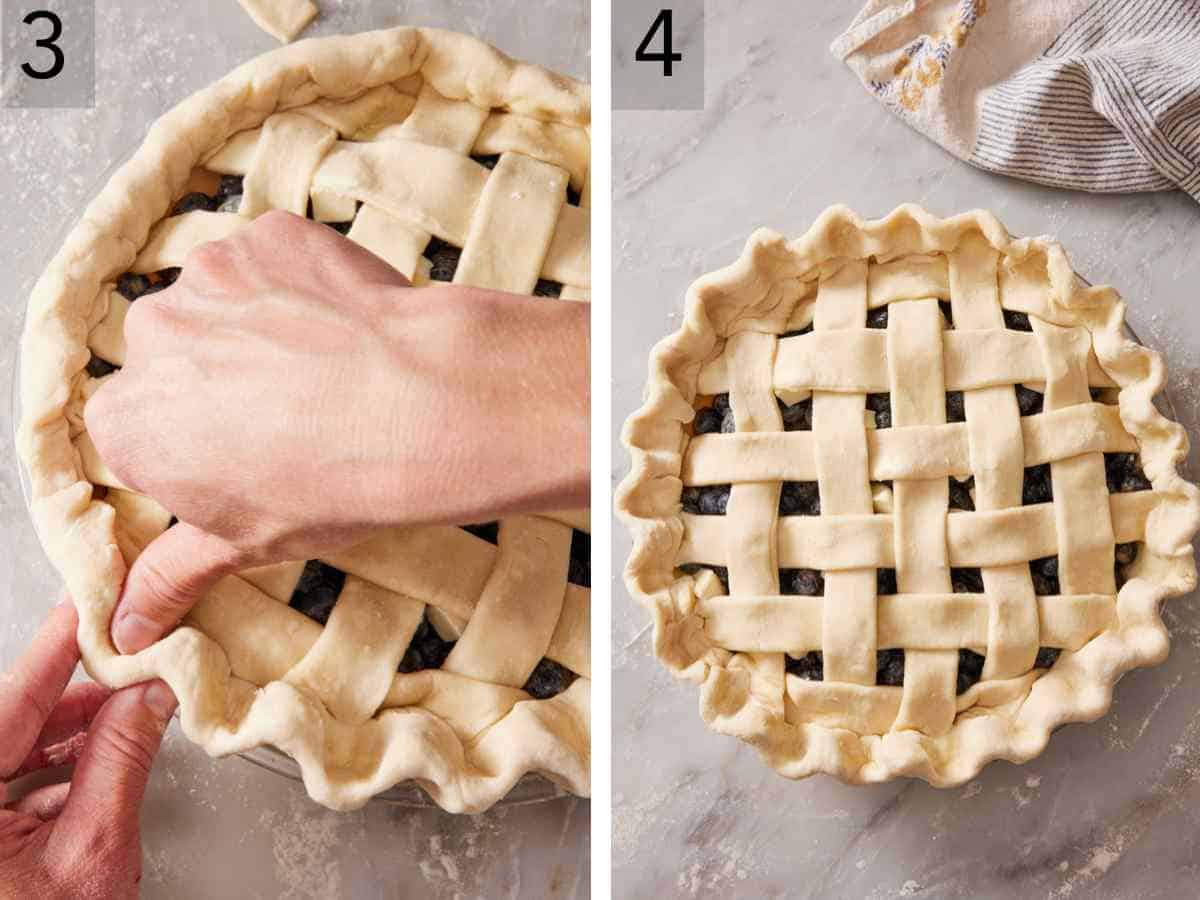
3. Crimp. Press your preferred decorative pattern into the edge of the crust to seal it. The classic options: a fluted edge (use your thumb and two fingers to press scallops around the rim), a fork crimp (press fork tines into the edge, all the way around), or a rope crimp (pinch and twist sections of the edge in alternating directions). Learn how to make each of these in my lesson on how to crimp a pie crust.
4. Chill. Once the edges are crimped, freeze the assembled pie for 15 to 20 minutes for the best results. This is the same logic as the cold-dough test above—cold dough holds its shape in the oven. A pie that goes into the oven at a colder temperature bakes up with sharper edges and a crisper crust than one that goes in at room temperature.
If you’d like an extra-shiny, golden top crust, brush with egg wash (1 egg whisked with 1 tablespoon water or milk) just before baking. The lattice will come out glossy and richly colored. You can also sprinkle granulated, sparkling, or coarse sugar over the egg wash for sparkle and crunch.
Pie without an egg wash turns out paler and matte. Both taste equally good, and the difference is purely visual. For a special-occasion pie, use an egg wash. For weeknight baking or a quick, rustic pie, you can skip it.
The Cold-Dough Test
The most important thing about lattice work that most bakers underplay: The dough has to be cold. How long you wait to roll and cut your strips to the temperature of your filling all matters. During pie tests, I wove lattice strips at three different temperatures:
| Dough Temperature of Strips | What Happens When Weaving |
| Cold from the fridge (~45°F) | Strips lift cleanly, hold their shape when folded back, and weave together without stretching. The lattice looks crisp and even. |
| Slightly warmed (~55°F; sat at room temp for 10-15 mins) | Strips start to stretch slightly when lifted. Manageable, but you have to work fast. |
| Room temperature (~70°F) | Strips stretch or tear when folded. Dough sticks to itself and to the counter. The lattice looks uneven, and the finished weave looks messy. |
| Cold dough with warm filling | The dough heats up quickly, and the strips turn sticky, greasy, and stretch when folded. The lattice is uneven and messy. |
The difference between cold and room-temperature dough isn’t subtle—it’s the difference between an easy 5-minute job and a frustrating fight. If your dough is feeling soft as you work, stop and put everything (the rolled-out dough, the strips, the partially-woven pie) back in the fridge for 10 minutes. Then resume. Better to take the break than to push through with warm dough.
The same applies to your filling. A hot filling melts the strips on contact, ruining the lattice. The filling should be cold or at room temperature, never hot. If your filling is freshly cooked (some recipes precook the fruit), let it cool completely before assembling.
Best Pies For A Lattice Top
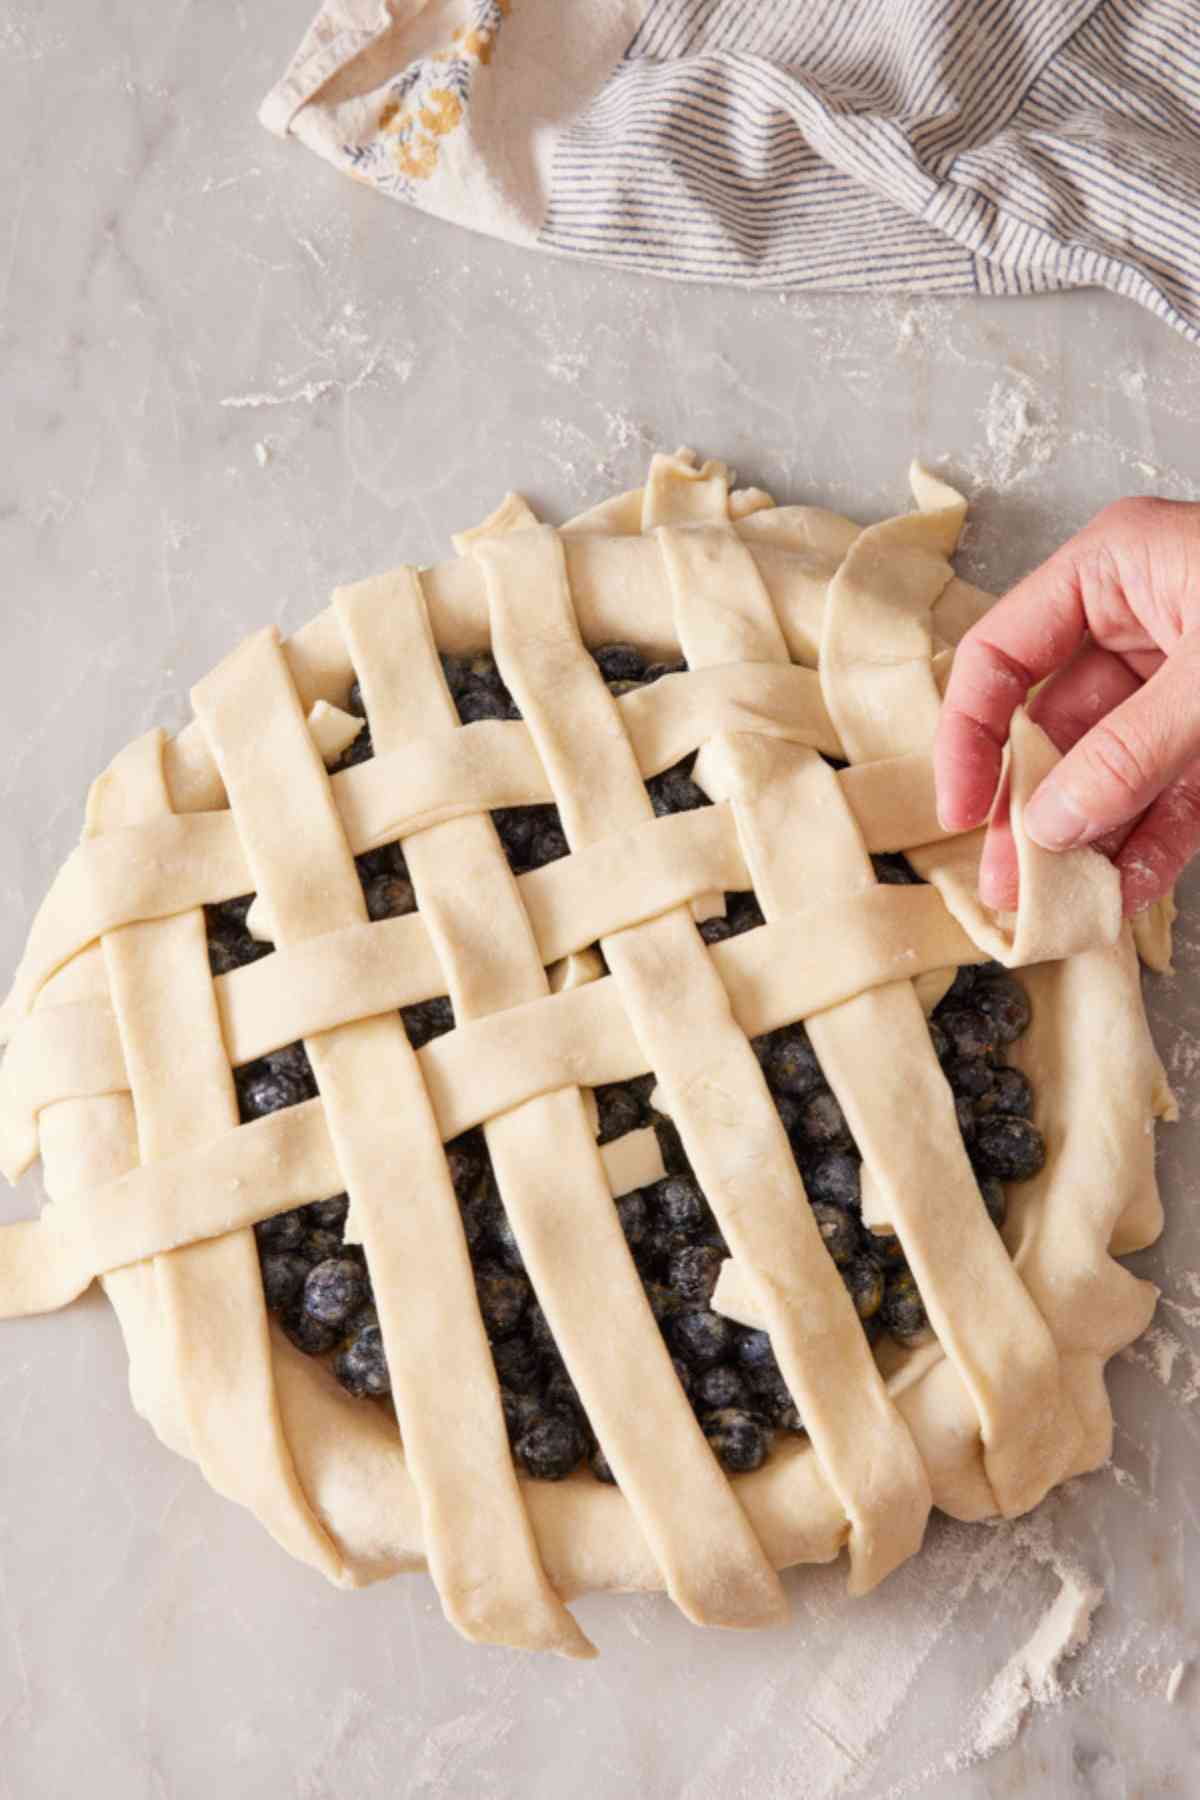
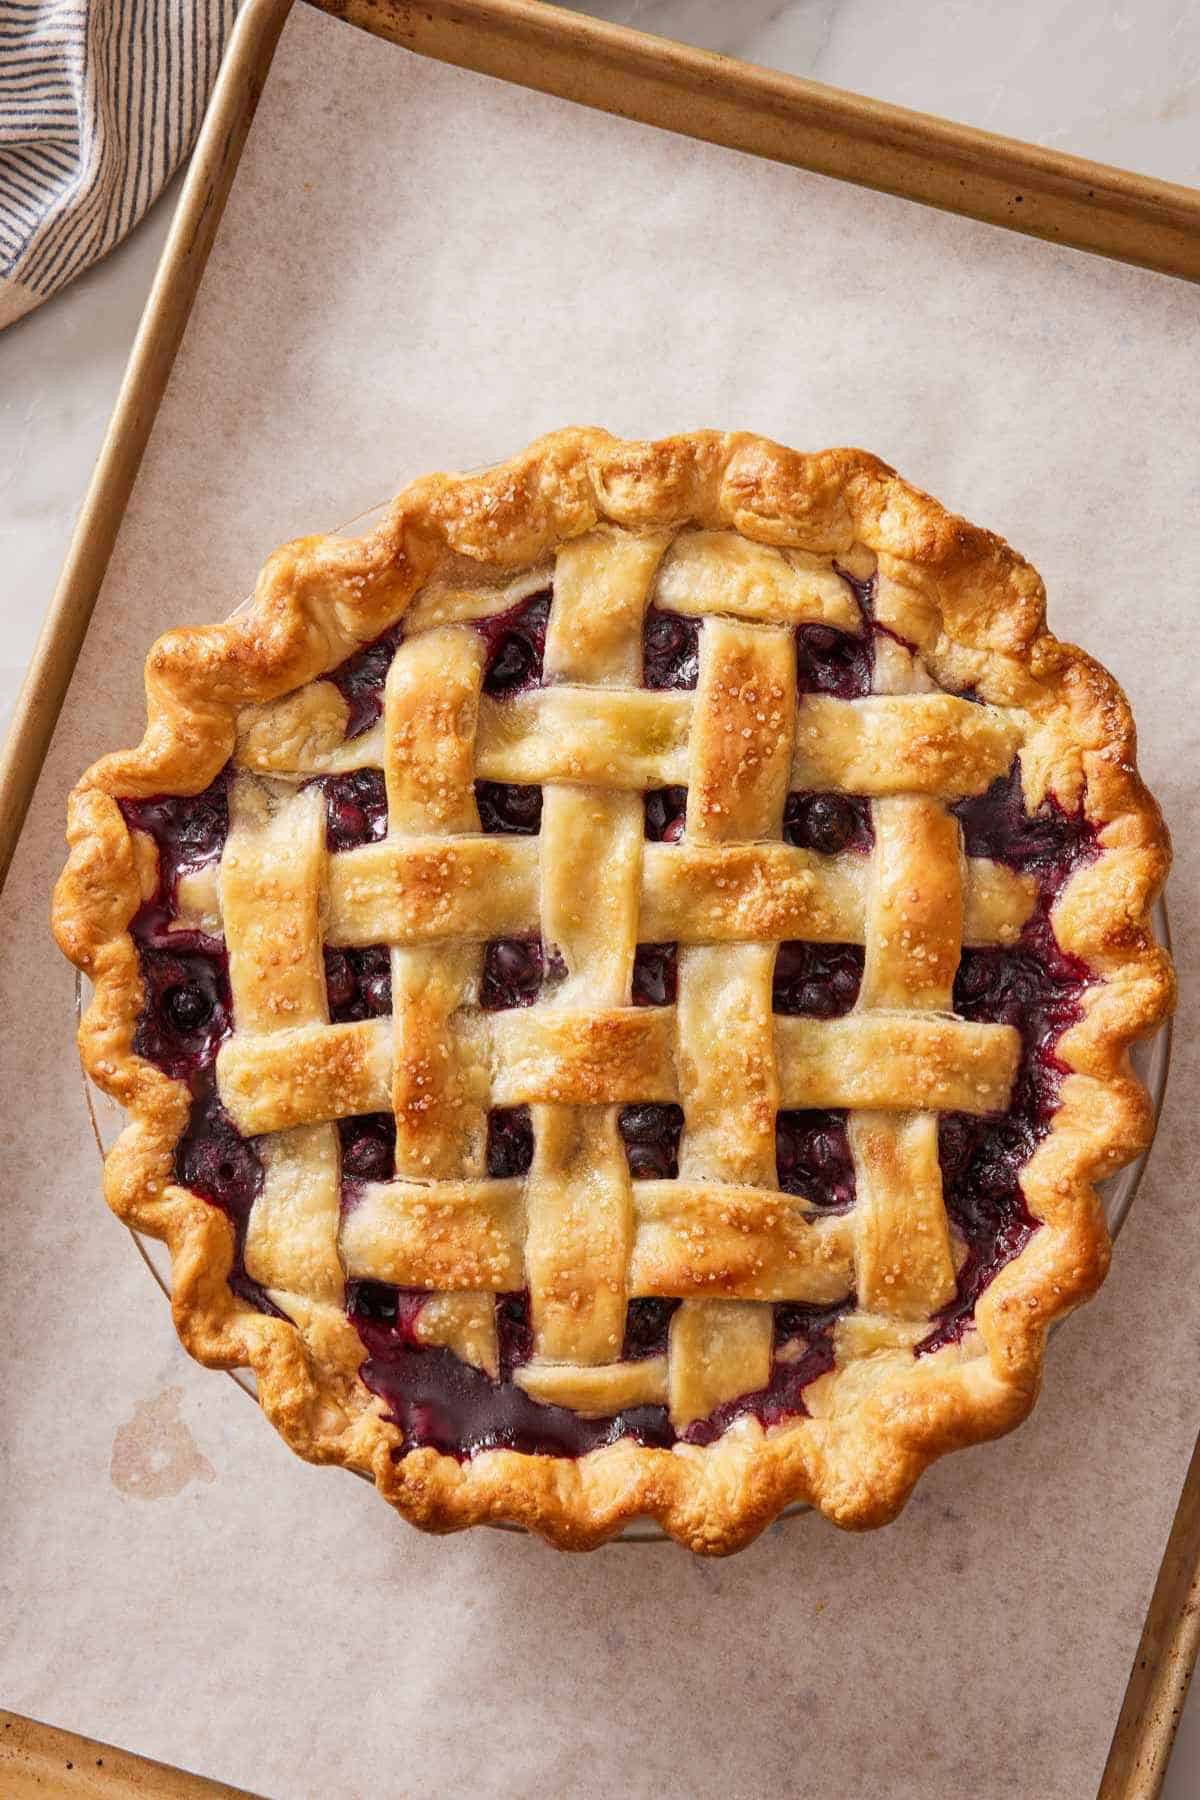
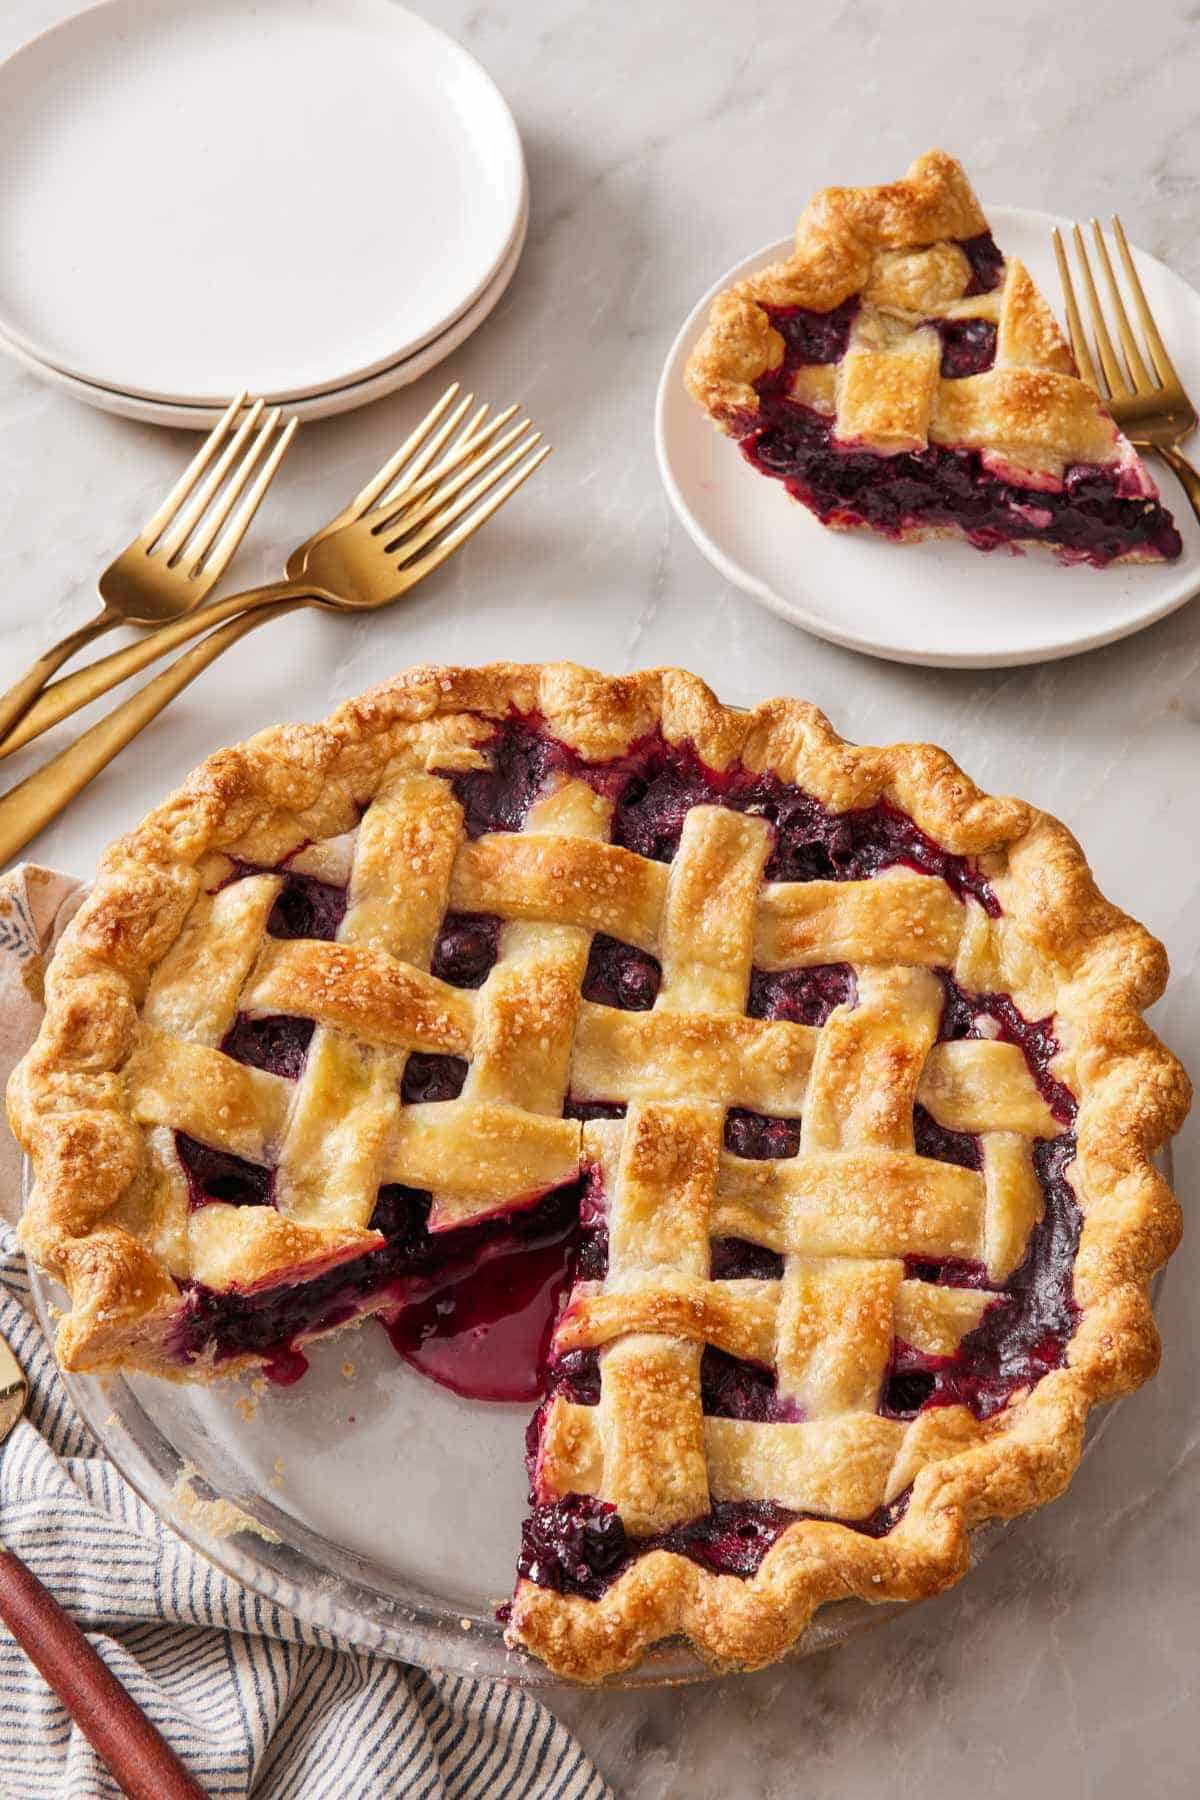
Lattice tops shine on fruit pies with juicy, syrupy fillings. The open weave lets steam escape and gives the filling a place to bubble visibly during baking. That bubbling juice peeking through the lattice is part of what makes a fruit pie so photogenic, and is a visual indicator that your pie is cooked through.
My best Preppy Kitchen pies for a lattice top:
- Apple Pie — the classic. Lattice + apple pie is the iconic American pie image. Steam release helps the apples cook through without making the bottom crust soggy.
- Blueberry Pie — visually striking with the deep purple filling visible through the lattice.
- Strawberry Rhubarb Pie — high-juice filling that genuinely needs the steam release. The ruby-red filling pops through the lattice gaps.
- Peach Pie — peaches release a tremendous amount of juice. A lattice prevents the top crust from going soggy and the filling from being runny.
- Cherry Pie — another high-juice fruit pie that benefits from the steam release. It’s also gorgeous with the bright red juices bubbling through the lattice.
- Apple Pie Filling — once you have the filling ready, a lattice is a quick way to dress it up.
For miniature versions, mini apple pies and other hand-held fruit pies can use mini lattice tops, if baked in muffin pans or mini pie pans. Just scale down the strip width to ¼ inch and use 4-6 strips per pie.
Pies That Don’t Lattice Well
Not every pie is a candidate for a lattice top. Skip lattice for:
- Cream pies — banana cream pie, coconut cream pie, chocolate pie. These have no-bake fillings that are typically served with whipped cream or a meringue topping.
- Custard pies — pumpkin pie, pecan pie, key lime pie. The custard filling needs to set evenly during baking; a lattice top would interfere with the filling setting properly, producing an underbaked filling and a soggy top crust. These are single-crust pies by design.
- Tart-style pies — lemon tart, apple tart. Tarts use a single crust with no top.
- Fresh fruit pies that aren’t baked — strawberry pie, for example, uses a blind-baked single crust filled with cornstarch-thickened fresh berries. There’s no top crust to lattice.
When in doubt, the rule is: If the recipe calls for a double crust and the filling is fruit-based, lattice is on the table. Otherwise, it isn’t.
Lattice Pie Crust Success Tips
Keep everything cold. This is the rule that breaks more lattice attempts than anything else. Cold dough is firm, easy to lift and weave, and holds its shape in the oven. Room-temperature dough stretches, tears, and produces a sad-looking lattice. If anything starts feeling soft as you work, stop and chill it for 10 minutes or freeze it for 5 minutes.
Place the rolled dough on parchment paper if you’re a beginner. Then, cut your strips. This lets you slide the entire sheet into the fridge if you need to chill it mid-process. When you first try a lattice, it may take you a bit longer to learn the weaving pattern. Having it ready to go on parchment paper makes it much easier to quickly pop it in the fridge than trying to transfer warm dough to a tray.
Cool your filling before assembly. Hot filling melts the strips on contact, ruining the lattice before you’ve even started weaving. Most recipes either use cold, uncooked fruit or precooked filling that’s been cooled to room temperature.
Don’t stress about perfection. The beauty of pie is in its rustic nature. An imperfect weave still looks beautiful. Once the pie bubbles in the oven and the lattice strips brown, small inconsistencies disappear. No one will turn down a slice of homemade pie because the lattice had a slightly uneven gap!
Use a rimmed baking sheet under the pie when baking it. Fruit pies bubble, and sometimes they bubble over. A rimmed baking sheet underneath catches drips and prevents oven cleanup. Always use one with lattice pies—there’s no solid top crust to help contain runaway juice.
Consider a pie shield for the edges. Crimped edges brown faster than the rest of the lattice and can burn before the center is done. A pie crust shield (or a strip of foil molded around the rim) protects them. Add the shield after about 25-30 minutes of baking, once the edges are starting to color.
Frequently Asked Questions
Usually, the dough has gotten too warm. Pause and put everything back in the fridge for 10 minutes (or freezer for 5)— any cut dough strips and the partially-woven pie. After 10 minutes of chilling, the strips will be firmer and more cooperative. If a strip tears mid-weave, you can press the torn pieces back together with your fingers or replace it with a fresh strip from your scraps. Reroll any leftover dough together for backup strips.
Strips from the center of your rolled-out dough will be longer than strips from the edges. Save the longest strips for the center of the pie, where the diameter is greatest. Use shorter strips for the outer rows, where less length is needed. If a strip falls a bit short of the edge, no problem. The bottom crust gets folded and crimped anyway.
About ⅛-inch thick—the same thickness as you’d roll a regular pie crust. Strips that are too thin can tear; strips that are too thick produce a dense lattice that is underbaked rather than a flaky one.
Yes. The lattice technique works with any pie dough—homemade or store-bought, butter-based or shortening-based. Store-bought refrigerated pie dough is generally a bit firmer and holds together well for lattice work, though it lacks the flavor of homemade.
Yes, and it’s a great time-saver for big baking days. Roll out and cut your strips, lay them flat on a parchment-lined sheet pan with a piece of parchment between any layers. Wrap the pan tightly, and freeze. The strips keep for up to 1 month frozen. To use, transfer them to the fridge for an hour or two to soften slightly, then weave directly onto your pie. (You can also weave the entire lattice on parchment, freeze the assembled lattice, and slide it onto a filled pie just before baking, though this is more advanced.)
Yes, brush the egg wash over the entire visible top of the lattice, including the crimped edge. This produces a uniformly golden, glossy crust. Avoid letting egg wash pool in the lattice gaps or drip onto the bottom crust below. (Pooled egg wash bakes into hard yellow or brown spots.) A light, even coat is the goal.
This is normal, especially with mounded fresh-fruit fillings. The fruit loses structure and volume as it cooks down (apples shrink dramatically, berries collapse), and the lattice settles with it. Pies with lots of cornstarch or flour as a thickener stay more stable. There isn’t really a fix; it’s a feature. A slightly settled lattice means your pie is properly cooked if you want to minimize sinking, mound the filling slightly higher than the rim and pack it tightly, or use a precooked filling.
Not really. Since you add a lattice to fruit pies, most of those recipes do not call for par-baking a bottom crust first. If a recipe states differently, you can follow those instructions. Otherwise, the lattice needs to be added before the pie is baked at all.
If the dough comes out of the fridge too firm to roll, let it sit on the counter for 5-10 minutes. It will still be cold but slightly more pliable. Don’t let it sit for too long (15+ minutes) or you’ll lose the cold-dough advantage. Roll slowly and gently when you start. If the edges crack as you roll, use your fingers to mend them back together (like working with cold modeling clay). Then, cover the dough and let it rest for a couple of minutes before you continue rolling. If it continues to crack, it almost always indicates the dough needs slightly more water next time you make it.
More Baking Tutorials To Try
I have lots of baking tutorials you can reference:
- Academy: How To Blind Bake A Pie Crust — coming soon to the Pie Academy. The technique for pre-baking a crust before adding wet fillings (custard, cream, no-bake).
- Academy: How To Crimp A Pie Crust — coming soon. Detailed techniques for fluted, fork-crimped, and rope edges.
- Academy: How To Freeze A Pie Crust — coming soon. Make ahead and freeze unbaked or baked crusts for the holiday baking marathon.
- Academy: How to Freeze Cakes — companion lesson covering cake freezing techniques.
- Academy: How to Measure Ingredients Correctly — accurate measurement matters for pie crust hydration. The 167g vs. 120g flour test in this lesson explains why two cooks following the same recipe can get very different doughs.
If you’ve tried this “how to lattice pie” tutorial, then don’t forget to rate it and let me know how you got on in the comments below. I love hearing from you!






