
This post may contain affiliate links. Please read our disclosure policy.
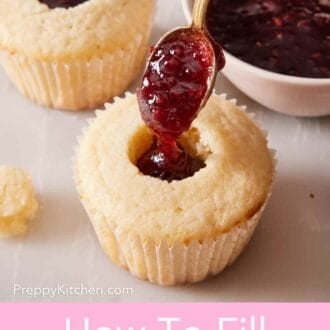
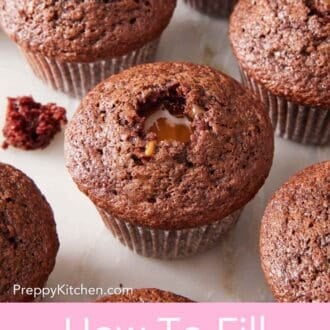
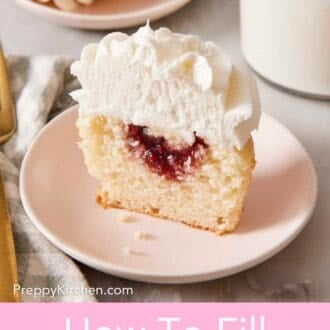
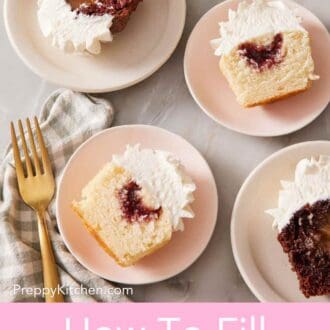
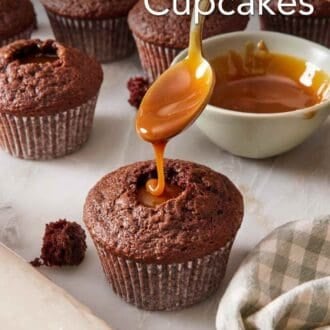
Filling cupcakes adds a fun surprise, but it can be a bit tricky. I’ve tested several methods to show you what works best with four different tools you can use: apple corer, cupcake corer, paring knife, and a piping tip. Plus, learn the best fillings to use and how to keep the fillings from leaking.
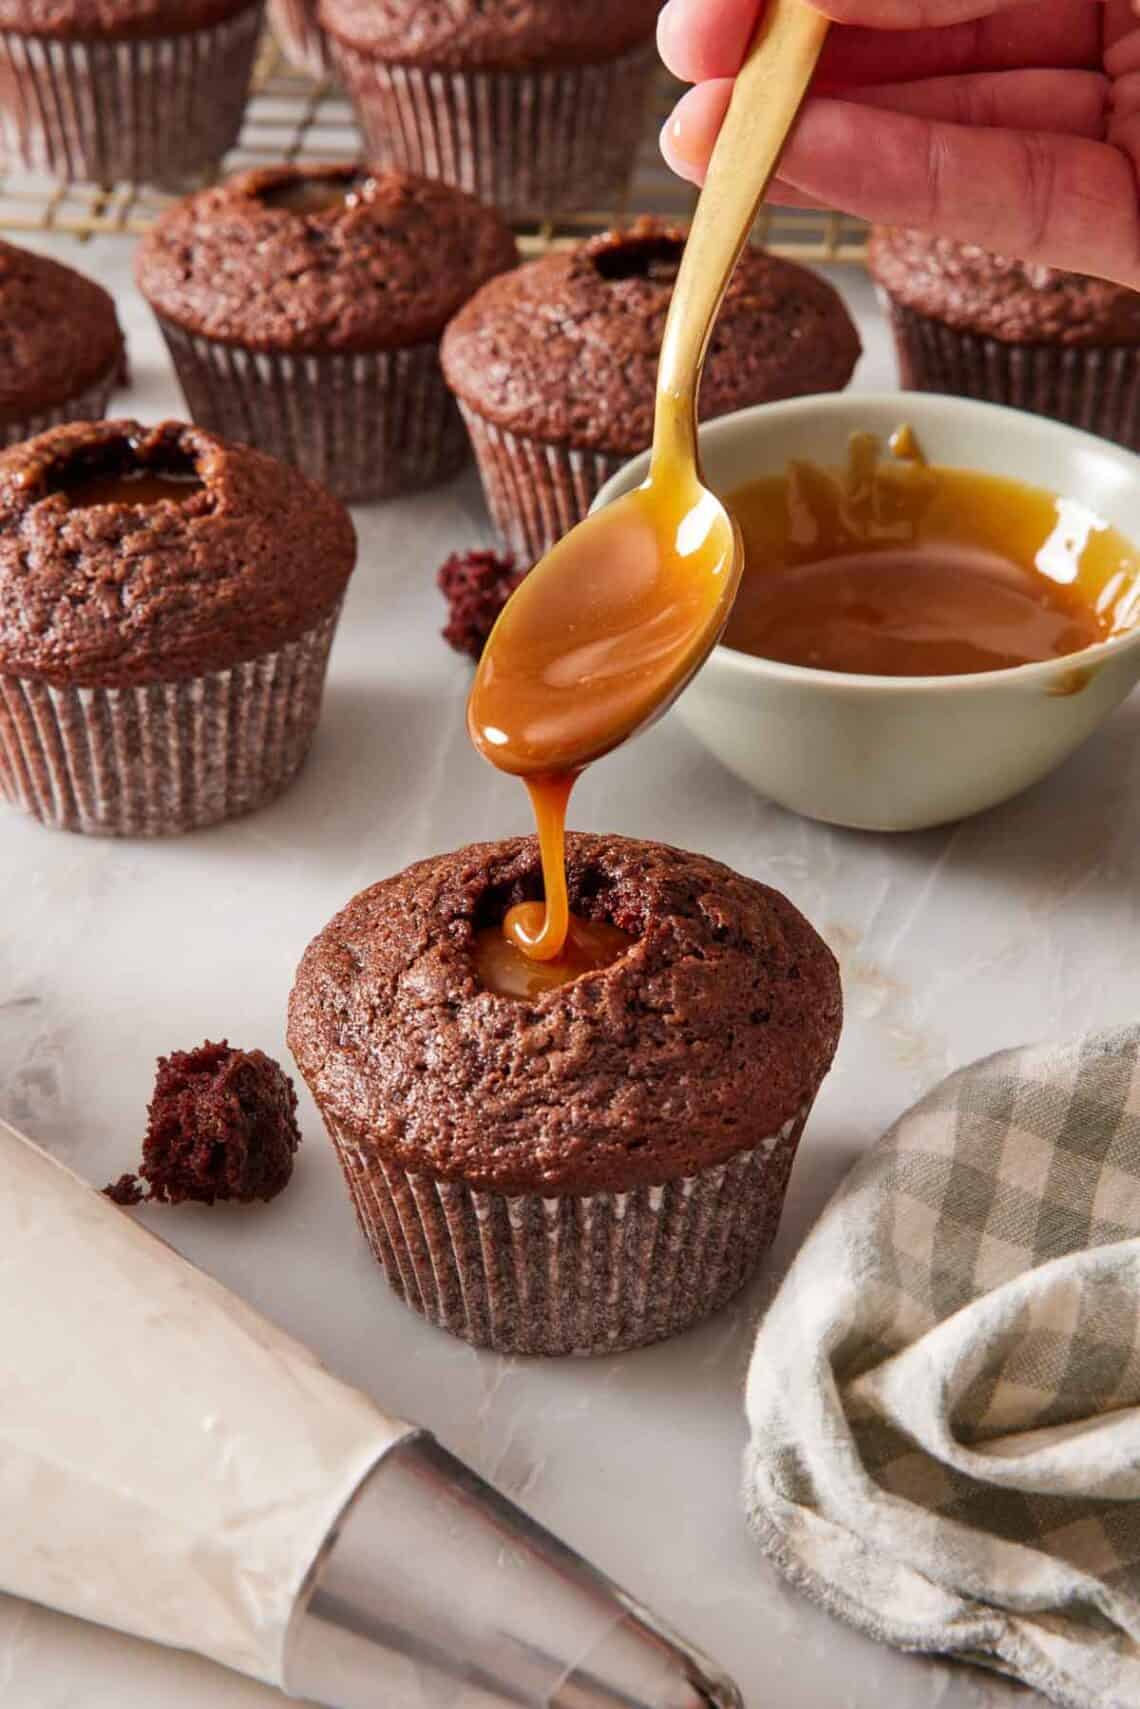
The first time I filled cupcakes, I removed too much of the cupcake centers without knowing it. I added filling, and then it started oozing into the bottom of the wrapper, making the cupcakes soggy. I learned a few things in that kitchen that night: don’t go all the way to the liner, you can overfill them, and the exact tool you use matters less than the depth of the cavity.
Filling a cupcake well comes down to three main choices: what to remove the center with, how deep to go, and what filling works well. In this guide, I’ll walk you through three different methods you can use to core the cupcakes, filling types that work great and what doesn’t, and how to ensure your filling stays in the cupcake without leaking out. I’ve made hundreds of filled cupcakes since that first leaky batch, including my German chocolate cupcakes and chocolate raspberry cupcakes that have been on the site for years. It’s the small details that separate a fun surprise center from a soggy mess!
“This was such a fun technique to use for my son’s birthday party! He likes strawberries and chocolate. I filled strawberry cupcakes with ganache and he loooooved them. I don’t have an apple corer, so I used the piping tip trick and it went great.”
Joshua
What “Filling a Cupcake” Actually Means
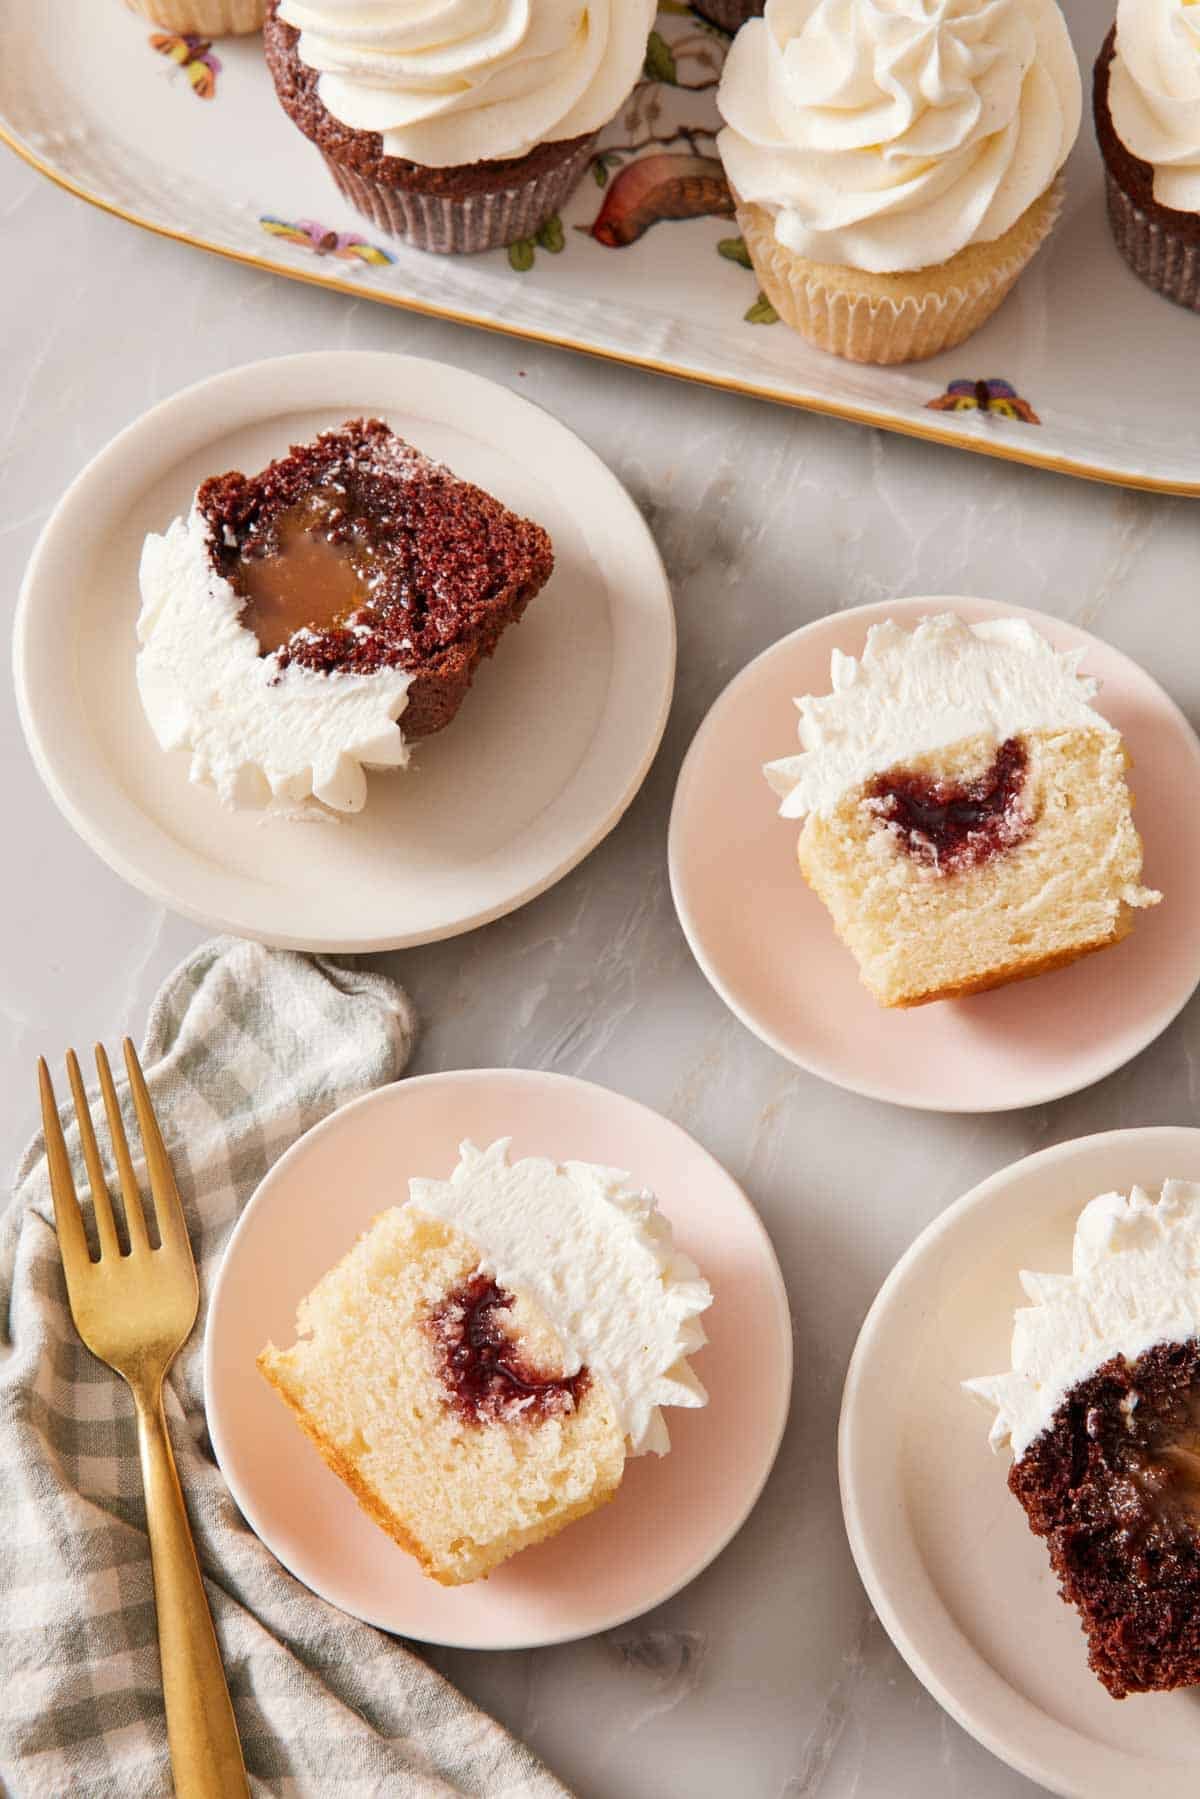
Filling a cupcake means putting a small pocket of something—jam, curd, ganache, pastry cream, frosting, candy—inside the baked cupcake before you frost it. The filling sits in the middle, and the frosting piped on top hides it and seals it in. When someone bites into the cupcake, they find a surprise!
Almost any type of cupcake is fillable without changing the recipe. My moist vanilla cupcakes, chocolate cupcakes, and lemon cupcakes all take a filling without any recipe modification—you just bake them as written, let them cool completely, and add the filling once they’re at room temperature. Mini cupcakes are an exception, and I’ll get to those later in this guide.
Tools You’ll Need
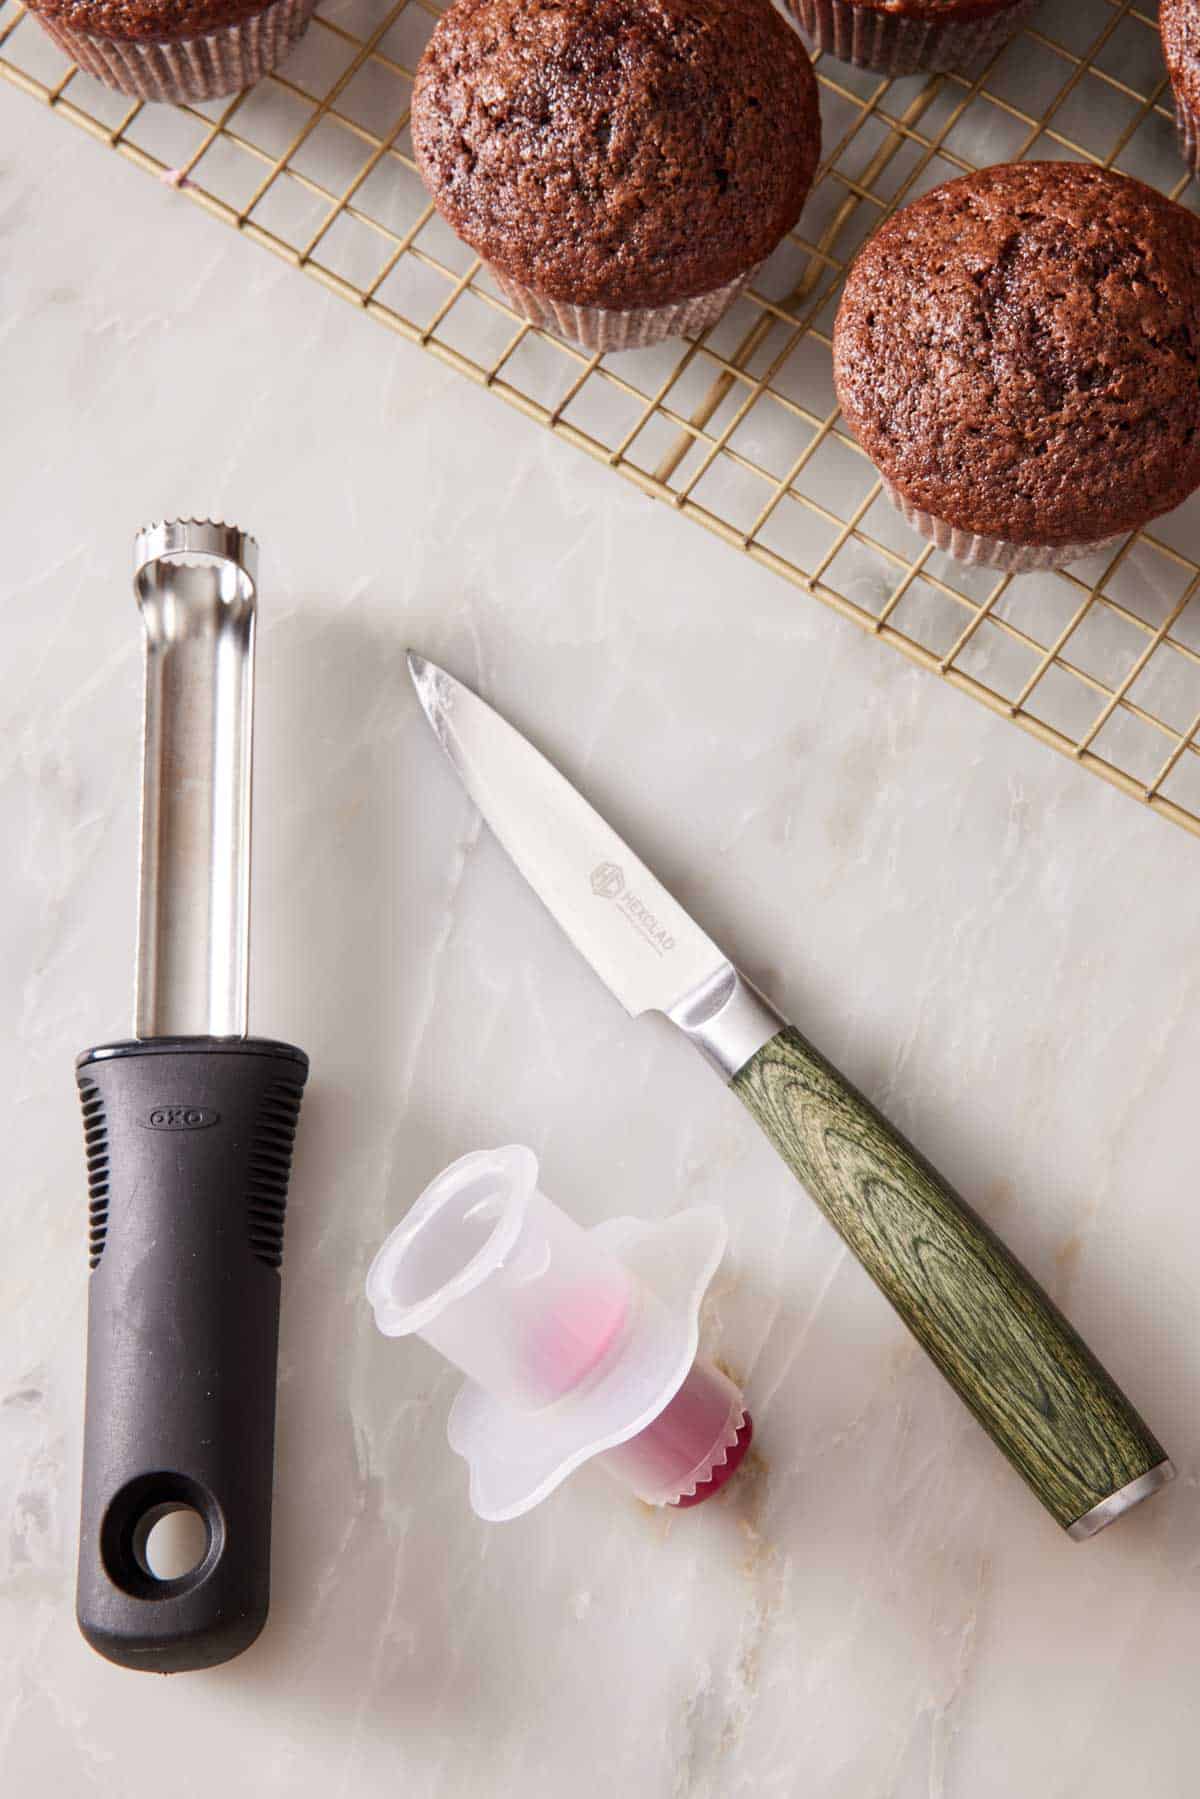
Standard Tools: A muffin tin and paper liners for the cupcakes themselves, a wire cooling rack so the cupcakes can come fully to room temperature, and one of the two coring tools—an apple corer or a small knife. An offset spatula or a butter knife can also be helpful for sealing the cake lid back on top of the filling, but it isn’t necessary.
Specialty Tools (Optional): A dedicated cupcake corer (sold at baking supply stores and online) is essentially an apple corer with a slightly smaller diameter that cores to the perfect depth. It works great, but it’s a single-purpose tool. If you already own an apple corer or pairing knife, you definitely don’t need to buy a cupcake corer. Also, a larger piping tip (1A) does a very good job, and I’ll walk you through how to use one.
Piping Tools: A piping bag with the tip snipped off works great for piping in thicker fillings like buttercream, ganache, lemon curd, or pastry cream. You don’t need a piping tip for this! For thinner fillings like caramel sauce, a runnier ganache, or jam, can be spooned in.
The 3 Coring Methods (Tested Side By Side)
I tested three methods on the same batch of chocolate cupcakes. I cored a few cupcakes with each tool, filled each batch with a tablespoon of caramel sauce, frosted them, and cut them in half to compare. Here’s what I found.
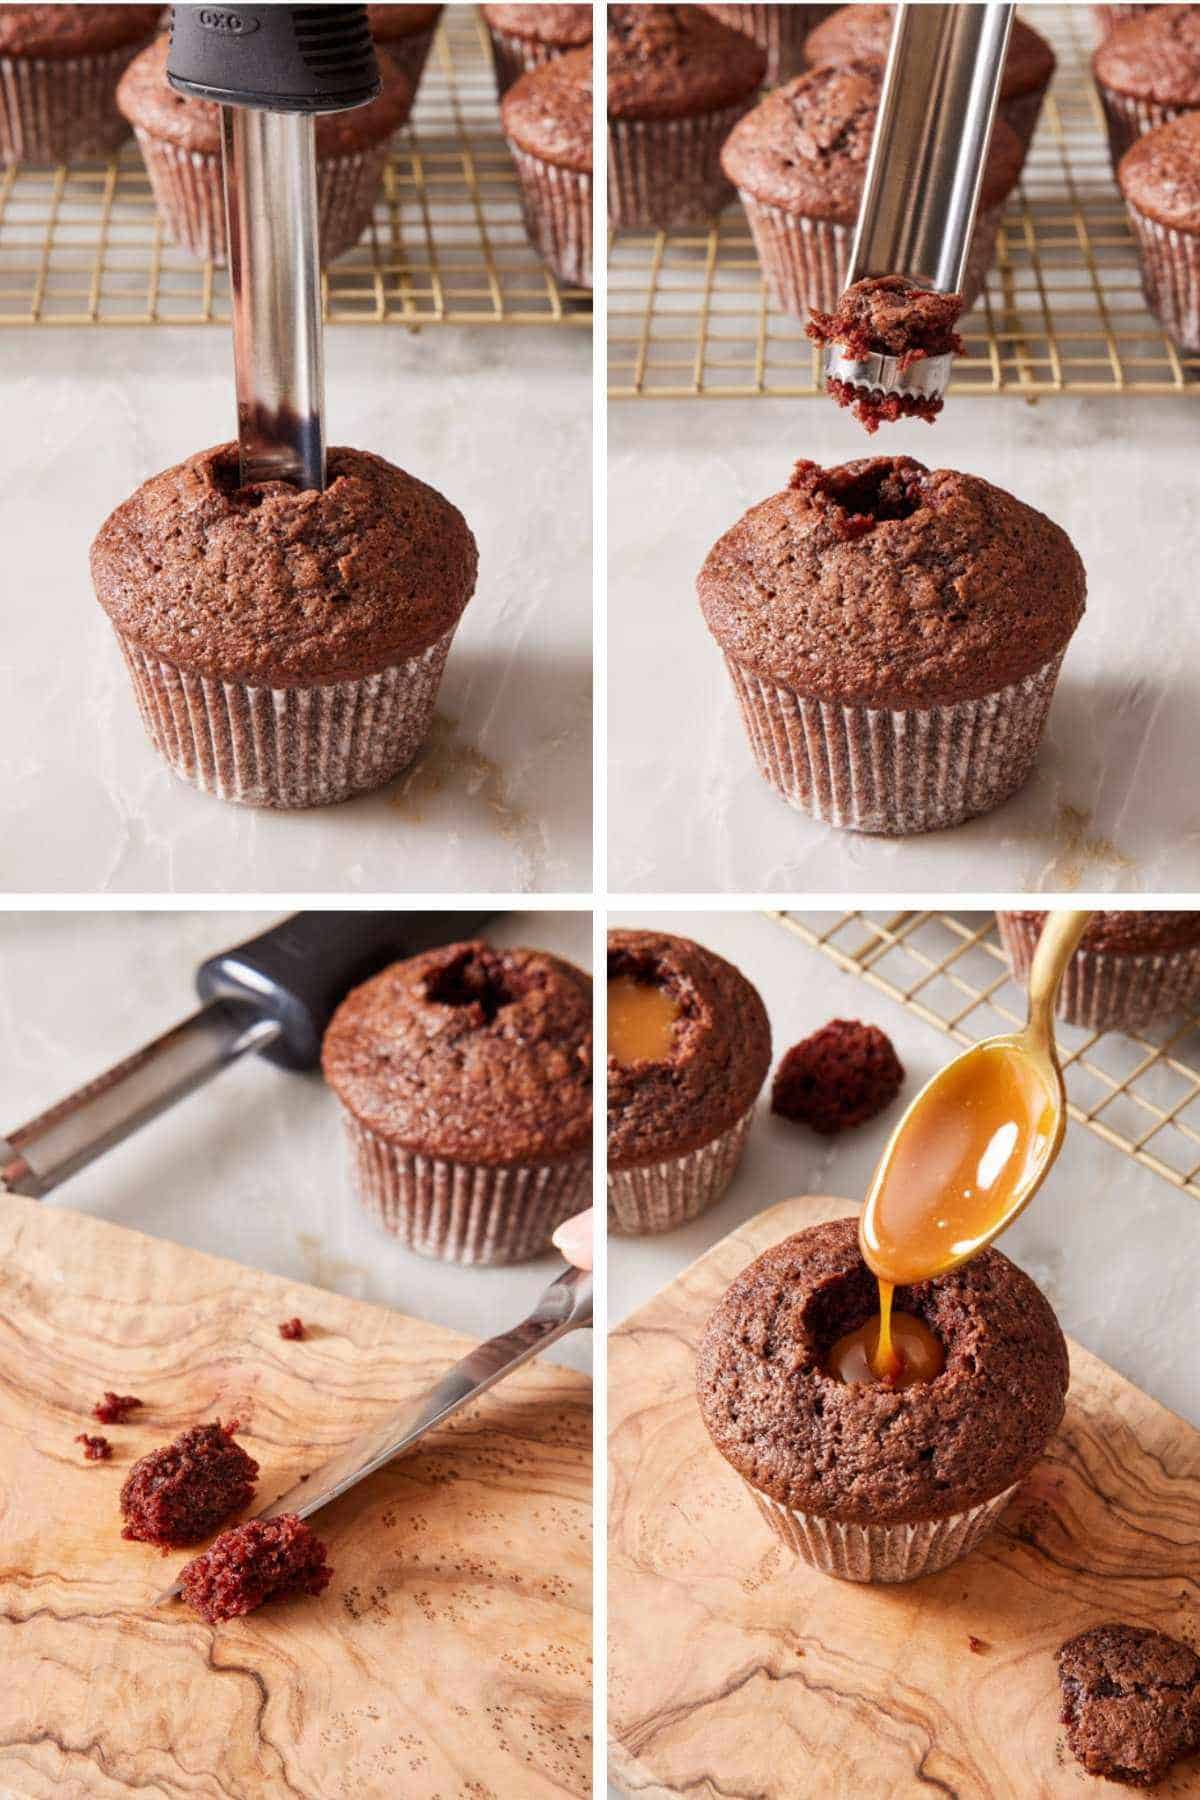
Method 1: Apple Corer (My Default)
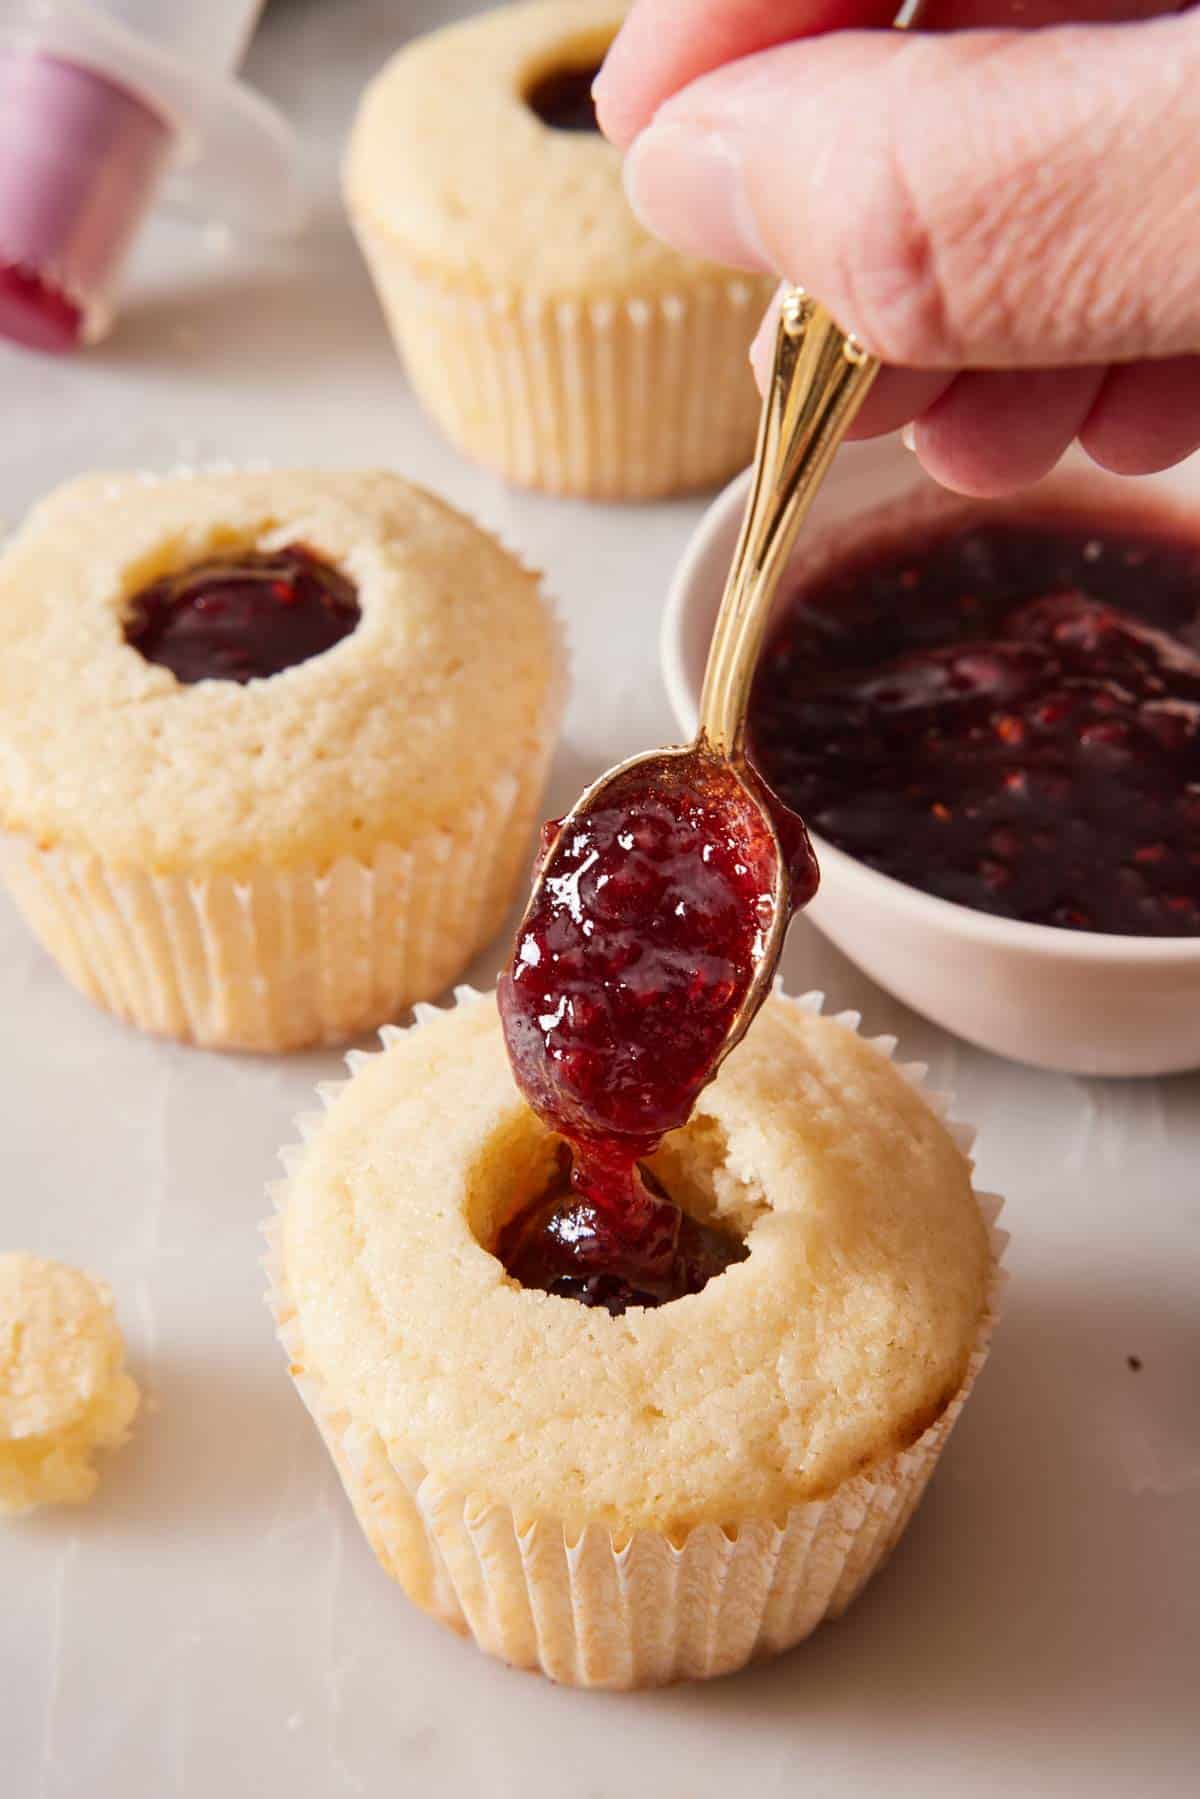
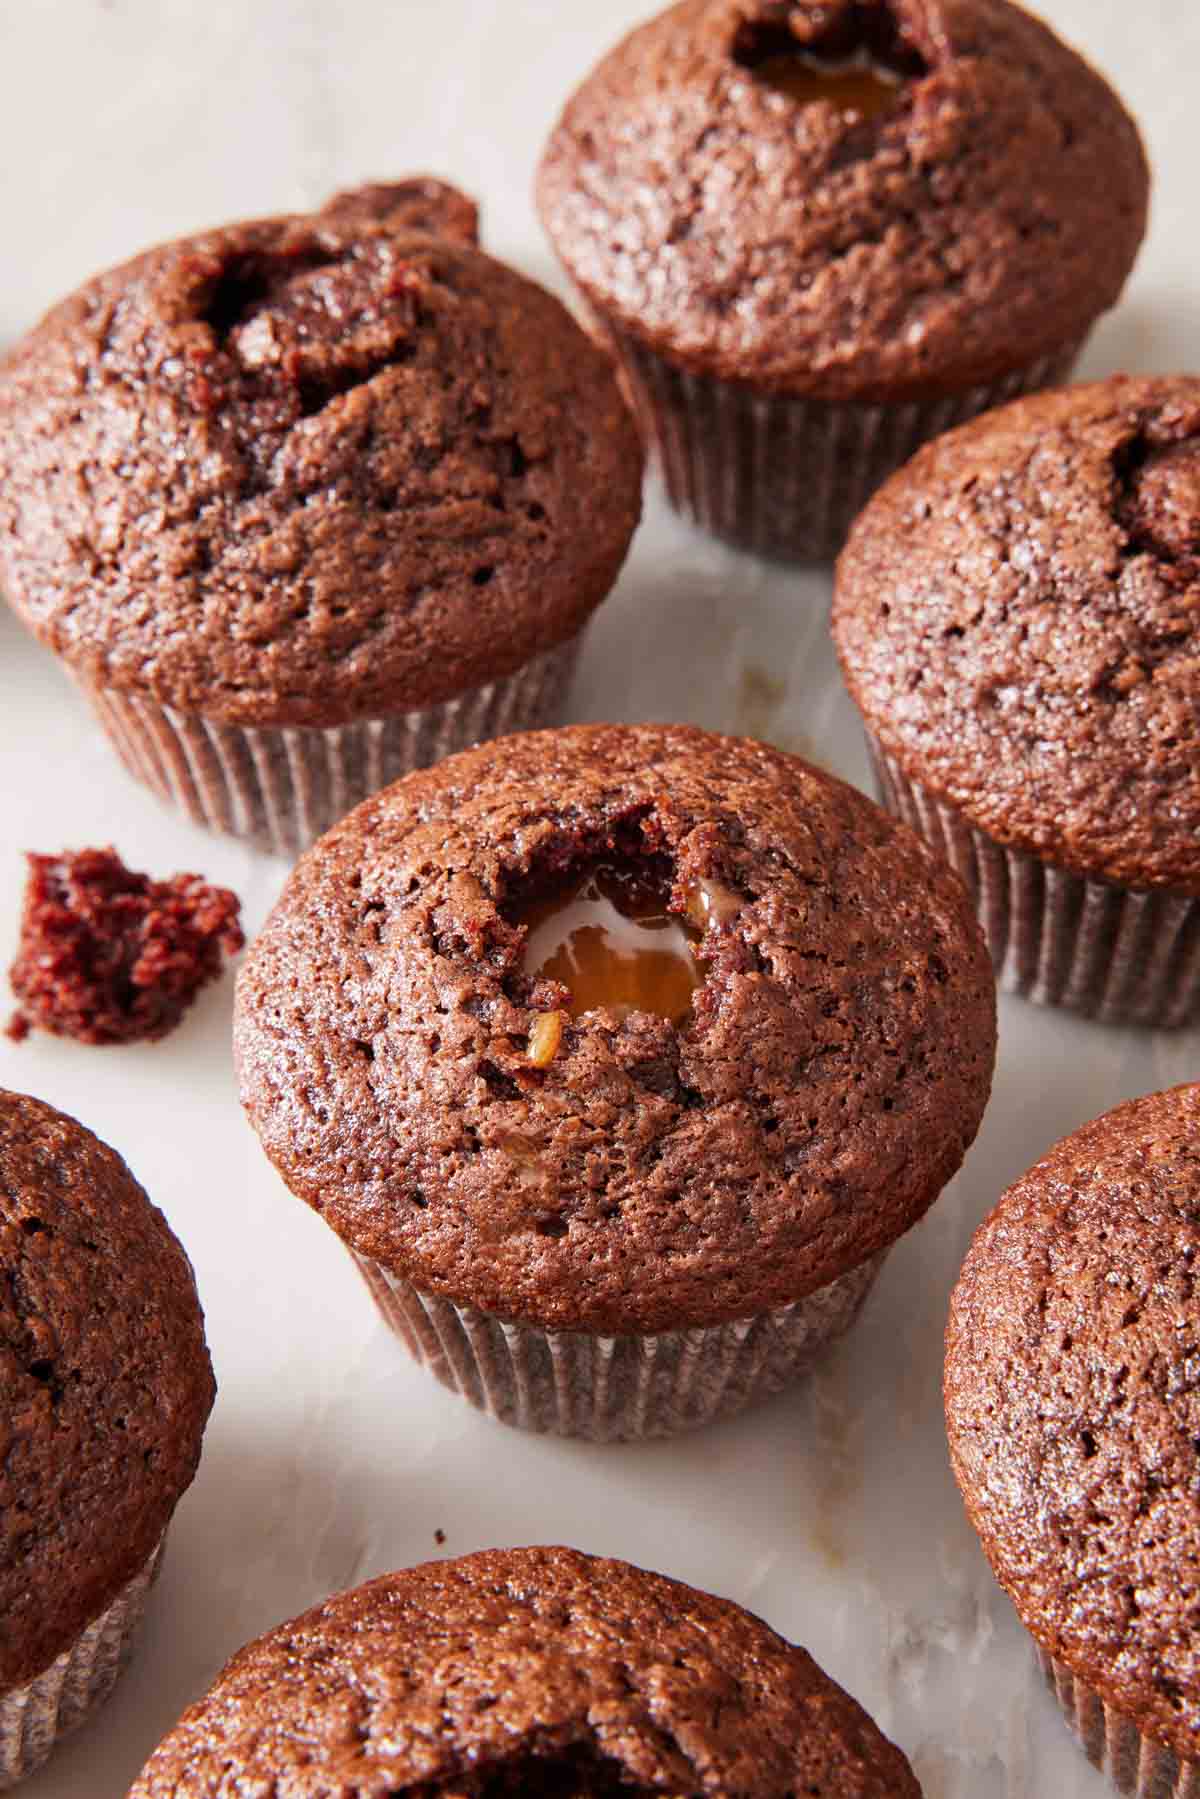
An apple corer is what I reach for anytime I fill a cupcake. The shape is exactly right for a standard cupcake, and the tool does the work for you. You simply press it straight down through the center, about 1 inch deep, twist a quarter turn, and pull straight up. The cake comes out as a clean cylinder roughly the diameter of a nickel. The hole left behind has straight walls and a mostly flat bottom, which means there is plenty of room to hold filling, but not so much that it makes the crumb soggy. Trim about ½ inch off the center piece you removed and use it to cover the top of the filling.
Two things to know: The apple corer is sized for apples, which means it’ll punch deeper than a cupcake is tall if you let it. Stop at about 1 inch deep. You can measure and mark the side of your corer before you start if you need a depth guide. When you twist, twist about a quarter turn to help the bottom of the cut center break off from the rest of the cupcake. Turning too much can tear the cake walls, and you end up with crumbs in your filling.
A cupcake corer works the same way as the apple corer, but is sized to just the right depth! Insert the corer into the cupcake center until the stopper hits the top of the cupcake. Twist slightly and pull straight out. You can use the plunger in the corer to pop the cake out of the tool.
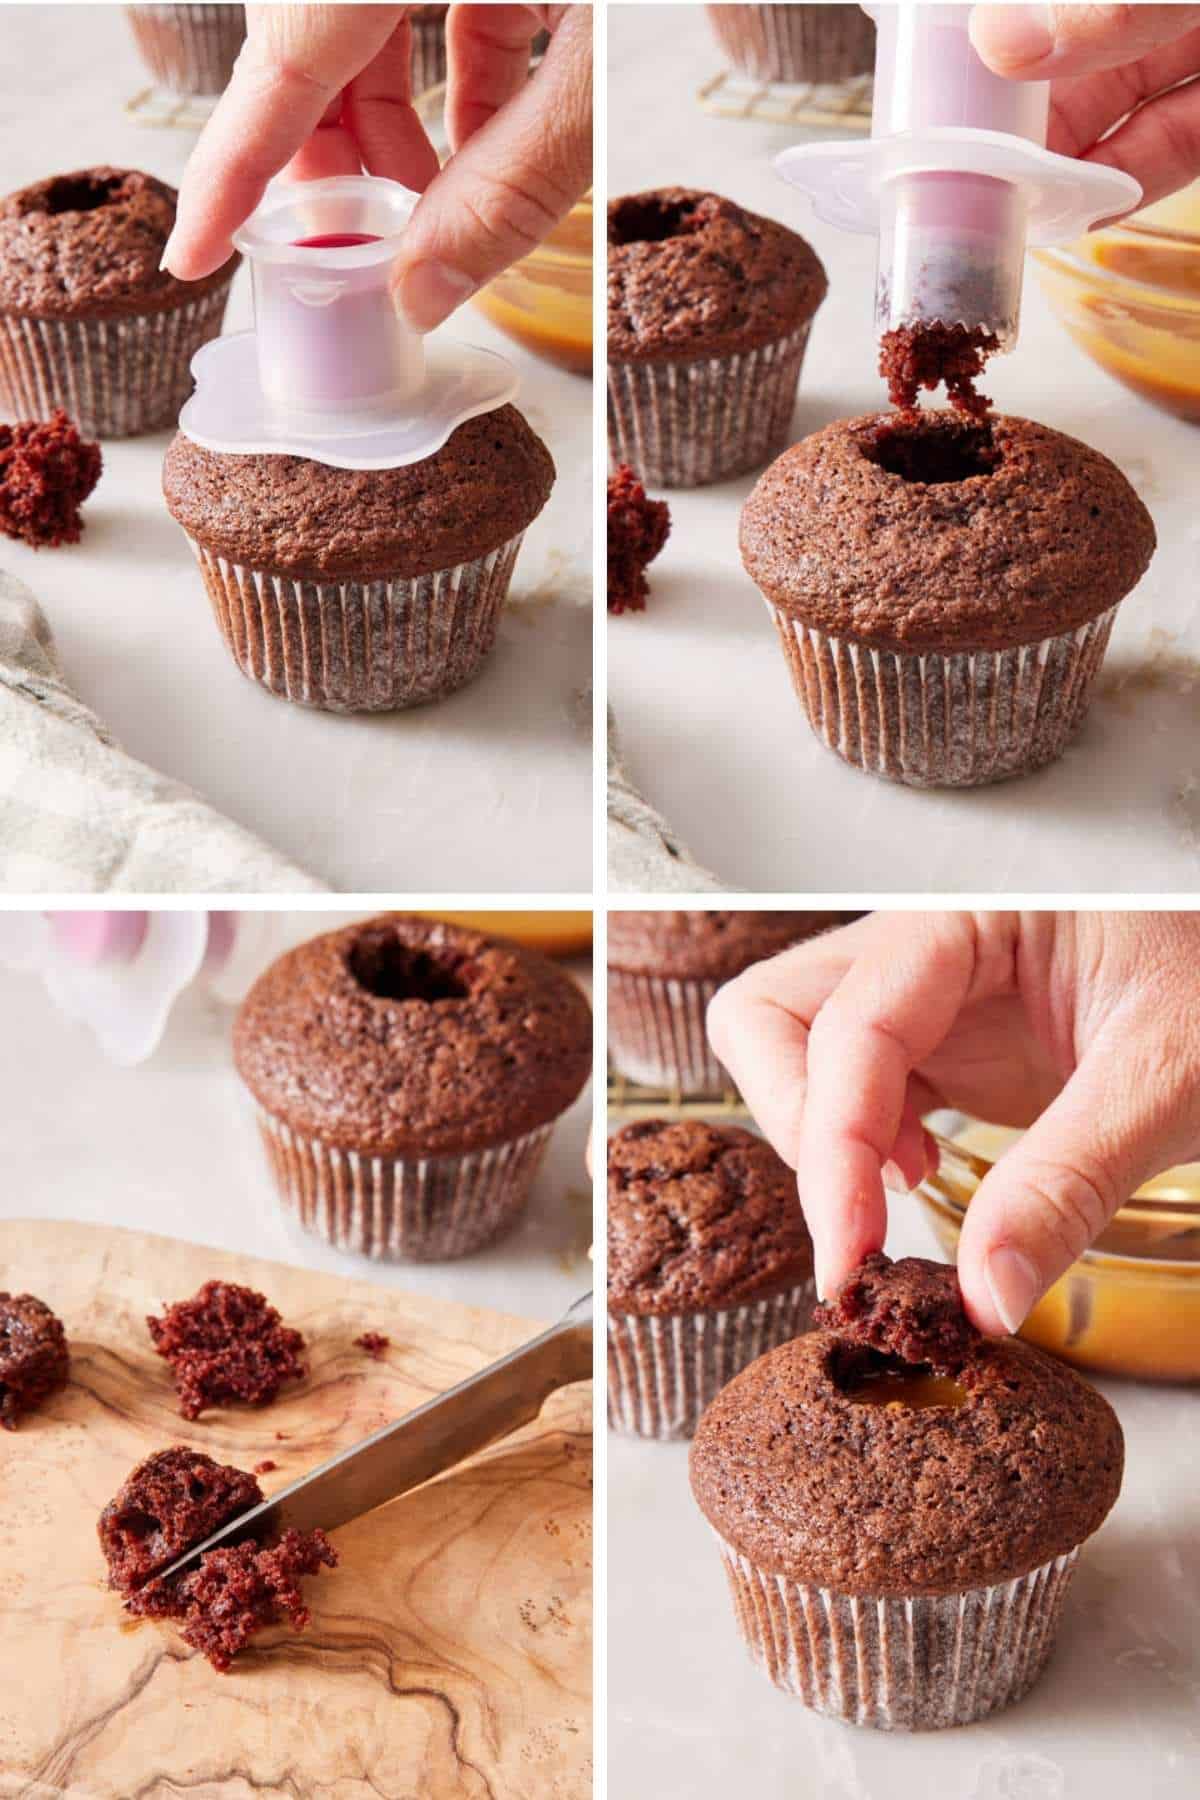
Method 2: Piping Tip (The Surprise Backup)
This is my go-to alternative for an apple corer if you don’t have one. Take a piping tip with a base that has roughly a ¾-inch opening—it doesn’t matter which shape the tip is— and use the back end (the base or wide end) like a tiny cookie cutter. Push it straight down into the cupcake about an inch, twist a quarter turn, and pull it back up. (This is the same technique as using a corer.) The cake plug stays inside the piping tip, and either falls out on its own when you tap it, or you can push it out through the tip with the back of a chopstick or skewer. Trim the cake piece to use as a cover for the filling.
There are two reasons I love this as a secondary method. First, the hole it leaves is roughly the same shape as the apple corer hole. It’s just about the same width with a flat bottom to hold plenty of filling. Second, if you are making cupcakes, you are likely to have a piping tip for frosting them, which means you don’t need an extra tool. I tested it against the apple corer with the chocolate cupcakes and caramel sauce, and the results were indistinguishable. The only downside is that the cake plugs can stick in the tip more easily, and you likely need to push them out.
Method 3: Paring Knife (The Reliable Backup)
A paring knife, or any small, sharp knife, is slower than an apple corer or piping tip, but it uses a tool you most likely have in your kitchen. This is also called “the cone method” because the shape of the piece you remove is cone-shaped! To core a cupcake with a pairing knife, you insert the tip at a 45-degree angle into the top, just off-center. Push down about an inch, and rotate the cupcake (not the knife) to make a circle. The piece that comes out looks like a tiny cone or pyramid. Trim the pointy bottom off, save the flat top piece as a lid, and discard the rest (or eat it as a snack, as I do!).
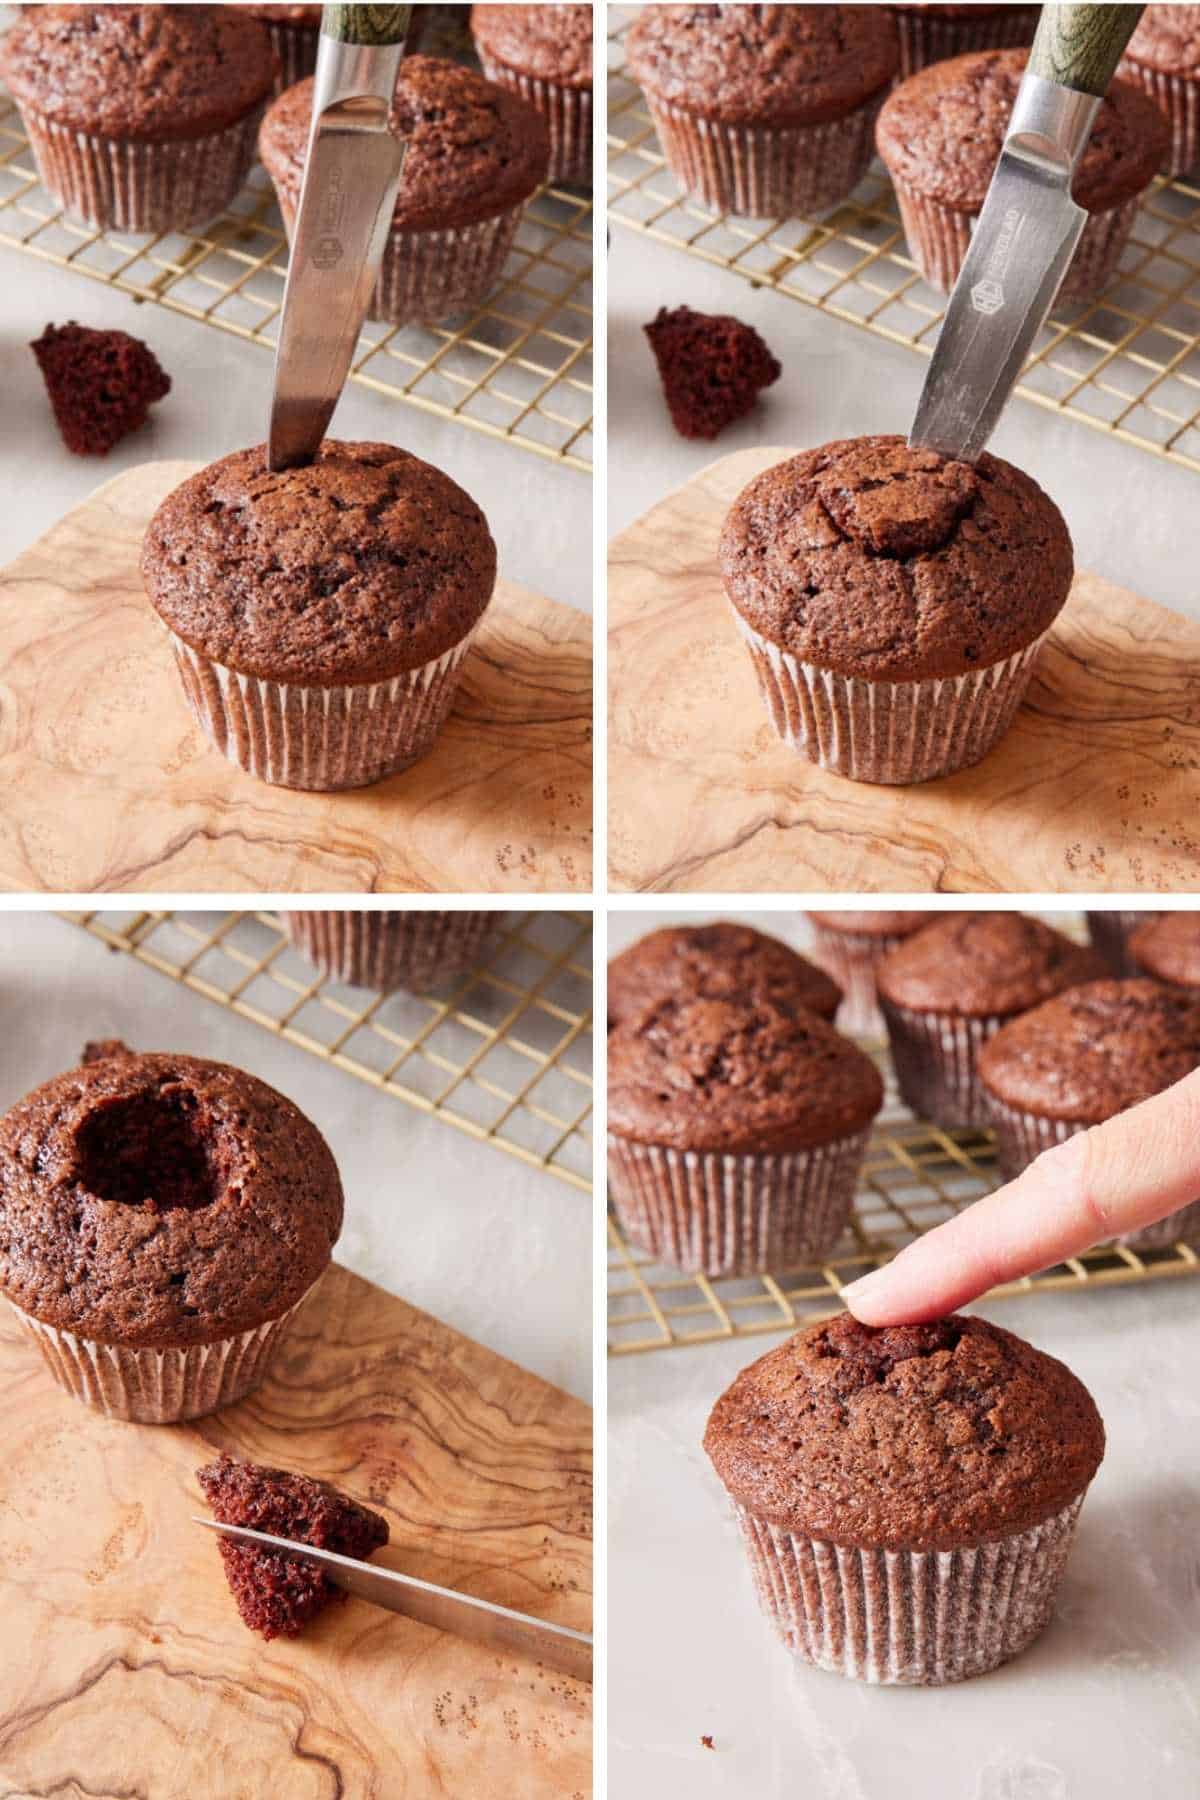
The knife method’s advantage is that you don’t need any special tool to core and fill cupcakes. The disadvantage is that the cone shape leaves a slightly tapered hole, so the filling has less room at the bottom than the hole left by a corer or piping tip. This means you get slightly less filling in each cupcake. This is the method my executive editor, Sarah, uses because she doesn’t have an apple corer. It works, well, it’s just a little slower!
My verdict. An apple corer or cupcake cake corer is the best for precision and speed. A piping tip is great if you don’t own a corer and don’t want to buy one. A paring knife is a reliable backup when you don’t have the other tools.
How Deep to Go (The 1-Inch Rule)
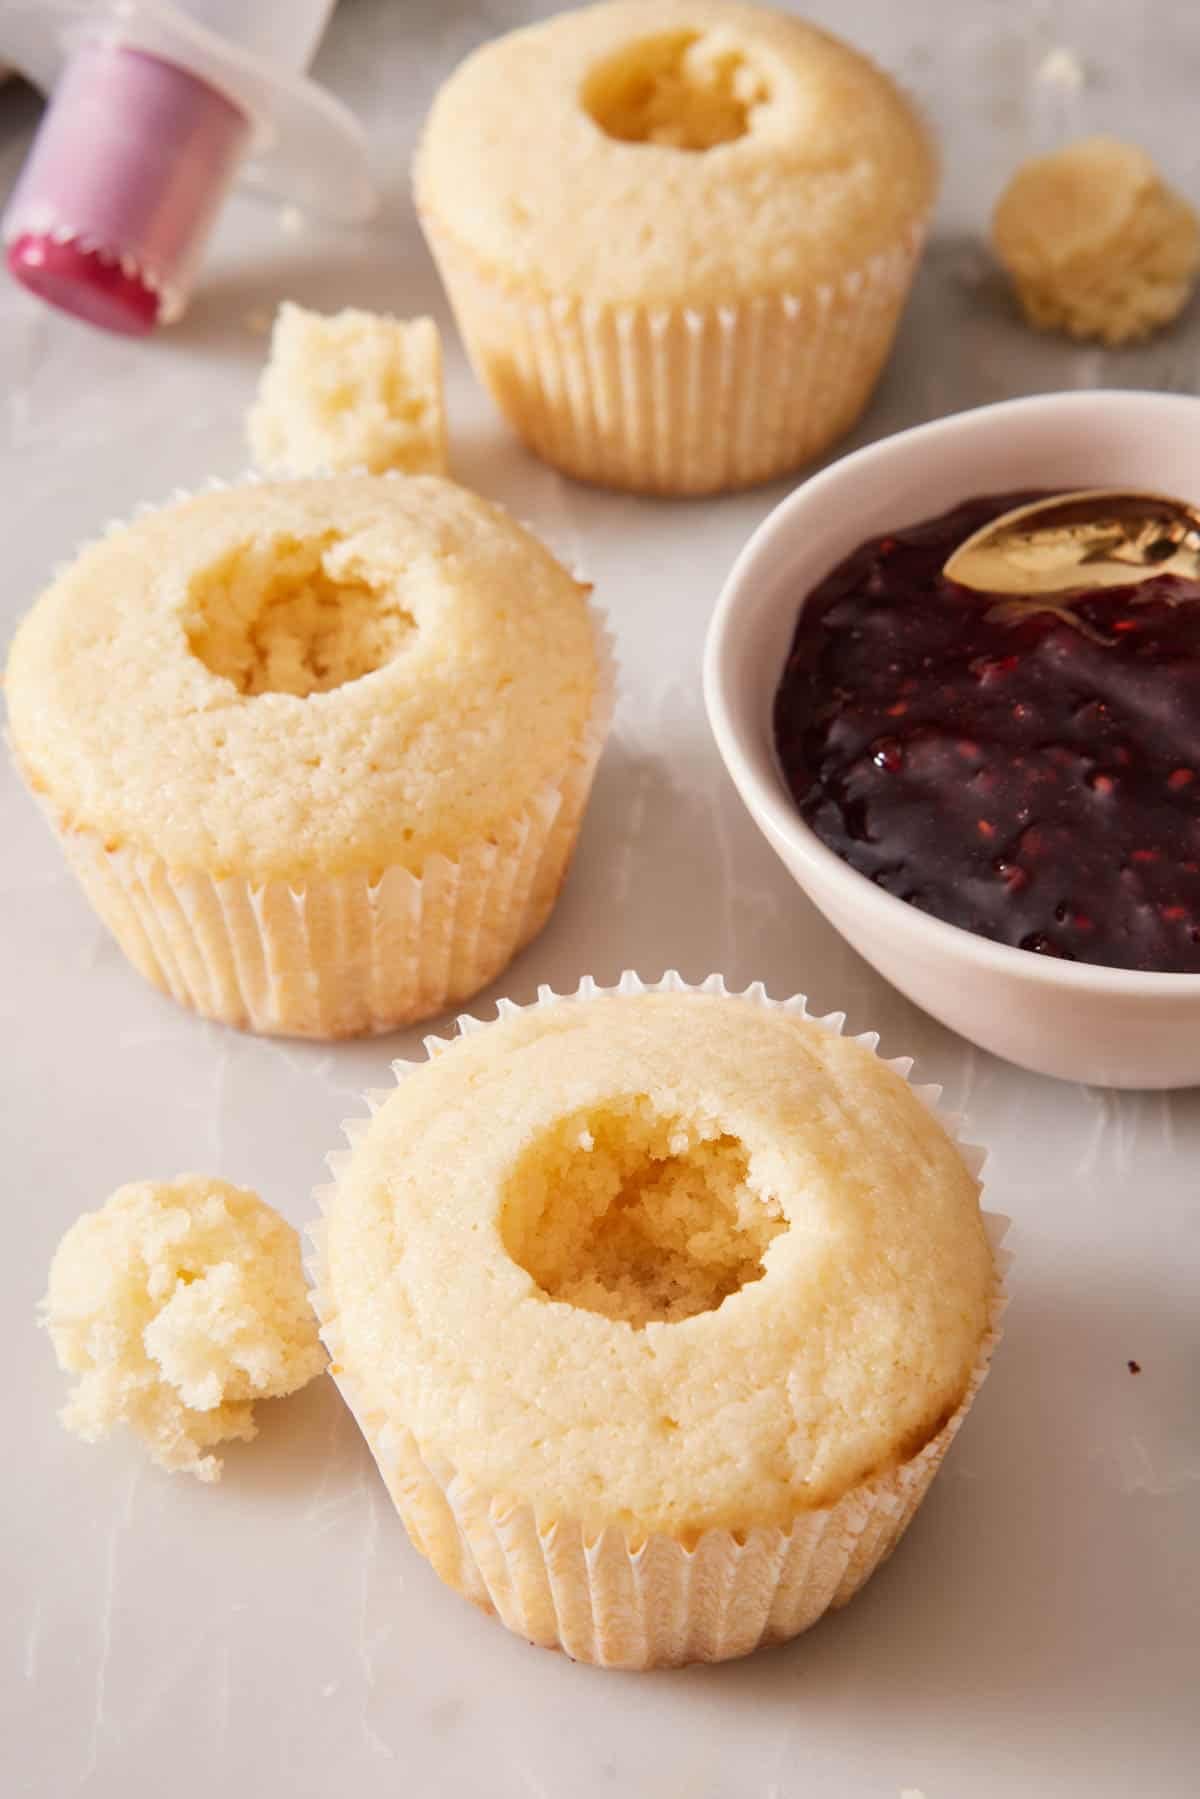
This is where most cupcake filling failures happen, just like with my first try. Standard cupcakes, baked in a regular muffin pan with paper liners, are roughly 2 to 2½ inches tall when finished. The hole you cut needs to stop at about an inch deep, leaving at least an inch of cake at the bottom intact. That bottom inch makes sure the cupcake still has structure and holds the filling in without seeping to the wrapper.
If you go deeper, you can punch through to the liner. Or the filling pools at the bottom of the paper, soaks into the liner, and when someone peels the wrapper off, the whole thing collapses. (Remember my first experience filling cupcakes? This is how I know!) Make sure when you insert the corer or knife, you can still feel resistance. You can also make the side of the apple corer, piping tip, or knife with a piece of tape to act as a depth gauge.
I typically test one first, and measure the removed piece of cake to make sure it’s roughly 1 inch (or a little less—it can compress when you twist the corer). If you’re nervous, stop shorter. You’ll have less filling, but you won’t risk your cupcakes falling apart from cutting too deeply.
The 12 Fillings That Work (And the Ones That Don’t)
When you’re choosing a filling, the two main things to consider are that it tastes good with the cupcake and it’s thick enough to stay where you put it, but not too thick to pipe or spoon into the cupcake. Anything too runny soaks into the cake. Anything too thick fights you when you’re trying to spoon or pipe it in. Here’s what I’ve tested, with twelve of my favorite fillings to use and a few I don’t recommend:
Cream and Custard Fillings
Pastry cream (vanilla, chocolate, coffee). The classic vanilla custard filling. Set it until firm in the fridge before using and pipe it into the cupcake for easy filling. This is the filling in Boston cream pie, if you want to turn it into a cupcake version. You can make my pastry cream recipe and add cocoa, melted chocolate, or coffee to flavor it.
Whipped cream (stabilized). Plain whipped cream collapses inside a cupcake within a few hours. But whipped cream stabilized with mascarpone, gelatin, or cream cheese holds for 24+ hours and gives you that diner cream pie effect. Try the whipped cream frosting recipe from my chantilly cake as a cupcake filling (you can also pipe it on top).
Diplomat cream. Pastry cream lightened by folding in whipped cream is the texture of professional bakery cream fillings. This pairs well with a whipped ganache topping on any cupcake flavor you like.
Curd and Jam Fillings
Lemon curd. My favorite filling for any vanilla, lemon, or coconut cupcakes. Lemon curd’s thickness means it holds its well inside a cored cupcake—it doesn’t seep or run, and the bright tartness cuts through a sweet frosting beautifully. I use my homemade lemon curd because the flavor is much better than store-bought, and the texture is perfect for a cupcake filling. A spoonful of lemon curd inside a lemon cupcake topped with vanilla buttercream is, I’d argue, the perfect cupcake!
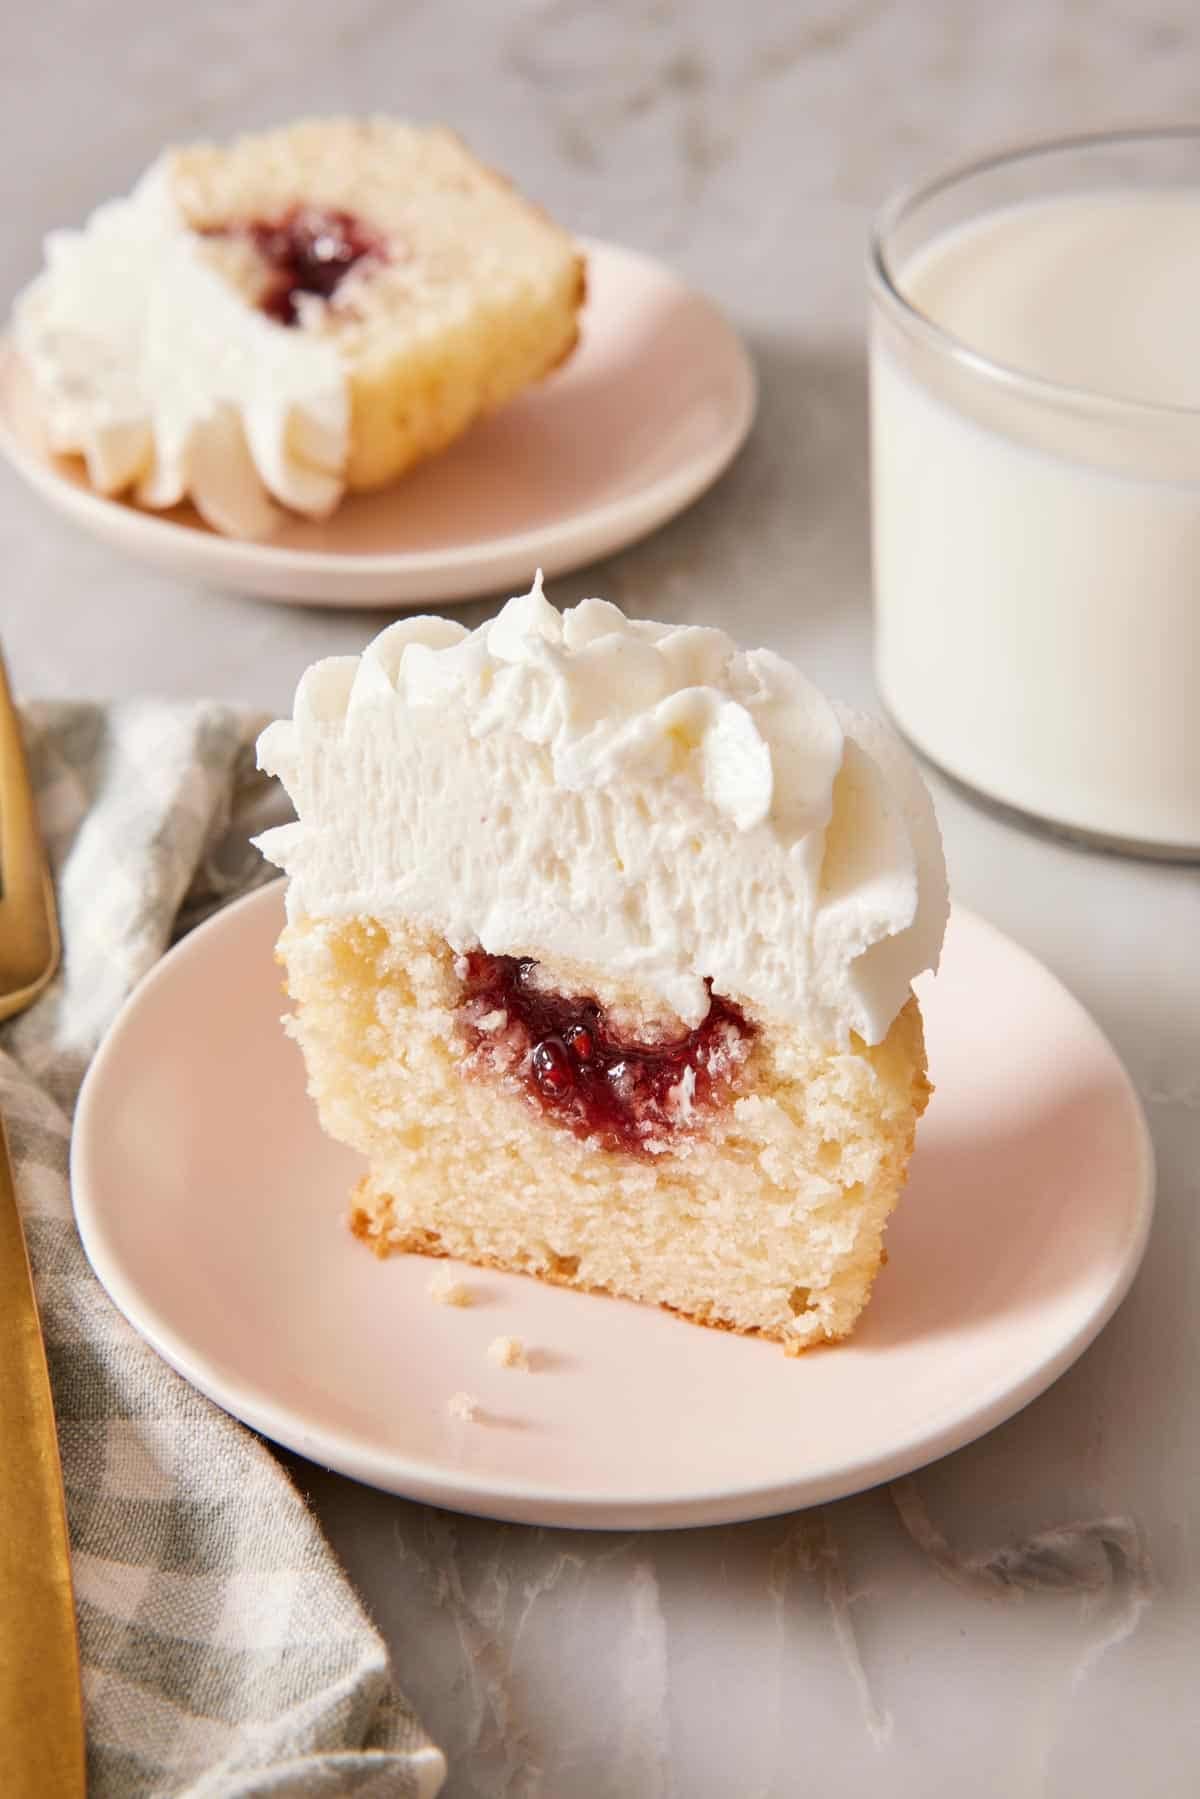
Fruit jams. Thick enough to stay put but not too firm to be unpleasant to eat (like jelly). My raspberry jam, strawberry jam, and blueberry jam work very well if you want a homemade filling. If your homemade or store-bought jam is on the thin side, simmer it in a small saucepan for a few minutes to reduce it before filling. (Be sure to cool it back down first.)
Apple pie filling (chopped fine). A very fun surprise filling for pumpkin cupcakes, snickerdoodle cupcakes, or vanilla cupcakes in the fall. Dice the apples for the apple pie filling instead of slicing them so they fit inside the cupcake.
Chocolate, Caramel, and Nut Butter Fillings
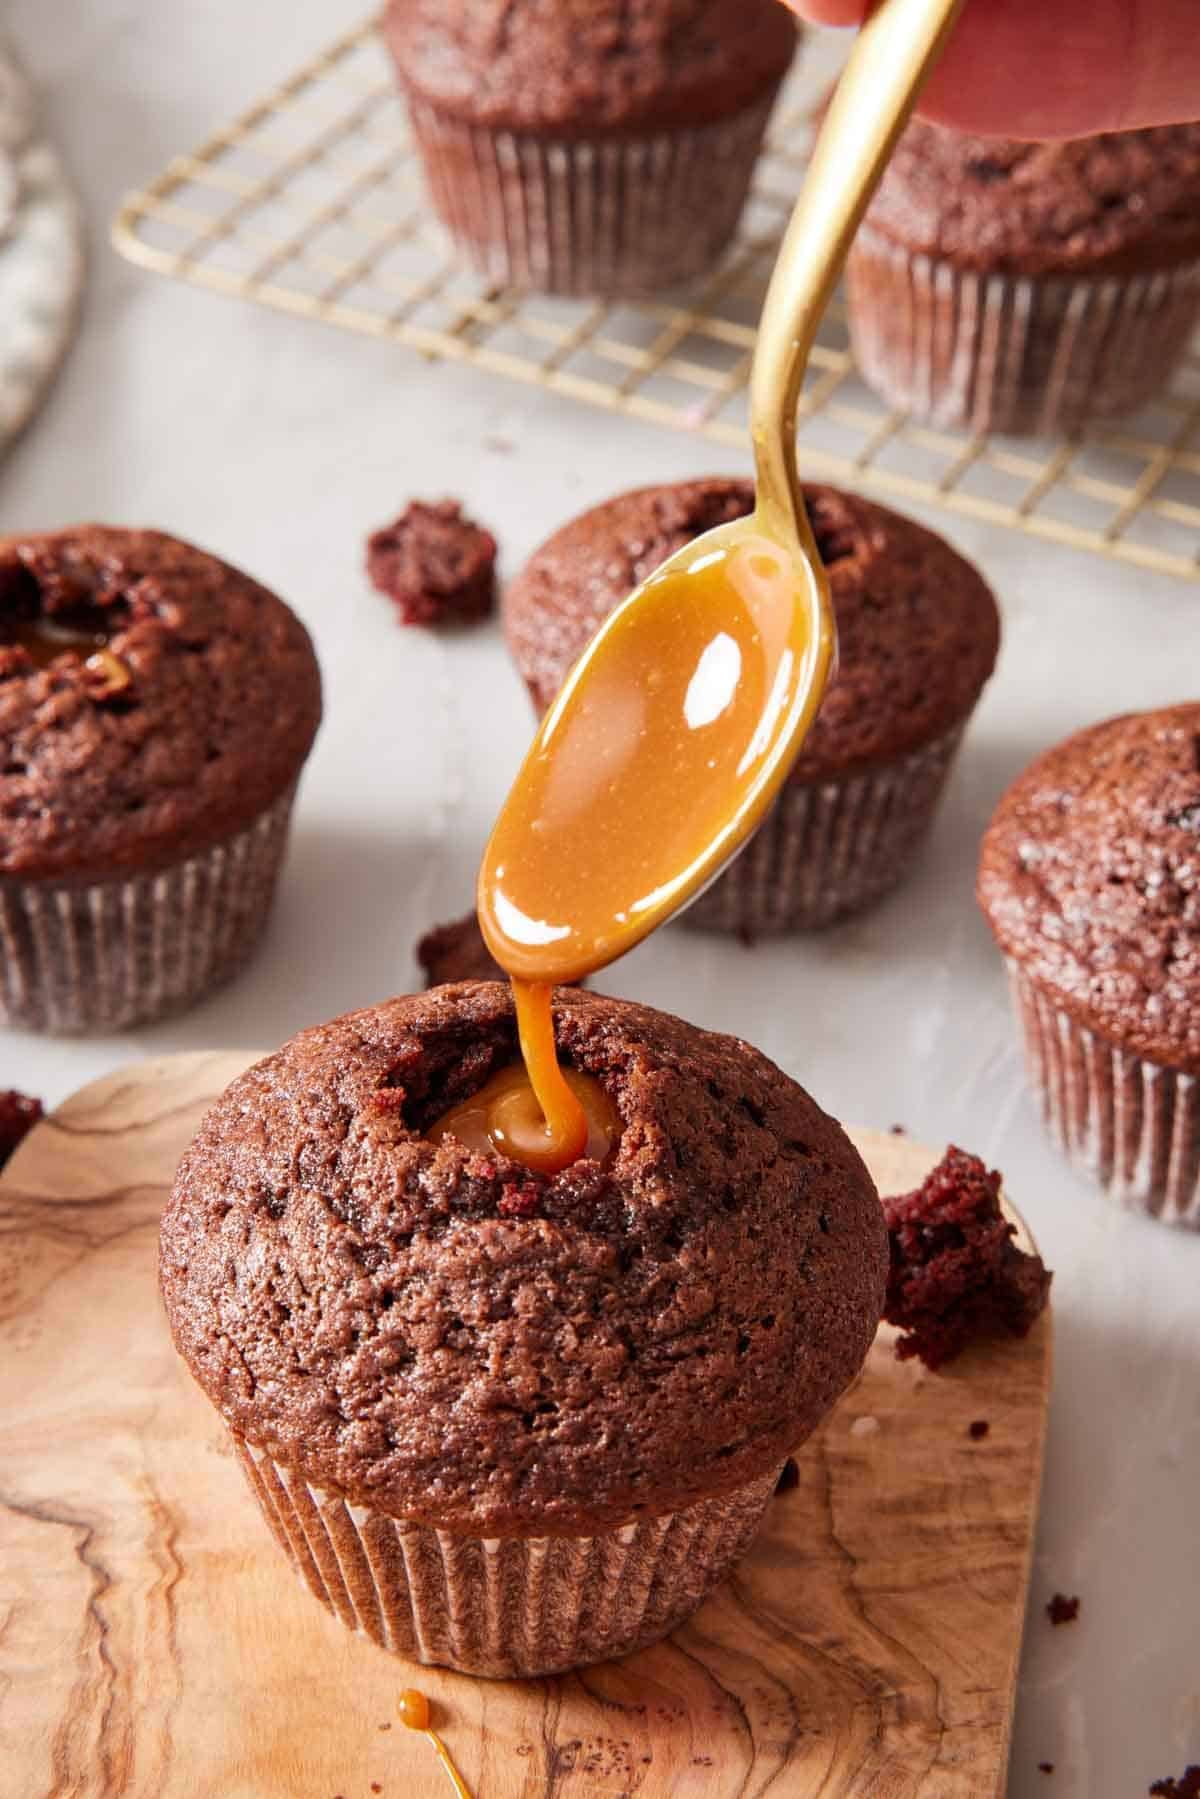
Chocolate ganache. This is what’s inside my German chocolate cupcakes, my chocolate raspberry cupcakes, and my mocha cupcakes. Let the ganache cool to barely warm or room temperature before filling—if it’s too warm, it’ll melt into the surrounding cake, and it can melt the frosting piped on top. The texture you want is soft enough to spoon (like honey) but not runny. If the ganache has firmed too much, microwave it for five seconds at a time until it loosens.
Nutella, cookie butter, and nut butters: You can use these directly from the jar, piping them into the cupcakes so they are easier to fill. Spooning also works, but is a bit messier. These work especially well inside chocolate cupcakes for a deep, almost truffle-like center. I love using pistachio cream and flavored peanut butter. Natural peanut or almond butter with a looser consistency works fine as well.
Caramel sauce: A thicker caramel sauce works exceptionally well as a filling for chocolate, vanilla, and pumpkin cupcakes. If you are making homemade caramel sauce or purchasing a jar, be sure the sauce is spoonable when it is room temperature, but not too runny. It should be about the thickness of honey.
Frosting and Buttercream Fillings
Buttercream: Use any standard buttercream—my vanilla buttercream is one of my main go-tos. Peanut butter frosting inside a chocolate cupcake is essentially a homemade peanut butter cup in cupcake form. Others, like strawberry buttercream or Oreo frosting, can add a fun flavor surprise to a variety of cupcake flavors.
Cream cheese frosting: A classic pairing for carrot cake cupcakes and red velvet cupcakes when you want a denser cream cheese hit than a simple top dollop gives. Instead of putting all the cream cheese frosting on top, hide a bit of it inside, or top with a chocolate cream cheese frosting to mix it up.
Other frostings: Ermine frosting or marshmallow frosting make those nostalgic packaged cream-filled chocolate cupcakes something you can actually replicate at home.
Fillings I Don’t Recommend
Warm fillings: Anything that’s still warm or best if eaten while warm is not ideal. It will melt the frosting on top. For fillings like ganache or caramel that may need to be warmed to spoon or pipe, make sure the filled cupcakes are completely cooled before you add the frosting.
Thin or runny filling: Anything thinner than honey, like maple syrup, runny caramel, or thin fruit purees, will soak straight through the cake, making it very soggy. Instead, thicken them or use them to flavor frosting or cream to keep the filling from soaking completely into the cake.
Fresh fruit (if making ahead): Chopped fruit, like strawberries, peaches, and cherries, releases juices as they sit and can make the cupcakes mushy by the next day. If you want to use fresh fruit, be sure to assemble the cupcakes the day of serving.
How Much Filling Per Cupcake
For a standard cupcake cored to 1 inch deep with an apple corer, the cavity holds about 2 teaspoons of filling. With a paring knife (cone-shaped hole), closer to 1 to 1½ teaspoons.
For a batch of 12 cupcakes, plan on about ½ cup of filling total. Have ¾ cup of filling for 18 cupcakes and 1 cup of filling for 24 cupcakes. (You may need slightly less filling with the knife method.)
I always make a little more than I think I’ll need. Running out of filling on cupcake #11 is more annoying than having a little filling left over in the bowl.
Fixing What Goes Wrong
Filling leaked out the bottom. You went too deep with the corer. Stop the corer at one inch for your other cupcakes. You should still feel resistance (cake) under the tool. If you’ve already cored all of the cupcakes, they will still taste great! They may fall apart when you peel off the liner, so serve them on a plate with a fork.
The filling soaked into the cake and disappeared. The filling was too thin (or too warm). Thicken a jam or caramel filling by simmering it, or chill a ganache or pastry cream in the fridge for 15 minutes.
Cake plugs are crumbly and falling apart. The cupcakes may have been warm when you cored them. Wait until they’re at full room temperature (at minimum an hour out of the oven, two hours is safer). Warm cake is structurally weak, and the corer crushes it instead of cutting it cleanly. If your cupcakes are cool but very delicate, pop them in the freezer for 30 minutes before coring. This will firm up the crumb structure so it cuts instead of tearing apart.
Cupcakes look bumpy on top after covering with the cake piece. Don’t worry about it. The frosting will hide it. If you are using a stable buttercream or frosting on top of the cupcakes, you can even skip the little cake cover—the frosting alone will keep the filling in place.
Make-Ahead and Storage
Filled cupcakes are typically best when eaten the day they’re filled, but they can hold longer based on the filling you use. Most filled and frosted cupcakes will keep at room temperature in an airtight container for 24 hours as long as the filling is shelf-stable (jam, curd, ganache, frosting).
Anything dairy-heavy that needs refrigeration—pastry cream, stabilized whipped cream, fresh-fruit compote—needs to be stored in the fridge. (The FDA recommends refrigerating dairy-containing fillings within two hours at room temperature.) Refrigerating filled cupcakes for 2-3 days is generally fine, but always check the storage recommendation of the filling you are using. For chilled cupcakes, let them sit at room temperature for 30 minutes before serving so the buttercream and cake texture soften.
Freezing filled cupcakes can be an option, but it is very dependent on the type of filling used. Ganache, jam, caramel, and buttercream fillings typically freeze well. (always check your filling recipe to be certain, though!) Custards and cream fillings do not freeze well.
If you need to make them ahead, I recommend freezing the unfilled cupcakes for the best results (they freeze beautifully for up to 3 months—see my guide on how to freeze cupcakes for specific instructions). Thaw, then fill and frost when you’re ready to serve them.
You can also bake and core the cupcakes the day before, store them at room temperature in an airtight container, and fill and frost them the day of. This is actually my preferred make-ahead approach for events.
Frequently Asked Questions
I don’t recommend it with this method. Mini cupcakes are about an inch tall total, so there isn’t really enough cake to core and put a meaningful amount of filling without it falling apart.
If you want to try filling mini cupcakes anyway, the only method that works is direct injection with a small piping tip (like making a jelly donut). Push the tip in from the top about a third of the way down, squeeze in a quarter teaspoon of soft filling (ganache, curd, or thinned pastry cream), and pull straight out. Frost over the top hole.
You went too deep with the corer, and the filling soaked through to the liner. The other possibility is that your filling was too thin and seeped into the crumb of the cupcake.
Jam straight from a good-quality jar. Flavors like raspberry, strawberry, or apricot jam work great and need no prep. Plus, they don’t require refrigeration, and they pair with almost any cupcake flavor. Spoon about 2 teaspoons into each cored cupcake, frost, and you’re done!
More Tutorials To Try
Increase your baking skills with one of these Baking Academy lessons:
- Academy: How To Frost Cupcakes — learn how to top your filled cupcakes
- Academy: Cupcake Pan Sizes & Types — learn the best type of pan materials for baking the best cupcakes
- Academy: The 5 Main Cake Mixing Methods — learn how different methods of mixing cake batter make different types of cake
- Academy: How to Bake Flat Cake Layers — bake perfectly flat cake layers for sturdy layer cakes






